Category Archives: Live Audio Tactics

Tips, tricks, and strategies for concert sound in small venues.

Stageplot Aggravation

Sometimes no stageplot is better than the wrong one.

Please Remember:

The opinions expressed are mine only. These opinions do not necessarily reflect anybody else’s opinions. I do not own, operate, manage, or represent any band, venue, or company that I talk about, unless explicitly noted.

 
Want to use this image for something else? Great! Click it for the link to a high-res or resolution-independent version.

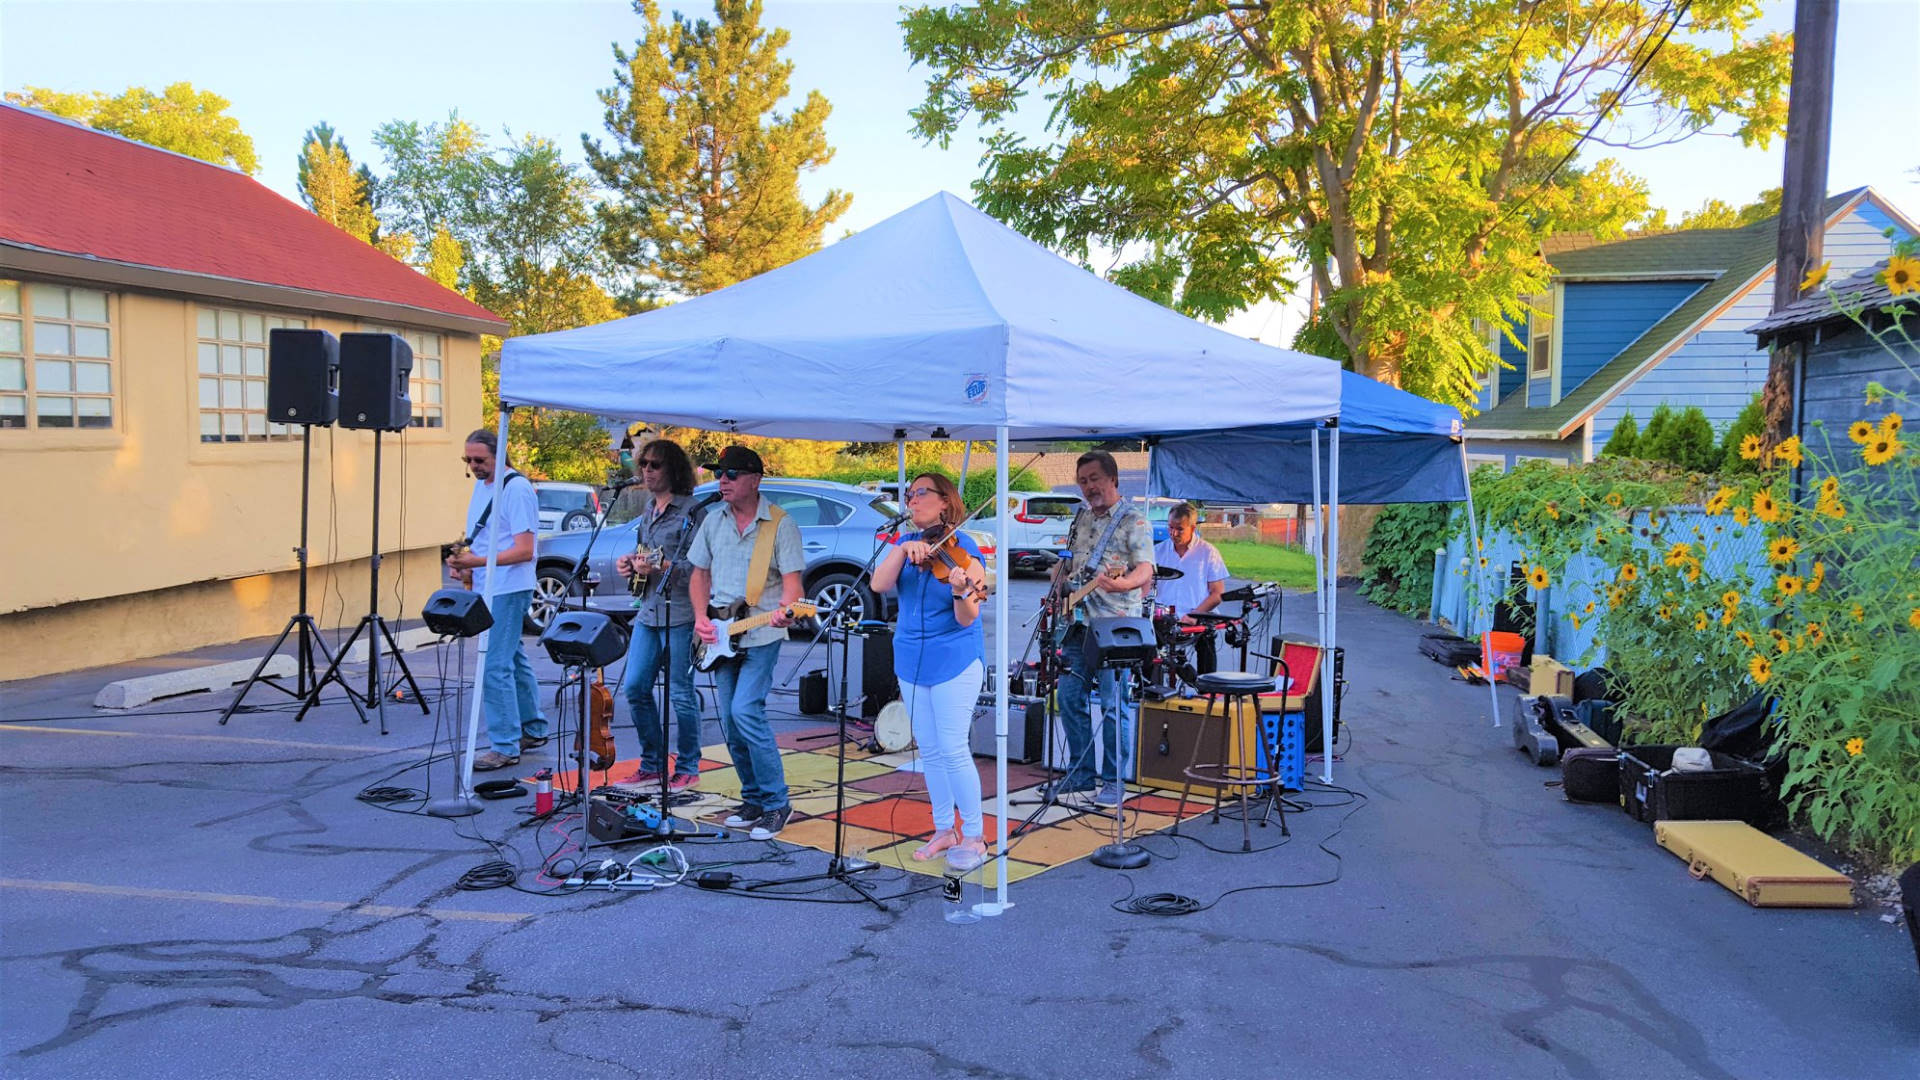
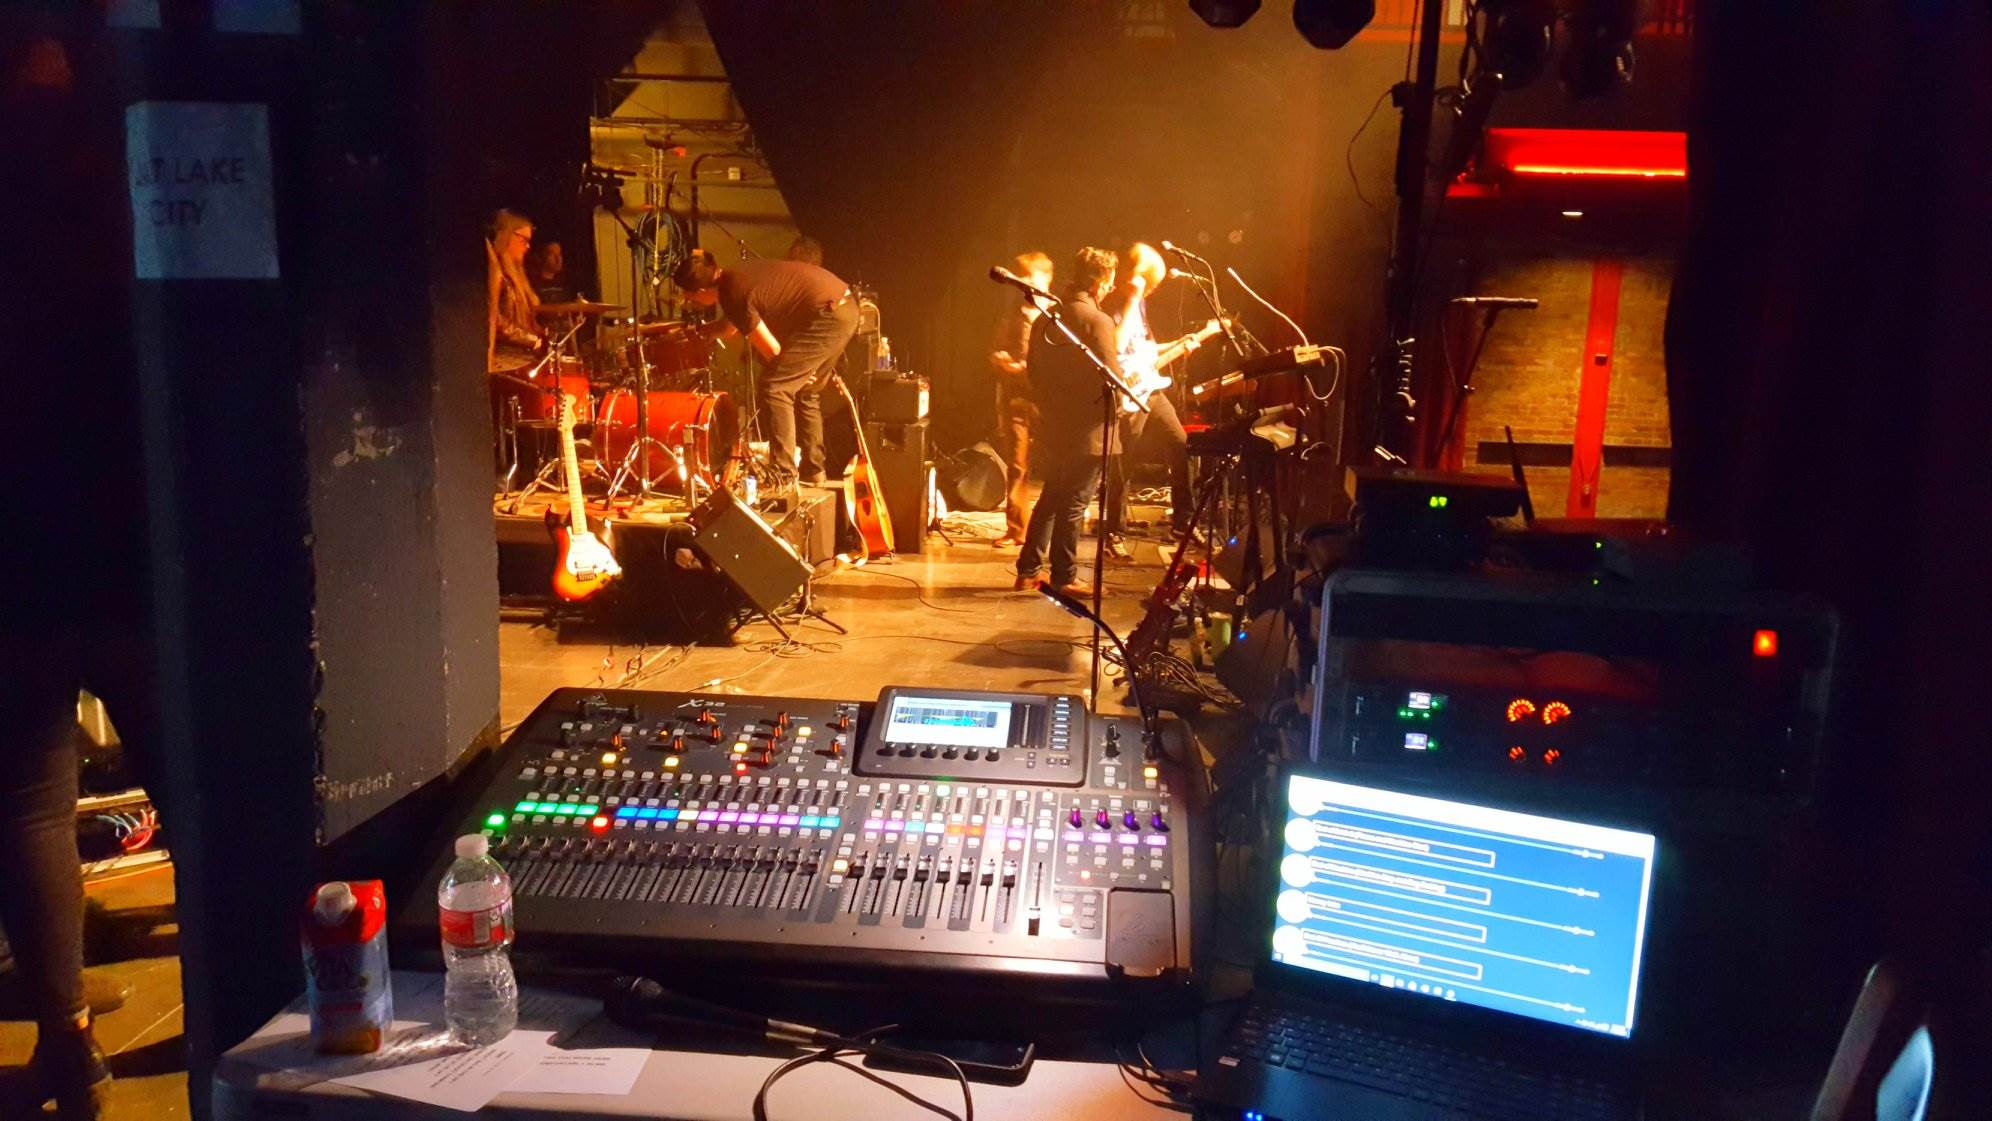
Folks, may I please be brutally frank with you? I really want to have input lists and stage plots. They are monumentally valuable for readiness – they tell me what to expect and where to expect it, which gives all of us a huge head start on patching and setup.

Please send me the correct plot or list, though.

If the correct plot is, “We’ll have three vocalists, two guitars, a xylophone, and a drummer, and we always pick new places to stand for each show,” that’s completely fine. It tells me to patch my stage and layout my console with the expectation that your on-stage positions will be unknown until the last minute.

The flipside of that is when I get a plot that meticulously details exactly where everybody is going to stand, where all the instruments are going to be, and even gives me clues on how to construct monitor mixes…and is wrong. Or someone’s mind changes at the last second. For me, that’s almost worse than simply getting a few basics and having to “wing it” on everything else.

This has happened to me in festival situations – with headliners! I recall one instance where everything was mapped out in great detail, as I mentioned before, and when the band took the stage it all went out the window. One person was deleted, another person was added, and they picked almost completely different stage locations for everyone. I had taken the time to label, patch, and even premix as per their instructions, and now all of that was undermined in the space of 30 seconds.

“But, Danny,” you say, “isn’t part of your job to deal with the unexpected?”

Yes.

“And aren’t digital consoles capable of soft-patching everything so that you can get around that kind of thing.”

Also yes.

My retort, though, is that the entire point of a good input list and plot is to not be doing things on a “panic” basis at all. Even with having soft-patching at my disposal, the induced chaos consumed our changeover time such that it was more practical to simply pull up the festival reset scene and rebuild in the moment. We did pull it off, and everyone was happy, yet I still couldn’t understand the whys and wherefores – what was the point of having all that detail if 90% of it was going to be useless in the moment?

Please, then, I ask you: Send me the correct list and plot. If a real part of your plot is that you don’t know what’s going to happen, or you’re probably going to change your mind on some things, please include that. The show advance tells me what to expect, and it’s unhelpful if the wrong expectation lands in my mind. If your info tells me to gear up for a very ordered and pre-planned gig, then that’s what I’m going to build. If the reality is the opposite, then the plot didn’t help. The point is never simply to have the paperwork; The RIGHT paperwork is what’s necessary, even if that’s less extensive information.

PICNICs and PIANOs

Gear has limitations, right?

Please Remember:

The opinions expressed are mine only. These opinions do not necessarily reflect anybody else’s opinions. I do not own, operate, manage, or represent any band, venue, or company that I talk about, unless explicitly noted.

 
Want to use this image for something else? Great! Click it for the link to a high-res or resolution-independent version.

Pro Sound Web’s LAB (Live Audio Board) is a mine wherein may be found rich veins of knowledge. While extracting that ore, precious gems may be found: Glittering rocks of especially concentrated wisdom, convenient packages of conceptual crystals. When you find one, you can’t help but smile – and smile I did when someone (probably Tim McCullogh) brought up and illustrated the concept of PICNIC.

PICNIC is an acronym meaning “Problem In Chair, Not In Configuration,” and it encapsulates a stark reality of this business: There are people who can understand how to deploy a pro-audio system. They can understand how all the different parts of a mixing console operate to route audio to destinations. They can understand what all the knobs do. Yet, they can’t seem to coax a pleasing result out of even the most capable system. Much like a person who could identify every part of an aircraft but never successfully take off, they “just don’t have a feel for flying.”

Our gear is a tool, and at the most basic level, any tool is a force multiplier. An input force is modified in some way to create an output that would be difficult or impossible otherwise. If the system gets bad input, it will inevitably transform that input into bad output. If an operator fundamentally misunderstands the problem they are trying to solve, or misreads what solution is appropriate, the gear won’t save them. It may be possible for their worst impulses to be attenuated, but an operator who can’t suss out what makes a band sound like a band will have the same problems at all scales. Worse, at large scale their inabilities may become painfully magnified. Give a poor driver an underpowered runabout car, and they can only get into so much trouble. Hand them a Lamborghini, though, and they remain a terrible operator…but now they can accelerate out of control and crash with frightening rapidity and force.

So, what’s a PIANO, then?

It’s an idea I came up with after hearing the PICNIC acronym, and it means “Problem Is Acoustical, Nothing Other.”

Here again, is a reality imposed by the limits of our equipment. All sound reinforcement is, by harsh necessity of physics, an additive process. We can impart zero additional energy to an acoustical event, or we can impart some non-zero addition, but we can’t reduce the “starting” energy. That’s imposed on us as a rigid condition, changeable only by modifying the environment where the event is happening. Even such trickery as directional subwoofer arrays don’t subtract energy from the equation. Rather, they involve putting even MORE energy into the environment, such that the additional energy will cancel the perceived effects of other energy.

I’ve been in PIANO situations tons of times, and you probably have been as well. There we were, with plenty of system capability at our disposal and no way to use it to our advantage meaningfully. To our great dismay, different parts of our capable system might actually have worked against us. That nice, loud monitor rig we brought might be killing our night, because the process of making all the noise the band could want is overcoming the main PA’s contribution. If the band needs that amount of acoustical energy in the room, then we’re stuck. Our only option for modification is to add more energy, possibly running out of FOH capacity because of the sheer force of our starting point, or overwhelming the audience with intensity, or both.

Whether it’s a PICNIC or a PIANO (or both), our equipment can’t be more than it is or less than it is. We can be tempted to try to fix the problem with additional or different toys, but in the end we’ll be always disappointed if we’re not addressing – or even understanding – where things are going wrong.

One Side, Please

Another take on a monoblock.

Please Remember:

The opinions expressed are mine only. These opinions do not necessarily reflect anybody else’s opinions. I do not own, operate, manage, or represent any band, venue, or company that I talk about, unless explicitly noted.

Want to use this image for something else? Great! Click it for the link to a high-res or resolution-independent version.

It’s tough to challenge our preconceptions, right? When deploying an audio system, you have a left and right, correct? That’s just how it’s done. You might have a center cluster as well, but really – you always deploy left and right.

Hey, let’s be honest. We like symmetry, and almost every performance is set up with the players in the center, so what do we do?

PA boxes left and right.

But sometimes you get to a gig, and you realize that a traditional L/R setup won’t do what you need…or is just pointless. That’s a great time to think about using the toys you brought in a different way. That’s exactly what happened for me at a recent Lazlos gig.

As we were loading in, we were informed that the layout of the dining tables would be different, and also that a certain homeowner was well and truly displeased about the music that had been lately pouring out of the restaurant’s lot. Standing there, looking at where our canopies were going to go, and thinking about what we were just told, I had a revelation.

There was no point, at all, in doing a traditional L/R deployment. The stage-left side of the PA would be doing nothing except either:

A) Missing the audience, if I kept the coverage away from the home in question, or

B) Hitting the same audience as stage right, but at a loss of coherence due to the delay (not that it doesn’t happen all the time – but still), and ALSO hitting the home that was having a problem with us.

In other words, going L/R stuck me with the choices of having “R” being a waste of power and coverage, or not being totally wasted but riddled with downsides.

At that point it seemed obvious to me that the solution was a “double-hung monoblock.” As I often do, the vocals would go through one output, and everything else would go through another. The only difference from a normal setup would be that we’d use two boxes total, instead of two pairs. Those two boxes would be set to cover the audience without line-of-sight to The House That Wished We Would Go Away.

Hence, a double-hung monoblock was what I did. It worked just fine, nobody noticed a lack of stereo (I mix The Lazlos in mono anyway, like the overwhelming majority of every show I do), and it didn’t work against us in regards to having someone call the police on the show. Sure, it didn’t LOOK like what people expected, but nobody cared – and all the coverage/ power in the equation was being used for the actual audience.

A Survey Of My Measurement Tools And Techniques

From ears to computers and back again.

Please Remember:

The opinions expressed are mine only. These opinions do not necessarily reflect anybody else’s opinions. I do not own, operate, manage, or represent any band, venue, or company that I talk about, unless explicitly noted.

 
Want to use this image for something else? Great! Click it for the link to a high-res or resolution-independent version.

I was recently asked specifically to write about how I measure and tune audio systems. I was tickled; Having topics suggested to me is something I dearly love. Here you go, then…an article about how I figure out what’s going on with a PA system, and the tools involved.

I’m going to set this against a “background” of a composite case study: Deploying a monitor system, FOH PA, and delays for the IAMA Bluegrass Night at Gallivan Plaza. I’ve done two iterations of the full setup now, handled slightly different ways, and have had success at it both times. Yes, I’m aware of the irony that Gallivan Plaza is definitely not a small venue. I may need to change the name of this site at some point. Well, anyway…

I Start With My Ears

When everything is placed, powered, and attached to signal, it’s time to get out a pink noise generator and do some listening. I’m fortunate in that my preferred consoles (Behringer/ Midas X/M 32s of various configurations) have noise generators built in. The point of this step is twofold.

  1. Confirm that everything is working and getting signal.
  2. Find out if anything is glaringly, obviously out of spec or set incorrectly.

If everything is passing noise, the polarity of the subwoofers seems right at one setting or another, and all boxes of the same model sound essentially the same, it’s time to move on. I don’t spend a lot of time on this step. There is no “agonizing” here. If something is clearly broken, mispatched, level-trimmed incorrectly, or significantly different in transfer-function than it ought to be, I act on it. If it doesn’t grab my attention immediately, it’s fine.

I want to note right here that many of the middle steps I’m about to discuss are often skipped. The Gallivan show is one where I have the time, support, and necessity to do more intensive measurement. On many other shows, instrument-aided analysis doesn’t make it onto the priorities list. That might seem a shame, and it might be to some extent, but it also highlights just how much mileage you get out of strong basics. Especially now, in the days of ultra-engineered loudspeakers, a simple check for correct function and level goes a long way.

Two Methods For System-To-System Time Alignment

I generally don’t worry about bandpass-level time alignments, especially when they involve boxes that are offset to the left or right of each other. For example, getting the full-range FOH speakers to line up exactly with the center-clustered subwoofers at some chosen point is more work than it’s worth in my case. Alignment that’s (effectively) along the horizontal axis is a situation where correction at one point is likely to be hugely UN-correct at many other points.

Delays are a different story. Alignment of whole, full range systems along the depth axis is much more effective. When you’re correcting for a distance that’s largely described by walking away from the main system, on axis, your chosen solution will be much more stable – that is, relevant and correct – for more audience members. (It still won’t be perfect, though, but that’s life.)

Because I don’t have a dual-FFT measurement system with a delay finder, I have two methods for measuring propagation time.

Two Mics And A DAW

The first method is to set a microphone right up against a main PA loudspeaker. Then, another microphone is set at the point that the solution is going to be tuned to. I recommend moving the second point off the delay speaker’s location horizontally, so that you’re midway between center stage and the audience’s outside edge. This is because, statistically, more people will be close to that horizontal location than dead center or to the far outside.

You then record both microphones into an audio workstation, like Reaper, on separate channels. While the recording is running, you play a single click or other, similar sound through the main speaker you’re using for reference. You do NOT play the click through the delay. Remember: You want to find the time that it takes that single click from the main to arrive. The click has to be loud enough at the delay point to be clearly distinguishable from ambient noise, so keep that in mind when setting levels.

At some time, the impulse will arrive at the first microphone. At time+delay, that same click will arrive at the solution-point microphone. If you get into your recording and measure the time between the click arrivals, you get your delay setting.

Those Two Funny Things On The Side Of Your Head

This method is significantly less accurate than a two-mic measurement, but it can be okay in a pinch. Remote control of your system is very helpful when trying this.

For the measurement, set the delay speaker to have an apparent level that’s very similar to the level of the main PA at the solution point. Now, stand at your desired solution point, and play a click through BOTH the main PA and delay speaker. (Use only one “side” of the PA if you can.) It will probably help to plug one ear, or at least turn so that one ear is pointed toward the overall sound system. You should clearly hear multiple arrivals. Adjust the delay time to the delay speaker slowly, listening for when the two arrivals seem to merge into one. Now, play some music or noise through both the main PA and the delays, listening for comb-filtering effects at your solution point. Adjust the delay until you get the least-objectionable result possible. Finally, restore the delay speaker to full level.

*****

Sidenote: My current methodology with delays is for them to be significantly louder than the main system when you’re standing close to them, so as to mitigate comb-filtering problems. If the signal that’s misaligned is relatively low in level, like 15 dB down or an even lesser magnitude, its summation effects are greatly reduced.

Meddling In The Affairs Of Wizards (Possibly With An Omnimic)

As I mentioned before, I don’t have a dual-FFT measurement system available. This doesn’t bother me very much; I’ve come to prefer single-ended measurement tools. They do have limitations, in that they require a known measurement stimulus signal to operate and thus aren’t good for “real time” readings, but they can still tell you a great deal about your system’s initial state. They’re also less fiddly in certain ways, like not being affected by propagation delay to the measurement mic.

I’ve used both the Dayton Omnimic system and Room EQ Wizard, and I’ve come to like REW’s more contemplative, “measure, tweak, measure again” workflow over Dayton’s “measure and tweak while annoying signals are running and the magnitude graph is bouncing around.”

The specifics of each system are beyond the scope of this article, but I will make some generalizations:

  1. Make sure your measurement signal is loud enough to swamp ambient noise, but not so loud that everyone around hates you. Sine sweeps have better signal-to-noise performance overall, because at any given instant the signal is a single frequency at a certain SPL, rather than all audio frequencies forming a total SPL.
  2. A basically okay measurement mic is just fine. I have a Behringer that I got for something like $50, and it’s survived occasional bouts of nonsense (like gravity plus a hard floor) while still delivering results that I can use meaningfully.
  3. Put the mic where your head is going to go.
  4. I generally don’t average a bunch of measurements. Mostly, I try to pick a point that represents my average audience member decently, and capture that for tuning. It’s important, though, to keep in mind that your tuning will deflect at physical points that aren’t where your mic was.
  5. Smooth your traces so that you can read them, but not so much that they lie like the people who were trying to sell me beachfront property in Topeka. I recommend 6dB per octave smoothing to start.
  6. Don’t chase every peak and dip. Look for trends and major deviations.
  7. Try to find a “hinge frequency” that represents the center of overall magnitude, such that overall boosts and overall cuts balance out. Be especially resistant to boosts that seem very large relative to any cuts you might make.
  8. Go for flat response in a reasonable passband for the boxes and application. Don’t boost anything to your subwoofers below about 45 Hz, or even better, don’t boost anything. If you find an egregious sub peak, cut it and leave everything else alone. A regular ol’ monitor wedge can often start rolling off around 75 Hz without anybody being upset about it.
  9. Measure after you tune whenever possible. If something in the trace doesn’t seem to be responding, that’s almost certainly to do with acoustics or time, and your EQ alone will not fix it. If a tweak doesn’t produce a meaningful response, free up that EQ band.

I End With My Ears

The final analysis goes right back to my hearing. This is also why tablet-driven mixing is so helpful. I can walk out to a monitor, or the main PA, or the delay system, and hear it while I make my last few decisions. Does my tuning make any sense in real life? Do the mains kill me when I’m up close? These are questions that are answered by listening. Also, for every practical purpose I’ve stopped doing any real tuning with music. I do use music for a basic reference point on listenability, but what I really want to know is how a vocal mic sounds through the boxes. If a vocal mic sounds terrible in FOH or monitor world…surprise! It sounds terrible, and no amount of “the trace looked right” can defend that. Be concerned about your reinforcement inputs, not your break music.

Localization Failure

If you thought it was all mush, it might be because you couldn’t localize the FOH PA.

Please Remember:

The opinions expressed are mine only. These opinions do not necessarily reflect anybody else’s opinions. I do not own, operate, manage, or represent any band, venue, or company that I talk about, unless explicitly noted.

 
Want to use this image for something else? Great! Click it for the link to a high-res or resolution-independent version.

Last night, I was running a show in a very, VERY reflective environment. The whole thing was inarticulate mush, like what you would expect in a stadium/ hockey rink/ basketball arena, even though the place was probably fire-rated for only 200 people.

Listening to the splatter, I had an epiphany. I couldn’t figure out where the FOH PA was with my ears, even though I could see it with my eyes. The wash from the monitors and drums hitting the back wall was overwhelming the “timing information” from the mains. I mentally contrasted this with recent experiences mixing outside, where FOH could easily separate from the monitors due to lack of reflections. You could instantly point to a mid-high and say, “That’s where the singer is coming from.” Not so during my last gig. This crystallized a thought in my mind:

If you think a mix sounds bad, but can’t figure out why, the reason may be that you can’t separate FOH from everything else.

In the case of last-night’s mix, achieving separation would have meant very high volume. With all the blast and smear, though, it was already too loud. As such, I was using FOH to just barely fill in the subwoofer range and information above 1 kHz or so. Doing that wasn’t enough to create a sonic impression that the band was coming from FOH, though. It was a mere blend to make it seem that the reflections had a better magnitude response.

Overall, that was the appropriate choice. We weren’t there to be loud, achieving a great sound in an acoustically hostile space. We were there to play some tunes that people might want to dance to, without being overwhelming. As often happens “best overall show” won out over “best sound.” That’s part of the job…and so too, thankfully, is having a small revelation every so often.

Fun With A VRX Monoblock

It works because a JBL VRX module is a point-source box.

Please Remember:

The opinions expressed are mine only. These opinions do not necessarily reflect anybody else’s opinions. I do not own, operate, manage, or represent any band, venue, or company that I talk about, unless explicitly noted.

Want to use this image for something else? Great! Click it for the link to a high-res or resolution-independent version.

At a recent gig celebrating our country’s independence from a country that spells certain words with an extra “u,” we deployed a VRX system by stacking it upon SRX subwoofers.

As the picture shows, though, the stack was horizontal instead of vertical.

Was this “wrong?”

No.

It was unorthodox, but it was 100% in accordance with the fundamental design of JBL’s VRX modules. That is, a VRX system’s top-level design orthodoxy is for a vertically oriented array of modules…but remove the specialized hardware and each module is just a point-source box.

A VRX system is not a line array. I know people call it that. I know JBL’s own website uses “line array” in the descriptive blurbs. It’s called a line array because that’s what people search for, and buy, and market to their end clients. The modules can be hung or mounted vertically, and the result looks like the down-fire coverage of those big hangs at concerts, and that impresses people, and they hire you again, and they recommend you to their friends.

That’s all fine.

But a VRX system is not a line array. It’s not built such that several modules together combine to radiate in a pattern that’s more cylindrical than spherical. It’s built such that any particular listener is meant to be hearing as few boxes at a time as possible – ideally, only one box. Of course, the low-frequency sections interact pretty strongly. There’s nothing that can be done about that, because there’s nothing about a VRX box that can give you tight pattern control below about 2kHz anyway.

So, anyway, a VRX system is a point-source system. It’s just that, module per module, the vertical HF coverage is quite tight – about 30 degrees at 2kHz, narrowing to 15 degrees by the time you get to 5kHz or thereabouts. The problem, then, is if you turn the box on its side, you don’t get much coverage in the horizontal plane. Even three boxes together only get you 45 degrees of “guaranteed” coverage through the entire VRX bandwidth.

At such a point, you’ve got a choice. If you’ve brought 8 VRX modules to the show, and want to go horizontal, you could do two arrays of four. Your consistent coverage angle with the boxes on their sides is then 60 degrees per cluster. To handle a need for wider coverage, you then have to crossfire the clusters somewhat (or use center fills). That’s not a horrible thing, but there is another choice if you aren’t really attached to:

A) Stereo, or

B) Having things look normal.

That other choice is a monoblock. Pile all the subwoofers together, and array 7 VRX modules in a big arc on top. You get more output, because the tight-packed enclosures are more in phase with each other, more overall coherence because of the same thing, and your full-bandwidth coverage is 100 degrees by 100 degrees. The folks to the sides get some attention, and the folks up the hill also stay in the pattern.

Are there issues? Sure. Anytime you have multiple sources you will get some interference weirdness at certain places and frequencies. You’ll get swishing when the wind blows. That happens with orthodox deployments and unorthodox deployments. What changes is the specifics. In any case, you decide what you can live with and what you can’t, try to tune the system so that the majority of the audience is getting a nice show, and shrug your shoulders about everything else. The monoblock was definitely crispy up close, and also high-mid hot when you walked away up the hill. That aggressiveness had to be tamed with EQ – but it could be tamed.

Unorthodox isn’t a synonym for “wrong,” although there are plenty of unorthodox deployments that are very bad ideas. In this case, though, the system 100% supported what we were doing, and I felt that the results worked out well. We could have done something traditional by center-clustering the subs and running side-by-side mounts of two boxes per stick, plus outfills…

…but that would have been boring, and it wouldn’t have worked any better. To be frank, if we had the resources to fly the monoblock array over downstage center, I’d probably push for that as a common way of us doing things. One big source that’s more coherent because all the elements are closer together? Yes, please.

Take The Monitor Engineer

If you’re going to leave someone behind, leave the FOH engineer. Take your monitor operator.

Please Remember:

The opinions expressed are mine only. These opinions do not necessarily reflect anybody else’s opinions. I do not own, operate, manage, or represent any band, venue, or company that I talk about, unless explicitly noted.

 
Want to use this image for something else? Great! Click it for the link to a high-res or resolution-independent version.

I can’t remember where I read it, but someone once suggested that, when touring, take the FOH engineer if:

  1. Your FOH and monitor engineer are separate people, and
  2. You can only take one on the road.

I can NOT disagree with this more. Do the opposite. If you must choose, leave FOH at home and take a monitor engineer with you.

Why?

Because consistently good monitors are much more key to a great gig than consistently good FOH audio.

Think about your most favorite live band. Imagine them on tour with a truly enormous, beautifully tuned, FOH PA system. Imagine that this PA system is made of unicorns. These unicorns use the magical power of love and non-hydrogenated vegetable oil to create a bubble universe that causes all acoustical problems to vanish in the vicinity of the band.

Now imagine that the unicorns carry a curse. The FOH PA will be perfect, but the sound on stage will be bad. The band won’t be able to hear each other or themselves very well. The sound on deck will always be a muddy roar. Requests for “more or less this or that” will always be ignored.

Do you want to go to that show? Would you spend top dollar on a ticket for that show? Do you think that show will feature an amazing performance by that band that you love?

My feeling is that the answer is “not really.”

A band that can fully engage and enjoy the show on deck has a much, much better chance of delivering the kind of blistering performance that satisfies old friends and makes new ones. If they can’t do that, then who cares if the FOH mix is absolutely spot on? It’s irrelevant.

…and I can tell you why I feel very confident about my position: People go to, and often manage to greatly enjoy, performances in acoustically hostile spaces. Rooms where even very seasoned FOH engineers end up with results that aren’t particularly satisfying. Places where the sound for the audience isn’t so great, but where monitor world managed to give the band a good solution.

The performance. The spectacle. The emotion. That comes from the band, and is translated through the PA. That’s what has to be achieved, and the sound on deck is the root. If the root is lost, the tree dies.

It’s not that FOH isn’t important, or that we shouldn’t worry about it. We should. It’s a big component in crafting a memorable show. But start at the beginning. The stage is where a great FOH mix starts. It’s best not to have to choose, but if you do have to choose, prioritize the sound on stage.

Take the monitor engineer. Don’t leave a foundational element of a killer gig to somebody you’ve never met before. To do so is nonsensical.

Keep Your Canopies

When it comes to things that catch the wind, anchor the sail – not the legs.

Please Remember:

The opinions expressed are mine only. These opinions do not necessarily reflect anybody else’s opinions. I do not own, operate, manage, or represent any band, venue, or company that I talk about, unless explicitly noted.

 
Want to use this image for something else? Great! Click it for the link to a high-res or resolution-independent version.

The summertime show season is upon us, and that means a great number of people will be breaking – or outright losing – pop-up shelters.

For some of you, the whys and wherefores of this phenomenon are well known and obvious, but they aren’t always apparent to folks just getting started…or even more seasoned people.

The problem is this: People anchor the feet and/ or legs of their shelter, and then the wind kicks up. The canopy catches the wind, applies a proportionally large force to the legs and their fittings, and that’s all she wrote. Something in the frame deforms, or downright breaks. Alternatively, you may experience the unbridled hilarity of the pop-up becoming airborne.

YEEEEEHAAAAWWW!

It doesn’t help that manufacturers supply consumers of pop-ups with stakes for the feet. This provides a subtle bit of (incorrect) encouragement that an adequate anchoring method is to prevent the feet from moving. Staking the feet is good for keeping things in order against an errant foot or soccer ball, but not much else.

So, what’s the key? The key is to prevent movement of the system component that imparts force to the rest of the system. In the case of wind, the legs impart very little force to everything else. The canopy cover itself, though, is capable of tearing the whole mess to pieces when it gets moving. Expressed as a simple machine, the cover is the arm of a lever. If you want to stop a lever from moving, you prevent movement at the arm – not the fulcrum.

Thus, what you want to anchor is the canopy cover, or the part of the frame that supports the cover. If that doesn’t move, then nothing else will move, and your canopy will live to fight another day.


We Blew Up A Monitor. Or Not.

Sleuthing may save you from unnecessary repair and replacement.

Please Remember:

The opinions expressed are mine only. These opinions do not necessarily reflect anybody else’s opinions. I do not own, operate, manage, or represent any band, venue, or company that I talk about, unless explicitly noted.

 
Want to use this image for something else? Great! Click it for the link to a high-res or resolution-independent version.

It was night two out of three with Samba Fogo, an epic-level Brazilian music and dance extravaganza. I had walked down to the deck to run my nightly shutdown when Francisco mentioned a serious problem: We had wrecked a DBR12 monitor wedge. Soon after the monitor mix had included percussion, the box had started to make a horrible crackling noise. Francisco said it sounded like we’d killed the HF driver.

Dangit!

I wanted to hear the problem for myself, so I opened monitor world’s channels and started talking into a mic. Everything seemed fine at first, but then – ah! – there it was. Something was definitely wrong. I decided to sweep a tone through the box to figure out where the compression driver had de-spec’d.

And that’s when I started to get a tiny bit suspicious.

I tried tones from 1 kHz all the way up to 8k, and the playback from the DBR was as clean and clear as you please. If we’d blown up that tweeter (which should be hard to do anyway), why was it sounding like it was just fine?

I went back to the mic and noticed something curious. The problem seemed to correlate with my saying “two” during “Check, test, one, two.” That’s low-frequency information. I rolled the high-pass up on the channel…and the problem disappeared. Had the LF driver been ruined?

Dangit!

I wanted to do more diagnosis, but it was late, so out the door I went.

I arrived early the next day with my drill. I needed to get the grill off the Yamaha so I could test the woofer cone. My guess was that the coil was no longer centered in the gap, and sufficient excursion caused rubbing that was very audible. (This wasn’t totally reasonable, now that I think about it some more. If the coil really wasn’t centered, I should have heard nasty grinding all the time. Even so…)

The grill being removed, I applied pressure to the driver diaphragm, certain I was about to hear and feel a coil rubbing against a magnet.

Nothin’. It was smooth as a fighter jet made entirely of unsalted butter.

I got the tone-generator going again, and the problem came back with a vengeance. Maybe something had come loose on the input board? I plugged the signal cable into a different box – and the new box made exactly the same noise.

Ah-ha! It had to be something else, because the problem was now common across two completely different wedges. I walked around the upstage riser to get to my mix racks and snake heads, and that’s when it happened. The crackling tracked perfectly with my footsteps on the stage. I stomped a foot a few times. Exact correlation.

A loose connection was masquerading as a driver failure!

I poked and prodded at my main stagebox. No problem. I tweaked the drop snakes. No problem. I started jiggering the “last mile” connections to the monitors and –

Bang! There it was. one of my “not that great” 50-foot XLRs wasn’t quite mating with the stagebox correctly. So I swapped out the cable.

And our blown monitor wasn’t blown anymore. As near as I can tell, we finally got enough vibration happening on the stage such that the connection partially let go after being properly seated for a couple of days.

The moral of the story is, if something seems busted, try to track down the “why.” Work through as many different failure causes as you can think of. You may find out that some other, much less expensive thing is what’s causing your problem.


Show File Commentary For A Pink Floyd Tribute

The (not so secret) sauce behind audio production for Pigs Over The Depot.

Please Remember:

The opinions expressed are mine only. These opinions do not necessarily reflect anybody else’s opinions. I do not own, operate, manage, or represent any band, venue, or company that I talk about, unless explicitly noted.

Want to use this image for something else? Great! Click it for the link to a high-res or resolution-independent version.

For weeks now, I’ve been meaning to open up the show files from Pigs Over The Depot (A Tribute To Pink Floyd) and go through some parts therein. I finally got off my rear and got busy! Here are some selected thoughts:

Routing

The show routing was really straightforward, with one small twist in monitor world:

The monitor console was gain-master for the show, because all analog input was handled by it. FOH was an X32 core connected by AES50, meaning that four of monitor world’s AES50A Output routing blocks needed to be sourced from the local inputs.

Some folks might look askance at such a setup, but it’s just fine for me. Jason, the monitor engineer, is a top-shelf operator. Plus, neither of us are preamp twiddlers. Jason figured out a good, healthy input level for his headamps, and left them alone after that.

FOH was connected to its own AES50 stagebox for physical tie lines to The Depot’s system. Driveback through monitor world’s auxiliary channels would have been possible, but easy, XLR connectivity was my priority for the evening.

Buses and VCAs and FX, Oh My!

FOH

On my side, I had two mix buses going on: Vocals and Drums. I wanted to be able to EQ and compress all the vocal and drum mics as separate groups, especially if there was a consistent “vocal garble” frequency giving me trouble. I also wanted to have a quick control for “more vocals NOW,” if the need arose.

As is my usual, I had a main L/R mix and a separate send for subwoofer material.

For FX, I  set myself up with three options: Hall Reverb, Long Delay, and Regular Delay.

The reverb was driven hard for “Great Gig In The Sky,” and Grant had a guitar part that needed to be fed through it. Other than that, I tried to be pretty sparing.

The long delay was specifically for the echoing “Stone!” in “Dogs,” with the left-side of the delay having a time of 1.5 seconds and the right side being set for one second. I used quite a bit of feedback in order to make the echoes last longer, but I still feel that I undershot a little on my settings there.

The regular delay was 0.5 seconds with only a touch of feedback, and I didn’t lean on it very much. Mostly, it ended up being a vocal texturizer on “Great Gig In The Sky.”

Due to a late-breaking addition of a second channel for the Juno synth which got pushed off into a spare line that would have been for drums, I couldn’t stereo link the Juno inputs. I should have just bused them together, but I went for a DCA instead. Clever – but I didn’t realize that the DCA was muted until we were a few songs into the first set. Whoops!

Monitor World

In monitor land, there was a true extravaganza of feeds for Jason to mix. The first six buses were monitor wedges deployed in pairs but fed with total independence. One wedge was dedicated to carrying a vocal mix only, while the other wedge was for all the instrumentation that the performer wanted. The idea was to increase clarity and separation by having the vocals emanate from a source that was physically separate from everything else. (In other words, yes, it was a Dave Rat double-hung system, but with monitor wedges.)

After that, four buses were used by the stereo in-ears that Rylee and Cason listened to. The two sax players were back on wedges, with one box dedicated to each. The final two monitor buses were used to drive a “Texas Headphones” drumfill, which sat on both sides of the kit but was mixed in mono: One bus drove the tops, and the other bus drove the subwoofers.

Reverb and delay were critical to the onstage performance, so Jason had independent processing at his disposal. The two FX sends, added to all the monitor sends, meant that the X32 was maxed out in terms of all 16 mix buses being consumed.

Jason didn’t really get into anything DCA wise, but he did make use of mute groups. One group was to mute all the inputs, the second group was to manage vocals, and the third was to kill the FX sends easily when they weren’t needed.

Lots Of Input

Of course, we didn’t just maximize the output side of things. Pigs is a 32 input show if you count everything, including a spare.

First, there’s a block of vocal mics. It starts with Lisa on stage right, and then has Grant, Rylee, and Mike included. Cason was also going to have a vocal, but in the end that was switched out to a bari sax option.

The next three channels were dedicated to electric guitars. Normally we have two, but Marty Thomas put in the clutch performance on “Dogs,” so we needed one more. After that, we had one line for acoustic guitar.

The next nine(!) inputs were for various keys and synths. Rick had a Moog, a B3 in stereo, a Korg, and a Roland to work with. Grant uses a Micro Korg and a SubPhatty in the course of the show. The left side of the Juno was next, followed by the Nord.

The bass line came after, followed by one mic for each saxophone.

Originally, I had seven inputs reserved for drums, but Mike surprised me by deleting one tom from his shell pack. This lead to the “split Juno” situation, where between the toms and the overheads we plugged in the right side of the Juno.

Channels 29 and 30 were for the playback FX (the preshow announcement that’s actually part of the show, the crashing plane, helicopter, clocks, etc). The final two inputs were for crowd mics that we connected purely for recording purposes. Some performers like to have some ambience blended into their IEM mixes, but Rylee and Grant didn’t opt in for that on this occasion.