Tag Archives: Feedback

Holistic Headroom

If you have zero headroom anywhere, you have zero headroom everywhere.

Please Remember:

The opinions expressed are mine only. These opinions do not necessarily reflect anybody else’s opinions. I do not own, operate, manage, or represent any band, venue, or company that I talk about, unless explicitly noted.

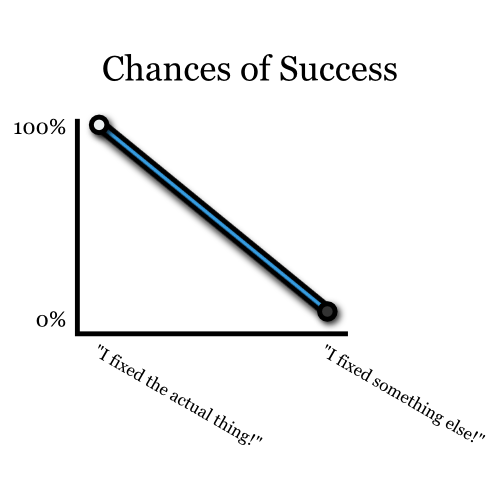
“Headroom” is a beloved buzzword for audio craftspersons. Part of the reason it’s beloved is because you can blame your problems on the lack of it:

“I hate those mic pres. They don’t have enough headroom.”

“I’m always running out of headroom on that console’s mix buses.”

“I need to buy a more powerful amplifier for my subs, because I this one doesn’t have enough headroom.”

(I’m kinda tipping my hand a bit with that last one, in terms of this post being sort of a “follow on” to my article about clipping.)

Headroom is sometimes treated as a nebulous sort of concept – a hazy property that really good gear has enough of, and not-so-good gear doesn’t possess in the required quantity. In my opinion, though, headroom is pretty easy to define, and its seeming mysteriousness is due to it being used as a “blamecatcher” for things that didn’t go as planned.

Headroom, as I was taught, is “the difference between the maximum attainable level and the nominal level.” In other words, if a device can pass a signal of greater intensity than is required for a certain situation, then the device has some non-zero amount of headroom. For example, if your application requires a console’s main bus to pass 0 dBu (decibels referenced to 0.775 volts, RMS), and the console can pass +24 dBu, then you have 24 dB of headroom in the console.

(If it’s available, and ya ain’t usin’ it, it’s headroom.)

The overall concept is pretty easy to understand, but what a good number of folks aren’t taught, and often fail to realize for a good long while (this includes me), is that headroom is holistic, and “lowest common denominator.” That is to say:

Two or more audio components – whether electrical or acoustical – connected together all have the SAME effective headroom, and that effective headroom is equal to the LOWEST amount of headroom available at any point in the signal chain.

So…what the heck does that mean?

Everything Has A Maximum Level – Everything

To start with, it’s important to point out that hyphenated bit in the above definition. Especially because this is a site about live-performance, what you have to realize is that absolutely everything connected to that live performance has a maximum amount of appropriate signal intensity. Even acoustical sources and your audience qualify for this. Think about it:

A singer can’t sing any louder than they can sing.

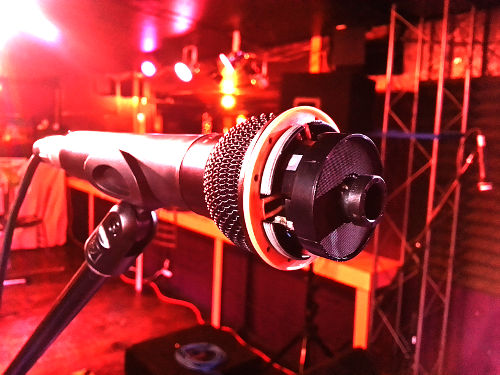
A mic can only handle so much SPL.

A preamp can only swing a limited amount of voltage at its outputs.

Different parts of a console’s internal signal path have limits on how much signal they can handle.

A power amplifier can’t deliver an infinite amount of voltage.

Speakers handle a limited amount of power.

The people listening to the show have a finite tolerance for sound pressure.

…and every single one of these “components” is connected to the others. Sure, the connection may not be a direct, electrical hookup, but the influences of other parts of the system are still felt. If your system can create a “full tilt boogie” sound pressure level of 125 dB SPL C, but your audience will only tolerate about 105, then that lower level becomes your “don’t exceed” point. Go beyond it, and you effectively “clip” the audience…which makes your 20 dB of unused PA capability partially irrelevant. That leads to my next point.

Your Minimum Actual Headroom Is All You Effectively Have

Sometimes, a singer will “run out of gas.” They may have strained themselves, or they might not be feeling well, or they might just be tired. As a result, their maximum acoustical output drops by some amount.

Here’s the thing.

The entire system’s EFFECTIVE headroom has just dropped by that amount. If the singer is 10 dB quieter than they used to be, you’ve just lost 10 dB of effective headroom.

Now – before you start getting bent out of shape, complaining that your console’s mix bus headroom hasn’t magically changed, look at that paragraph again. The key is the word “effective.”

Of course your console can still pass its maximum signal. Of course your loudspeakers still handle the same power as they did a moment ago. As isolated components, their absolute headroom has not changed in any way.

But components working in a complete electro-acoustical system are not isolated, and are therefore limited by each other in various ways.

In the case of a singer getting worn out, their vocal “signal” drops closer to the noisefloor of the band playing around them. Now, if we were talking about an electrical device, the noisefloor staying the same with a decrease in maximum level above that noisefloor would be – what? Yes: A loss of headroom.

The way this affects everything else is that you now have to drive the vocal harder to get a similar mix. (It’s not the same mix, because there’s less acoustical separation between the singer and the band at the point of the mic capsule, but that’s a different discussion.) Because the singer’s overall level has dropped, your gain change might not be pushing you any closer to clipping an electrical device…but you are definitely closer to the point where your system will “ring” with feedback. A system in feedback, effectively, has reached its maximum available output.

Your effective headroom has dropped.

A Bigger Power Amp Isn’t Enough

Okay – here’s the bit that’s directly related to my “clipping” article.

The concept of holistic headroom is one of the larger and fiercer bugaboos to be found in the piecing together of live-audio rigs. As many bugaboos do, it grows to a fearsome size by feeding on misconceptions and mythology. There is a particular sub-species of this creature that’s both common and venomous: The idea that a system headroom problem can be fixed by purchasing more powerful amplifiers.

Now, if you’re constantly clipping your amps because the system won’t get loud enough for your application, then yes, you need to do something about the problem. However, what you need to do has to be effective on the whole, and not just for one isolated part of the signal chain. Buying a bigger amplifier will probably get you some headroom at the amplifier, but it might not actually get you any more effective headroom (which is what actually matters). If your old amplifier’s maximum level was equal to your speakers’ power handling, and the new amplifier is more powerful than the old one, then you’ve done nothing in terms of effective headroom.

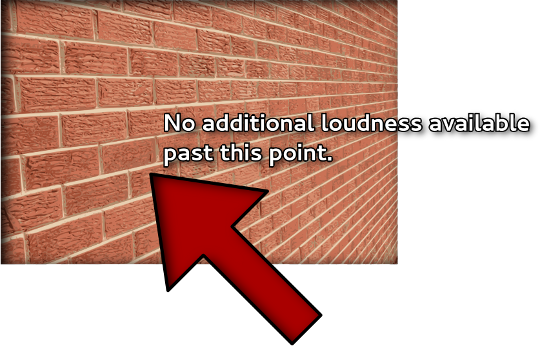
The loudspeakers were already hitting their maximum level. As such, they had zero headroom, and your new amp is thus effectively limited to zero additional headroom. Your enormously powerful amp is doing virtually nothing for you, except for letting you hit your unchanged maximum level without seeing clip lights.

To be fair, the system will get somewhat louder because loudspeakers don’t “brickwall” at their maximum input levels. Also, the nature of most music is that the peaks are significantly higher than the continuous level, which lets you get away with a too-big amp for a while. You will get some more level for a while, but your speakers will die much sooner than they should – and when they do, your system will become rather quieter…

Anyway.

The point is that, if you want a system headroom increase of “x” decibels, then you have to be sure that every part of your system – not just one piece – has “x” more decibels to give you. If you’re going to get more power, you have to make sure that you also have that much more “speaker” to receive that power. (And this gets into all kinds of funny business, like whether or not you can buy speakers that are just as efficient as what you’ve had while handling more power, or whether you need to buy more of the same speakers, and if that’s a good idea because of arrayability, or…)

There’s also the question of whether or not a more powerful system is what your audience even wants. It all ties together, because headroom is holistic.


Fixing The Wrong Thing

Cleverness is only helpful if it’s applied to the right problem.

Please Remember:

The opinions expressed are mine only. These opinions do not necessarily reflect anybody else’s opinions. I do not own, operate, manage, or represent any band, venue, or company that I talk about, unless explicitly noted.

Back in October, I ran a fog machine “dry” by fixing it’s remote switch. Not directly, you understand. In an effective sense.

Here’s the story:

I switched over to an actual, honest-to-goodness continuous hazer after my old unit refused to unclog. I still had juice for the old hazer, though, and I didn’t want to just toss it out. I discovered that we had an old fogger that still worked, and the leftover haze juice was water based – thus, it would be (mostly) compatible with the fogger. I decided to take the new hazer out of service for long enough to burn off the old haze fluid.

I rigged up an extension to the fogger’s remote so that I could drive the output from FOH (Front Of House). In the process of making my extension work, I discovered that something was amiss in the remote’s switch wiring. I did some light pulling and finagling, and a proper connection was re-established.

Groovy. (Yes, that’s a shout out to “Army of Darkness,” even though you couldn’t tell.)

The fogger went back into service in time for a two-band show. The opener ended up pushing their downbeat time back about 30 – 45 minutes, but I wanted to establish some atmosphere (literally and figuratively) while we waited.

So, I hit the “Fog” button, and nothing happened. I figured that the button wiring had gotten tweaked again, so I pushed and pulled on the remote’s strain relief…hey, look! Fog! Nice.

The fog unit vented its output into a fan, and I got a pretty-okay haze effect out of the whole shebang. The hang-time on the haze wasn’t very long, though, so the stage ended up clearing in only a few minutes.

I kept hitting the button.

We got through most of the first act’s set, when I suddenly didn’t get fog anymore.

“Freakin’ button.” I thought. “I’m going to just open up the unit and twist the conductors together. It won’t be as nice as having the button, but I can still yank the extension connection if the haze gets out of control.”

And that’s exactly what I did. As the first band was getting their gear off the deck, I was unscrewing the cover on the remote and shorting the wires that would otherwise be connected to different poles on the “Fog” switch. Satisfied that I had performed a nifty little bit of “rock and roll” surgery, I got set for the main act.

The band’s first set got rolling, and I connected my remote.

No fog.

“The connection at the machine end must be bad. Oh well, I’ll fix that later.”

When I finally got up on deck and took a look at the fog machine, I realized what the problem actually was: In the process of keeping the venue hazy during walk-in and the opener, I had run the (rather small) fog tank completely dry. The remote wasn’t the problem at all.

Seriously, if the fogger had been a car, I would have just tried to fix the issue of not having any gas by tearing down and rebuilding the steering column. Whoops.

If Fixing A Problem Doesn’t Fix THE Problem, You’ve Fixed The Wrong Problem

I had just been bitten by what some folks call “The Rusty Halo Effect.” A rusty halo is a sort of mental designation that we humans give to things that have caused us trouble in the past. If a person, piece of gear, venue, component, or really anything has been a point of failure before, we tend to assume that the same thing will be the point of failure again. This can actually be quite helpful, because we can build and maintain an internal list of “bits to check if you’re having problems.” Being good with the list can make you look like a fix-it ninja…

…but assuming that your list is complete can cause you to miss different causes for similar problems.

I’ll go so far as to say that most of my really embarrassing audio problems in the last few years have been due to “Fixing The Wrong Thing,” or “Misdiagnosing The Problem.” Not so long ago, I was soundchecking a drummer who wanted a lot of the kit in the drumfill. We were getting everything dialed up, and I had taken a stab at getting some levels set on the sends from the drum mics. We started to really work on the kick sound, and when we got it to the right point we also found the point where feedback became a problem.

“I’ll just notch that out,” I thought. I got into the kick mic EQ for monitor world, and starting sweeping a narrow-ish filter around the area of the big, low-frequency ring we were dealing with. Strangely, I couldn’t find the point where the filter killed the feedback.

I muted the kick mic. The feedback slowly died. Much more slowly than I would normally have expected.

This is what tipped me off to me having tried to fix the wrong problem. If a single channel is, overwhelmingly, the culprit in a feedback situation, then muting that channel should kill the feedback almost instantaneously. If that’s not the case, then you’ve muted the wrong channel.

The real problem was one of the tom mics. It was perfectly stable as long as no low-frequency acoustic energy was present, but when the drummer hit the kick there was a LOT of LF energy introduced into the tom mic, the actual tom itself, and the drumfill. All that together created an acoustical circuit that rang, and rang, and rang…right up until I muted the offending tom mic.

Silence.

I killed the appropriate frequency in the tom mic, and we were all happy campers.

So – what can be generalized from these two stories? Well:

For troubleshooting, try to maintain a skillset that includes rapid isolation of problem areas. If a suspected problem area is isolated and removed from the involved system, and the problem persists, then the problem area is actually elsewhere.

Corollary: It is very important that you strive to know EXACTLY how the individual parts of your system connect and communicate with each other.

In other words: Try not to fix the wrong thing.


The Curious Case Of The Miced Acoustic That Fed Back

Putting a mic in front of an acoustic guitar does NOT allow the laws of physics to be overcome.

Please Remember:

The opinions expressed are mine only. These opinions do not necessarily reflect anybody else’s opinions. I do not own, operate, manage, or represent any band, venue, or company that I talk about, unless explicitly noted.

Every so often, I’ll work on a set (or even a whole show) where I struggle. It’s why I try to remember to say, “I hope it’s not my night to suck.” I think it’s important to be honest about not being able to work miracles.

Anyway.

Not too long ago, I did a show where the opening act brought an acoustic guitar. Please note my exact words: “Acoustic Guitar.” Not electro-acoustic!

Acoustic guitar. No pickup, that is.

Luckily for me, the opening act’s set was pretty short. This was lucky because I had more feedback problems in that one set than I usually have in two-months-worth of shows. Weird rings. Phantom squeals. High-pitched ghosts that bared their teeth and then disappeared. It was embarrassing, and un-fun.

My mistake primarily lay in trying harder to make the performer happier than the laws of physics would allow. I should have gotten on the talkback and said, “I’m sorry, but I think that’s all we can get out of this setup tonight,” but I didn’t. I tried to fight my way through, and I think the end result was worse for it.

…but everything seemed okay during soundcheck. What went wrong?

The Changing Environment

Your gear isn’t the only thing with a noisefloor. (The noisefloor is the voltage or sound pressure level where non-musical information can be found. It usually sounds like hiss, or rumble, or hum, or a combination of all three.) A venue also has a noisefloor, and unlike a well-maintained piece of equipment, a venue’s noisefloor can change wildly and quickly.

In the case of the problematic set, we were fine at soundcheck. The performer was happy with the onstage blend between his voice and his guitar, and we all liked how things sounded out front.

The venue noisefloor was also about 50 – 60 dB SPLC (Sound Pressure Level, C weighted).

Between soundcheck and the actual show, a rather dramatic thing happened: A whole bunch of college-age humans arrived. Unsurprisingly, most of them were talking to each other. If I had my guess, the new noisefloor was probably between 75 and 85 dB SPLC. In “linear” terms, that’s a magnitude difference with a factor between about 30 and 300.

I’m not joking. An 85 dB SPLC noisefloor is just a bit more than 300 times louder when compared to a 60 dB SPL noisefloor. Logarithmic math is a heck of an eye-opener, I tell ya.

For a performer who’s perception of the “correct” level for their sound was formed in an empty, relatively quiet space, the addition of the crowd certainly had a HUGE effect. What’s more, I’m guessing that the total level on stage was only slightly higher (3 – 6 dB) than the level of the crowd’s conversations. Even worse, the “roar” was probably right in the critical ranges for both the guitar and the vocals.

So, of course, the performer wanted more level from the monitors. He couldn’t hear himself properly anymore – he even said so, outright.

I got on the gas with both the guitar mic and the vocal mic, and that’s when the fight start – I mean, that’s when my feedback issues took hold.

I Had A Problem, So I Added A Mic. Then, I Had Two Problems

Another issue that worked against me was that I had two mics contributing to one “loop.” There was a mic for vocals, and one for the guitar. The mics were in relatively close proximity, and being put through the same monitor.

At high gain.

See where this is going?

Essentially, the two microphones combined into a single, extremely high-gain device that was in a partially closed loop with the wedges. Of course the system was unstable. Of course it was a battle. The gain was so high that, if one of the “so much vocal power that my usual head-amp preset would be driven into hard clip” singers around town had grabbed a mic at that setting, they would have launched a monitor’s LF driver through the grill and into their face.

But here’s the thing:

Gain is proportionally related to acoustic output, but gain is NOT absolutely related to acoustic output.

That is to say, more gain will produce more volume compared to lower gain on the same signal, but the measured, acoustic sound pressure level for any particular gain setting will not always be the same. The entire acoustical and electrical signal chain is ultimately responsible for that.

So, we were running at “super hot” gain levels, but we weren’t all that loud. Unfortunately:

Undamped feedback in a loop is a product of gain, not volume. The only limiting factor that volume represents is that the system must be able to produce enough level to be audible over the noisefloor.

The performer could barely hear himself, but when the system “took off,” all of us could hear THAT just fine.

Reflection and Resonance

There are a couple of other factors that contribute to acoustic guitar feedback issues, especially when monitor wedges are involved.

The first factor is resonance. An acoustic guitar works as an acoustic guitar because of the big, vibrating box that the strings are attached to. The box works because it vibrates in response to external stimuli. The problem is that the box can’t tell the difference between the stimulus presented by the strings, and the stimulus presented by a sufficiently-loud monitor wedge. Get the wedge loud enough at the right frequency, and the resonant acoustic circuit you’ve just unleashed will ring until you do something to stop it.

In the case of the show I’ve been referencing, I don’t think we got the monitors loud enough for wedge-to-body resonance to be a real factor. What may have been a factor, though, is reflection.

Onstage feedback happens when the audio captured by a mic is output through a loudspeaker, and then re-enters the same mic. It doesn’t really matter how the audio returns to the mic – it just matters that it does. So, what do you think happens when a mic is pointed at an acoustic guitar body, which is big, and flat, and not completely absorptive, and which is also right in the path of the audio coming out of the monitors?

Yup.

The monitor audio hits the guitar body and reflects back into the mic. Sure, the lower frequencies might diffract around the guitar, or just pass through the thin walls of the body, but the high frequencies are a different story.

SQUEEEAALLL!

And, of course, the squeal comes and goes, because the guitar player is probably moving around a bit. A lot of the time, you might just barely be okay, and then the guitarist gets everything in just the right alignment…

SQUEEEAALLL!

The Upshot

At this point, the question becomes: “What can we take away from this?”

I think the main takeaway – and it applies to everybody, performers and techs alike – is that a purely acoustic guitar really can’t be expected to be dramatically louder than it already is. Perhaps even more correctly, a purely acoustic guitar can’t be expected to be dramatically louder than it is, as experienced by the microphone capsule.

As a result, if an acoustic guitar needs to be at 90 dB SPL in order to compete with a rowdy crowd, then it really needs to be making at least 87 dB SPL without any help from the PA. If, for some reason, the guitar needs to be a great deal (10 dB or more) louder than it is naturally, then we must have some way of “partially opening the loop” that includes the guitar, the mic, and the audio rig. Either that, or we have to make the guitar much louder – from the mic’s perspective – than the wedges and main PA.

The most practical way to do this is with an internal pickup, optionally coupled with a soundhole cover. The internal pickup gains some isolation by virtue of being inside the guitar body (or outside, but directly coupled to some part of the guitar), and the mic also “perceives” the guitar as being quite loud.

Because it’s, you know, inside or directly attached to the guitar. Life is pretty loud right there, just like it’s really loud inside a piano.

The soundhole cover helps by providing even more isolation from external sounds, and also by changing the resonant frequency of the guitar body. The size and shape of the soundhole is a major component in determining what an acoustic guitar sounds like, and closing the hole may just shift the body resonance to a non-problematic area.

In the end, we all need to know our abilities, and the abilities of our tools, and be aware of when we’re asking too much of ourselves or our gear. We also need to be able to look back at our problems with an analytical eye, and figure out exactly what went wrong.

Of course, I’ll probably end up trying to break the laws of physics again in six months, because I have a short memory for situations I don’t encounter every week…


The EV N/D 767a

A highly competent mic for a reasonable price.

Please Remember:

The opinions expressed are mine only. These opinions do not necessarily reflect anybody else’s opinions. I do not own, operate, manage, or represent any band, venue, or company that I talk about, unless explicitly noted.

This is what a 767a looks like with the “nose cone” removed.

Doug Wood (from the band Hostage and Woodshar Recording) tried to kill one of my 767a mics the other night.

Well, okay, he wasn’t doing it purposefully.

The mic stand had its boom almost fully extended, and the boom-angle was almost parallel to the floor. When you combine that situation with having the arm extended between two of the tripod legs (instead of along one of them), you’ve got a recipe for an unstable stand.

I think the whole shootin’ match went over about three times, with each occurrence sending a loud, dull “thop!” through the PA.

Hey, that’s what limiters are for. And reasonable powering.

I digress.

As he took action to very definitely secure the stand, Doug commented, “I haven’t dented your mic yet, but I’m working on it.”

So, yes, the N/D 767a can handle the inevitable accidents that occur on stage. That’s a point in its favor, but what else does the mic offer?

Sounds Good, Resists Feedback – If Used Properly

One of the first things I noticed about the N/D 767a is that it’s one of the few mics that sounds like the manufacturer got the “high end” right.

In my time, I’ve come across plenty of mics that sound dull, and I’ve come across plenty of mics that sound “overhyped.” The dull mics end up giving you that annoying, midrangey bark that just screams “old, worn out PA system from 1982.” The overhyped mics sound great when you’re standing alone on stage, sighting-in the monitor rig, but all that studio-quality top end stops being really useful when there’s an actual rock band in play. (There’s nothing inherently wrong with “air” in a vocal, but at high volume the air does little more than draw attention to itself.)

In contrast, the high-frequency component of an N/D 767a seems nicely smooth and natural, without any “FD&C Yellow #5,” as it were. This is important, because it allows the mic to have a clear and pleasing tonality without added feedback problems or “ess” sounds that cause windburn as they go by.

As a matter of course, I build an EQ preset for all my mics which is meant to “sound right in the solo bus.” Comparing presets is a sloppy metric – no argument there – but I can say that the N/D 767a is one of the least EQ’ed mics in my arsenal. To me, that says a lot about the mic being built well and voiced correctly.

These mics are designed to have a supercardioid pattern overall, and the overall implementation seems to resist feedback as well as other tight patterned mics I’ve encountered. Mounted on a stand with the correct orientation, or handheld by a competent vocalist, the 767 seems to be as trouble free as any other mic I’ve used. As with anything, you’ll need to do a requisite amount of “homework” when setting up. If you’re going to need to run at high gain, you’re also going to need to ring your monitor rig – no matter what mic you choose.

In a sense, one of the best compliments I can give these mics is that they just do what they’re supposed to do without a lot of fuss. With that being the case, there isn’t a whole lot of writing to do when it comes to the major positives of the 767a. You plug ’em in, you point ’em at something, they sound like that something, and off you go. In sound reinforcement, that’s what a mic is supposed to do.

Your Mileage May Vary

Currently, I’m convinced that there’s no such thing as the perfect mic for all situations. The N/D 767a works well across a range of applications, but there are some aspects of the unit that aren’t always ideal. It’s ironic that what amount to nitpicky concerns with the mic are what I have the most to talk about, but here we go anyway:

On the sound side, the mic’s pop-and-blast filtering seems to be just a little too “light” for a mic that people are going to be very – shall we say – personal with. The plosives and breath noise aren’t horrific by any means, but they still surprised me a bit at first. (To be fair, an appropriate-for-your-situation high-pass appears to help with this issue quite a bit, and now that I have some presets built for the mic, I don’t notice the problem much anymore.)

Tight patterned mics (supercardioid and “above”) are more finicky than their cardioid counterparts. As I said above, the feedback resistance on these units is what I would consider fit for varsity-level work. At the same time, though, that feedback resistance requires that the mic be in the correct orientation, and held the correct way. It’s my experience that tight pattern mics aren’t the right choice for people who want to combine high-gain monitoring with:

Turning every which way in a chaotic and unpredictable fashion.

And/ or working the mic at an inconsistent distance.

And/ or cupping the mic every now and then.

…and, of course, extreme practitioners of the above can’t be helped by any mic, so there’s that.

This restriction on application is by no means a failing of the 767a or any other similar mic, but it’s something to be aware of.

The physical construction of the units is nicely engineered, with everything fitting tightly. The XLR connector is what I would call “slightly recessed,” which necessitates a notch in the mic body so that the cable end can latch. This is hardly an issue in itself, but it becomes one when the internal assembly is rotated away from the notch. The XLRF on your cable will still mate with the mic’s pins, but the cable won’t latch. A good pull on the cable can result in the corresponding channel going silent – and in this case, the highly engineered construction becomes a hindrance. It would be a simple matter to rotate the internal assembly to match the notch if I could figure out how to do so without breaking the mic, but there’s only so much teardown that I’m confident in doing. N/D 767a mics just aren’t as user-serviceable as other stage transducers, and so they’re a little intimidating when you expose what internals you can.

Yeah, yeah, I should just Google for a teardown guide. I know.

Anyway.

My last nitpick is with the foam insert for the 767a’s grill. I can understand that there’s probably a good reason for it, but I also think that EV overcomplicated the whole thing. The actual insert is a small piece of foam that’s held in place by a tabbed, fabric ring. It doesn’t take very much to cause the ring to separate from the foam, and its easy to get the tabs bunched up. Getting the whole assembly back to factory stock is not a trivial thing. I’ve tried, and I can’t quite pull it off. This might not be a big issue for folks who rarely open their mic, but if you need to wash out your mic grills regularly, it’s a bit of a concern. The upside is that a “sorta fit” seems to work as well as an exact fit, but I just don’t see why over-engineering the pop-filter insert was so necessary.

Nitpicks Aside

The reason to go into detail about my little “dings” on these mics isn’t to discourage you from considering them. Rather, the point is to help you make an informed decision. I really like these mics, but I don’t want to give anybody the idea that they work miracles. No mic can do that, but you wouldn’t know it to read some of the reviews out there.

So…

I highly recommend the EV N/D 767a. They’ve earned a first-choice spot in my mic collection, and – in my opinion – they’re quite worth the small price premium over the industry standard. (You know, the thing with the model number of 58. I’m “Shure” you know what I mean.) To borrow the words of Yahtzee from Zero Punctuation, they aren’t perfect, but what is?

If you’re shopping for mics, put these on your short-list of contenders.


Buying A Vocal Mic

Sound quality is important, but it’s not at the top of the priorities list.

Please Remember:

The opinions expressed are mine only. These opinions do not necessarily reflect anybody else’s opinions. I do not own, operate, manage, or represent any band, venue, or company that I talk about, unless explicitly noted.

As a live-audio tech, I’m often the guy who supplies all the mics. As such, I end up picking microphones that work for me in a variety of situations. My “favorite pets” are usually the transducers that work without a fuss on 90%+ of whatever they get pointed at. It really isn’t about what’s stunningly stellar for any particular vocalist or instrument rig, because there isn’t time to figure that out directly.

What you might think, then, is that buying a mic for yourself as an individual vocalist would be an exercise in different priorities. At an intuitive level, it makes sense that you would put most of your effort into finding a transducer that sounds amazing when coupled with your voice.

…and of course, you don’t want to pick a mic that makes you sound bad, or is downright painful to listen to.

But…

What’s not intuitive is that you will probably be best-served by satisfying a different list of priorities. That priorities list is basically the same one that a pro-audio human uses – it’s just that you meet it in ways that are specific to you, instead of ways that are generally applicable.

Priority 1: Gain Before Feedback

The most beautiful sounding mic for your voice is completely worthless if you can’t be heard. The most durable mic on Earth isn’t worth a dime if you’re completely and unintentionally buried in the mix. The mic that you could afford “right now” that squeals like a pissed-off toddler and howls like a talkative husky? It just effectively made the spendier mic even more expensive.

The most important thing to look for in a mic for stage-vocals is that it, when coupled with your performance style, can have sufficient gain applied for you to be heard clearly – both onstage and out front.

A complete discussion of everything that effects GBF is beyond the scope of this article. However, there are some rules of thumb that can help you narrow things down a bit:

  • You don’t need to worry about the microphone’s sensitivity or overall output. You can think of mic sensitivity as a sort of fixed, pre-preamp gain. It doesn’t necessarily buy you greater feedback rejection. It dictates how much preamp gain is required to get the mic output up to a voltage that’s good for other devices…and that’s it.
  • You do need to think about the mic’s polar pattern. Mics with tighter patterns, like supercardioid and hypercardioid models, can be more resistant to feedback when used correctly. The tradeoff with a tighter pattern is that it’s easier to cause feedback by “cupping” the mic, and you have to be much more careful not to move “off axis” during your performance.
  • You also need to think about where the mic’s capsule is placed. Certain mics achieve better GBF by putting the capsule very close to the grill – it’s just basic physics. The tradeoff is that you only get the benefit of this placement if you are willing to park your face right on the mic. If you’re not willing to do this, then any benefit of “right up on the grill” capsule placement is lost.
  • You don’t necessarily need a mic with “laser flat” frequency response, but you should try to find a mic where the response is “smooth.” Feedback problems are exaggerated by mics with narrow peaks in their response, because the peaks are disproportionately disposed to ringing compared to the frequencies around them. If a mic has a “response peak” or “presence boost” that’s been designed into the capsule, it’s best if the peak or boost covers a wide area – say, two octaves or more.
  • Even though a flat response isn’t imperative, you should be wary of mics that are overly “hyped” in one frequency range or another. If a monitor or FOH rig also has proportionately higher gain in the same frequency range, you may experience problems. VERY exaggerated response can cause feedback even if the live-sound rig doesn’t have higher gain in the same range.

Priority 2: Reliability

I chose “reliability” over “durability” because I think there’s more to this factor than just being able to handle wear and tear. A reliable mic stands up to being transported and accidentally dropped, but it also “just works” without being finicky.

The second most important thing to look for in a stage-mic is that it should be resistant to accidents, and require as little external or specialized equipment as possible.

So – what does this mean?

Well, for one thing, it means that condenser mics are less reliable than dynamic mics. It’s not that a condenser mic can’t be made to be quite durable. The drop in reliability comes from the condenser needing phantom power to work. It’s possible to be in a situation where you don’t have phantom available for the mic. It’s also possible to have phantom, and forget to engage it. The mic may be rock-solid, but it becomes effectively less reliable.

(This isn’t to bag on condenser mics, by the way. A condenser may, in fact, be the right mic for you. You just need to be aware of the downsides.)

There are, of course, all kinds of other considerations. If a mic needs a special, odd-sized clip to fit on a stand, it’s effectively less reliable. If its XLR connector has trouble mating with certain mic cables, the microphone is effectively less reliable. If the mic has a switch that’s a little too easy to disengage, the unit is effectively less reliable. If the mic has extremely high or low sensitivity, it’s effectively less reliable.

You might say that another way to express “reliability” is “resistance to unexpected events.” If you can cover the unexpected events by carrying more equipment (a mic pre with phantom power, your own cables, spare mic clips, etc), then you can increase a finicky mic’s reliability.

For the record, the most reliable stage-vocal mics are dynamic units with thick, metal cases, and capsules with sensitivities of roughly -55 dBV/Pa (about 1.7 – 1.8 mV). They require no phantom power, stand up to abuse, and work with the gain ranges available from most preamps.

Priority 3: Great Sound

This might seem like an obvious factor, but it still bears some discussion. You have to think about which mics will sound great on your voice, and in the performance situations that you find yourself in the most. A mic that sounds fantastic when you listen to it in headphones is great – if everybody’s going to be listening to it in headphones. A mic that sounds divine at the venue you only get to play at once a year isn’t a good choice if it’s unflattering through the PA and monitor rigs you play through every other weekend.

Further, a mic has to work well with your performance style. This is similar to the considerations involved with GBF. If the unit is breathtakingly beautiful only when you’re right on it, and you almost never get right on the mic, then you should probably pick something else. On the flipside, if you always have your face planted on the grill, and the mic sounds terribly muddy when you do, then you might want to pick something else.

I should definitely point out that you can be VERY surprised by what works well and what doesn’t. Some folks think that the only way to get a great vocal is with a super-spendy mic, but I once heard Katie Ainge sing at a coffee shop with an inexpensive mic connected to a keyboard amp.

It was one of the most beautiful and perfect vocal sounds that I’ve ever heard.

So…How Do You Test For These Priorities?

The actual nuts and bolts of figuring out which mic is right for you look like this:

  • Do some research, either empirically or online. If you play at a bunch of different places with different mics, make note of when you could hear yourself, were feedback free, and you liked the overall sound.
  • Most mics can’t be returned once purchased, so either borrow or rent the units you’re interested in.
  • At rehearsal, try the different mics you’ve gathered up. Feed the signal through a monitor wedge to find out which ones are feedback resistant while sounding as nice as possible.

Recommendations

To help narrow down the bewildering array of choices to be had in the vocal mic arena, here are a few transducers that I’ve had decent experiences with:

Shure SM-58 – I’m really not a fan of the 58, but that doesn’t make it an invalid choice. Most 58s that I’ve run across have ended up sounding muddy, with a rolled-off top end, but there are some voices that they’re just perfect for. The SM-58 has a cardioid pattern, workable GBF, and is capable of surviving a LOT of punishment. SM-58s seem to be slightly more forgiving of shaky mic technique than some other products.

Shure Beta 87a – These are mics that Stonefed carries with them for road shows. I would characterize them as “pretty okay.” In certain situations, we had some issues with feedback at very high frequencies (in the range of 15kHz). Their clarity can border on “whininess” in some situations, and they have more mud than I think a condenser ought to have. I’d probably cut these mics more slack if they weren’t $250 a pop – to me, that’s a lot of money for something that isn’t my favorite. The “a” units are supercardioid, so you need to stay on axis and avoid cupping the grill.

Sennheiser e835 – Bought singly, an 835 costs about as much as an SM-58…but I’ll take an 835 over an 85 any day of the week. These mics seem to have far less of the “Shure-standard mud,” coupled with a crisp top end. That same crispiness may be a bit much, depending on your tastes. GBF on these mics has rarely been a problem for me, but every so often I’ve had some trouble with ringing at low frequencies. An 835 is a cardioid device.

Sennheiser e822s – A major advantage of the e822 is that you can still find it in packages for about $50 a unit. These mics are surprisingly good for the price. I personally own a handful of them, and they have been just as reliable as more expensive units. I personally prefer the sound of these mics over that of an SM-58, but they do still have a bit of mud and garble to manage. The GBF on an 822 seems to be comparable to other mics I’ve used – sometimes even a bit better. Sennheiser e822 units are cardioid.

Audix OM5 – These mics are VERY crisp. So crisp, in fact, that you can really tear people’s heads off if things get loud. On the other hand, I’ve heard these mics deliver live vocals that sounded like a world-class studio recording. Their GBF is definitely “pro-grade,” although their marketing might make you expect miracles that they can’t deliver. OM5s are hypercardioid, so they’re best for people who aren’t shy about sticking their face to the mic.

Electrovoice N/D767a – The 767a is one of the few mics I’ve heard that seems to get the top end exactly right. They have nice clarity without being overhyped. The bottom end of the frequency response is okay, but these mics do seem to suffer from breath noise and plosives more than some others. They don’t display as much muddiness as other mics, but some situations will still require a good bit of EQ. The GBF on these supercardioid mics seems to be on par with other, professional level units.


Only So Much Addition

A PA system can only do so much – the band’s overall volume has to be right, and their proportionality has to be right, too.

Please Remember:

The opinions expressed are mine only. These opinions do not necessarily reflect anybody else’s opinions. I do not own, operate, manage, or represent any band, venue, or company that I talk about, unless explicitly noted.

My last article was primarily written to technicians. However, the issue of “only being able to get so much, in comparison to full-tilt boogie” has big implications for musicians playing live. Small venue, big venue, whatever venue, there’s an important reality that has to be faced:

There’s only so much that a PA system or monitor rig can add to the sound of an instrument or vocal.

Now, this certainly holds true in the aesthetic sense. There’s a practical limit to the amount of sweetening that can be applied to any particular sonic event. A drumkit (for example) that sounds truly horrific can’t really be “fixed in the mix,” especially if the tech doesn’t have hours to spend on making it sound like a different, much better drumkit. What really needs to happen is for that set of drums to sound decent, or even amazing, without any outside help. At that point, the PA’s job is to make those drums loud enough for the audience (if the drums aren’t already), and maybe add some “boom” and reverb – if appropriate.

There’s another sense of “what the sound system can add”, though, that’s much easier to quantify. This is the relatively simple reality of how much SPL (Sound Pressure Level) an audio rig can deliver for a given input from a given acoustical source. This “amount of level deliverable” is often less – even a LOT less – than what the rig can do on the spec sheet. (This can often be surprising, especially to musicians and techs who are still working on gaining practical experience with live performance.) The other side of the coin is how much overall level the PA should be adding to the show to have the result sound decent, and be at a comfortable for the audience.

How Much Should The PA Contribute?

When trying to get a handle on how much the FOH (Front Of House) PA should add to the show, there are a number of things to consider:

  • How loud is the band, all by itself?
  • What do you really want the PA to be doing? (Carrying the room? Just putting a bit more “thump” in the drums? Vocals only?)
  • How much level will the audience and venue operators be happy with?

It can actually be helpful to work backwards through these points.

In small venues, the amount of tolerable level usually isn’t very high. Although some “pure music” rooms might work with 115+ dBC SPL continuous (decibels Sound Pressure Level, “slow” average), most places that cater to 200 patrons or less will probably see 110 dBC continuous as very, very loud. The problem is that, with a band and monitor rig that are REALLY cookin’, 110 dBC is very easy to achieve – and the PA isn’t even turned on yet!

In general, I recommend an upper limit of 105 dBC continuous for everything when working in a small venue. Band, monitor bleed, and FOH. Even that might be too much for some places, but it’s a start.

Once you’ve established how loud the whole show ought to be, you can begin figuring out what the PA’s contribution should entail. The handy rule of thumb here is that, for a given maximum volume, greater PA contribution requires you to keep a tighter rein on the stage volume.

To help illustrate this point (and others), I’ve prepared some audio samples in OGG format. I’ve used a live recording of a drum kit from Fats Grill, along with a reverb processor, to roughly simulate three conditions:

Of course, this is an imperfect representation. Although most PA loudspeakers are designed to be somewhat directional, they still excite the reverberant field – they often don’t “dry out” the sound quite as much as these samples do.

Still, these clips give you an idea of what happens as more PA is applied. The overall level goes up, the PA sound starts to overcome the stage volume, and the transients get more defined. Putting more direct sound, with clean transient response into the audience is usually a good thing – but notice how much volume the PA had to add before the drumkit really “cleaned up.”

On a discussion forum, I believe that Mark from audiopile.net made a simple, profound, and very true statement with important implications: “Audio engineers don’t feel like they have control until they are 10 dB louder than everything else in the room.” With this guideline in mind, the issue crosses into the first point:

If you want the PA to really define how your band is heard by the audience, then the band’s stage volume should be about 10 dB below the PA. If the maximum volume for a small venue is about 105 dBC SPL continuous, this means that the band and monitor rig need to stay in the close vicinity of 94.5 dBC SPL continuous.

I’m not gonna lie – squishing a rock band into a box smaller than 95 – 100 dBC SPL is tricky. It can be done, but not everybody is willing to take on the challenge and make the decisions involved.

This is why, most of the time, small venue sound involves careful compromises. The PA is often used only to “fill spaces.” That is, the guitar amps might carry the room with only occasional reinforcement for solos, while the midrange and high-end from the drums is stage volume with a bit of “kick” from the subs. The vocals will be getting pretty much constant attention from the FOH rig, of course. In the end, the contribution from the FOH PA is minimal…or at least kept under tight control.

Proportionality Can Kick Your Butt

Beyond the issue of raw volume, though, is the conundrum of how much an audio reproduction system (be it an FOH PA or a monitor rig) can add to a given acoustical event on stage. This is where “sounding like a band without the PA” becomes really critical.

Here’s why.

For most audio rigs that are even half-decent, gain-before-feedback is at least as critical, if not more, than total output power. That is, a loudspeaker might be physically capable of creating earth-shattering SPL, but the squeals and howls of feedback will prevent you from actually getting there. Either the overall differentiation between the stage volume and the PA volume is too great, or the differentiation between on-stage sources is too great.

This is a little abstract, so here’s an object example.

Every so often, I’ll run into a group that has a proportionality problem. They’re not too loud for the room by any means – they might be an acoustic duo, for instance. The issue is that one person is vigorously strumming a big-body guitar, using a pick. Another person is playing a different guitar, with a much smaller body.

…and they’re playing fingerstyle.

Delicately.

Hoo, boy.

Depending on the players, that big guitar might already be a LOT louder than the small guitar – and then, the player of the big guitar decides that they want a pretty healthy amount of monitor level. No problem for the big guitar, especially if the instrument is free of resonance problems and includes a decent pickup. The small guitar? Well – it doesn’t have a pickup installed, so we had to mic it. We were only able to get “so” close, and the player’s not making a whole lot of level anyway.

The chances are that feedback issues will prevent even the most competent monitor operator from making that fingerstyle guitar compete with the big boy.

It’s not the absolute volume that’s the problem. It’s the proportionality. The massive level differential between the two instruments just can’t be dealt with in a live situation. In the studio, where feedback is basically non-existent, it’s another story. Here, though, getting through the set will be a struggle.

As a generality, I would propose the following guidelines for the feasibility of what a small-venue audio system can add to an onstage source’s volume – especially when talking about monitors on deck:

  • +3 dB – Usually trivial.
  • +6 dB – Usually very simple, if not entirely trivial. Depends on the situation.
  • +10 dB – Average, may be challenging for sources that are resonant, or when using certain microphones.
  • +20 dB – Difficult to impossible, can be done in certain cases with instruments that have well-isolated pickups and physical feedback reduction. May be possible with certain microphones in certain orientations relative to the monitors, or with common microphones and in-ear monitors. With line-inputs, noise may also be a problem.
  • +30 dB – Generally impossible unless the source is completely feedback isolated. Noise from line inputs will probably be a big issue.

The way to get around these issues is to fix them before you arrive at the venue. If somebody is getting positively drowned during rehearsals, it’s simply not a safe assumption that a PA system (even a professionally operated one) will fix the issue. If everybody is clearly audible in rehearsal, on the other hand, then your proportionalities are either right on the money or “plenty close enough.”

This may sound a bit preachy, but I want to assure you that there are big benefits to “sounding like a band” before a PA system is added to the equation. If you’ve done the hard work of being balanced without outside help, then you have a much better shot at sounding killer with PA and monitor rigs that are only minimally adequate – or operated by a minimally competent audio human. Even better, when you get to work with great gear and great techs, they’ll be able to put their maximum effort towards presenting a flat-out amazing sonic experience for your fans. They’ll be able to do this because they won’t have to make the compromises necessary to fix big imbalances amongst instruments, or between the instruments and the vocals.

Bottom line? Being at the right volume, both in terms of absolute levels and relative balance, is a huge part of creating a brilliant stage show.


Two Speed Limits

The amount of level that an audio rig can deliver is often less than the theoretical maximum.

Please Remember:

The opinions expressed are mine only. These opinions do not necessarily reflect anybody else’s opinions. I do not own, operate, manage, or represent any band, venue, or company that I talk about, unless explicitly noted.

I don’t think that very many people have trouble understanding the concept of “not enough PA.” For most folks, it just stands to reason that an FOH (Front Of House) or monitor system has a finite amount of level available.

Notice that I said, “most folks.” There are some people out there who do seem to believe that all PA systems are capable of infinite loudness. These people frighten me. They also wreck lots of gear when they’re allowed to drive an audio rig. Audio humans of this particular tribe are genetically related to the tribe of audio humans who must use every ounce of available system power, regardless of whether it’s a good idea or not. “It just doesn’t sound right until I see the clip lights, you know?” *Sigh.*

Anyway.

The idea that audio gear has finite performance limits is pretty intuitive, especially when we’re talking about equipment involved in output transduction (converting electricity to sound pressure waves). What’s not so intuitive is that a system’s maximum practical output is almost always lower than its true maximum.

The True Maximum

The absolute, full-tilt boogie, no-holds-barred maximum SPL that an audio system can produce is most heavily determined by the following:

  • How many drivers you’ve got. This is often simplified into “how many boxes didja bring?” because, most of the time, audio humans deploy drivers that have been conveniently bolted into different kinds of enclosures.
  • How much power you can put into the drivers you have. This can be made more tricky if you don’t actually have enough mains power to drive the amps at full-throttle.
  • The space that the drivers are firing into. Enclosed, highly reflective spaces are “loud” because acoustical energy is reflected back into the room, combining with the “direct” output from the audio system. Outdoors, or in highly absorptive rooms, a much greater proportion of acoustical energy is captured or radiated away from the listeners, never to add to the direct sound.

When you put this all together, you can get yourself some numbers regarding the maximum SPL (sound pressure level) achievable, assuming that no other factor stands in the way. Like I said, though, other factors usually DO stand in the way. One factor is essentially social – that is, how much auditory input people will accept before they perceive the sensation to be unpleasant. This is an important concept, but it’s not really within the scope of this article. However, other major, technically-based limiting factors do apply.

Distortion

A loudspeaker system might be capable of producing x-amount of SPL, but that doesn’t mean that it can do so in a pleasing fashion. It’s entirely possible that you’ll encounter unacceptably high distortion before you hit the absolute maximum level that a system can produce.

Even though I think most techs unconsciously account for this phenomenon when estimating or empirically determining the maximum output available from a rig, I also think it’s important to mention.

A, *ahem*, “dirty” secret that isn’t necessarily intuitive to folks outside of pro audio is that amplifiers are quite capable of producing more than their “rated” power. Rated power is a number that corresponds to what the amplifier can do, based on a certain amount of distortion that the manufacturer finds “acceptable.” Better manufacturers are less tolerant of distortion. One reputable manufacturer is willing to claim that a certain amplifier can put about 397 watts into two, 8 Ohm loads at less than 0.02% distortion. (You have to do a bit of math, because the actual rated power is 500 watts, and the distortion number is given at 1 dB BELOW rated power, for some reason.)

Distortion that low is pretty hard to hear. According to the calculator at Sengpiel Audio, 0.02% THD is about 73 dB down from the original signal. I rigged up a test with two tones (1 kHz and 2 kHz) in my DAW, and I couldn’t hear the 2 kHz tone (at all) against the 1 kHz signal when the 2k channel was pulled down 73 dB.

Anyway, here’s the deal.

That same amplifier will display greater continuous output if greater distortion is allowed. That 397 watts is a continuous rating, based on an RMS (Root Mean Square) voltage – a bit more than 56 volts. To get that RMS voltage, you need a peak voltage of just a bit less than 79.7 volts. Into an 8 Ohm load, 79.7 volts produces an instantaneous power of almost 800 watts. Take note of that “instantaneous,” though. That 800 watts isn’t applied to the loudspeaker for very long, and so, when everything gets averaged out, the loudspeaker only experiences about 400 watts. (It’s actually more complicated than this, especially with actual music, but this will do for an illustration.)

As you push an amplifier harder and harder, its peak voltage output will remain the same, but the RMS voltage will increase. This is because the amplifier spends more and more time producing output voltages that are closer and closer to the peak voltage.

This power isn’t “free” though. The more you push the amp, the more distortion you get. Some manufacturers will allow for much higher distortion at “rated” power, so as to be able to publish a bigger number on the spec sheet.

Bottom line?

The absolute maximum SPL that you can achieve with a rig under a given set of acoustical conditions may actually require that the system be driven into audible, unpleasant distortion. This distortion isn’t just limited to the amplifiers, either. You could be driving any part of the signal chain too hard, even the loudspeaker drivers themselves. The effective “speed limit” on the rig may be brought down (and brought down a lot) by just how far the system can go before it sounds like a pile of garbage.

Of course, for some folks, this (frighteningly) doesn’t matter very much, leading to the classic pro-audio line of “Well, it sounds like !@#$, but it’s REALLY !@#$%^& loud!”

Gain Before Feedback

Then again, you might never even get to the point of audible distortion. GBF (gain before feedback) issues can lower your effective speed limit even more. The underlying reason for this isn’t necessarily obvious: A given amount of gain only guarantees a repeatable output level if the input signal’s overall level remains unchanged. If the input signal’s overall level changes significantly, any fixed gain is correlated to, but not absolutely matched with a particular system output situation.

In other words, you may have a huge amount of gain applied to something, but if the input signal is very small, the final output can still be very quiet. Now, add in the fact that live audio is almost always a “partially closed loop,” and *WOOOOOOOOoooooossssssquuuuuuEEEEEAALLLL!*

Feedback.

“Feedback” is when the output of a system returns to an input of the system. This can be used for some very cool things, but it can also cause serious problems. In the partially-closed-loop situation of live audio, some fraction of the output of the rig finds its way into a microphone or instrument pickup, and is then re-added to the system output. The parts of the signal that are in phase sum constructively, causing the system output to rise, which means that more signal finds its way back into the system, which means that the system output rises still further at those frequencies, which –

*SQQQQUUUEEEEEEEeeeaaaaaaaoooooooooOOO!*

You get the point.

GBF is just a shorthand for “how much can we turn this thing up before it starts to ring.” With some sources, it simply isn’t possible to stay out of feedback while simultaneously applying sufficient gain to drive a rig at full-tilt. There just isn’t enough input.

Where you see this “in the wild” is with the quiet singer (or the singer who’s moderately loud but wants to stand 5 feet from the mic), and also with the quiet player of the [acoustic instrument that you can’t get a good mic placement on]. The same gain structure with a louder source would drive the system all the way to the limiters, while also clipping the console’s input circuitry. However, for these folks, you’re barely making 90 dBC. Maybe not even that.

And yes, you’ve gotten out the EQ and notched the major problem areas. The issue is that any more EQ will either completely wreck the sound of the source, or just reduce the overall gain by the same amount you tried to add.

When you arrive at this kind of situation, you’re at the effective speed limit. You can’t get any more output, because you can’t add any more gain. Turning things up will just result in feedback, terrible sound, or no net gain at all.

As with a lot of things in life, just having the basic capacity to do something doesn’t mean it can actually be achieved. The circumstances have to be right.