Tag Archives: Listening

Pink Floyd Is A Bluegrass Band

If you beat the dynamics out of a band that manages itself with dynamics, well…

Please Remember:

The opinions expressed are mine only. These opinions do not necessarily reflect anybody else’s opinions. I do not own, operate, manage, or represent any band, venue, or company that I talk about, unless explicitly noted.

floydgrassWant to use this image for something else? Great! Click it for the link to a high-res or resolution-independent version.

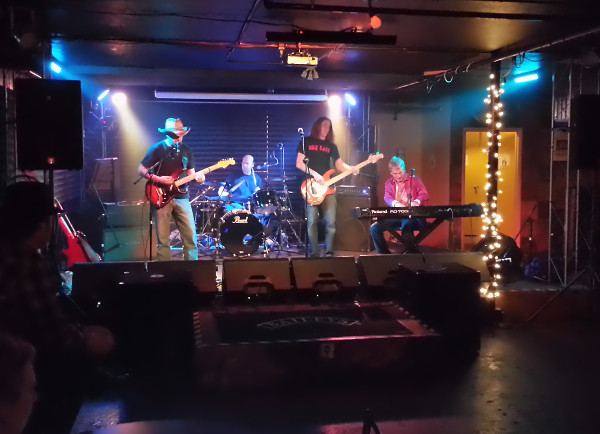
Just recently, I had the privilege of working on “The Last Floyd Show.” (The production provided the backdrop for that whole bit about the lighting upgrade that took forever.) We recorded the show to multitrack, and I was tasked with getting a mix done.

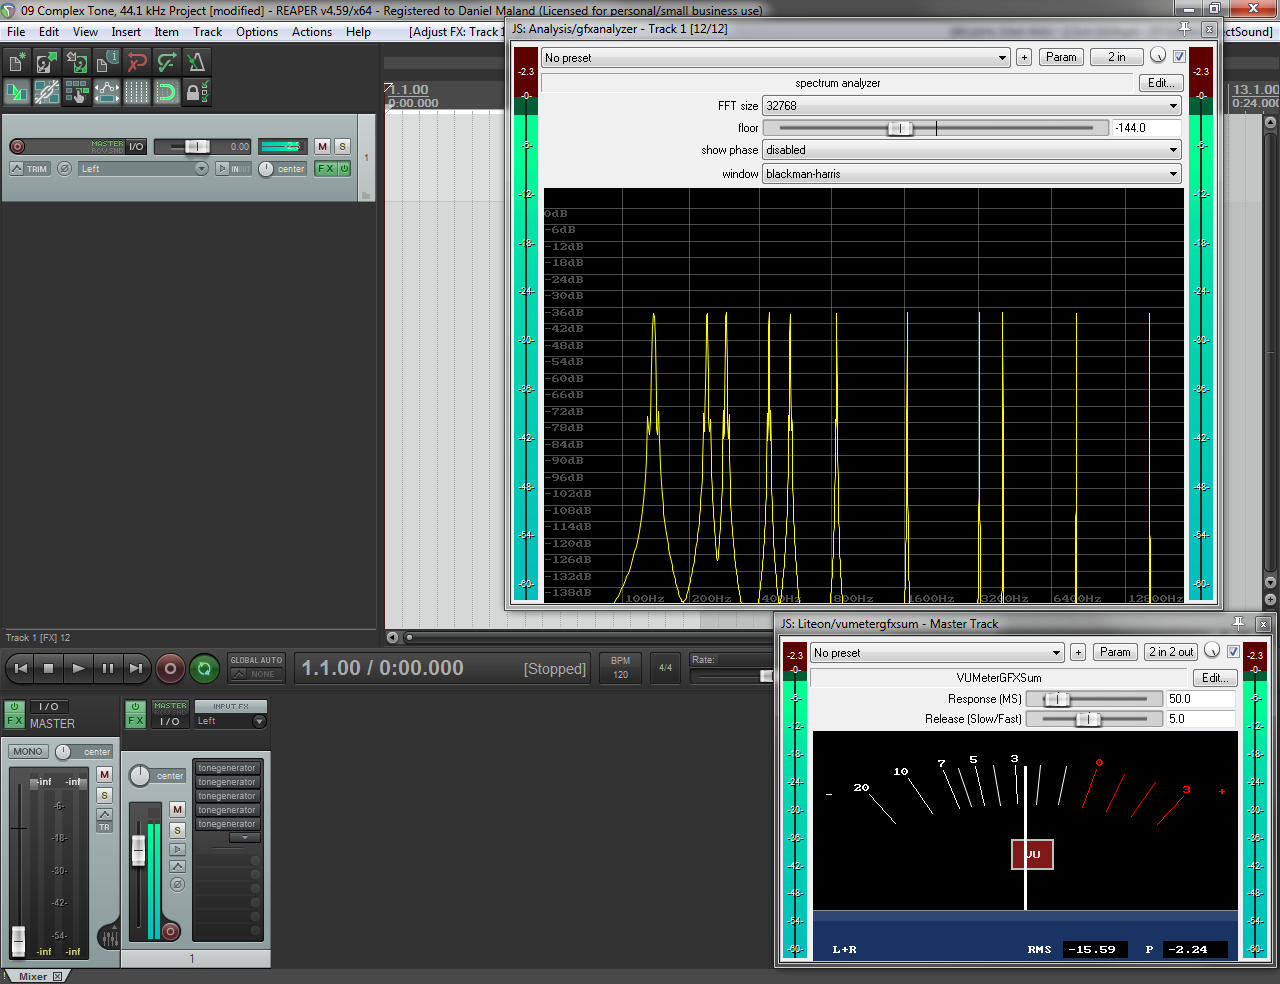
It was one of the toughest mixdowns I’ve attempted, mostly because I took the wrong approach when I got started. I attempted a “typical rock band” mix, and I ended up having to basically start over once…and then backtrack significantly twice more. Things started to work much more nicely when I backed WAY off on my channel compression – which is a little weird, because a lot of my “mix from live” projects actually do well with aggressive compression on individual channels. You grab the player’s level, hold it back from jumping around, fit ’em into the part of the spectrum that works, and everything’s groovy.

Not this time, though.

Because Pink Floyd is actually an old-timey bluegrass act that inhabits a space-rock body. They use “full-range” tones and dynamics extensively, which means that preventing those things from working is likely to wreck the band’s sound.

General Dynamics (Specific Dynamics, Too)

Not every Floyd tune is the same, of course, but take a listen over a range of their material and you’ll discover something: Pink Floyd gets a huge amount of artistic impact from big swings in overall dynamics, as well as the relative levels of individual players. Songs build into rolling, thunderous choruses, and then contract into gentle verses. There are “stings” where a crunchy guitar chord PUNCHES YOU IN THE FACE, and then backs away into clean, staccato notes. Different parts ebb and flow around each other, with great, full-range tones possible across multiple instruments – all because of dynamics. When it’s time for the synth, or organ, or guitar to be in the lead, that’s what is in the lead. They just go right past the other guys and “fill the space,” which is greatly enabled by the other guys dropping far into the background.

If you crush the dynamics out of any part of a Pink Floyd production, it isn’t Pink Floyd anymore. It’s people playing the same notes as Floyd songs without actually making those songs happen. If those dynamic swings are prevented, the arrangements stop working properly. The whole shebang becomes a tangled mess of sounds running into each other, which is EXACTLY what happened to me when I tried to “rock mix” our Floyd Show recording.

This usage of dynamics, especially as a self-mix tool, is something that you mostly see in “old school acoustic-music” settings. Rock and pop acts these days are more about a “frequency domain” approach than a “volume domain” sort of technique. It’s not that there’s no use of volume at all, it’s just that the overwhelming emphasis seems to be on everybody finding a piece of the spectrum, and then just banging away with the vocals on top. (I’m not necessarily complaining. This can be very fun when it’s done well.) With that emphasis being the case so often, it’s easy to get suckered into doing everything with a “rock” technique. Use that technique in the wrong place, though, and you’ll be in trouble.

And yes, this definitely applies to live audio. In fact, this tendency to work on everything with modern rock tools is probably why I haven’t always enjoyed Floyd Show productions as much as I’ve wanted.

In The Flesh

When you have a band like Floyd Show on the deck, in real life, in a small room, the band’s acoustical peaks can overrun the PA to some extent. This is especially true if (like me), you aggressively limit the PA in order to keep the band “in a manageable box.” This, coupled with the fact that the band’s stage volume is an enormous contributor to the sound that the audience hears, means that a compressed, “rock band” mix isn’t quite as ruinous as it otherwise would be. That is, with the recording, the only sound you can hear is the reproduced sound, so screwing up the production is fatal. Live, in a small venue, you hear a good bit of reproduction (the PA) and a LOT of stage volume. The stage volume counteracts some of the “reproduction” mistakes, and makes the issues less obvious.

Another thing that suppresses “not quite appropriate” production is that you’re prepared to run an effectively automated mix in real time. When you hear that a part isn’t coming forward enough, you get on the appropriate fader and give it a push. Effectively, you put some of the dynamic swing back in as needed, which masks the mistakes made in the “steady state” mix setup. With the recording, though, the mix doesn’t start out as being automated – and that makes a fundamental “steady state” error stand out.

As I said before, I haven’t always had as much fun with Floyd Show gigs as I’ve desired. It’s not that the shows weren’t a blast, because they were definitely enjoyable for me, it’s just that they could have been better.

And it was because I was chasing myself into a corner as much as anyone else was, all by taking an approach to the mix that wasn’t truly appropriate for the music. I didn’t notice, though, because my errors were partially masked by virtue of the gigs happening in a small space. (That masking being a Not Bad Thing At All.™)

The Writing On The Wall

So…what can be generalized from all this? Well, you can boil this down to a couple of handy rules for live (and studio) production:

If you want to use “full bandwidth” tones for all of the parts in a production, then separation between the parts will have to be achieved primarily in the volume and note-choice domain.

If you’re working with a band that primarily achieves separation by way of the volume domain, then you should refrain from restricting the “width” of the volume domain any more than is necessary.

The first rule comes about because “full bandwidth” tones allow each part to potentially obscure each other part. For example, if a Pink Floyd organ sound can occupy the same frequency space as the bass guitar, then the organ either needs to be flat-out quieter or louder at the appropriate times to avoid clashing with the bass, or change its note choices. Notes played high enough will have fundamental frequencies that are away from the bass guitar’s fundamentals. This gives the separation that would otherwise be gotten by restricting the frequency range of the organ with EQ and/ or tone controls. (Of course, working the equalization AND note choice AND volume angles can make for some very powerful separation indeed.)

The second rule is really just an extension of “getting out of the freakin’ way.” If the band is trying to be one thing, and the production is trying to force the band to be something else, the end result isn’t going to be as great as it could be. The production, however well intentioned, gets in the way of the band being itself. That sounds like an undesirable thing, because it is an undesirable thing.

Faithfully rendered Pink Floyd tunes use instruments with wide-ranging tones that run up and down – very significantly – in volume. These volume swings put different parts in the right places at the right time, and create the dramatic flourishes that make Pink Floyd what it is. Floyd is certainly a rock band. The approach is not exactly the same as an old-school bluegrass group playing around a single, omni mic…

…but it’s close enough that I’m willing to say: The lunatics on Pink Floyd’s grass are lying upon turf that’s rather more blue than one might think at first.


Speed Fishing

“Festival Style” reinforcement means you have to go fast and trust the musicians.

Please Remember:

The opinions expressed are mine only. These opinions do not necessarily reflect anybody else’s opinions. I do not own, operate, manage, or represent any band, venue, or company that I talk about, unless explicitly noted.

Want to use this image for something else? Great! Click it for the link to a high-res or resolution-independent version.

Last Sunday was the final day of the final iteration of a local music festival called “The Acoustic All-Stars.” It’s a celebration of music made with traditional or neo-traditional instruments – acoustic-electric guitars, fiddles, drums, mandolins, and all that sort of thing. My perception is that the musicians involved have a lot of anticipation wrapped up in playing the festival, because it’s a great opportunity to hear friends, play for friends, and make friends.

Of course, this anticipation can create some pressure. Each act’s set has a lot riding on it, but there isn’t time to take great care with any one setup. The longer it takes to dial up the band, the less time they have to play…and there are no “do overs.” There’s one shot, and it has to be the right shot for both the listeners and the players.

The prime illustrator for all this on Sunday was Jim Fish. Jim wanted to use his slot to the fullest, and so assembled a special team of musicians to accompany his songs. The show was clearly a big deal for him, and he wanted to do it justice. Trying to, in turn, do justice to his desires required that a number of things take place. It turns out that what had to happen for Jim can (I think) be generalized into guidelines for other festival-style situations.

Pre-Identify The Trouble Spots, Then Make The Compromises

The previous night, Jim had handed me a stage plot. The plot showed six musicians, all singing, wielding a variety of acoustic or acoustic-electric instruments. A lineup like that can easily have its show wrecked by feedback problems, because of the number of open mics and highly-resonant instruments on the deck. Further, the mics and instruments are often run at (relatively) high-gain. The PA and monitor rig need to help with getting some more SPL (Sound Pressure Level) for both the players and the audience, because acoustic music isn’t nearly as loud as a rock band…and we’re in a bar.

Also, there would be a banjo on stage right. Getting a banjo to “concert level” can be a tough test for an audio human, depending on the situation.

Now, there’s no way you’re going to get “rock” volume out of a show like this – and frankly, you don’t want to get that kind of volume out of it. Acoustic music isn’t about that. Even so, the priorities were clear:

I needed a setup that was based on being able to run with a total system gain that was high, and that could do so with as little trouble as possible. As such, I ended up deploying my “rock show” mics on the deck, because they’re good for getting the rig barking when in a pinch. The thing with the “rock” mics is that they aren’t really sweet-sounding transducers, which is unfortunate in an acoustic-country situation. A guy would love to have the smoothest possible sound for it all, but pulling that off in a potentially high-gain environment takes time.

And I would not have that time. Sweetness would have to take a back seat to survival.

Be Ready To Abandon Bits Of The Plan

On the day of the show, the lineup ended up not including two people: The bassist and the mandolin player. It was easy to embrace this, because it meant lower “loop gain” for the show.

I also found out that the fiddle player didn’t want to use her acoustic-electric fiddle. She wanted to hang one particular mic over her instrument, and then sing into that as well. We had gone with a similar setup at a previous show, and it had definitely worked. In this case, though, I was concerned about how it would all shake out. In the potentially high-gain environment we were facing, pointing this mic’s not-as-tight polar pattern partially into the monitor wash held the possibility for creating a touchy situation.

Now, there are times to discuss the options, and times to just go for it. This was a time to go for it. I was working with a seasoned player who knew what she wanted and why. Also, I would lose one more vocal mic, which would lower the total loop-gain in the system and maybe help us to get away with a different setup. I knew basically what I was getting into with the mic we chose for the task.

And, let’s be honest, there were only minutes to go before the band’s set-time. Discussing the pros and cons of a sound-reinforcement approach is something you do when you have hours or days of buffer. When a performer wants a simple change in order to feel more comfortable, then you should try to make that change.

That isn’t to say that I didn’t have a bit of a backup plan in mind in case things went sideways. When you’ve got to make things happen in a hurry, you need to be ready to declare a failing option as being unworkable and then execute your alternate. In essence, festival-style audio requires an initial plan, some kind of backup plan, the willingness to partially or completely drop the original plan, and an ability to formulate a backup plan to the new plan.

The fiddle player’s approach ended up working quite nicely, by the way.

Build Monitor World With FOH Open

If there was anything that helped us pull-off Jim’s set, it was this. In a detail-oriented situation, it can be good to start with your FOH (Front Of House) channels/ sends/ etc. muted (or pulled back) while you build mixes for the deck. After the monitors are sorted out, then you can carefully fill in just what you need to with FOH. There are times, though, that such an approach is too costly in terms of the minutes that go by while you execute. This was one such situation.

In this kind of environment, you have to start by thinking not in terms of volume, but in terms of proportions. That is, you have to begin with proportions as an abstract sort of thing, and then arrive at a workable volume with all those proportions fully in effect. This works in an acoustic music situation because the PA being heavily involved is unlikely to tear anyone’s head off. As such, you can use the PA as a tool to tell you when the monitor mixes are basically balanced amongst the instruments.

It works like this:

You get all your instrument channels set up so that they have equal send levels in all the monitors, plus a bit of a boost in the wedge that corresponds to that instrument’s player. You also set their FOH channel faders to equal levels – probably around “unity” gain. At this point, the preamp gains should be as far down as possible. (I’m spoiled. I can put my instruments on channels with a two-stage preamp that lets me have a single-knob global volume adjustment from silence to “preamp gain +10 dB.” It’s pretty sweet.)

Now, you start with the instrument that’s likely to have the lowest gain before feedback. You begin the adventure there because everything else is going to have to be built around the maximum appropriate level for that source. If you start with something that can get louder, then you may end up discovering that you can’t get a matching level from the more finicky channel without things starting to ring. Rather than being forced to go back and drop everything else, it’s just better to begin with the instrument that will be your “limiting factor.”

You roll that first channel’s gain up until you’ve got a healthy overall volume for the instrument without feedback. Remember, both FOH and monitor world should both be up. If you feel like your initial guess on FOH volume is blowing past the monitors too much (or getting swamped in the wash), make the adjustment now. Set the rest of the instruments’ FOH faders to that new level, if you’ve made a change.

Now, move on to the subsequent instruments. In your mind, remember what the overall volume in the room was for the first instrument. Roll the instruments’ gains up until you get to about that level on each one. Keep in mind that what I’m talking about here is the SPL, not the travel on the gain knob. One instrument might be halfway through the knob sweep, and one might be a lot lower than that. You’re trying to match acoustical volume, not preamp gain.

When you’ve gone through all the instruments this way, you should be pretty close to having a balanced instrument mix in both the house and on deck. Presetting your monitor and FOH sends, and using FOH as an immediate test of when you’re getting the correct proportionality is what lets you do this.

And it lets you do it in a big hurry.

Yes, there might be some adjustments necessary, but this approach can get you very close without having to scratch-build everything. Obviously, you need to have a handle on where the sends for the vocals have to sit, and your channels need to be ready to sound decent through both FOH and monitor-world without a lot of fuss…but that’s homework you should have done beforehand.

Trust The Musicians

This is probably the nail that holds the whole thing together. Festival-style (especially in an acoustic context) does not work if you aren’t willing to let the players do their job, and my “get FOH and monitor world right at the same time” trick does NOT work if you can’t trust the musicians to know their own music. I generally discourage audio humans from trying to reinvent a band’s sound anyway, but in this kind of situation it’s even more of something to avoid. Experienced acoustic music players know what their songs and instruments are supposed to sound like. When you have only a couple of minutes to “throw ‘n go,” you have to be able to put your faith in the music being a thing that happens on stage. The most important work of live-sound does NOT occur behind a console. It happens on deck, and your job is to translate the deck to the audience in the best way possible.

In festival-style acoustic music, you simply can’t “fix” everything. There isn’t time.

And you don’t need to fix it, anyway.

Point a decent mic at whatever needs micing, put a working, active DI on the stuff that plugs in, and then get out of the musicians’ way.

They’ll be happier, you’ll be happier, you’ll be much more likely to stay on schedule…it’s just better to trust the musicians as much as you possibly can.


Case Study – Compression

A bit about how I personally use dynamic compression in a live-audio setting.

Please Remember:

The opinions expressed are mine only. These opinions do not necessarily reflect anybody else’s opinions. I do not own, operate, manage, or represent any band, venue, or company that I talk about, unless explicitly noted.

Want to use this image for something else? Great! Click it for the link to a high-res or resolution-independent version.

Generally speaking, I try not to go too far into specifics on this site. I avoid a “do exactly this, then exactly that” approach, because it can cause people to become “button pushers.” Button pushers are people who have memorized a procedure, but don’t actually know how that procedure works. I think we need a lot fewer of those folks in live-audio, and a lot more of people who understand WHY they’re doing something.

Of course, in a “how-to” kind of situation, you do need some specific instructions. Those posts are the exception to the rule.

Anyway.

My avoidance of explicit procedures means that this site has very little in the way of “set this processor this way for this effect” kinds of information. This information does have its place, especially when it’s used as a starting point for creating your own live-sound solutions. Not too long ago, a fellow audio-human needed some help in getting started with compression. What I presented to him was a sort of case-study on what I use compression for, and how I go about setting up the processor to get those results.

Here’s what I said to him, with some clarification and expansion as necessary.

Sledgehammers VS. Paintbrushes

Compression is a kind of processing that has a vast range of uses. Some of those uses are subtle, and some smash you in the face like a frisbee that’s been soaked in something flammable, set alight, and hurled at your nose. Of course, there’s also everything in between those two extremes.

As a creative tool, compression acts all the way from a tiny paintbrush to the heaviest sledgehammer in the shop. For my part, I tend to use compression as a sledgehammer.

The reason that I’m so heavy-handed with compression basically comes down to me working a small room. In a small room, doing something subtle with compression on, say, a snare drum is rarely helpful. The reason is because the snare is usually so loud – even without the PA – that getting that subtle tweak across would require me to swamp the acoustic sound with the PA. That would be REALLY LOUD. Much too loud. The other piece of the small-room puzzle is that the acoustic contribution from the stage tends to wash over even very heavy compression with a large amount of transient content. Because of this, a lot of the compression I end up doing turns into “New York” or “parallel” compression by default. (Parallel compression is a technique where a signal is compressed to some degree, and then mixed together with an uncompressed version of itself. This is usually thought of in a purely electronic way. However, it can also happen with a signal that’s been compressed and reproduced by a PA, but also exists as an uncompressed acoustical event that’s independent of the electronics.) This partial “washing out” of even very heavy compression can let me get away with compression settings that wouldn’t sound very good if there were nothing else to listen to.

Also, there are logistical issues. A good number of small-venue shows are very “on the fly” experiences, where you just don’t have time to explore all the subtle options available for processing a sound. You need to get something workable NOW, and if you have time to refine it later then that’s great.

In another sense, you might say that I view compression less as a sculpting tool and more as a volume-management device. A utility of sorts. Compression, for me, is a hammer that helps me put signals into defined “volume boxes.” For signals like guitar and bass, sticking them into a well defined and not-wildly-changing volume box means that I can find a spot for them in the mix, and then not have to worry too much about level changes. If they get a bit quieter, they are much less likely to get lost, and if they get a bit louder, they probably won’t overwhelm everything. Used across the whole mix, compression lets me basically choose a “don’t exceed” volume level for the PA. I can then push the vocals – hard – into that mix limiter, which helps to keep things intelligible without having the vocal peaks completely flatten the audience.

WARNING REGARDING THE ABOVE: Pushing vocals into an aggressive compressor can be a way to invite feedback problems, because feedback is dependent on gain instead of absolute volume. You can also end up making the stagewash worse, because everything entering a vocal mic (besides vocals) is a kind of “noise.” Running hard into the dynamics processor effectively causes this “noisefloor” to go up. You have to be careful, and if you run into a problem, dropping the vocal level a bit and raising the limiter’s threshold a bit might be necessary. Listen, experiment, work settings against each other, iterate, iterate, iterate…

Setting Up The Sledgehammer

As I said, my tendency is to use compression as a way to stick something into a well-defined space of volume level. That goal is what drives my processor settings.

Attack: Attack time is the how quickly the compressor reduces gain upon signal changes that exceed the threshold. Because my usage for compression is to keep things in a box, I have very little use for slow(er) attack times that allow things to escape the box. Further, I will probably have plenty of “peak” material from the deck anyway, so I don’t have to worry too much. If I notice a problem, I can always act on it. So…I prefer short attack times. As short as possible. Very short attack times can cause distortion, because the compressor acts in a time range that’s less than one wave cycle (which is a pretty good recipe for artifacts.) Even so, I will often set a compressor to the minimum possible attack time – even 0 ms – and live with a touch of crunch here and there. It all depends on what I can get away with.

Release: Release time is how quickly the compressor gain returns toward normal (unity-gain) upon signal changes. I prefer compressors that have an auto-release function which also partially honors a manual release time. With a compressor like that, setting a longer release time with the auto-release engaged means that the auto-release takes proportionally longer to do its thing – while still being program-dependent overall. If I can’t get auto-release, then a manual setting of 50 – 100 ms is about my speed. That’s fast enough to keep things consistent without getting into too many nasty artifacts. (Fifty ms is the time required for one complete cycle of a 20 Hz wave. Letting the compressor release just slowly enough to avoid artifacts at 20 Hz means that you’ll probably be fine everywhere else, because the rest of the audible spectrum cycles faster than the compressor releases.)

Ratio: Ratio is the measure of how much the compressor should ultimately attempt to reduce the output relative to the input. A 1:1 ratio means that the compressor should do nothing except pass signal through its processing path. A 2:1 ratio means that, at or above the chosen threshold, 2 dB greater signal at the input should result in the compressor attempting to reduce the output to a signal that’s only 1 dB “hotter.” Since I’m all about shoving things into boxes, I tend to use pretty extreme ratios…unless it becomes problematic. If a compressor has an infinity:1 setting (where the threshold is the target for maximum output, period) I will almost always try that first.

Seriously, the way I used compression would make lots of other engineers weep. I’m not gonna lie.

Anyway.

Threshold: The threshold is the point at which the compressor’s program-dependent processing is to begin changing from unity-gain to non-unity-gain, assuming that the ratio is not 1:1. In other words, a signal that reaches the threshold and then would otherwise continue to increase should have gain reduction applied. As a signal decreases towards the threshold, gain reduction should be released. If the signal falls below the threshold entirely, then the compressor’s program-dependent processing should return to unity gain – the signal should pass straight through. (I qualify unity-gain with “program-dependent processing” because there are potentially other gain stages in a compressor which can be non-unity and also program invariant. For instance, a compressor’s makeup gain might be non-unity, but it doesn’t vary with the input signal. You manually set it somewhere and leave it there until you decide it needs to be something else.)

Threshold settings are chosen differently in different situations. If I need the compressor to just “ride” a signal a bit, then I’ll try to set the threshold in a place where I see 3 or so dB of gain reduction. If I want the compressor to really squeeze something, then I’ll crank down the threshold until I see 6 dB (or more) on the gain reduction meter. When I’m using a compressor as a “don’t exceed this point” on the main mix, the threshold is set in accordance with a target SPL (Sound Pressure Level) from the PA. However hard I end up hitting the compressor is immaterial unless I start having a problem.

An Important Disclaimer

This case-study was all about showing you how I tend to work. It may or may not work for you, and you should be aware that extreme compression can get an audio-human into BIG trouble in a BIG hurry. This isn’t meant to dissuade you from trying experiments, it’s just said so that you’ll be aware of the risks. I’m used to it all, but I’ll still trip over my own feet once a year or so.

When in doubt, hit “bypass” and let things ride.


What Can You Do For Two People?

Quite a bit, actually, because even the small things have a large effect.

Please Remember:

The opinions expressed are mine only. These opinions do not necessarily reflect anybody else’s opinions. I do not own, operate, manage, or represent any band, venue, or company that I talk about, unless explicitly noted.

Want to use this image for something else? Great! Click it for the link to a high-res or resolution-independent version.

MiNX is a treat to see on the show schedule. They’re not just a high-energy performance, but a high-energy performance delivered by only two people, and without resorting to ear-splitting volume. How could an audio-human not appreciate that?

A MiNX show is hardly an exercise in finding the boundaries of one’s equipment. Their channel count is only slightly larger than a singer-songwriter open mic. It looks something like this:

  1. Raffi Vocal Mic
  2. Ischa Vocal Mic
  3. Guitar Amp Mic
  4. Acoustic Guitar DI
  5. Laptop DI

That’s it. When you compare those five inputs with the unbridled hilarity that is a full rock band with 3+ vocals, two guitars, a bass rig, keys, and full kit of acoustic drums, a bit of temptation creeps in. You get the urge to think that because the quantity of things to potentially manage has gone down, the amount of attention that you have to devote to the show is reduced. This is, of course, an incorrect assumption.

But why?

Low Stage Volume Magnifies FOH

A full-on rock band tends to produce a fair amount of stage volume. In a small room, this stage volume is very much “in parallel” with the contribution from the PA. If you mute the PA, you may very well still have concert-level SPL (Sound Pressure Level) in the seats. There are plenty of situations where, for certain instruments, the contribution from the PA is nothing, or something but hardly audible, or something audible but in a restricted frequency area that just “touches up” the audio from stage.

So, you might have 12 things connected to the console, but only really be using – say – the three vocal channels. Everything else cold very well be taking care of itself (or mostly so), and thus the full-band mix is actually LESS complex and subtle than a MiNX-esque production. The PA isn’t overwhelmingly dominant for a lot of the channels, and so changes to those channel volumes or tones are substantially “washed out.”

But that’s not the way it is with MiNX and acts similar to them.

In the case of a production like MiNX, the volume coming off the stage is rather lower than that of a typical rock act. It’s also much more “directive.” With the exception of the guitar amplifier, everything else is basically running through the monitors. Pro-audio monitors – relative to most instruments and instrument amps – are designed to throw audio in a controlled pattern. There’s much less “splatter” from sonic information that’s being thrown rearward and to the sides. What this all means is that even a very healthy monitor volume can be eclipsed by the PA without tearing off the audience’s heads.

That is, unlike a typical small-room rock show, the audience can potentially be hearing a LOT of PA relative to everything else.

And that means that changes to FOH (Front Of House) level and tonality are far less washed out than they would normally be.

And that means that little changes matter much more than they usually do.

You’ve Got To Pay Attention

It’s easy to be taken by surprise by this. Issues that you might normally let go suddenly become fixable, but you might not notice the first few go-arounds because you’re just used to letting those issues slide. Do the show enough times, though, and you start noticing things. For instance, the last time I worked on a MiNX show was when I finally realized that some subtle dips at 2.5 kHz in the acoustic guitar and backing tracks allowed me to run those channels a bit hotter without stomping on Ischa’s vocals. This allows for a mix that sounds less artificially “separated,” but still retains intelligibility.

That’s a highly specific example, but the generalized takeaway is this: An audio-human can be tempted to just handwave a simpler, quieter show, but that really isn’t a good thing to do. Less complexity and lower volume actually means that the details matter more than ever…and beyond that, you actually have the golden opportunity to work on those details in a meaningful way.

When the tech REALLY needs to be paying attention to the small details of the mix is when the PA system’s “tool metaphor” changes from a sledgehammer to a precision scalpel.

When you’ve only got a couple of people on deck, try hard to stay sharp. There might be a lot you can do for ’em, and for their audience.


Fix It In Rehearsal

…because many music problems are best fixed by musicians.

Please Remember:

The opinions expressed are mine only. These opinions do not necessarily reflect anybody else’s opinions. I do not own, operate, manage, or represent any band, venue, or company that I talk about, unless explicitly noted.

Want to use this image for something else? Great! Click it for the link to a high-res or resolution-independent version.

Problems discovered in rehearsal should be fixed in rehearsal.

If they are not fixed, you have to hope that the venue has a powerful PA, experienced tech, large room, and highly tolerant audience.

Letting issues go, and hoping for all of the above to be true will not likely lead to a successful show.


If It Ain’t Broken…

…don’t fix it. If it seems like it’s broken, it may not be.

Please Remember:

The opinions expressed are mine only. These opinions do not necessarily reflect anybody else’s opinions. I do not own, operate, manage, or represent any band, venue, or company that I talk about, unless explicitly noted.

Want to use this image for something else? Great! Click it for the link to a high-res or resolution-independent version.

There certainly can be a point where you have to “fix” a band.

Be warned, however, that even the very experienced can make a DISASTROUSLY BAD call about where that point actually is. When you’re tempted to make that call, start by assuming that you’re wrong and try to figure out what you’ve missed.

Then stop and think about it some more.

Trying to remake a band’s sound into your own sound is almost never the right idea.

Especially if you haven’t been asked to.


The Secret Recipe

Good sound mostly “does you.”

Please Remember:

The opinions expressed are mine only. These opinions do not necessarily reflect anybody else’s opinions. I do not own, operate, manage, or represent any band, venue, or company that I talk about, unless explicitly noted.

The recipe for a great live-sound mix:

1 gallon: A great band on stage.

1 cup: An audio tech not getting in the way of the great band.

Everything else is negotiable, or even expendable.


Two Simple Steps For Finding A Great Drum Mic

It’s both incredibly easy and very difficult.

Please Remember:

The opinions expressed are mine only. These opinions do not necessarily reflect anybody else’s opinions. I do not own, operate, manage, or represent any band, venue, or company that I talk about, unless explicitly noted.

To find a great drum mic:

1. Obtain any microphone that essentially sounds like what it’s pointed at.

2. Point the mic at a kit that sounds wonderful, and that is being played by a really excellent drummer.

Modified versions of this technique work for vocalists, guitar players, bassists…


In A No-Soundcheck World, The Reckless Spirit Is King

“Throw and go” is 100% possible – if you’re ready to do it well.

Please Remember:

The opinions expressed are mine only. These opinions do not necessarily reflect anybody else’s opinions. I do not own, operate, manage, or represent any band, venue, or company that I talk about, unless explicitly noted.

I have a tendency to forget how good bands are. If I don’t work with a certain group regularly, my mental recall of their musicianship gets hazy and vague. Such is the case with Reckless Spirit, a really killer local band whose killer-ness I forgot.

Don’t get me wrong – I remembered that they were good. It’s just that I didn’t have a real grip on just how good.

Reckless Spirit was closing a two-band bill. It took a bit to get the bands changed over, and all we really had time for was a quick “line check.” Everything had a solid connection to the console, and the vocals were audible in monitor world, so –

Off we went.

And the show sounded fantastic.

With no proper soundcheck at all.

Their sound came together in about 30 seconds, and the result was one of the most enjoyable rock-band mixes I’ve heard in a while. I’m not joking. It was effortless.

Why?

Working It All Out Ahead Of Time

I’m convinced that Reckless Spirit’s “secret” is a pretty simple one: Make sure that the music actually works as music, before you ever get to the venue. When you get right down to it, the band has become expert at dealing with The Law Of Conservation of Effort, especially in terms of having their “ensemble proportionalities” dead on.

Seriously – I don’t know if rock n’ roll has its arrangements described as “exquisite” very often, but that’s the word I would use to describe the way Reckless Spirit’s show came together. At every moment, everything had a proper (and very exact) place. When it was time for a run on the keys, the timbre and volume of the keys rig was EXACTLY correct for the part to stand out without crushing everything else. The same was very much true for the guitar, and the bass-and-drum rhythm section was always audible and distinct…yet never overbearing.

Everybody had their spot in terms of volume – and not just overall level, but the levels for the specific frequency ranges that they were meant to cover. The guitar parts and keyboard bits weren’t trying to be in the same tonal range at the same time. The bass wasn’t stomping on the guitar, and the drums fit neatly into the musical “negative space” that remained. Sure, a really good PA operator (with a sufficiently powerful PA) can do a lot to create that situation, but it takes a very long time – and a busload of volume – if the band isn’t even close to doing it themselves.

The point here is that the band didn’t need the PA system to be a band. There was no requirement for me to take them completely apart, and then stick them back together again. Before even a single channel was unmuted, they were 100% prepared to be cohesive…and that meant that when the live-sound rig DID get involved, the PA was really only needed for a bit of room-specific sweetening. Sure, FOH (Front of House) was needed as a “vocal amp,” but that pretty much goes for everyone who plays amplified music. Aside from getting clarity into the lyrical portion of the show, the PA didn’t need to “fix” anything.

…and getting clarity was easy, because the band was playing at a volume that fit the vocals in neatly. We actually REDUCED the monitor volume on deck, because my “standard rock show” preset made the vocals too loud. Even with that, Brock (the guitarist and main vocalist) informed me that he was really backing off from the mic, because it seemed very, very hot.

Great ensemble prep + reduced stage wash = nice sound out front.

I’m convinced that just about anyone can be in possession of that equation up there. The key is to do your homework, Reckless Spirit style. Use as much rehearsal time as you can to figure out EXACTLY where everybody’s sound is supposed to be, and EXACTLY when those sounds are supposed to be there. Figure out how to do all that at small-venue volume, and how to get the vocals spot-on without powerful monitors, and your chances of a sonically great show will jump in a massive way. You’ll be 90% down the road to a successful partnership with any given night’s audio-human, because by doing your job you’ll enable them to do theirs more effectively.

Be Reckless (proper noun).


Digital Audio – Bold Claims, Experimental Testing

Digital audio does benefit from higher bit-depth and sample rate – but only in terms of a better noise floor and higher frequency-capture bandwidth.

Please Remember:

The opinions expressed are mine only. These opinions do not necessarily reflect anybody else’s opinions. I do not own, operate, manage, or represent any band, venue, or company that I talk about, unless explicitly noted.

When I get into a dispute about how digital audio works, I’ll often be the guy making the bizarre and counter-intuitive statements:

“Bit depth affects the noise floor, not the ability to reproduce a wave-shape accurately.”

“Sample rates beyond 44.1 k don’t make material below 21 kHz more accurate.”

The thing is, I drop these bombshells without any experimental proof. It’s no wonder that I encounter a fair bit of pushback when I spout off about digital audio. The purpose of this article is to change that, because it simply isn’t fair for me to say something that runs counter to many people’s understanding…and then just walk away. Audio work, as artistic and subjective as it can be, is still governed by science – and good science demands experiments with reproducible results.

I Want You To Be Able To Participate

When I devised the tests that you’ll find in this article, one thing that I had in mind was that it should be easy for people to “try them at home.” For this reason, every experiment is conducted inside Reaper (a digital audio workstation), using audio processing that is available with the basic Reaper download.

Reaper isn’t free software, but you can download a completely un-crippled evaluation copy at reaper.fm. The 30-day trial period should be plenty of time for you to run these experiments yourself, and maybe even extend them.

To ensure that you can run everything, you will need to have audio hardware capable of a 96 kHz sampling rate. If you don’t, and you open one of the projects that specifies 96 kHz sampling, I’m not sure what will happen.

With the exception of Reaper itself, this ZIP file should contain everything you need to perform the experiments in this article.

IMPORTANT: You should NOT open any of these project files until you have turned the send level to your monitors or headphones down as far as possible. Otherwise, if I have forgotten to set the initial level of the master fader to “-inf,” you may get a VERY LOUD and unpleasant surprise. If you wreck your hearing or your gear in the process of experimenting, I am NOT responsible.

Weak Points In These Tests

The veracity of these experiments is by no means unassailable. It’s very important that I say that. For instance, the measurement “devices” that will be used are not independent of Reaper. They run inside the software itself, and so are subject to both their own flaws and the flaws of the host software.

Because I did not want to burden you with having to provide external hardware and software for testing, the only appeal to external measurement that is available is listening with the human ear. Human hearing, as an objective measurement, is highly fallible. Our ability to hear is not necessarily consistent across individuals, and what we hear can be altered by all manner of environmental factors that are directly or indirectly related to the digital signals being presented.

I personally hold these experiments as strong proof of my assertions, but I have no illusions of them being incontestable.

Getting Started – Why We Won’t Be Using Many “Null” Tests

A very common procedure for testing digital audio assumptions is the “null” test. This experiment involves taking two signals, inverting the polarity of one signal, and then summing the signals. If the signals are a perfect match, then the resulting summation will be digital silence. If they are not a perfect match, then some sort of differential signal will remain.

Null tests are great for proving some things, and not so great for proving others. The problem with appealing to a null test is that ANYTHING which changes anything about the signal will cause a differential “remainder” to appear. Because of this, you can’t use null testing to completely prove that, say, a 24-bit file and a 16-bit file contain the same desired signal, independent of noise. You CAN prove that the difference between the files is located at some level below 0 dBFS (decibels referenced to full scale), and you can make inferences as to the audibility of that difference. Still, the reality that the total signal (including unwanted noise) contained within a 16-bit file is different from the total signal contained within a 24-bit file is very real, and non-trivial.

There are other issues as well, which the first few experiments will reveal.

Open the project file that starts with “01,” verify that the master fader and your listening system are all the way down, and then begin playback. The analysis window should – within its own experimental error – show you a perfect, undistorted tone occurring at 10 kHz. As the file loops, there will be brief periods where noise becomes visible in the trace. Other than that, though, you should see something like this:

test01

When Reaper is playing a file that is at the same sample rate as the project, nothing odd happens.

Now, open the file that starts with “02.” When you begin playback, something strange occurs. The file being played is the same one that was just being used, but this time the project should invoke a 96 kHz sample rate. As a result, Reaper will attempt to resample the file on the fly. This resampling results in some artifacts that are difficult (if not entirely impossible) to hear, but easy to see in the analyzer.

test02

Reaper is incapable of realtime (or even non-realtime) resampling without artifacts, which means that we can’t use a null test to incontestably prove that a 10 kHz tone, sampled at 44.1 kHz, is exactly the same as a 10 kHz tone sampled at 96 kHz.

What is at least somewhat encouraging, though, is that the artifacts produced by Reaper’s resampling are consistent in time, and from channel to channel. Opening and playing the project starting with “03” confirms this, in a case where a null test is actually quite helpful. The same resampled file, played in two channels (with one channel polarity-inverted) creates a perfect null between itself and its counterpart.

test03

Test 04 demonstrates the problem that I talked about above. With one file played at the project’s “native” sample rate, and the other file being resampled, the inverted-polarity signal doesn’t null perfectly with the other channel. The differential signal IS a long way down, at about -90 dBFS. That’s probably impossible to hear under most normal circumstances, but it’s not digital silence.

test04

Does A Higher Sampling Rate Render A Particular Tone More Accurately?

With the above experiments out of the way, we can now turn our attention to one of the major questions regarding digital audio: Does a higher rate of sampling, and thus, a more finely spaced “time grid,” result in a more accurate rendition of the source material?

Hypothesis 1: A higher rate of sampling does result in a more accurate rendition of a particular tone, as long as the tone in question is a frequency unaffected by input or output filtering. This hypothesis assumes that digital audio is an EXPLICIT representation of the signal – that is, that each sample point is reproduced “as is,” and so more samples per unit time create a more faithful reproduction of the material.

Hypothesis 2: A higher rate of sampling does not result in a more accurate rendition of a particular tone, as long as the tone in question is a frequency unaffected by input or output filtering. This hypothesis assumes that digital audio is an IMPLICIT representation of the signal, where the sample data is used to mathematically reconstruct a perfect copy of the stored event.

The experiment begins with the “05” project. The project generates a 10 kHz tone, with a 44.1 kHz sampling rate. If you listen to the output (and aren’t clipping anything) you should hear what the analyzer displays: A perfect, 10 kHz sine wave with no audible distortion, harmonics, undertones, or anything else.

test05

Project “06” generates the same tone, but in the context of a 96 kHz sampling rate. The analyzer shifts the trace to the left, because 96 kHz sampling can accommodate a wider frequency range. However, the signal content stays the same: We have a perfect, 10 kHz tone with no audible artifacts, and nothing else visible on the analyzer (within experimental error).

test06

Project “07” also generates a 10 kHz tone, but it does so within a 22.05 kHz sampling rate. There is still no audible signal degradation, and the tone displays as “perfect” in the analyzer. The trace is shifted to the right, because 10 kHz is very near the limit of what 22.05 kHz sampling can handle.

test07

Conclusion: Hypothesis 2 is correct. At 22,500 samples per second, any given cycle of a 10 kHz wave only has two samples available to represent the signal. At 44.1 kHz sampling, any given cycle still only has four samples assigned. Event at 96 kHz, a 10 kHz wave has less than 10 samples assigned to it. If digital audio were an explicit representation of the wave, then such small numbers of samples being used to represent a signal should result in artifacts that are obvious either to the ear or to an analyzer. Any such artifacts are not observable via the above experiments, at any of the sampling rates used. The inference from this observation is that digital audio is an implicit representation of the signals being stored, and that sample rate does not affect the ability to accurately store information – as long as that information can be captured and stored at the sample rate in the first place.

Does A Higher Sample Rate Render Complex Material More Accurately?

Some people take major issue with the above experiment, because musical signals are not “naked” sine waves. Thus, we need an experiment which addresses the question of whether or not complex signals are represented more accurately by higher sample rates.

Hypothesis 1: A higher sampling rate does create a more faithful representation of complex waves, because complex waves are more difficult to represent than sine waves.

Hypothesis 2: A higher sampling rate does not create a more faithful representation of complex waves, because any complex wave is simply a number of sine waves modulating each other to varying degrees.

This test opens with the “08” project, which generates a complex sound at a 96 kHz sample rate. To make any artifacts easy to hear, the sound still uses pure tones, but the tones are spread out across the audible spectrum. Accordingly, the analyzer shows us 11 tones that read as “pure,” within experimental error. (Lower frequencies are less accurately depicted by the analyzer than high frequencies.)

test08

If we now load project “09,” we get a tone which is audibly and visibly the same, even though the project is now restricted to 44.1 kHz sampling. Although the analyzer’s trace has shifted to the right, we can still easily see 11, “pure” tones, free of artifacts beyond experimental error.

test09

Conclusion: Hypothesis 2 is correct. A complex signal was observed as being faithfully reproduced, even with half the sampling data being available. An inference that can be made from this observation is that, as long as the highest frequency in a signal can be faithfully represented by a sampling rate, any additional material of lower frequency can be represented with the same degree of faithfulness.

Do Higher Bit Depths Better Represent A Given Signal, Independent Of Noise?

This question is at the heart of current debates about bit depth in consumer formats. The issue is whether or not larger bit-depths (and the consequentially larger file sizes) result in greater signal fidelity. This question is made more difficult because lower bit depths inevitably result in more noise. The presence of increasing noise makes a partial answer possible without experimentation: Yes, greater fidelity is afforded by higher bit-depth, because the noise level related to quantization error is inversely proportional to the number of bits available for quantization. The real question that remains is whether or not the signal, independent of the quantization noise, is more faithfully represented by having more bits available to assign sample values to.

Hypothesis 1: If noise is ignored, greater bit-depth results in greater accuracy. Again, the assumption is that digital is an explicit representation of the source material, and so more possible values per unit of voltage or pressure are advantageous.

Hypothesis 2: If noise is ignored, greater bit-depth does not result in greater accuracy. As before, the assumption is that we are using data in an implicit way, so as to reconstruct a signal at the output (and not directly represent it).

For this test, a 100 Hz tone was chosen. The reasoning behind this was because, at a constant 44.1 kHz sample rate, a single cycle of a 100 Hz tone has 441 sample values assigned to it. This relatively high number of sample positions should ensure that sample rate is not a factor in the signal being well represented, and so the accuracy of each sample value should be much closer to being an isolated variable in the experiment.

Project “10” generates a 100 Hz tone, with 24 bits of resolution. Dither is applied. Within experimental error, the tone appears “pure” on the analyzer. Any noise is below the measurement floor of -144 dBFS. (This measurement floor is convenient, because any real chance of hearing the noise would require listening at a level where the tone was producing 144 dB SPL, which is above the threshold of pain for humans.)

test10

Project “11” generates the same tone, but at 16-bits. Noise is visible on the analyzer, but is inaudible when listening. No obvious harmonics or undertones are visible on the analyzer or audible to an observer.

test11

Project “12” restricts the signal to an 8-bit sample word. Noise is clearly visible on the analyzer, and easily audible to an observer. There are still no obvious harmonics or undertones.

test12

Project “13” offers only 4 bits of resolution. The noise is very prominent. The analyzer displays “spikes” which seem to suggest some kind of distortion, and an observer may hear something that sounds like harmonic distortion.

test13

Conclusion: Hypothesis 2 is partially correct and partially incorrect (but only in a functional sense). For bit depths likely to be encountered by most listeners, a greater number of possible sample values does not produce demonstrably less distortion when noise is ignored. A pure tone remains observationally pure, and perfectly represented. However, it is important to note that, at some point, the harmonic distortion caused by quantization error appears to be able to “defeat” the applied dither. Even so, the original tone does not become “stair-stepped” or “rough.” It does, however, have unwanted tones superimposed upon it.