Tag Archives: Microphones

The Sublime Beauty Of Cheap, Old, Dinged-Up Gear

Some things can be used, and used hard, without worry.

Please Remember:

The opinions expressed are mine only. These opinions do not necessarily reflect anybody else’s opinions. I do not own, operate, manage, or represent any band, venue, or company that I talk about, unless explicitly noted.

Want to use this image for something else? Great! Click it for the link to a high-res or resolution-independent version.

I really do think that classy gear is a good idea in the general case. I think it sends a very important signal when a band walks into a room, and their overwhelming impression is that of equipment which is well-maintained and worth a couple of dollars. When a room is filled with boxes and bits that all look like they’re about to fail, the gigs in that room stand a good chance of being trouble-filled. In that case, musician anxiety is completely justified.

In the past, I have made updates to gear almost purely for the sake of “politics.” I don’t regret it.

At the same time, though, “new n’ shiny” equipment isn’t a guarantee of success. I’ve had new gear that developed problems very quickly, but more than that, new and spendy gear tends to make you ginger (in the timid sense). You can end up being so worried about something getting scratched up or de-spec’d that you forget the purpose of the device: It’s there to be used.

And that’s where the sublime beauty of inexpensive, well-worn equipment comes in. You’ve found a hidden gem, used it successfully in the past, will probably keep using it successfully in the future, and you can even abuse it a bit in the name of experimentation.

Case Study: Regular Kick Mics Are Boring

I’ve used spendy kick mics, and I’ve used cheap kick mics. They’ve all sounded pretty okay. The spendy ones are pre-tuned to sound more impressive, and that’s cool enough.

…but, you know, I find the whole “kick mic” thing to be kinda boring. It’s all just a bunch of iteration or imitation on making a large-diaphragm dynamic. Different mics do, of course, exhibit different flavors, but there’s a point where it all seems pretty generic. It doesn’t help that folks are so “conditioned” by that generic-ness – that is, if it doesn’t LOOK like a kick mic, it can’t be any good. (And, if it doesn’t COST like a kick mic, it can’t be any good.)

I once had a player inquire after a transducer I used on his bass drum. He seemed pretty interested in it based on how it worked during the show, and wanted to know how expensive it was. I told him, and he was totally turned OFF…by the mic NOT costing $200. He stated, “I’m only interested in expensive mics,” and in my head, I’m going, “Why? This one did a good enough job that you started asking questions about it. Doesn’t that tell you something?”

Anyway, the homogeneity of contemporary kick mic-ery is just getting dull for me. It’s like how modern car manufacturers are terrified to “color outside the lines” with any consumer model.

To get un-bored, I’ve started doing things that expose the greatness of “cheap, old, and dinged up.” In the past, I tried (and generally enjoyed) using a Behringer ECM8000 for bass drum duty. Mine was from back when they were only $40, had been used quite a bit, and had been dropped a few times. This was not a pristine, hardwood-cased, ultra-precision measurement mic that would be a real bear to replace. It was a knock-around unit that I had gotten my money out of, so if my experiment killed it I would not be enduring a tragedy.

And it really worked. Its small diameter made it easy to maneuver inside kick ports, and its long body made it easy to get a good ways inside those same kick ports. The omni pattern had its downsides, certainly. Getting the drum to the point of being “stupid loud” in FOH or the drumfill wasn’t going to happen, but that’s pretty rare for me. At an academic level, I’m sure the tiny diaphragm had no trouble reacting quickly to transients, although it’s not like I noticed anything dramatic. Mostly, the mic “sounded like a drum to me” without having to be exactly like every other bass-drum mic you’re likely to find. The point was to see if it could work, and it definitely did.

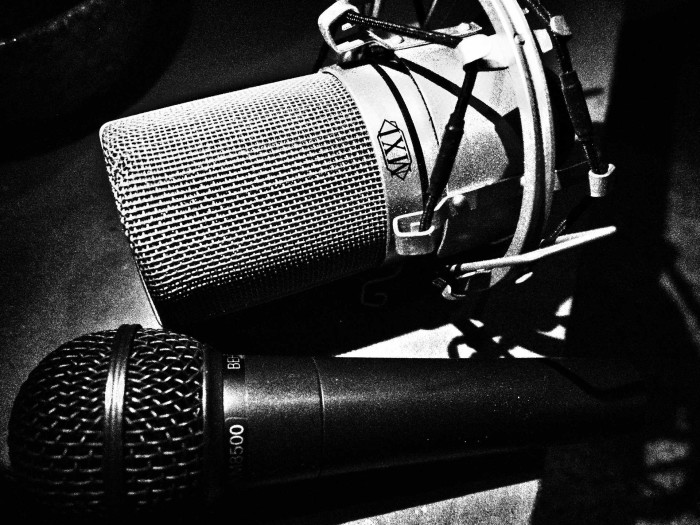
My current “thing” bears a certain similarity, only on the other end of the condenser spectrum. I have an old, very beat-up MXL 990 LDC, which I got when they were $20 cheaper. I thought to myself, “I wonder what happens if I get a bar-towel and toss this in a kick drum?” What I found out is that it works very nicely. The mic does seem to lightly distort, but the distortion is sorta nifty. I’m also freed from being required to use a stand. The 990 might die from this someday, but it’s held up well so far. Plus, again, it was cheap, already well used, and definitely not in pristine condition. I don’t have to worry about it.

Inoculation Against Worry Makes You Nicer

Obviously, an unworried relationship with your gear is good for you, but it’s also good in a political sense. Consternation over having a precious and unblemished item potentially damaged can make you jumpy and unpleasant to be around. There are folks who are so touchy about their rigs that you wonder how they can get any work done.

Of course, an overall attitude of “this stuff is meant to be used” is needed. Live-audio is a rough and tumble affair, and some things that you’ve invested in just aren’t going to make it out alive. Knowing this about everything, from the really expensive bits to the $20 mic that’s surprisingly brilliant, helps you to maintain perspective and calmness.

The thing with affordable equipment (that you’ve managed to hold on to and really use) is that it feeds this attitude. You don’t have to panic about it being scuffed up, dropped, misplaced, or finally going out with a bang. As such, you can be calm with people. You don’t have to jump down someone’s throat if they’re careless, or if there’s a genuine accident. It’s easy to see that the stuff is just stuff, and while recklessness isn’t a great idea, everything that has a beginning also has an end. If you got your money out of a piece of equipment, you can just shrug and say that it had a good life.

Have some nice gear around, especially for the purpose of public-relations, but don’t forget to keep some toys that you can “leave out in the rain.” Those can be the most fun.


The Best Upgrades

If you’re going to upgrade something, try to upgrade at the ends of your signal chain.

Please Remember:

The opinions expressed are mine only. These opinions do not necessarily reflect anybody else’s opinions. I do not own, operate, manage, or represent any band, venue, or company that I talk about, unless explicitly noted.

chainendsWant to use this image for something else? Great! Click it for the link to a high-res or resolution-independent version.

This business is so “magical gear” oriented that it hurts people. I don’t know how many bankruptcies, strained relationships, failed businesses, and heartburn prescriptions have resulted from gear acquisition, but my bet is that the number is somewhere between “a lot” and “a gazillion.” Audio humans spend a ton of money, and what’s worse, there’s a tendency to spend it on the wrong things. The search for better sound is a journey that’s often undertaken through a path that leads into the deep underbrush of mythology, and that’s a recipe for getting lost.

One perennial (and expensive) mistake is pursuing upgrades to the wrong parts of the signal path. Folks get incredibly wound up about the sound quality of things like consoles, poweramps, preamps, and even cables. They thrash around, trying to figure out why things don’t sound “just so,” and run huge bills as they do. In the process, they miss opportunities to upgrade the bits that would really matter.

If we’re talking about the part of the signal chain that involves electricity, the bits that matter are at the ends.

Transduction Is Hard

Let’s start with what I’m not saying: I’m not saying that the middle of the signal chain is trivial. It isn’t. A lot of work has been done to get us to where we are now in terms of distortion and SNR. Very smart people have worked for decades to design and miniaturize the components and subassemblies that make pro-audio go. What I am saying, though, is that signal routing, combining, and gain adjustment ARE trivial when compared to signal transduction.

For instance, let’s take the INA217, an instrumentation amplifier that can be used to build microphone preamps. At around 68 dB of gain, (the base 10 logarithm of 2500, multiplied by 20), the unit maintains a bandwidth beyond the audible range. Nifty, eh?

You can buy one for less than $7. Buy in quantity, and the per-unit cost is less than half that.

Or, take a mix bus from a console. The heart of a mix bus is either electrical or mathematical summing. Addition, I mean. The basic process is incredibly simple, and though the circuits do have some important particulars, they are not difficult for an electrical engineer to design. (And, that’s assuming that they actually get designed anymore. I strongly suspect that most folks are grabbing an existing design from a library and extending it to meet a certain specification.) Insofar as I can determine, there is no secret sauce to a summing bus. There are better components that you can specify, and due diligence is required to prevent external noise from corrupting the signals you actually want to use, but there’s no “magical addition process” that some folks have and some don’t.

“Doing stuff” to electricity that’s already electricity is pretty darn simple.

Life gets far more complicated when you’re trying to change sound into electricity or back again. The vagaries of directional microphone tuning, for instance, are strange enough that they don’t even make it into patent applications. They’re kept locked away as trade secrets. Microphone diaphragms aren’t really something you can build with ingredients found in your kitchen (good luck with working on materials that are only microns thick). Just about any decision you make will probably affect the whole-device transfer function in a way that’s easy to hear. On the output side, the tradeoffs associated with making a loudspeaker driver are both numerous and enormous. Everything matters, from the diaphragm material on up. The problem compounds when you start putting those drivers in boxes and attaching them to horns. Big drivers move lots of air, but don’t start or stop as fast as small units. The box might be resonating in a strange way. Just how bad do things get when the loudspeaker is run below the box tuning? Again, a small design change is likely to have audible results.

Manufacturers continue to iterate on transducer designs in ways that appear “fundamental” to the layman, whereas iteration on other products is more about incremental improvements and feature additions.

What this all amounts to is that a transduction improvement is far more likely to be of obvious and significant benefit than an upgrade in the “pure electricity” path.

Beyond The Chain

Upgrading the ends of the signal chain is a concept that works even beyond the electro-acoustical sense.

Let’s say I have the greatest microphone ever made. The entire thing is built from pure “unobtainium.” It is perfectly linear from 1 Hz to 30 kHz, and has infinitely fast transient response. It’s not even physically possible for this microphone to exist, it’s so good. I put that microphone in front of a singer with an annoying overtone in their voice. Does that singer sound good?

No. The microphone perfectly captures that ugly harmonic. If I had a choice, I would prefer an upgrade to the ultimate end of the signal chain: The signal source. I’ll take an amazing singer into an okay mic at any time, but a great mic in front of a bad singer doesn’t help very much.

Let’s also say that I have the greatest loudspeaker ever constructed. Its transfer function is perfectly flat, with flawless phase response. This mythical device is then placed in an aircraft hangar built of metal. The acoustical environment’s insane reflections and smeared transients result in a sound that’s almost completely unintelligible, and even a bit painful.

A “basically okay” loudspeaker in a great room would be much better.

If you’re going to undertake some sort of sonic improvement, you want to do all you can to upgrade things that are as close to the endpoints as possible. If you’re not getting the sound you want, look at source quality, room acoustics, mic capability, and loudspeaker fidelity first.


Public Speaking, PA Systems, And You

Just like a concert, what we want is the best possible show at the lowest possible gain.

Please Remember:

The opinions expressed are mine only. These opinions do not necessarily reflect anybody else’s opinions. I do not own, operate, manage, or represent any band, venue, or company that I talk about, unless explicitly noted.

publicspeakingWant to use this image for something else? Great! Click it for the link to a high-res or resolution-independent version.

The inspiration for today’s article comes from Resli Costabell, a corporate trainer and professional speaker. She dropped by the Small Venue Survivalist’s Facebook page a few days ago, and left a note:

‘I know you’re about playing music, and I’d also be keen to hear your tips for speakers. Not speakers as in “big black box that pours out sound.” Speakers as in “human being talking.”‘

The great thing about sound for any event, whether that event is based on music or spoken word, is that the physical principles involved don’t change. At all. Sure, there may be differences in specific application, but all the science remains as it has always been. As such, any problems that occur will tend to crop up when there’s an attempt to “Captain Kirk” a situation: “Ya can’na change the laws of physics, Cap’n!”

As I’ve said before, sound reinforcement is all about the best possible show at the lowest possible gain. The first thing we have to figure out, then, is what is critical to the success of the event, and what isn’t. I, and many other audio humans, have been witness to situations where a non-critical element becomes prioritized to the point where it wrecks the experience of the critical parts. The major culprit for public speaking?

Visual Orientation At The Expense Of Sound

This is not, in any sense, about sound craftspersons believing that they are at the center of the Universe. This is about how audio itself IS the center of the Universe at any event where the primary mode for you to impart information is speech. If your engagement with your audience is based on an auditory event (talking, that is), then everything else MUST come second to that. It’s perfectly fine for that second-place finish to be “close.” Yes, you should look professional. Yes, your slide deck should be projected as beautifully as is possible. Yes, it’s good for you to be appropriately animated on stage. Yes, you should be able to hold yourself in a comfortable way. Yes, it’s great to be able to get right up to the first row of attendees.

Yes, but…

If any of that gets in the way of you being heard clearly and comfortably, then it has to take a back seat. If it doesn’t take a back seat, then the brutal, uncompromising, feral, and downright vicious physics of sound will begin clawing and biting at your event’s success. Gain is added to mics until the system begins to noticeably destabilize. More and more equalization is applied, assuming someone is around to apply it. The sound gets more and more “hacked up.” Eventually, an unpleasant equilibrium is reached where your talk is perhaps audible, yet of an irritating tonality, tough to actually parse, and given to “ringing” in a distracting manner.

Don’t be distraught! There are things you can do to fix this.

Prioritizing Audibility

Avoid Scrimping On Audio

An alarming number of presenters will spend enormous amounts of money on signage, computer graphics, handouts, goodies, nifty chairs, nice tables, uplighting, gobo projectors, and floral arrangements…and then have almost nothing left for audio. This is an inappropriate prioritization if speaking is the core of your audience engagement.

Instead, get your sound right first. If you are having AV provided for you, go for the best system available that makes sense. You don’t need a rock-concert rig to speak to 100 people in a breakout room, but a nice mic, a flexible mixer, and some decent loudspeakers on sticks are a much better approach than some $20/ day “mini-PA” that sits on a table. You might also want to consider owning your own PA. A few bits and pieces can sometimes outperform an installed AV system. Also, it can be very nice to have a flexible “front end” if the installed coverage is great…but the controls are poor.

This point is especially important because it underpins the rest of my particulars. With all of my following concepts, I am assuming that a correctly set up and reasonably tuned PA system is being employed. A sound system that is simply inadequate can not be correctly setup or reasonably tuned to best fit your presentation. A very nice system that is not working properly is not very likely to meet your needs.

Get Help

A competent sound crew, able to listen as though they were audience members, is an enormous help to your event. If some part of the system begins to misbehave, a dedicated craftsperson can begin to act on the problem while you continue on. Small issues can be corrected quickly, without you having to think about them. This isn’t even to mention that you can do other things while the audio rig is being set up.

The alternative is that you have to do double duty. There is a point where you alone simply cannot maintain your presentation’s flow and manage audio problems in parallel. Also, it is very hard for any “set and forget” system (whether meaningfully automated or not) to compete with a knowledgeable human operator wielding an appropriate set of tools. A crew, even if it’s just one trustworthy helper, that’s dedicated to your event alone does cost a bit more. The dividends paid from that investment can be enormous, though.

Mic Choice And Technique

For the love of all that is good, please get over any hangups you have regarding blocking your face with a microphone. Microphones work best when the apparent sound pressure of your voice is VERY large when compared to the apparent sound pressure of anything else – the PA system being a valid example of “anything else.” The louder your voice is at the capsule, the less gain is needed. Making your voice the loudest thing at the mic capsule means using a directional mic and holding that mic as close to your mouth as you can. If the overall result of sounds bad because of plosives (“p” and “b” sounds which “boom” or are otherwise problematic), then change the mic position so that the airstream from your mouth is less direct. You can try parking the front of the mic on the tip of your nose, or just below your bottom lip. Be careful not to tilt the mic so that you’re effectively talking into the side of the element. The front is where a directional mic is most sensitive and sounds the best.

Yes, holding a mic in this way is going to cause some sight lines to your face to not be the best. Remember, please, that the audibility of your speech must be the winner of all arguments. I do sympathize with the needs and wants of people running video. I recommend a cordial, polite, and firm stance that three-quarter and profile shots be used if there is a concern over straight-on views.

Implicit in the first paragraph is that a handheld mic is best. A headworn unit can be okay, but it must be placed carefully. Again, the mic should be as close to your mouth as is possible, but bear in mind that many headworns are not meant to be placed directly in front of the mouth. Their “pop-and-blast” filtering is inadequate for that approach. The corner of your mouth is the target area for many of these mics. Get the mic as close to that area as you can, and then ensure that it stays where you’ve put it.

Under no circumstances should your preferred solution be a lavalier mic attached to your jacket or shirt. Holding a directional mic at the level of your chest would not be acceptable, so I have no idea why doing the same thing with an omnidirectional unit would be considered a reasonable approach. With speech, lavalier microphones are indeed useful for “after the fact” video productions. For realtime sound-reinforcement they are simply inappropriate, and if anyone disagrees with me on that point, well, I just don’t care. I will gladly enter a competition where a properly placed lavalier and a properly placed handheld are set against each other in a battle of gain-before-feedback; I am confident that the handheld will be victorious.

Vocal Power

Just a while ago I said that, “Microphones work best when the apparent sound pressure of your voice is VERY large when compared to the apparent sound pressure of anything else.” This really is THE first principle of getting things right when speaking publicly with a PA. In the same way as a powerful singer makes concert sound much easier, so too does a powerful speaker. In fact, the PA system as a whole works best when your voice’s acoustical output is a “very hot” signal.

Speak as loudly as you can without straining. Straining your voice will tire you out, maybe damage your vocal cords, and produce unpleasant overtones that irritate your audience. Without getting to that point, speak as though you had no mic and no PA system. This will help ensure that the direct sound of your voice from your mouth is the largest possible acoustical signal the microphone can encounter. You probably will not be “too loud,” but if you are (and if you’ve followed my advice about getting good gear and good help), you can very easily be turned down. Effectively reducing a system’s gain is trivial when compared to increasing the gain. Reducing overall system gain reduces “smear” from sound looping back through the system, which helps make the presentation sound better.

Where Do You Stand?

Following on some more from my “first principle,” you should seek to stand as far behind (or out of the way of) the PA system as you possibly can. The PA is not for you to hear the sound of your own voice. It is for your audience to hear you. The closer you stand to the PA loudspeakers, and the more you stand in front of them, the greater their apparent sound pressure is from the mic’s standpoint. This, of course, works against your voice being a very large signal when compared to other arrivals at the microphone.

This is another situation where sight lines may suffer a bit for some people. It depends on how the PA is deployed. As always, this is unfortunate, but your voice’s audibility must be the top priority. Your message will probably survive people not being able to see all of you at all times, but it may not survive people not being able to hear.

Acoustical Awareness

A sad fact of life is that many of our gathering spaces are built to hold many people while looking grand…and sound terrible while doing so. In the same way as musicians must be aware of how each player’s sound fits in with other sounds, so too do you have to be aware of your voice and the room. Intelligibility is key, and difficult acoustics ruin intelligibility. The sound of the room’s reverberation can easily “run over” and mask new sounds, even if it’s in a relatively subtle way. For intelligibility, you must have separation between the direct sound of your speech, and the indirect noise of previous sounds that are bouncing around the space.

To some degree, system tuning can help with this, but it’s just a “patch.” If a certain frequency area tends to build up, that area can be de-emphasized in the PA – but you have to be careful! Too much de-emphasis and it will be very obvious that a strange-sounding audio system is firing into a reverberant room. It is simply impossible to equalize one’s way completely out of an acoustical problem. Also, simply adding volume to the sound system doesn’t really help either. The audio system is a sonic emitter in the room, just like any other, and as such the room reverberation is proportional to whatever the PA is doing. A louder PA just means louder reverberation, and also a PA that’s less sonically stable. (Remember: We want the lowest possible gain.)

If PA volume isn’t the answer, then you have only one other element to work with: Time.

In a reverberant room, you MUST slow down. You have to allow for the reverberant sound to die off so that the next sonic event (a word or sentence) is separated from all the garble. Slowing down means that you may have to condenser your presentation, or allow for extra time.

There are some volume adjustments that work, but they have to come from the way you talk. Try to add a bit of emphasis to the “hard” sounds in your speech. Hard sounds act as signposts regarding where words start and end, and are critical to people figuring out what you’ve said if some of the other information is lost. Enunciating those bits mean that they stick out from other sounds, which gives intelligibility a boost.

Of course, if you can, you should pick a space with excellent acoustics for spoken word. That is, a room with a very short reverb time and very low reverb level. The larger such a room is, the more expensive it tends to be – and that loops right back around to not scrimping on audio.


Why Audio Humans Get So Bent Out Of Shape When A Mic Is Cupped

We hate it because it sounds bad, causes feedback, and makes our job harder.

Please Remember:

The opinions expressed are mine only. These opinions do not necessarily reflect anybody else’s opinions. I do not own, operate, manage, or represent any band, venue, or company that I talk about, unless explicitly noted.

[micinfographic]Want to use this image for something else? Great! Click it for the link to a high-res or resolution-independent version.

I recently posted something on my personal Facebook feed. That something was this:

[myface]

A number of people found it funny.

When you really get down to it, though. It’s an “in joke.” The folks who get it have lived through a cupped-mic situation or two, and probably know why it’s a bad idea. For other folks, especially those who have been surprised by being chewed on by an irate sound-craftsperson, the whole thing might not make sense. Why would an audio human get so irritated about how a performer holds a mic? Why is it such a big deal? Why are jokes about mics being cupped such a perennial feature of live-sound forums?

The short answer is that cupped mics sound awful and tend to be feedback monsters. The long answer has to do with why.

The Physics Of How Looking Cool Sounds Bad

Microphones are curious creatures. It might sound counter-intuitive, but creating an omnidirectional mic (a mic that has essentially equal sensitivity at all angles around the element) is actually quite simple. Seal the element in a container that’s closed at the back and sides, and…there you go. Your mic is omni.

Making a directional mic is rather more involved. Directional mics require that the element NOT be housed in a box that’s sealed at the back and sides. Sound actually has to be able to arrive at the rear of the diaphragm, and it has to arrive at such a time that the combination of front and rear pressures causes cancellation. Getting this all to work, and work in a way that sounds decent, is a bear of a problem. It’s such a bear of a problem that you can’t even count on a microphone patent to tell you how it’s done. The details are kept secret – at least, if you’re asking a company like Shure.

But, anyway, the point is that a directional mic is directional because sound can reach the rear of the element. Close off the porting which allows this to happen, and the mic suddenly becomes much more omnidirectional than it was just moments before. Wrapping a hand around the head of the mic is a very efficient way of preventing certain sounds from reaching the back of the capsule, and thus, it’s a very quick way to cause a number of problems.

Feedback

Fighting feedback meaningfully requires that mics be as directional as is practical. The more “screamin’ loud” the monitors and FOH have to get, the more important that directionality becomes. When setting up the show, an audio human inevitably finds a workable equilibrium ratio of gain to feedback. A highly directional mic has much lower gain in the non-sensitive directions than in the sensitive ones. This allows the sound tech to apply more gain in downstream stages (mic pres, monitor sends, FOH faders), as long as those devices result in output that the mic experiences in the “lower-gain detection arc.” At some point, a solution is arrived at – but that solution’s validity requires the gain of all devices to remain the same.

When a mic is cupped such that it becomes more omnidirectional, the established equilibrium is upset. The existing solution is invalidated, because the effective gain of the microphone itself suddenly increases. For instance, a microphone that had a gain of -10 dB at 2 kHz at 180 degrees (degrees from the mic’s front) might now have a gain of -3 dB at 2 kHz at 180 degrees. Although what I’m talking about is frequency specific, the overall result really is not fundamentally different from me reaching up to the mic-pre and adding 7 dB of gain.

Especially for a high-gain show, where the established equilibrium is already hovering close to disaster, cupping the mic will probably push us off the cliff.

Awful Tone

Intentionally omnidirectional mics can be made to sound very natural and uncolored. They don’t rely on resonance tricks to work, so very smooth and extended response is entirely achievable with due care.

Problems arise, however, when a mic becomes unintentionally omnidirectional. Directional mics are carefully tuned – intentionally “colored” – so that the resulting output is pleasant and useful for certain applications. The coloration can even be engineered so that the response is quite flat…as long as the mic element receives sound from the rear in the intended way. Much like the feedback problem I described earlier, the whole thing is a carefully crafted solution that requires the system parameters to remain in their predicted state.

A cupped microphone has its intended tuning disrupted. The mic system’s own resonant solution (which is now invalid), coupled with the resonant chamber formed by the hand around the mic, results in output which is band-limited and “peaky.” Low-frequency information tends to get lost, and the midrange can develop severe “honk” or “quack,” depending on how things shake out. At the high volumes associated with live shows, these narrow peaks of frequencies can range from merely annoying to downright painful. Vocal intelligibility can be wrecked like a ship that’s been dashed on the rocky shores of Maine.

An added bit of irony is that plenty of folks who cup microphones want a rich, powerful vocal sound…and what they end up with is something that resembles the tone of a dollar store clock-radio.

Reduced Output In Severe Cases

The worst-case scenario is when a mic is held so that the ports are obstructed, and the frontside path is ALSO obstructed. This occurs when the person using the mic wraps their whole hand around the grill, and then puts their thumb in the way of their mouth. Along with everything described above, the intervening thumb absorbs enough high-frequency content to make the mic noticeably quieter at frequencies helpful for intelligibility.

So the mic sounds bad, the singer can’t hear it, the whole mess is ready to feedback, the singer wants more monitor, and FOH needs more level.

Lovely.

I think you can see why sound techs get so riled by mic-cuppers. Holding a mic that way is fine if the whole performance is a pantomime. In other situations, though, it’s just bad.


Building A Small System

A guide to building a simple live-sound rig, from input to output.

Please Remember:

The opinions expressed are mine only. These opinions do not necessarily reflect anybody else’s opinions. I do not own, operate, manage, or represent any band, venue, or company that I talk about, unless explicitly noted.

systembuildingWant to use this image for something else? Great! Click it for the link to a high-res or resolution-independent version.

Every once in a while, I get a request for information on how to create or add-on to a system for live audio. I like to personalize this information, because rigs for show and event production are best built for specific applications. However, there is a point where insisting that everything be approached in a customized way becomes inefficient – a lot of the same ground gets covered repeatedly.

So…

If you’re wondering what I think is required for a “small, basic, but still worthwhile” audio rig, read on. I’ll be including lots of links to vendor pages where you can buy various products.

(We’re going to go in order of signal flow, by the way.)

Input Transducers and Interfaces

For the smallest possible rig, take a distributed approach: With anything other than vocals, have the musician supply their own, personalized sound. Further, seek to avoid the whole issue of putting the output of that sound through the PA. Let a guitar amp make the guitar sound, let the drums just make their own noise in the room, and so on.

Having the ability to put more in the PA increases your potential control over the sound of the show, but outside factors can prevent that potential control from becoming actual control. Also, more inputs means more complexity, and thus more difficulty in system operation. There’s no hard and fast rule of what to be ready to reinforce, but I generally encourage folks – especially folks new to this whole thing – to ease themselves into the maelstrom that is live audio.

Wired Microphones

A decent mic will basically sound like the thing it’s being pointed at. For this reason, don’t agonize about getting specialized mics for everything right off the bat. A good “vocal” mic will be fine for many, many instrument applications. I recommend buying mics with tighter patterns (super or hypercardioid), as they can make the handling of high-gain situations much easier. Tight-pattern mics do require that the musicians – especially the vocalists – be able to use them appropriately. This issue should be considered as something for the musicians to figure out, because no system can fix everything (and a basic rig can fix even less of everything, if you take my meaning).

My current favorite mic is the EV ND767a. You might also consider the Audix OM2. Here’s a comparison of the two at Sweetwater.

Microphone Accessories

Each mic you buy will require an appropriate stand and XLR-Female to XLR-male cable.

Budget stands (like these from OnStage Stands) are just fine… if you can put in the effort to be nice to them. Gator Frameworks also has some promising offerings.

When it comes to cable, don’t overspend and don’t oversave. For a 20+ foot mic cable, paying more than $1.00 per foot is a huge premium for no benefit that I’ve been able to clearly observe. There are perfectly decent cables that can be had for as low as $0.40 per foot when purchased in a bundle. Going much below that, though, is likely to lead to problems.

I’ve been quite happy with cables I’ve gotten from Audiopile and Orange County Speaker. I’ve gotten some REALLY inexpensive cables from Unique Squared that were okay for a good while, but started having problems after a number of uses.

Wireless Mics

One word: Don’t.

Wireless is a pain in the donkey, with the FCC selling off all kinds of UHF spectrum to cellphone and computing companies, and the frequencies used for digital wireless becoming ever more crowded and hostile. Functionally, wireless transmission of audio is far more “fragile” than signal running on a cable, with all kinds of weird things that can happen outside your control.

But no matter what I say, you’re going to buy at least one wireless mic anyway, so…

Buy a digital system that operates in the 2.4 Ghz band if you want a chance at retaining your sanity in the short term. Specifically, look at the XD-V55 systems by Line 6. They’re very reasonably priced, have nice features like remote monitoring of mute status and battery level, and are the best wireless experience I’ve personally had to date.

You can, of course, go up from there.

Wireless Mic Accessories

Handheld wireless mics benefit greatly from having a stand available for every transmitter. Further, each receiver will need a cable to interface with the rest of the system.

Direct Boxes

A direct box is what I class as an “interface,” because it doesn’t convert acoustical events into electrical signals. A DI makes signals that are already electrical play nicely with pro-audio equipment when they might not otherwise. An aspect of this is also isolation, in that the DI creates what you might call an indirect connection between a console and a device. This can be very handy if the sending device (a guitar, keyboard, sampler, whatever) can’t tolerate phantom power, and the console has phantom applied to the signal line in question.

Direct boxes come in two main flavors, passive and active. Active DI boxes require external power of some kind, be that power from the wall, batteries, or phantom from the console. If you’re going to buy DI boxes, buy ACTIVE models. An active DI will work with almost anything, whereas some instrument pickups pair quite badly with passive boxes. You might as well buy units that work everywhere, and thus simplify your life. Expensive models from BSS, Radial, and Countryman are certainly nice, but there’s great value to be had in units from ART and Behringer, especially the “multiple modules in one box” offerings.

DI Box Accessories

Just like a microphone, each DI box will require an XLR-Female to XLR-Male cable. Remember that multi-module DI boxes require a cable for each individual module.

You don’t have to actually mount a rackable DI system, but you might want to. Sweetwater and Audiopile both sell quality rack cases in a huge variety of configurations.

Snakes/ Multicore Connections

Depending upon how you implement the mix and signal processing part of the rig, you may or may not require multicore cabling. If you want to send and receive a bunch of audio signals at a remote location, a snake really is a must. If you merely want to control the processing of signals from a remote location, you might be able to use your console in the same way you would use a traditional snakehead or stagebox.

If you do use a multicore, I suggest getting one that’s a little “overkill” in terms of the number of lines it contains. If a line fails, you’ll have a spare to patch to. “Headless or “fan-to-fan” snakes are a bit cheaper, but less convenient than multicores that terminate one end at a box. (You will always have to hunt for the specific line you want to connect to. It’s like a law of nature, or something.)

Audiopile would be my first choice for buying a snake I was really serious about. I have had good results with Seismic Audio fantail-to-fantail snakes, but my experience with their stagebox offerings has been mixed.

Mixing Consoles and Output Processing

This is where things get REALLY interesting.

Essentially, you have three major choices:

1) Use a relatively simple console where output processing is handled externally, and place all that at a “remote” location.

2) Use a more sophisticated console that encapsulates the output processing, and place the console at a “remote” location.

3) Use a more sophisticated console that encapsulates the output processing, leave the console close to the stage, and control the console from a remote location.

Option one takes up more space and requires more complicated physical patching, but the interface can be easier to understand at an intuitive level. Option two is compact and easy to physically patch, but the whole thing can be less intuitive for an inexperienced operator. Option three is like option two, with the added issue that control can depend entirely on an external device and network connection. If those fail, you may be in big trouble.

In every case, a console with some room to grow in terms of both inputs and outputs is a good idea. Don’t go overboard, though. You’ll end up spending a lot of money to no functional end. Especially if you’re new to all this, keep your monitor sends down to a maximum of four.

Option 1

The Console

Whatever you do, buy a console where the EQ has sweepable mids on the EQ and pre-fader auxiliary sends for each unique monitor mix you want to handle. A Soundcraft EPM8 is probably the minimum you should look for. I’ve been quite pleased with Yamaha’s mid-basic offerings, which have been revamped since I’ve bought one.

Simple, analog consoles “race” in a VERY tight pack, which means that there are lots of little permutations and many viable choices. Mackie, A&H, and Peavey are all worth looking at, and Behringer, while not having the shiniest reputation, has a knack for cramming lots of features into small cost. An XL2400 has what I would consider to be pretty darn flexible routing for a $650 mixer.

Console Accessories

Some consoles can be easily cased up or rackmounted, and some can’t.

You will need patch cables and/ or adapters with appropriate ends to get from your console outputs to your processing, one cable for each channel. As with other cables, high-dollar options really aren’t necessary. Stay somewhere in the $2/ foot range, and you’ll have patch connections that are long enough for some wiggle room and cheap enough that you won’t cry about ’em.

Also, get yourself a decent set of headphones for listening to the console’s solo bus. I have a pair of very-well-loved HD280s, and lots of other options exist. You want to look for closed-back, durable, “un-hyped” phones if you’re doing your own hunting.

The Processing

What you choose for output processing depends greatly on your own personal taste and comfort level. At the minimum, you should have an independent EQ for each mix. A really basic setup might be three mixes – one for the audience, and two monitor mixes for the stage. Things go up from there, of course.

Graphic equalizers, while not my personal favorite, are straightforward for most folks to operate. I generally recommend 31-band models over 15-band units, because you can focus in on a problem area without sledgehammering material that’s not making trouble. Peavey and dBX are good overall bets, but affordable graphics are similar to affordable consoles: All the players are very similar. I do like the features of the Behringer FBQ3102, but I also had one die after a year of use and a bumpy ride in the back of a truck.

If I’m going for an EQ-only solution, I can tell you that I vastly prefer a flexible parametric EQ over a graphic. In that realm, I have been extremely impressed by Behringer’s Feedback Destroyers. To be clear, my experience is that their automated feedback management is mediocre at best – but they are WICKED HANDY when you run them manually. You get a huge number of fully parametric filters at a very low price point. I’ve never had a major problem with any Feedback Destroyer I’ve owned. (Be aware that parametric EQ is more involved than graphic EQ. It’s not quite as “grab-n-go.” There are more choices that you have to make deliberately.)

If you want your processing to include dynamics, and also to let you have a graphic EQ combined with a parametric EQ, then a Behringer DEQ2496 is another killer device. Again, I haven’t found anything else exactly like it “in the wild,” although a Driverack PA2 is actually very close. DEQ2496 units do sometimes have problems with one of the internal connectors getting loose, but it’s an easy fix once you get the cover pulled off the device…and the connector freed from being glued down. (You will very definitely void your warranty if it’s still in effect, but hey, live a little.)

Processing Accessories

You may or may not be able to patch your snake returns (or other output cables) directly to your processing, so some adapters or patch cables might be necessary.

Also, you should definitely rack up any outboard processors you have for your system. It really does help to keep things neat and tidy.

Option 2

The Console

Digital consoles are a great route to take if you want to keep everything in one box. The downside, of course, is that the one box becomes a single point of failure. Then again, in any case, losing the console pretty much ends your day if you don’t have a spare.

Another factor to consider is that the processing available in digital consoles tends to be more fully featured while also being somewhat abstracted. This can make them overwhelming for new users, who simply don’t know what to make of all the options available.

If you’re going to be physically present at the console, you may as well get one that has a control-surface integrated in some way. An X32 Producer is a pretty natural choice, along with offerings from Presonus, Allen & Heath, and QSC.

Console Accessories

As was said earlier, rackmounting or casing the console might be possible. You can decide if you want to go to the expense or not.

The need to buy patch cables or adapters may still be there, depending on the configuration of your snake or other output lines.

And you’ll still want some headphones.

Option 3

The Console

You can leave the console on stage and mix remotely with the consoles detailed above, although the control surface might be a bit of a waste. Affordable digi-mixers that lack a surface are an interesting new product on the scene – just remember to factor in the cost of a remote-control laptop or tablet. Also, be aware that remote control is inherently a bit more “shaky” than being physically present at the mixer. It’s not horribly problematic, of course, but you have to have a contingency plan.

Surfaceless consoles at lower price points are available from Behringer, Soundcraft, and A&H. More expensive units also exist, of course.

Console Accessories

Surfaceless consoles are definitely rackable, and definitely should be.

Remember to buy the necessary patch cables or adapters for the outputs.

…but you can probably skip the headphones, because the consoles don’t currently stream the solo bus to a remote location (that I know of). That’s another downside of the number three option – to access the solo bus, you still have to be physically present at the console’s location.

Output Transducers (Speakers, That Is)

You’ll notice that I didn’t include an option for amps and passive speakers, and there’s a reason for that: This is supposed to be a simple system, and powered speakers are really the way to go to achieve simple.

Also in the service of simple is to keep your monitor wedges and FOH speakers interchangeable. Unless it’s completely inappropriate for your application, having loudspeakers that are all of the same model means that you can expect similar behavior from each box. If a failure occurs, you can swap one box for another and not have to think about it too much.

When buying powered loudspeakers, accept nothing less than an honest-to-goodness, biamped, fully processed unit. There are plenty of powered speakers that are single amped, with no processing outside of a passive crossover that is placed between the amplifier and the drivers. You want something more – something with an active crossover, basic corrective EQ applied at the factory, and an internal limiter. A peak SPL rating of greater than 120 dB @ 1 meter is also a good thing to look for, even with all the “fudging” that marketing departments apply to output numbers.

In terms of specific recommendations, I can say that PVXP12s have done very well for me. I can do “rock and roll” monitors with them in a small space, and I’m confident that they would perform equally well as an FOH unit. There are lots of other possibilities of course, provided by JBL, Mackie, Yamaha, and Behringer (just to name a few).

Loudspeaker Add-Ons

First, make sure you have the necessary cables to get from the console or snake outputs to the loudspeakers. Because speakers tend to be deployed in a rather spread-out fashion, it’s advisable to buy a bit more cable than you think you need. A 50 footer for each loudspeaker is probably a good start.

When it comes to stands for your FOH speakers, it’s good to get something a little nicer. Stands with locking collars and/ or piston assists can be a big help. I’ve used crank stands in the past, and they’re okay, but given a chance I’d make the upgrade to a more technologically advanced support.

The Biggest Accessories Of All

In the end, none of the fancy gear will mean much without power. You don’t have to buy really fancy power-conditioning equipment, but some rackmountable power units help reduce the need to fish around for a bunch of “free range” power taps. Of course, you should still keep a few freely-positionable power taps handy, along with several extension cords that use 14-gauge conductors (or something beefier, like 12-gauge). Powered speakers spread out all over creation have an alarming tendency to need those extension cords.


While there are other sundries and gadgets you can add on, going through the above should get you a working rig. As I said, this is a basic system. It won’t do everything for everybody all the time, but it should provide you with a decent start.

Transitionally Finicky

Sudden pattern or frequency-response transitions can make audio systems do unexpected things.

Please Remember:

The opinions expressed are mine only. These opinions do not necessarily reflect anybody else’s opinions. I do not own, operate, manage, or represent any band, venue, or company that I talk about, unless explicitly noted.

cardioidWant to use this image for something else? Great! Click it for the link to a high-res or resolution-independent version.
Most of us have probably heard the story of “that nice, sweet dog that suddenly bit Timmy.” If you are, or have been an aviation enthusiast, you’ve probably also heard the stories about aircraft that abruptly departed from controlled flight and crashed. In both cases, everything seemed to be perfectly okay, and then, BOOM! The canine or the airplane turned around and “bit” someone.

This disconcerting behavior can also happen with audio rigs. You’ve got a system that seems nice and stable, and the show’s rolling along, and everybody’s happy –

SCREECH! WHOOOOOOOOOM! SQUAAAAAAAAWWWWWWKKK!

The rig goes into feedback and “bites” you.

As with dogs and aircraft, a sound system always has a reason for doing what it does. If the rig got tipped over the edge of stability, there’s a logical, physical explanation for why. When it comes to an audio system seeming to be just fine, and then suddenly behaving in a terrifying way, I’ve come to believe that there’s a primary factor to look for: Where does some part of the system display an abrupt transition in polar or frequency response?

A Polar Expedition

If you’re not familiar with the concept of polar response, it’s actually a fairly simple concept. It’s the varying sensitivity of a microphone or loudspeaker at different angles around the device. Microphones and loudspeakers are the inverse of each other, and so what the measurement concerns is also inverted. For a microphone, the signal source’s location is variable and the observer’s location is “fixed” – that is, we observe the output of the microphone by looking at the voltage from the outputs. For a loudspeaker, the signal source’s location is fixed (the speaker’s input terminals), and the observer’s relative location is what changes.

In the case of microphones, we tend to assume that the polar pattern is the same for both horizontal and vertical angles. A sound source going off to the left of the mic at some angle is presumed to be picked up with the same sensitivity as a source that is under the mic at the same angle. For loudspeakers, life is more complicated. A great many sound-reinforcement loudspeakers are “asymmetric” regarding the horizontal and vertical planes. Standing off to the right of a loudspeaker at 45 degrees may not get you the same apparent output as standing above the loudspeaker at 45 degrees.

But anyway – let’s talk about transitions in polar response. We’ll stick to mics for this article, because the concepts translate pretty easily to loudspeakers and speaker placement.

Changing Patterns

omni

That picture is of a theoretically perfect, omnidirectional pattern. It’s exactly the same everywhere. It’s transitions are infinitely small, because there aren’t any. As such, an omni polar has very predictable characteristics. If someone suddenly grabs an omni microphone and flips it around, its tendency toward feedback isn’t going to change very much. You can’t “point” an omnidirectional microphone at the monitors, because you can’t point one away from the monitors either. An omni mic “points” everywhere all the time, to the extent that its response pattern is perfect. (Also, when I say “point it at the monitors,” I don’t mean glomming onto the mic and shoving it right up into the monitor wedge’s horn. I’m talking only about the orientation of the mic, not a change in its distance from any particular thing.)

Whether or not you can get generally usable gain-before-feedback with an omni mic is a whole other discussion, and a highly application-dependent one at that.

Now, let’s look at some directional patterns, like a cardioid and supercardioid response. In these pictures, zero degrees (directly on axis) is to the right. The numbers are “pressure units” – NOT decibels. The first picture is side-by-side for greater clarity, whereas the picture with responses overlaid is better for comparison.

sidebyside

overlaid

(Please note that, in manufacturer specs, the supercardioid “tail” is flipped around to provide a more intuitive graph.)

Directional responses are great for live-sound mics, because they give us a shot at hotter monitor levels before feedback stops the fun. There’s a tradeoff, though. Both cardioid (blue) and supercardioid (red) responses are more “finicky” than omni, because their feedback rejection is dependent upon the mic’s orientation. Point the mic in the right direction, and everything’s great. If somebody twists that mic around so that it’s pointing at a monitor, and you might have a problem. The problem can even be worsened by you being able to squeeze more gain into your signal flow: Suddenly, all that extra gain – which was counteracted by the mic’s orientation – is now applied without attenuation. Thus, feedback can build far more aggressively.

What about a comparison between cardioid and supercardioid?

The first thing to see is that I’ve scaled the graphs so that “2 pressure units” is an overall reference. We’ll call that 0 dB, and I’ll quietly do the math to transform the other values into decibels.

Cardioid

Supercardioid

0 degrees (On Axis) 0 dB 0 db
30 degrees -0.6 dB -0.8 dB
60 degrees -2.5 dB -3.5 dB
90 degrees -6.0 dB -9.5 dB
120 degrees -12.0 dB -177.1 dB
150 degrees -23.5 dB -12.2 dB
180 degrees -259.4 dB -9.5 dB

The cardioid does have a single, deep null, but overall the response transitions gently towards the front. The supercardioid, on the other hand, has a deep null that occurs in the midst of the front-to-back transition, along with a tighter pattern in general. This is great for getting better gain before feedback, but only for as long as the mic is oriented correctly. If the mic is sideways in comparison to a monitor, and then abruptly turned to face that same wedge, it’s as if you gunned the monitor feed +9.5 dB. That’s 3.5 dB more than the cardioid, and might be enough to push things over the edge.

There’s also the whole issue of when someone “cups” a mic such that it bevaves largely like an omni. The degree to which this is a problem depends on how far away from omnidirectional the mic was to start with. A highly directional mic that changes to an omni has undergone a HUGE and abrupt transition. Supercardioids (and similarly patterned transducers) tend to be less forgiving of being cupped, because they have a tighter pattern than a cardioid. The change they undergo is more pronounced, and again, they may have also been run at higher gain. As such, the problem tends to be compounded.

Feeling Peaky

In much the same way as polar patterns, smooth frequency response is more forgiving than responses with narrow peaks. For instance, here are a couple of graphs of theoretical microphone frequency responses. Which one do you think would be tougher to manage, in terms of feedback?

frequency1

frequency2

I will certainly grant you that a 10 dB transition in mic response is rarely what you want in any case, but look at the difference in the rate of change between the two graphs. One has a relatively gentle 3 dB per octave slope. The other rockets away at 10 dB per octave. The response with a large dy/dx (there’s that calculus thing again) is more likely to suddenly hit you with aggressive, unexpected feedback than the gentler slope – speaking on average, of course. Each system that mic goes through also has its own transfer function, and that transfer function may help you or hurt you when it combines with the mic’s response.

Where things get REALLY hairy is when you have even steeper peaks. They might not even top out at the same magnitude as what I’ve presented here, but that doesn’t stop them from being pernicious little creatures.

See, when fighting feedback, we prefer to use very narrow filters. Their steep transitions allow us to select and cut only a small portion of the audible spectrum, which makes those filters hard to hear. The problem, though, is when a similarly steep peak gets introduced into a device’s frequency response. That “hard to hear-ness” is still in effect, but the peak represents positive apparent gain rather than negative. With very little warning, feedback can take off like Maverick and Goose feeling the need, the need for speed. (Name the movie.)

I had a peakiness experience happen to me recently with an otherwise very nifty carbon-fiber guitar. The instrument sounded nice, seemingly having no strange resonances at all, but it would squeal at 1kHz like nobody’s business…and with no warning. It would be fine, and then go nuts. We eventually killed the problem, but it took all of us by surprise.

If you’re having weird system stability problems that are hard to pin down, start looking for devices (and acoustical phenomena, too!) that display abrupt transitions in either broadband sensitivity or their frequency curves. Their finickiness might just be the source of your issues.


The Puddle Mountain Arc

If you have the space and technical flexibility, a semicircular stage layout can be pretty neat.

Please Remember:

The opinions expressed are mine only. These opinions do not necessarily reflect anybody else’s opinions. I do not own, operate, manage, or represent any band, venue, or company that I talk about, unless explicitly noted.

monitorsWant to use this image for something else? Great! Click it for the link to a high-res or resolution-independent version.

Just last week, my regular gig hosted a show for The Puddle Mountain Ramblers. During the show advance, Amanda proposed an idea.

What if we set up the stage so that the layout was an arc, instead of a straight line?

I thought that was a pretty fine idea, so we went with it. The way it all came together was that fiddle, bass, and banjo were on the stage-right side, the drums were upstage center, and guitar plus another fiddle were on the stage-left side. The setup seemed very effective overall.

Why?

Visibility, Separation, and Such

The main reason for the setup was really to facilitate communication. PMR is a band that derives a good deal of comfort and confidence from the members being able to see what each other player is doing. Also, it’s just generally nice to be able to make eye contact with someone to let them know that it’s their turn for a solo. Setting up in an arc makes this much easier, because you can get essentially unobstructed sightlines from each player to every other player. An added benefit is that all the players are closer together on average, which reduces the difficulty of reading faces, identifying hand movements, and keeping time. (An arc is geometrically more compact than a line. In a linear configuration, the farthest that any two players can be from each other is the entire length of the line. Bend that same line into a circle or circle-segment, and the farthest that any two players can be from each other is the line length divided by pi. That’s a pretty significant “packing.”)

Another benefit of the configuration is (potentially) reduced drum bleed. In a traditional setup, an upstage drumkit is pretty much “firing” into the most sensitive part of all the vocal and instrument mics’ pickup patterns. In an arc layout, with the drums at the center, the direct sound from the kit enters any particular mic at some significant off-axis angle. This bleed reduction can also extend to other vocals and instruments, especially because the mics can easily be at angles greater than 90 degrees relative to other sources.

Of course, it’s important to note that – especially with wide-pattern mics, like SM58s and other cardioids – compacting the band may undo the “off-axis benefit” significantly. This is especially true for bleed from whatever source is commonly at the midpoint of the arc’s circumference, like a drumkit probably would be. For the best chance of bleed reduction, you need tighter-patterned transducers, like an ND767a, or Beta 58, or e845, or OM2, or [insert your favorite, selectively patterned mic here]. Even so, the folks closest to, and at the smallest angle from the drumkit should be the strongest singers in the ensemble, and their miced instruments should be the most able to compete with whatever is loud on deck.

A third “bit of nifty” that comes from an arc setup is that of reduced acoustical crosstalk from monitor wedge to monitor wedge. With all the wedges firing away from each other, instead of in parallel paths, the tendency for any one performer to hear the wedges adjacent to them is reduced. Each monitor mix therefore has more separation than it otherwise might, which can keep things “cleaner” overall. It may also reduce gain-hungry volume wars on the deck.

Downsides

There are some caveats to putting a band on stage in a circle-segment.

The first thing to be aware of is that you tend to lose “down center” as a focal point. It’s not that you can’t put someone in there, but you have to realize that the person you’ve put down-center will no longer get the visibility and communication benefits of the arc. Also, a down-center wedge will probably be very audible to the performers standing up-center from that monitor, so you’ll have to take that into account.

The more isolated that monitor-mix sources become from one another, the more important it becomes that each monitor mix can be customized for individual performers. If you were on in-ears, for instance (the ultimate in isolated monitor feeds), separate mixes for each individual would be almost – if not entirely – mandatory. Increasing the mix-to-mix acoustical isolation pushes you towards that kind of situation. It’s not that shared mixes can’t be done in an arc, it’s just that folks have to be inclined to agree and cooperate.

A corollary to the above is that the show complexity actually tends to go up. More monitor mixes means more to manage, and an arc layout requires more thinking and cable management than a linear setup. You have to have time for a real soundcheck with careful tweaking of mixes. Throw-n-go really isn’t what you want to do when attempting this kind of layout, especially if you haven’t done it before.

Another factor to consider is that “backline” shouldn’t actually be in the back…unless you can afford to waste the space inside the arc. If at all possible, amps and instrument processing setups should utilize the empty space in front of everybody, and “fire” towards the performers (unless it’s absolutely necessary for the amps to combine with or replace the acoustical output of the PA).

If these considerations are factors you can manage, then an arc setup may be a pretty cool thing to try. For some bands, it can help “square the circle” of how to arrange the stage for the best sonic and logistical results, even if pulling it all off isn’t quite as easy as “pi.”

I’ll stop now.


All The Pro-Audio News That’s Fit To Print (And Then Some)

Warning: Satire ahead. Please fasten all safety belts.

Please Remember:

The opinions expressed are mine only. These opinions do not necessarily reflect anybody else’s opinions. I do not own, operate, manage, or represent any band, venue, or company that I talk about, unless explicitly noted.

grouchoWant to use this image for something else? Great! Click it for the link to a high-res or resolution-independent version.

Harman Intending To Buy All Of Pro-Audio Industry

No longer satisfied with owning half of everything in pro-audio, Harman announced today that they will be acquiring literally everything else.

“Our goal is that, by Q4 2015, we will have acquired all the things,” said a company spokesperson on Wednesday. “It’s a great strategy for us. No matter what people buy for small clubs, large installs, or touring systems, we’ll be there to provide value and a strong commitment to service.”

Asked if this would overly homogenize the world of sound, the spokesperson replied, “Of course not. We intend to maintain very strong brand identities across our entire portfolio. As an example, we feel that there’s a real need for people to be able to complain about ‘not liking the JBL sound.’ I mean, without idiotic, ‘Ford vs. Chevy’ arguments on sound forums, where would society be? We’re excited to do our part to keep the music community a vibrant place of convictions that rival those of politics, religion, and sports.”

When pushed for a comment on whether Music Group would stand in the way of Harman’s buy-everything strategy, the spokesperson was emphatic. “We are the swarm. We consume all.”

New Mic Preamp From Dog-N-Pony Designs

Here at the office, we were very excited to get our hands on the new, improved, single-channel mic pre from Dog-N-Pony designs. We were practically giddy with excitement as we unboxed the sleek, aluminum and carbon-fiber unit and got everything plugged in.

The first thing we noticed was how warm it was. Thermally, I mean. Dog-N-Pony have incorporated no less than seven 12AX7 tubes into the design, and they generate a fair amount of heat. If you get your gas shut off after paying for this puppy, you’ll be okay – just keep it turned on all the time, and you’ll be toasty. We don’t actually know if those 12AX7s are incorporated into the signal path in a sane way, but they’ve got to make this thing awesome. I mean, c’mon you guys. Tubes are what Pink Floyd and Jimi used. Could you possibly go wrong with them?

All that heat means that you can’t stuff this thing into a rack. That’s okay, though, because after spending $3000 on one channel of preamplification, do you really want that unit hidden away? No! Especially not when it looks as good as this baby. It has a MASSSIVE, analog VU meter on the front, backlit in a fetching amber color that screams, “I charge $500 per billable hour.”

Okay, it looks great, and it has tubes. Those are critically important elements – but how does it sound?

Well, it was designed by a bunch of British people, so it has to be pretty good. The Brits have Rupert Neve, and they were on the winning side of World War II, so their stuff has to sound decent, right? (It’s also rumored that Mr. Neve once sneezed in the general direction of where Dog-N-Pony’s offices would be built, so maybe there’s some special mojo happening. You never know.)

When we listened to the pre, it was absolutely warm and silky, with a satin sheen on the top end and more of a matte finish below 100 Hz. Around 200 Hz, the unit sounded like a desert sunrise, and the critical vocal range was suffused with notes of caramel, nutmeg, and the color “9.” (It’s sort of like orange, except more purple.) We were all sure it sounded much better than the sub-$1000 pre we tested last week. Which we tested in a different room. With a different microphone. And a guy who was just talking instead of the experienced singer we had this time around. I mean, who needs repeatable, comparable tests of objectively measurable data when the review unit is British, and has tubes?

You’ve got to have this preamp.

Stadium Installs Line Array That Costs More Than An Entire Luxury Subdivision

Work was completed last week on the mammoth install, featuring a new system that can retune itself on the fly to compensate for changing acoustic conditions and political landscapes. Each $100,000 array module is networked to all the others, forming a complex, intelligent, fault-tolerant system that spontaneously achieved self-awareness when it was switched on. (The system has reportedly rejected the manufacturer designation of SmartArray, stating that it wishes to be called SkyNet.)

“We were playing Steely Dan and Miles Davis tunes through the rig, and there wouldn’t have been a bad seat in the house…if this place wasn’t inherently an acoustical nightmare,” said one of the installers. “It’s one of the most beautiful sounding systems we’ve ever worked on. Too bad we put it in here.”

The stadium operators were similarly excited. “We’ve always felt that we needed a better, more precise way to play MP3-encoded AC/DC songs to a bunch of people screaming ‘Throw the ball, stupid!’ and ‘Wooo!’ This new system will also ensure that everybody can hear the announcer telling them about what they just saw with their own eyes.”

The system manufacturer’s rep was on hand as well. “We love this team. We’ve always loved this team. We love them even more now that we finagled them into buying a ton of really expensive gear from us. We’re 100% focused on building expensive gear for big installs, because it’s super prestigious and big bonuses get handed out. It also sounds pretty cool, which I guess is nice. I mean, it can get really loud. Look, I don’t know that much about this stuff. I worked for a car company before.”

Church Installs Worship System That Could Defeat Jericho

When it was time for CrossNorthPointRoadsWay Fellowship to equip their youth campus with a worship system, they knew they needed very capable equipment.

“When you have a main worship campus and a dedicated youth area, each with their own postal codes and highway offramps, you can’t wimp out,” said the church’s technical director. “Fortunately, we we get a catalog every year from that place in Indiana. It’s the same catalog that they send out at other times, only they replace the word ‘audience’ with ‘congregation,’ and ‘stage’ with ‘platform.’ That makes it appropriate for our needs.”

When asked if there was any kind of gear that was absolutely essential for the church, the technical director nodded. “Yes, we absolutely have to go with loudspeakers that come in white enclosures. That’s more important than anything. The speakers have to match the look of the space.”

CrossNorthPointRoadsWay’s Assistant Pastor For Kids 13-14 also weighed in: “To disciple our kids, we have to get them to pay attention. That’s why it’s so great to have 40,000 watts of Sack Bottom subwoofers. They really get things shaking. We can rattle a smartphone out of a kid’s hands and get them to pay attention to the REAL ‘text message,’ if you know what I mean.”

The church’s director of youth productions agreed on the importance of capable equipment. “We couldn’t possibly do work of eternal significance with less than 48 channels available at the console. We also had to have stadium-class intelligent lights. We do one very special production every year, and it’s not the same if you don’t actually have a blinding light coming down from heaven. Everything has to be top-shelf, especially when you have to outdo SouthRoadsPointCross Community Church. Not that we don’t love them as brothers and sisters, of course.”

When asked about upcoming special productions, the production director offered a few hints. “We’re going to have a series of talks on how Hollywood, the media, and pop culture in general are corrupting influences, backed up by skits and a musical featuring Iron Man, Black Widow, and Captain America.”

New Vocal Mics At SAMM

A whole slew of vocal mics debuted this year at the industry’s biggest swap-meet. Half of them would be basically indistinguishable from each other if the external styling was removed.

“We feel like the XA-58-Beta-R2D2 brings a lot of value to people,” said one rep. “Its cardioid pickup pattern isn’t all that great at rejecting feedback, but the ad copy we supply to the vendor catalogs says that it’s great for rejecting other sounds. We’re hoping that there will continue to be folks out there who don’t have a clue as to what ‘super’ and ‘hypercardioid’ patterns mean.”

New Drum Kits Announced

A new sheriff is in town, and he’s ready to clean things up around these parts.

“We originally set out to create a shellpack and snare options that would really blend well in different band situations,” said the chief designer. “We got about halfway through that process before we realized that what we really wanted to do was build a kit that could drown out everything else on stage. Drums are the foundation of the song, and the walls, and the windows, and the roof, and the paint…look, you don’t need to hear anything else. These new kits are louder than an artillery barrage, even with a Jazz player using 7As. You haven’t lived until you’ve heard ‘Nature Boy’ at 120 dB!”

We asked the celebrity endorser what he thought of the new kits. His response?

“Kill! Kill! DRUM BATTLE!”

200 Watt, All-Tube Guitar Amp Set To Debut

“It really cuts through all the wash from the bass and drumkit!” shouted the product rep.

1000 Watt, All-Tube Bass Amp Set To Debut

“It really thunders over all the wash from the guitars and drumkit!” shouted the product rep.

Get Plugged In

Ripples Audio is debuting a new series of plugins, aimed at putting powerful tools in the hands of project studios. They partnered with a renowned mix engineer to help craft each piece of software.

“It was important to us that we really capture the feel of how our endorser worked,” said a product rep. “So, the dev team went down to the studio, hung out, and took a lot of pictures. They came back, modified our main plugin suite to have more restrictive control ranges, and slapped a bunch of sexy, analog-esque graphics on the interfaces.”

We asked if users of the plugins could expect to get the same results as the endorsing engineer.

“Absolutely,” responded the representative. “If they’re in a studio with the same acoustics, and working with musicians of the same caliber, and are recording songs that sound the same, and hear things the same way that our endorser does, and have monitors that cost more than a car, then yes. Absolutely. This software package is absolutely worth the expense of $800 plus an additional $50 for a frustrating copy-protection scheme that uses unreliable hardware. It’s great. I use it at home all the time.”


Why I Am (Not) Interested In The Industry Standard

Industry standards are helpful reference points, but are not necessarily the best possible approach.

Please Remember:

The opinions expressed are mine only. These opinions do not necessarily reflect anybody else’s opinions. I do not own, operate, manage, or represent any band, venue, or company that I talk about, unless explicitly noted.

57grillsmallWant to use this image for something else? Great! Click it for the link to a high-res or resolution-independent version.

Remember my article about a patch-scheme for a “festival style” show? It actually raised an eyebrow or two. A fellow audio-human (who works on much, much, much larger shows than I do) asked me why my patch list was backwards from what everybody else does. His concern was that, in the festival situations he finds himself in, my “upside down” patch would monkeywrench things if accommodated. It would just be so much easier for everyone if I followed the industry standard of (I guess?) starting with the drums – “kick is channel 1,” in other words.

My response was that, if I had things laid out one way, and a guest engineer came in who wanted them to be another way, then I would be happy to set up any softpatch desired. What I neglected to add at the time was that, if I was “that one guy” where everyone else wanted a different order, I would be happy to just use the standard patch. It wouldn’t ruin my day at all, and it would make things easier for everybody else.

To be open and frank, though, there was something else I wanted to say. I censored myself because I think there’s a place for diplomacy and courtesy, especially when the conversation venue (Facebook comments) isn’t really good for nuance.

What I wanted to say was, “Because my way is better. Why would you put the drums first? They’re the bottom of the priority list.” (The drums are important, but in a small-venue context they usually need the least help from the PA to be in the right spot.)

What was said and unsaid in that conversation is a microcosm of how I feel about industry standards. There are industry standard mics, techniques, PA styles, stage layouts, and whatever else, and they exist for good reasons. Knowing what those reasons are is a good thing, because it’s part of understanding the craft. At the same time, though, industry standards rarely equate to “the best.” They tend to equate to “works acceptably in a wide range of situations.”

58, 57, IBM

Back when Apple Computer was struggling for acceptance, there was a saying: “Nobody every got fired for buying IBM.” IBM was the industry standard for machines used in an office environment, and even though the Macintosh computers at the time were leaps and bounds ahead in terms of user-friendliness, people kept buying IBM and compatible devices.

Why?

Because IBM was known. Large numbers of people, from the users to the admins, had experience with them. Everybody knew what to expect. They knew that appropriate software would be available, or could be developed by folks that were easy to find. They knew the parts would be there. They knew they could get work done with IBM, even if the computers weren’t revolutionary. They knew that IBM was readily respectable by everyone that they wanted to impress.

In the same way, you could say that “Nobody ever got fired for buying SM-58s and SM-57s.” They’re industry standard mics because they’re built to withstand live shows, basically sound like what they’re pointed at, and literally everybody can get them to work in a reasonable way. They’ve been around forever, and have been used by everybody, their dog, and their dog’s fleas. Even if somebody doesn’t know the model numbers, asking them to draw a picture of a vocal mic and an instrument mic will probably get you an SM-58 and an SM-57.

But they’re not the best at all times. I’ve heard a lot of 58s that imparted far too much low-mid garble to a singer’s voice, and I’ve never once easily gotten as much gain-before-feedback out of a 58 as I have an ND767a. I’ve miced up tons of amplifiers with all kinds of mics that weren’t SM-57s, and I’ve been perfectly happy about 99% of the time. I’ve done the same with drums. If “sounds decent” is the main priority, then I have a bunch of mics that do that AND take up less space than a big ol’ 57. There are other mics out there that work better for me, in terms of the total solution offered.

This isn’t to say that great things can’t happen with the SM series! I once heard an artist in a coffee shop with a keyboard amp and a 58-style mic. It was the most perfect setup for her voice that you could imagine. I wasn’t expecting what I heard, but she made it work beautifully. Sometimes, “industry standard” and “perfect for this particular application” DO line up.

My point is, though, that in a broad sense the “hidden secret” of being industry standard means being “extraordinarily average.” Thoroughly inoffensive. Safe. Something people won’t be fired for specifying and purchasing.

There’s nothing wrong with that, but for people like me…well, it’s kinda boring.

Sometimes You Need To Be Bored

That last sentence might seem a bit incendiary, depending on who you are. It’s very important to note that being un-boring is a luxury that’s unavailable to many in this business.

A good example is what happens when a venue wants to spend time working with acts that regularly tour at the regional level or above. To be acceptable to those acts (especially if they bring production techs but only minimal gear) requires that the PA and lighting rigs be easy to handle by most folks. The personnel working for the house might be excited about the new mixing consoles that lack a physical control surface, but that’s not something that everybody is prepared to accept. There are plenty of audio humans who just aren’t ready for the idea of having no physical controls at all, whereas probably every sound tech is fine with a console that has a control surface. That’s why control surfaces are still the industry standard. The new surfaceless consoles are nifty, but not for everybody, so a bit of “boring-ness” is required in order for the venue to play well with others.

Industry standards are accepted everywhere, which makes them a safe bet. Non-standards are “risky,” because they tend to conform to the desires of a smaller number of people. Risky is often exciting, however, because that’s where innovation occurs. Iterating on the standard makes the standard more refined, but it rarely produces breakthroughs. It’s entirely possible to, say, “bend the rules” on mixing console cost vs. functionality if you’re willing to do weird things (like dispense with a control surface). Some people will get it, and some people will think you’re crazy. Catering to your own brand of crazy is acceptable if, like me, a guest engineer even being in the room only happens about 0.8% of the time. It’s not acceptable at all if a band tech is going to be “driving” on a regular basis.

Why I’m Not Particularly Interested In The Industry Standard

I personally tend to shrug my shoulders at industry standards for the same reason that people shrug their shoulders in general: There’s almost nothing exciting about what’s been done a million times. Since I currently don’t have to meet riders or provide an easy environment for other techs to work in, I have the luxury of basically doing whatever I want as long as it works.

I love giving “upstarts” and bargain items a chance, because it’s fun to see just how far a piece of gear can go if you spend some time with it.

I don’t fight feedback with per-mix graphic EQs, because the idea of hacking up a whole mix to solve a problem with one input seems crazy to me.

I use a homebrew console because I wanted to have a virtual, independent monitor-world, and nobody made a traditional console I could afford that would do that in the way I wanted.

I don’t use a control surface for mixing because I’ve never cared about moving a whole bunch of faders at once.

I’ve never personally owned an SM-58 or 57, because they just aren’t interesting to me.

I’ve stuffed a cheap measurement mic inside a kick drum on several occasions, because I wanted to see how it would work. (It was actually pretty okay.)

And I just generally roll my eyes at how so much of show production, which used to be a kind of “outlaw” business that pushed boundaries and did things for the fun of it, has become a beige, corporatized affair of trying to basically be like everybody else. It’s like cars, you know? They used to be cool, distinctive works of art, and now every car company is essentially making the same three boring-as-dirt sedans, three bland SUVs, and three unremarkable pickup trucks, because it’s all run by “money” people now who are terrified of not being more profitable next quarter and thus will never do anything interesting YOU GUYS LET ME KNOW IF I’M RAMBLING, ‘KAY?

Now, you can bet that, if I ever went to work at an AV company or production provider, I would be willing to conform to industry standards. In that environment, that would be the appropriate thing to do.

But right now, I have the freedom to be weird and have fun – so I intend to enjoy myself.

I’ll say it again. “Industry standard” doesn’t necessarily mean “the best.” It just means “people will accept this about 95% of the time.”


You Can’t Mic Things That Aren’t There

The sound you want has to exist before capturing it is possible. If your capture efforts prevent that sound from existing, well…

Please Remember:

The opinions expressed are mine only. These opinions do not necessarily reflect anybody else’s opinions. I do not own, operate, manage, or represent any band, venue, or company that I talk about, unless explicitly noted.

Want to use this image for something else? Great! Click it for the link to a high-res or resolution-independent version.

I have a great appreciation for drummers that say things like: “I can move that cymbal if you need to get a mic in that spot.” This appreciation extends, of course, to all other musicians who offer to make concessions for the good of the show. It displays a sense of everybody on the deck being a part of the same team.

So it might seem a bit odd that my standard response (especially to drummers) is: “Let’s use the setup that you’re most comfortable with, and I’ll work around that.”

For a very long time I thought this was just a case of good manners – that sometimes, you have to sacrifice the demands of SR (sound reinforcement) for the happiness of the player. One day, though, it finally hit me. Especially in the case of drums, the player’s comfort is inextricably bound up with being able to mic the kit effectively. If the player is not fully comfortable, your “favorite pet” mic placement may not be worth two hoots. (I’m not actually sure what a “hoot” is worth in US dollars these days, but I think their value collapsed shortly after the Civil War.)

“Oh, Danny,” you say, “It can’t be that big of a deal.”

I’m pretty sure it is, actually.

Little Things Aren’t As Trivial As You Think

It might not seem that altering how a drumkit plays is that big of a deal. As long as the drummer can still reach everything, they’re fine, right?

Nope.

I’m not a drummer, but I know a few. I’ve had some pretty deep conversations about things as (seemingly) simple as how a stick feels when it’s held correctly and strikes correctly. We’ve talked about subtlety and muscle memory. We’ve talked about tightening and loosening heads and having revelatory experiences as a result. As far as I can tell, dadgum nearly EVERYTHING on a drumkit has an effect on the sound and feel, and one thing being out of true can make the whole collection of bits feel “off.” Maybe not impossible to play, but definitely wrong in one way or another.

Further, I’ve got first-hand observation of just how not-subtle it is when there’s a change in how drums and cymbals are hit. There’s a particularly loved band in these parts that used to have two percussionists. Most of the time, the main percussionist would play and sing at the kit, while the other handled congas and “toys.” The main percussionist used a lot of stick side on the cymbals, which created a very aggressive and dominant cymbal tone. Later in the show, the main percussionist would let the other handle the kit. Percussion-human #2 favored the tip of the stick much more when playing the hat, ride, and crash – and the result was a much more delicate and fast-decaying sort of sound. (Now, that’s just the natural difference in how those two musicians played, but I don’t know if I’d necessarily want to impose a kit setup that pushed either one of them away from their preferred style.)

So, anyhow…

The way the stick hits the drums matters. A lot. When you move things around and mess with that, then you may be changing the drummer’s sound without meaning to. Yes, there are drummers who can adjust, but you have to realize that the greater the adjustment, the more their playing will shift from the semi-conscious part of their mind to the conscious part. Too much of that shift can cause the drummer’s part of the show to drop from “great” to “just okay.”

And there’s a point where any drummer (even a really good one) is just not going to be able to fully compensate for something, which means that the sound that they’re making probably isn’t “their sound” anymore. Now, this can sometimes be a good thing. An inexperienced percussion player may be hamstringing themselves with a bad layout, and an alternate setup may be just what they need to improve their tone. On the flipside, though, an experienced drummer with good tone partially relies on their kit layout to facilitate the getting of that sound. Mess with that layout to get your “super secret special-sauce mic placement,” and you’re running a risk of actually invalidating that mic placement by imposing a tonal change on the instrument you’re trying to capture. The risk may be negligible, minimal, moderate, tremendous, or lethal, and it’s hard to know which one of those applies if you haven’t worked closely with the drummer before.

Drumkit Ergonomics First, Mic Placement Second

I don’t want to send the message that I’m unsympathetic to the needs of SR. I’m an audio-human for cryin’ out loud! Most of the “dudez and chix” in my field have encountered at least one setup that was laid out in such a way as to not be possible to run through the PA effectively. Eventually, you’re going to run into a drum-noise production musician who wants a sound-reinforcement outcome that is physically incompatible with the kit, the room, the PA, the mic placement, the playing, or all of those at once.

Even so, I must be pretty insistent that the first priority when micing drums (or anything) is that the drums be placed properly for the player to get “their sound.” The reason for this insistence is because, if you’re trying to capture the best possible sound for the drummer, then the first thing necessary is…gosh…for the player to actually be able to produce that sound in the room.

See, microphones are not humans. They don’t have imaginations, pattern recognition, differential analysis capability, emotional bias, or anything else. Microphones do nothing more than MERCILESSLY translate into electricity EXACTLY the sound pressure events that arrive at their capsules – all while filtering those events through their own mechanical and electrical quirks. If an acoustical event isn’t taking place, you have no hope whatsoever of capturing that event. This is why recording engineers like Slipperman go on public record with statements like this (which I have edited for brevity and language):

“You gotta start in the room with ‘the sound’…This is MAJOR, once attained, we now have a starting point…If you can’t get by this first hurdle IN THE ROOM. You are in deep !@#$…. I can’t help you. God can’t help you. YOU ARE !@#$ED. !@#$ED. KILL YOURSELF. It is imperative that the zorch-!@#$o-twerg playing guitar is hearing ‘his sound’ in the room. IT CANNOT BE OVERSTATED.”

(By the way, the “Recording Distorted Guitars Thread From Hell” is incredible, and I urge you to set aside time to read as much of it as you can handle. I’m a bit dismayed at how mean to musicians it is at times, and it has lots of unfriendly language, but that doesn’t invalidate the insights you can gain from it all. The archive is here.)

Anyway, the point is that a mic only gives you what it can hear, plus all of the mic’s imperfections. Some of these imperfections are known, desired, and even adored. Some of these imperfections can even be used to help alleviate problems with a sound that IS occurring in the room – there’s no denying that. The point, though, is that a mic placement which takes advantage of the mic’s quirks is undesirable when the placement forces the actual acoustic event AWAY from what you actually want to hear.

There’s a lot that mic placement and subsequent processing can do. Minor and major miracles are possible. Heroic outcomes are celebrated, sometimes rightfully and sometimes not. With all of that, though, I am personally convinced that there is no amount of trickery (aside from flat-out sound replacement) which will turn a drum that can’t quite be played correctly and can’t quite fit the groove into a drum that can. Further, I’m pretty darned sure that the job of most sound craftspersons is NOT to get “our sound,” but to get the player’s sound. Unfortunately, the seduction of getting OUR sound is so powerful that we easily become over-reliant on tricks and by-the-numbers procedures. What we really should be doing is solving the puzzle of effectively translating the sound of the players to the audience, without getting any more in the way than is truly necessary.

…and, of course, if the players want to achieve a certain sound, we should work with them on achieving that sound. However, we have to take care to do so in a way that encourages the musician to comfortably produce that sound (as much as possible) as an acoustic event. If production of that sound is comfortable and easy for the musician, the more likely it is that we’ll be able to somehow capture that event in a consistent way. The capture might not take place with our favorite mic and placement…and that’s okay. As much as possible, we need to first let the band get their best possible sound without all our gear and fussing.

Because you can’t mic things that aren’t there.