Tag Archives: Vocals

Buying A Vocal Mic

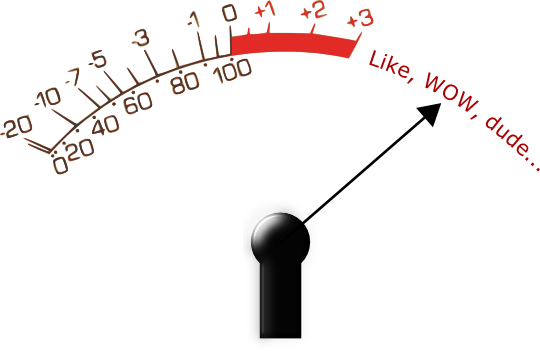
Sound quality is important, but it’s not at the top of the priorities list.

Please Remember:

The opinions expressed are mine only. These opinions do not necessarily reflect anybody else’s opinions. I do not own, operate, manage, or represent any band, venue, or company that I talk about, unless explicitly noted.

As a live-audio tech, I’m often the guy who supplies all the mics. As such, I end up picking microphones that work for me in a variety of situations. My “favorite pets” are usually the transducers that work without a fuss on 90%+ of whatever they get pointed at. It really isn’t about what’s stunningly stellar for any particular vocalist or instrument rig, because there isn’t time to figure that out directly.

What you might think, then, is that buying a mic for yourself as an individual vocalist would be an exercise in different priorities. At an intuitive level, it makes sense that you would put most of your effort into finding a transducer that sounds amazing when coupled with your voice.

…and of course, you don’t want to pick a mic that makes you sound bad, or is downright painful to listen to.

But…

What’s not intuitive is that you will probably be best-served by satisfying a different list of priorities. That priorities list is basically the same one that a pro-audio human uses – it’s just that you meet it in ways that are specific to you, instead of ways that are generally applicable.

Priority 1: Gain Before Feedback

The most beautiful sounding mic for your voice is completely worthless if you can’t be heard. The most durable mic on Earth isn’t worth a dime if you’re completely and unintentionally buried in the mix. The mic that you could afford “right now” that squeals like a pissed-off toddler and howls like a talkative husky? It just effectively made the spendier mic even more expensive.

The most important thing to look for in a mic for stage-vocals is that it, when coupled with your performance style, can have sufficient gain applied for you to be heard clearly – both onstage and out front.

A complete discussion of everything that effects GBF is beyond the scope of this article. However, there are some rules of thumb that can help you narrow things down a bit:

  • You don’t need to worry about the microphone’s sensitivity or overall output. You can think of mic sensitivity as a sort of fixed, pre-preamp gain. It doesn’t necessarily buy you greater feedback rejection. It dictates how much preamp gain is required to get the mic output up to a voltage that’s good for other devices…and that’s it.
  • You do need to think about the mic’s polar pattern. Mics with tighter patterns, like supercardioid and hypercardioid models, can be more resistant to feedback when used correctly. The tradeoff with a tighter pattern is that it’s easier to cause feedback by “cupping” the mic, and you have to be much more careful not to move “off axis” during your performance.
  • You also need to think about where the mic’s capsule is placed. Certain mics achieve better GBF by putting the capsule very close to the grill – it’s just basic physics. The tradeoff is that you only get the benefit of this placement if you are willing to park your face right on the mic. If you’re not willing to do this, then any benefit of “right up on the grill” capsule placement is lost.
  • You don’t necessarily need a mic with “laser flat” frequency response, but you should try to find a mic where the response is “smooth.” Feedback problems are exaggerated by mics with narrow peaks in their response, because the peaks are disproportionately disposed to ringing compared to the frequencies around them. If a mic has a “response peak” or “presence boost” that’s been designed into the capsule, it’s best if the peak or boost covers a wide area – say, two octaves or more.
  • Even though a flat response isn’t imperative, you should be wary of mics that are overly “hyped” in one frequency range or another. If a monitor or FOH rig also has proportionately higher gain in the same frequency range, you may experience problems. VERY exaggerated response can cause feedback even if the live-sound rig doesn’t have higher gain in the same range.

Priority 2: Reliability

I chose “reliability” over “durability” because I think there’s more to this factor than just being able to handle wear and tear. A reliable mic stands up to being transported and accidentally dropped, but it also “just works” without being finicky.

The second most important thing to look for in a stage-mic is that it should be resistant to accidents, and require as little external or specialized equipment as possible.

So – what does this mean?

Well, for one thing, it means that condenser mics are less reliable than dynamic mics. It’s not that a condenser mic can’t be made to be quite durable. The drop in reliability comes from the condenser needing phantom power to work. It’s possible to be in a situation where you don’t have phantom available for the mic. It’s also possible to have phantom, and forget to engage it. The mic may be rock-solid, but it becomes effectively less reliable.

(This isn’t to bag on condenser mics, by the way. A condenser may, in fact, be the right mic for you. You just need to be aware of the downsides.)

There are, of course, all kinds of other considerations. If a mic needs a special, odd-sized clip to fit on a stand, it’s effectively less reliable. If its XLR connector has trouble mating with certain mic cables, the microphone is effectively less reliable. If the mic has a switch that’s a little too easy to disengage, the unit is effectively less reliable. If the mic has extremely high or low sensitivity, it’s effectively less reliable.

You might say that another way to express “reliability” is “resistance to unexpected events.” If you can cover the unexpected events by carrying more equipment (a mic pre with phantom power, your own cables, spare mic clips, etc), then you can increase a finicky mic’s reliability.

For the record, the most reliable stage-vocal mics are dynamic units with thick, metal cases, and capsules with sensitivities of roughly -55 dBV/Pa (about 1.7 – 1.8 mV). They require no phantom power, stand up to abuse, and work with the gain ranges available from most preamps.

Priority 3: Great Sound

This might seem like an obvious factor, but it still bears some discussion. You have to think about which mics will sound great on your voice, and in the performance situations that you find yourself in the most. A mic that sounds fantastic when you listen to it in headphones is great – if everybody’s going to be listening to it in headphones. A mic that sounds divine at the venue you only get to play at once a year isn’t a good choice if it’s unflattering through the PA and monitor rigs you play through every other weekend.

Further, a mic has to work well with your performance style. This is similar to the considerations involved with GBF. If the unit is breathtakingly beautiful only when you’re right on it, and you almost never get right on the mic, then you should probably pick something else. On the flipside, if you always have your face planted on the grill, and the mic sounds terribly muddy when you do, then you might want to pick something else.

I should definitely point out that you can be VERY surprised by what works well and what doesn’t. Some folks think that the only way to get a great vocal is with a super-spendy mic, but I once heard Katie Ainge sing at a coffee shop with an inexpensive mic connected to a keyboard amp.

It was one of the most beautiful and perfect vocal sounds that I’ve ever heard.

So…How Do You Test For These Priorities?

The actual nuts and bolts of figuring out which mic is right for you look like this:

  • Do some research, either empirically or online. If you play at a bunch of different places with different mics, make note of when you could hear yourself, were feedback free, and you liked the overall sound.
  • Most mics can’t be returned once purchased, so either borrow or rent the units you’re interested in.
  • At rehearsal, try the different mics you’ve gathered up. Feed the signal through a monitor wedge to find out which ones are feedback resistant while sounding as nice as possible.

Recommendations

To help narrow down the bewildering array of choices to be had in the vocal mic arena, here are a few transducers that I’ve had decent experiences with:

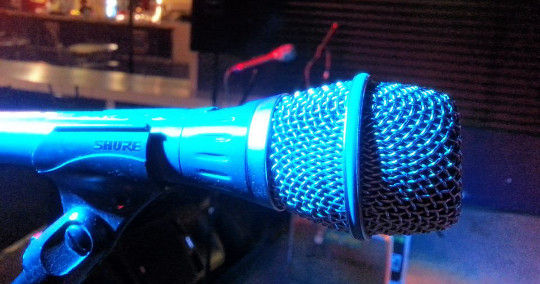
Shure SM-58 – I’m really not a fan of the 58, but that doesn’t make it an invalid choice. Most 58s that I’ve run across have ended up sounding muddy, with a rolled-off top end, but there are some voices that they’re just perfect for. The SM-58 has a cardioid pattern, workable GBF, and is capable of surviving a LOT of punishment. SM-58s seem to be slightly more forgiving of shaky mic technique than some other products.

Shure Beta 87a – These are mics that Stonefed carries with them for road shows. I would characterize them as “pretty okay.” In certain situations, we had some issues with feedback at very high frequencies (in the range of 15kHz). Their clarity can border on “whininess” in some situations, and they have more mud than I think a condenser ought to have. I’d probably cut these mics more slack if they weren’t $250 a pop – to me, that’s a lot of money for something that isn’t my favorite. The “a” units are supercardioid, so you need to stay on axis and avoid cupping the grill.

Sennheiser e835 – Bought singly, an 835 costs about as much as an SM-58…but I’ll take an 835 over an 85 any day of the week. These mics seem to have far less of the “Shure-standard mud,” coupled with a crisp top end. That same crispiness may be a bit much, depending on your tastes. GBF on these mics has rarely been a problem for me, but every so often I’ve had some trouble with ringing at low frequencies. An 835 is a cardioid device.

Sennheiser e822s – A major advantage of the e822 is that you can still find it in packages for about $50 a unit. These mics are surprisingly good for the price. I personally own a handful of them, and they have been just as reliable as more expensive units. I personally prefer the sound of these mics over that of an SM-58, but they do still have a bit of mud and garble to manage. The GBF on an 822 seems to be comparable to other mics I’ve used – sometimes even a bit better. Sennheiser e822 units are cardioid.

Audix OM5 – These mics are VERY crisp. So crisp, in fact, that you can really tear people’s heads off if things get loud. On the other hand, I’ve heard these mics deliver live vocals that sounded like a world-class studio recording. Their GBF is definitely “pro-grade,” although their marketing might make you expect miracles that they can’t deliver. OM5s are hypercardioid, so they’re best for people who aren’t shy about sticking their face to the mic.

Electrovoice N/D767a – The 767a is one of the few mics I’ve heard that seems to get the top end exactly right. They have nice clarity without being overhyped. The bottom end of the frequency response is okay, but these mics do seem to suffer from breath noise and plosives more than some others. They don’t display as much muddiness as other mics, but some situations will still require a good bit of EQ. The GBF on these supercardioid mics seems to be on par with other, professional level units.


Some Handy Mics

A video where I discuss the pros and cons of some of my most-used microphones.

Please Remember:

The opinions expressed are mine only. These opinions do not necessarily reflect anybody else’s opinions. I do not own, operate, manage, or represent any band, venue, or company that I talk about, unless explicitly noted.


The Appreciation And Care Of Strong Singers

Strong singers are great to work with. You just have to remember to use the right strategies.

Please Remember:

The opinions expressed are mine only. These opinions do not necessarily reflect anybody else’s opinions. I do not own, operate, manage, or represent any band, venue, or company that I talk about, unless explicitly noted.

I used to do a lot more work with exceptionally strong vocalists. In the period from 2005 – 2010, I was the operator of an all-ages music venue. In Salt Lake, if you were all-ages and all-genre, you did a lot (A LOT) of heavy music. Death/ Black/ Doom/ Whatever Metal. Hardcore. Screamo.

Pretty much every night, you would encounter vocalists who could produce levels that were surprising, staggering, or even frightening.

Nowdays, I mostly encounter vocalists with average to slightly-above-average power. As such, I have my mic-pres set up to afford about 9 – 15 dB of headroom to the singers I have around most often.

Every once in a while, though, I get a big surprise. When that happens, I have to adjust my tactics accordingly.

A Surprise From The Daylates

Picture the scene.

An Americana band called The Daylates has brought their show to Fats Grill. They’re a quartet of highly personable dudes who can REALLY play.

Plus, the lead guitarist’s actual, honest-to-goodness name is John McCool.

Seriously, when someone rolls up to a venue with “McCool” stenciled on their roadcases, things are about to get extremely real.

Anyway.

At this last show, we didn’t do a full-on check. We got tones for all the instruments, spread some things around in monitor world, and confirmed that the mics were audible – but we didn’t actually do a song. What I ended up with was a “ballpark” rock-band mix where the vocals had a very healthy amount of gain applied on stage and in the house.

And then, the actual show started.

Brian, the vocalist, got on the mic and promptly blew the band away. The backline was completely swamped by the lyrics…as in, the band was almost a whisper in comparison. He drove the console’s input stage into audible clipping. The low-mids and lows from monitor world were outrunning the “clarity zone” in FOH by a wide margin. I was hammering the “sane level enforcement” limiter on the console’s main output.

In a word: Dang.

Obviously, I was going to have to make some changes.

Using The Tools

Being able to really sing in a rock-band context is a mix of both talent and practice. In essence, it’s all about good “tool use.” The first tool is your own body. The second tool is the microphone.

Really strong vocal inputs come from two things.

The first thing is that the singer can actually “bring it to the table.” Actually being able to vocalize with serious output, great tone, and correct pitch is a major skill. Also a minor one. And Mixolydian too, not to mention all the other scales and modes out there. THAT’S A LITTLE MUSIC JOKE, FOLKS. Please, try the veal.

Anyway.

The second secret to a super-strong singer is that they get up-close and personal with the microphone when they’re singing at or below their average level. That is to say, a vocalist should be right up on the mic most of the time. If they’re going to get really loud in proportion to the rest of the show, then backing off a bit is “good form.” The “proportion” bit is very important. For a good number of metal vocalists, their average level and maximum level are basically the same – so they should be right on the mic at all times. For other folks, the range is wider.

…but why be right up on the mic?

Ironically, separation.

A singer’s proximity to the microphone element is (effectively) a “force multiplier” for their vocal strength. As many audio techs have said in a variety of ways, “the loudest noise at the capsule wins.” For a given sound pressure source, the apparent sound pressure level increases as distance decreases. So, if a singer wants to be clearly distinguished from all the sources behind them (drums, amps, etc), their chances go up significantly if they are – literally – right up in the mic’s grille. It’s essentially a classic signal-to-noise ratio issue, and proximity to the mic tilts the ratio in favor of the “signal,” that is, the vocalist.

Now, if you’re like Brian of The Daylates, what you’ve got is tremendous natural power coupled with a willingness to be as close as physically possible to the microphone element. This results in an excellent signal-to-noise situation, in addition to a very “hot” signal from the microphone, and some combination issues between monitor world and FOH.

In such a situation, the audio tech needs to be mindful of, and adjust for, a couple of major factors.

Gain and EQ

Mics can have “hot” output from receiving a lot of input, having a high-output element, or both. An important thing to note is that mic output which is proportionally hotter due to a high-SPL signal is a good thing. It lets you maintain your final system output level for that signal, while running at a lower gain. This increases system stability.

(This does NOT apply for mics which simply have high-output elements. The sensitivity of the element is a kind of fixed gain, so reducing the downstream gain just gets you back to the same overall gain as you would have had for a different mic. This being the case, there’s no stability benefit.)

With a vocalist like Brian, you do need to reduce your preamp gain to keep the signal out of clipping. That’s exactly what I did.

What did NOT happen, however, was a preamp gain reduction significant enough to restore the usual balance that I have between FOH and monitor world. Everybody on deck seemed to be happy with the lead vocal blend as it “settled in,” so there was no need for additional changes. What this meant from the FOH perspective was that the vocal started out a bit muddy.

Why?

Beyond just the simple fact of the monitors being louder, their tonal balance was different. This is a side-effect of having the vocalist very close to the microphone element. Single-element directional mics work by creating conditions necessary for audio traveling to the rear of the element to be significantly more delayed than it would be otherwise. As a result, the audio arriving at the rear of the mic is out of phase with the audio arriving at the front. This effect is different at different frequencies. For a given delay time, low frequencies will generate a smaller pressure difference than higher frequencies, because they have less “cycle time” available. This being so, the element has to be increasingly damped at higher frequencies to get an overall response that’s actually pleasing.

When the singer gets right up on the mic, the overall sound pressure at the capsule increases. However, the high frequencies are more damped than the low frequencies. This means that the effectiveness of increasing proximity to the element is greater for low frequencies than high frequencies. This is what causes “proximity effect” – the boost in tonal richness when a singer is close to the microphone.

Now, then…

In a small-venue situation, the monitoring on deck interacts – greatly – with the sound from FOH. Part of the tech’s job in a small room is to get a nice balance between the “monitor wash” and the PA that’s meant to cover the audience. In a reasonably decent room, the monitor wash is mostly midrange and below. The high frequencies get soaked up to some degree. As such, the contribution from the FOH PA will need to have less midrange and low-frequency content…unless FOH is completely overpowering monitor world.

In a small room, completely washing out the monitor spill with FOH is usually – to use formal terminology – way too !@#ing loud.

So, what I ended up with was a much louder than normal monitor contribution, and (because of proximity effect) that contribution had a lot of low-mids and bottom end. Like I said, the vocals were a bit muddy “out of the gate.”

The fix was to aggressively high-pass the vocals in FOH, while applying some mild taming to the low-mids and bottom end in the monitors. You don’t want to get crazy with changing the monitor mixes, because you can’t necessarily be sure that what sounds great at FOH is actually tonally pleasing to the players on deck. At FOH, however, you can get as nutty as you like, because you probably have a pretty good idea of what the audience is hearing. High passing the vocals (or cutting away the general area where monitor world and FOH are combining) lets you use your FOH power for what really matters – the high-mid and high frequencies which govern vocal intelligibility.

With the FOH audio trimmed to work well with the monitor wash, the mix cleared up nicely.

The bottom line is that a powerful singer who is willing to get close to their mic is a joy to work with. You just have to be ready to do your part.


Buy A Little Amp

Large, powerful amplifiers were necessary in the early days of rock and roll. Not anymore.

Please Remember:

The opinions expressed are mine only. These opinions do not necessarily reflect anybody else’s opinions. I do not own, operate, manage, or represent any band, venue, or company that I talk about, unless explicitly noted.

Nothing screams “Rock Band” like lots of gear. I myself will readily admit it: I LOVE the look of big, “ugly,” powerful, solidly-built amps and speaker cabs. You get all of that into a room, and by gum, everyone knows that you mean business.

Having people think that you mean business is a really good feeling. Heck, it’s an addictive feeling.

But it’s just a feeling.

What counts a lot more than looking like you mean business is to actually mean business, and then prove it beyond all doubt with your actual music. Proving you mean business in the small-venue context doesn’t require a lot of gear. It simply requires that you have enough gear.

Sure, you do want a bit of “cushion” or headroom, but a whole ton of it isn’t necessary. In fact, it can even be detrimental. We’ll get into that in a bit – but first, let’s talk about where the “big gear” thing came from.

The Days Before PA (As We Know It)

Way back when, in the days when men were real men, women were real women, and cars cost about as much as five tanks of gas today, you could count on one general rule for live-sound reinforcement:

You either made enough noise acoustically, or you had a dedicated amp.

The exception to this (but not by much) was the vocalists. Each vocalist might not have had their own PA, but the typical reality was that the PA only had a handful of inputs – and the PA only did vocals. The idea that you would put all the instruments through one sound rig was a foreign concept.

As a result, if you were doing a big show, you needed big amps. The drums might carry pretty well, but if you were going to get that guitar solo all the way to the back row, you needed serious firepower. Even as PA technology grew by leaps and bounds, the notion that guitarists and bass players would make all their own noise stayed entrenched. Hey – they already had the gear, right? Why fix what isn’t busted?

At this same time, the founding fathers of amplified guitar and bass were creating the tones and textures that would define those instruments for decades. They were getting those sounds through gear that had to be big, heavy, and loud to do its job. Especially for the guitar players, who loved (and still do love, for good reason) the thick, satisfying roar of power tubes being driven hard, the acoustical output was in-freaking-sane.

They got away with that volume because it was expected, and also because they were playing to huge crowds. Most of the audience wasn’t in the first few rows, and so the noise wasn’t as deafening.

Now, fast forward to 2013.

The iconic gear that defined the sound of rock and roll instruments is still very much in fashion. Sure, there have been various improvements in materials, construction, cost management, and design, but all of these creatures of the amplifier kingdom are fundamentally the same animals as their counterparts from 1969. They’re big, they’re heavy, and their most rockin’ sounds require stadium volume (or a power soak, if you don’t want stadium volume).

The problem is that stadium volume from amplifiers is no longer required, or even desirable – especially not in small rooms.

The 100 Watt Amp Problem

Let’s talk about some of what’s going on when an all-tube, 100 watt, gorgeous sounding amp is really doing its thing. Let’s make some conservative assumptions to start:

  • The 100 watt rating is the continuous power generated by the amp at a full-tilt, maximum overdrive, supersaturated roar.
  • The cab is a 4×12, wired so that each loudspeaker gets 25 watts.
  • Each loudspeaker has an average sensitivity of 95 dB SPL at 1 watt, measured at 1 meter.

The tone is killer. So is the volume.

Each cone is producing about 109 dB SPL, continuous. The summation of those four cones is 115 dB SPL, continuous, at 1 meter. The average audience member is probably sitting about 22 feet (6.7 meters) away. The venue isn’t totally dead, acoustically, so the average SPL decay is 5 dB per doubling of distance, as opposed to 6. This works out to 13.7 dB of volume decay for the average audience member.

So, for the most part, the audience is hearing about 101 dB SPL, continuous, of just the one guitar. Add another guitar of similar volume, and the continuous level is 104 dB SPL. The bass player fits in with a 99 dB SPL contribution, which takes our total to 105 dB SPL. The drummer is a spirited lad, able to make 100 dB SPL himself. Now we’re at 106 dB SPL. The vocals probably have to be at a minimum continuous level of 102 dB in order to be distinguishable, so that takes us to a grand total of…

Just under 108 dB SPL, continuous, for the average audience member, and that’s not including monitor wash.

For most people, that’s pretty dang loud. In a bar, that kind of level is hard to deal with when placing or taking orders (assuming that the bar is in the “average level” zone – which IS the case in a good number of rooms).

There’s no denying that the tone of the guitar is spectacular, but that spectacular tone is causing an audience discomfort problem, and potentially an economic problem for the venue.

This is bad for you.

Also bad for you is that, to get really good separation, the singer (who’s about 12 feet from the cab) has to be able to produce about 125 dB SPL at their mic capsule. This means that you need a singer with lots of power, stamina, and great pitch control at full volume…or less pitch control, but more raw power in reserve.

On top of that, for the vocalist to feel like they’re really hearing themselves in the monitors, the wedges will need to be making about 115 dB SPL continuous at the singer’s ears. If the singer is really powerful, and the wedges are good, then this should be achievable. If the singer isn’t really powerful, or is having an off day, or if the wedges are a little cheap, getting that kind of level may be a battle. Now, you’ve potentially got gain-before-feedback issues.

The Upshot

That arena-ready amp rig sure does sound good, but:

  • It probably costs a fair amount of money to acquire.
  • It takes up a lot of room.
  • It’s heavy.
  • It has to get really loud before it sounds right.
  • It forces everybody else to keep up.
  • It makes monitors harder to manage.
  • It can drive audience members away.
  • The venue can lose money.
  • It reduces the FOH audio tech’s options for the rest of the band (because the tech’s first priority can be forced towards just keeping up with you).

Bummer.

There’s a fix.

Buy a little amp.

There are plenty of all-tube combos out there that top out at 10 watts. That’s really all that you need. Get those tubes really hot to get the tone you want, and you’ll probably have about 105 – 110 dB SPL at 1 meter.

And you’ll be able to do it with a piece of gear that’s easy to carry.

And you’ll be able to do it with a piece of gear that you can fit anywhere.

And you’ll be able to do it without making your vocalist work themselves to death.

And you’ll be able to do it without forcing everybody else to keep up with you, whether in terms of volume or equipment purposes.

And you’ll be able to do it without flattening the audience.

And you’ll be able to do it while the bar still makes money.

And you’ll be able to do it while allowing the audio tech to make meaningful choices to get you the best sound possible.

And, because PA technology has come a very long way, that one amp will still work for you when you’re playing stadiums. The crew will just stick a mic in front of it, and turn that 10 watt amp into a 10,000+ watt amp with great coverage and smooth frequency response across the entire audience.

I can certainly understand that you might want a big rig because of the way it looks, or because there’s something very specific about the sound that can’t be perfectly replicated by other means. I do get that.

But big amps just aren’t necessary anymore, and they can be more trouble than they’re worth.


Only So Much Addition

A PA system can only do so much – the band’s overall volume has to be right, and their proportionality has to be right, too.

Please Remember:

The opinions expressed are mine only. These opinions do not necessarily reflect anybody else’s opinions. I do not own, operate, manage, or represent any band, venue, or company that I talk about, unless explicitly noted.

My last article was primarily written to technicians. However, the issue of “only being able to get so much, in comparison to full-tilt boogie” has big implications for musicians playing live. Small venue, big venue, whatever venue, there’s an important reality that has to be faced:

There’s only so much that a PA system or monitor rig can add to the sound of an instrument or vocal.

Now, this certainly holds true in the aesthetic sense. There’s a practical limit to the amount of sweetening that can be applied to any particular sonic event. A drumkit (for example) that sounds truly horrific can’t really be “fixed in the mix,” especially if the tech doesn’t have hours to spend on making it sound like a different, much better drumkit. What really needs to happen is for that set of drums to sound decent, or even amazing, without any outside help. At that point, the PA’s job is to make those drums loud enough for the audience (if the drums aren’t already), and maybe add some “boom” and reverb – if appropriate.

There’s another sense of “what the sound system can add”, though, that’s much easier to quantify. This is the relatively simple reality of how much SPL (Sound Pressure Level) an audio rig can deliver for a given input from a given acoustical source. This “amount of level deliverable” is often less – even a LOT less – than what the rig can do on the spec sheet. (This can often be surprising, especially to musicians and techs who are still working on gaining practical experience with live performance.) The other side of the coin is how much overall level the PA should be adding to the show to have the result sound decent, and be at a comfortable for the audience.

How Much Should The PA Contribute?

When trying to get a handle on how much the FOH (Front Of House) PA should add to the show, there are a number of things to consider:

  • How loud is the band, all by itself?
  • What do you really want the PA to be doing? (Carrying the room? Just putting a bit more “thump” in the drums? Vocals only?)
  • How much level will the audience and venue operators be happy with?

It can actually be helpful to work backwards through these points.

In small venues, the amount of tolerable level usually isn’t very high. Although some “pure music” rooms might work with 115+ dBC SPL continuous (decibels Sound Pressure Level, “slow” average), most places that cater to 200 patrons or less will probably see 110 dBC continuous as very, very loud. The problem is that, with a band and monitor rig that are REALLY cookin’, 110 dBC is very easy to achieve – and the PA isn’t even turned on yet!

In general, I recommend an upper limit of 105 dBC continuous for everything when working in a small venue. Band, monitor bleed, and FOH. Even that might be too much for some places, but it’s a start.

Once you’ve established how loud the whole show ought to be, you can begin figuring out what the PA’s contribution should entail. The handy rule of thumb here is that, for a given maximum volume, greater PA contribution requires you to keep a tighter rein on the stage volume.

To help illustrate this point (and others), I’ve prepared some audio samples in OGG format. I’ve used a live recording of a drum kit from Fats Grill, along with a reverb processor, to roughly simulate three conditions:

Of course, this is an imperfect representation. Although most PA loudspeakers are designed to be somewhat directional, they still excite the reverberant field – they often don’t “dry out” the sound quite as much as these samples do.

Still, these clips give you an idea of what happens as more PA is applied. The overall level goes up, the PA sound starts to overcome the stage volume, and the transients get more defined. Putting more direct sound, with clean transient response into the audience is usually a good thing – but notice how much volume the PA had to add before the drumkit really “cleaned up.”

On a discussion forum, I believe that Mark from audiopile.net made a simple, profound, and very true statement with important implications: “Audio engineers don’t feel like they have control until they are 10 dB louder than everything else in the room.” With this guideline in mind, the issue crosses into the first point:

If you want the PA to really define how your band is heard by the audience, then the band’s stage volume should be about 10 dB below the PA. If the maximum volume for a small venue is about 105 dBC SPL continuous, this means that the band and monitor rig need to stay in the close vicinity of 94.5 dBC SPL continuous.

I’m not gonna lie – squishing a rock band into a box smaller than 95 – 100 dBC SPL is tricky. It can be done, but not everybody is willing to take on the challenge and make the decisions involved.

This is why, most of the time, small venue sound involves careful compromises. The PA is often used only to “fill spaces.” That is, the guitar amps might carry the room with only occasional reinforcement for solos, while the midrange and high-end from the drums is stage volume with a bit of “kick” from the subs. The vocals will be getting pretty much constant attention from the FOH rig, of course. In the end, the contribution from the FOH PA is minimal…or at least kept under tight control.

Proportionality Can Kick Your Butt

Beyond the issue of raw volume, though, is the conundrum of how much an audio reproduction system (be it an FOH PA or a monitor rig) can add to a given acoustical event on stage. This is where “sounding like a band without the PA” becomes really critical.

Here’s why.

For most audio rigs that are even half-decent, gain-before-feedback is at least as critical, if not more, than total output power. That is, a loudspeaker might be physically capable of creating earth-shattering SPL, but the squeals and howls of feedback will prevent you from actually getting there. Either the overall differentiation between the stage volume and the PA volume is too great, or the differentiation between on-stage sources is too great.

This is a little abstract, so here’s an object example.

Every so often, I’ll run into a group that has a proportionality problem. They’re not too loud for the room by any means – they might be an acoustic duo, for instance. The issue is that one person is vigorously strumming a big-body guitar, using a pick. Another person is playing a different guitar, with a much smaller body.

…and they’re playing fingerstyle.

Delicately.

Hoo, boy.

Depending on the players, that big guitar might already be a LOT louder than the small guitar – and then, the player of the big guitar decides that they want a pretty healthy amount of monitor level. No problem for the big guitar, especially if the instrument is free of resonance problems and includes a decent pickup. The small guitar? Well – it doesn’t have a pickup installed, so we had to mic it. We were only able to get “so” close, and the player’s not making a whole lot of level anyway.

The chances are that feedback issues will prevent even the most competent monitor operator from making that fingerstyle guitar compete with the big boy.

It’s not the absolute volume that’s the problem. It’s the proportionality. The massive level differential between the two instruments just can’t be dealt with in a live situation. In the studio, where feedback is basically non-existent, it’s another story. Here, though, getting through the set will be a struggle.

As a generality, I would propose the following guidelines for the feasibility of what a small-venue audio system can add to an onstage source’s volume – especially when talking about monitors on deck:

  • +3 dB – Usually trivial.
  • +6 dB – Usually very simple, if not entirely trivial. Depends on the situation.
  • +10 dB – Average, may be challenging for sources that are resonant, or when using certain microphones.
  • +20 dB – Difficult to impossible, can be done in certain cases with instruments that have well-isolated pickups and physical feedback reduction. May be possible with certain microphones in certain orientations relative to the monitors, or with common microphones and in-ear monitors. With line-inputs, noise may also be a problem.
  • +30 dB – Generally impossible unless the source is completely feedback isolated. Noise from line inputs will probably be a big issue.

The way to get around these issues is to fix them before you arrive at the venue. If somebody is getting positively drowned during rehearsals, it’s simply not a safe assumption that a PA system (even a professionally operated one) will fix the issue. If everybody is clearly audible in rehearsal, on the other hand, then your proportionalities are either right on the money or “plenty close enough.”

This may sound a bit preachy, but I want to assure you that there are big benefits to “sounding like a band” before a PA system is added to the equation. If you’ve done the hard work of being balanced without outside help, then you have a much better shot at sounding killer with PA and monitor rigs that are only minimally adequate – or operated by a minimally competent audio human. Even better, when you get to work with great gear and great techs, they’ll be able to put their maximum effort towards presenting a flat-out amazing sonic experience for your fans. They’ll be able to do this because they won’t have to make the compromises necessary to fix big imbalances amongst instruments, or between the instruments and the vocals.

Bottom line? Being at the right volume, both in terms of absolute levels and relative balance, is a huge part of creating a brilliant stage show.


The Guitar Rig As A Singing Voice

When it comes down to it, you can look at an electric guitar setup as being a sort of “alien” vocal system.

Please Remember:

The opinions expressed are mine only. These opinions do not necessarily reflect anybody else’s opinions. I do not own, operate, manage, or represent any band, venue, or company that I talk about, unless explicitly noted.

Last weekend, I was having a conversation with Dee from The Black Smoke Gypsy Band. We were setting up for their show at Fats, and the discussion came around to a question that the band was kicking back and forth:

“Should we go direct with the guitars, or is a mic’ed amp THE way to go?”

Now, I ended up giving Dee a ton of information – information that I will be soon passing along to you folks. However, Dee’s question ended up getting me to look differently at the issue of how electric guitar sounds get into a PA system. The reason that my perspective changed is that I wanted to be able to generalize the answers – that is, I wanted to be able to give advice that could be applied conceptually, instead of just as a procedure.

To be able to talk about something conceptually, you have to understand “why.” What can sometimes catch you off guard is how deep the “why” goes. When it comes to choosing a technique for reinforcing electric guitar, the “why” ends up extending all the way down into the basic principles of how any instrument creates its own signature sonics.

Why Does Anything Sound Like It Does?

If you’re going to make a decision about how to put an instrument into a PA system, you will make much more informed choices if you have a handle on what makes that instrument actually produce sonic information. The critical question in this part of the puzzle is “What are the components of the whole instrument that makes it recognizable as itself, in an auditory sense?”

Okay, that was very “sciencey,” but maybe not very helpful all by itself. Let me explain a bit.

With acoustical instruments, the whole question of how to get the thing into the PA is pretty easy, right? You mic the thingamabob wherever the best sound is coming out.

I mean, you don’t put a vocalist into a sound reinforcement rig by plugging a cable into their chest cavity. You don’t stick a mic next to their shin. The sound comes out of their mouth. That’s where the mic goes. We rarely ask ourselves “why,” because (especially with vocalists) we don’t have a lot of workable variations in mic placement. For other instruments, you can get a bit more creative. Again, though, we still end up sticking a mic in the general vicinity of where the instrument’s sound is going into the room. There’s a TON that has to do with why the sound coming out of the instrument actually sounds like that instrument, but it often gets reduced to being a question of where the noise actually gets emitted.

…but think about it:

Why can’t we run vocals direct from the vocal cords, even if we could install a pickup there? That’s what actually makes the vibration that becomes singing, right?

Yes, but there are a lot of other components in the vocal “signal chain” that  are critical to the vocal being recognizable as a vocal, and that particular vocalist being recognizable as themselves.

The vocal cords create a vibration at a certain fundamental frequency, along with harmonics and other overtones, but that’s not enough. The singer’s chest cavity and head provide important overall resonances, and a skilled vocalist can utilize and shape those basic resonances at will. The singer’s airway, tongue, hard palate, and lips produce lots of dynamic resonance shifts on the fly. The tongue, lips, and teeth are also essential to final frequency shifts and subtle (or not so subtle) sound pressure dynamics. You can’t change or delete any part of that acoustical signal chain without greatly affecting the final sound of the vocalist.

Seriously, folks. Freddie Mercury of Queen had plenty of money to have his teeth fixed. He never did, because he was concerned about lousing up his vocal sound.

You can absolutely use this same model when you think about an electric guitar.

Why Do Electric Guitars Sound Like They Do?

An electric guitar signal chain is a lot like a vocal acoustics chain.

Really!

The comparison isn’t 1:1, especially because various parts are duplicated, or occur in a different order than what you find in a human voice. Still, there is striking “sameness” to be had. Check it out:

  • The guitar strings are like vocal cords. They create the basic vibration that makes the whole thing work.
  • The guitar’s body resonances are a lot like the chest and head resonances for a vocal. The creation of the core elements of the guitar’s tone happens here.
  • The guitarist’s pick choice, picking technique, and fretting technique are like the throat, mouth, tongue and teeth. The fundamental articulation in the guitar’s tone happens here.
  • Processing that happens between the guitar and the amp has all kinds of functions. Overdrive and distortion add resonances and harmonics like a singer’s chest, head, mouth, and vocal cord stress. EQ is very much the same as a singer changing the tension and breath flow in their head, chest, neck, mouth, and nose. Heck, a wah-wah pedal is just a resonant filter with an adjustable center-frequency, which is pretty much what a mouth is for.
  • The guitar amplifier itself is like another head, chest, throat, and mouth. The preamp section might be adding harmonics and resonances. The tone stack further alters frequency balance. The power amp section can add even more harmonics and resonances.
  • Then you’ve got loudspeaker, which functions like another vocal cord. (More resonances! More harmonics!) That vocal cord is mounted inside an enclosure, which acts like another chest cavity, head, and mouth.

It’s pretty wild when you translate all the parts of an electric guitar setup into their vocal equivalents. If taken as a unit, the result is a wild sort of space creature with bodies inside of other bodies. Fractal geometries. Alien architecture. Somebody, call H.P. Lovecraft!

Anyway.

The sum total of all the interaction of all this stuff is a distinctive guitar tone. To paraphrase the recording engineer called “Slipperman,” every component in the system is dependent upon every OTHER component of the system. Change or omit something, and it’s not the same guitar tone anymore.

By the way, Slipperman wrote some incredible (and incredibly) educational material on an Internet forum. The knowledge from that thread, entitled “Slipperman’s Recording Distorted Guitars Thread From Hell” is available, for free, at this link.

Still, for different players and different guitar rigs, certain parts of the setup may be more or less essential to their fundamental sound. When you can determine the bits that are really critical to making the noise that the guitar player is after, you can then determine your options for reinforcing that sound.

We’ll get into the specifics of THAT in another article. (Sequel hook!)


Use Your Power Wisely

If you’re a small-venue audio tech, you have to be careful to spend your power budget on what really matters.

Please Remember:

The opinions expressed are mine only. These opinions do not necessarily reflect anybody else’s opinions. I do not own, operate, manage, or represent any band, venue, or company that I talk about, unless explicitly noted.

If you work at a venue like Fats Grill, you’re used to the idea of (very) finite limits. You’ve only got so many mains circuits available to power PA, lighting, and backline. You’ve only got a few light fixtures hung, so you have to make the most of ’em.

And you’ve only got about 1 kW that you can put across the FOH PA continuously, if you’re REALLY “going for it.” (Or more accurately, if the band is really going for it and you have to keep up.)

In short, you’ve got a small “amp power bank account,” and you’ve got to figure out how to spend it wisely. The problem for a lot of techs is that there’s a tendency to get starry-eyed (or is that starry-eared?) about making PA systems do things that are impressive in the short-term only. You know what I mean:

  • The kick drum that sounds like an artillery piece.
  • The toms that seem like they’re a minimum of 5 feet in diameter.
  • The snare drum that distills everything good and right about arena rock into a sonic bolt that is released with every stick hit.
  • The bass guitar that could convince a Norse deity that Ragnarok had started without them.
  • The guitar amp that not only rules the world, but ALL worlds.

I think you get the picture.

All of these things are, indeed, cool. They’re very satisfying to hear. They’re very satisfying to create. They can also chew up a ton of your available system output.

“Available” Is Often Less Than Maximum

The “available” qualifier is an important one, because it reflects an important bit of reality: Just because a PA system can deliver a certain amount of power, it does not necessarily follow that you can actually use all that power.

The thing about small-venue PA systems is that they’re not necessarily “small” for the space they’re meant to cover. They’re often quite capable of producing levels that venue patrons will want to escape from. Producing that kind of SPL (Sound Pressure Level) unnecessarily is generally a bad move. With that in mind, you should usually assume that you actually have much less power to spend than the PA can deliver.

As a case in point, I have two brickwall limiters on the console outputs that feed the main, full range loudspeakers at Fats. There’s a “final” limiter, which kicks in just before the full range amplifier illuminates its clip lights, and in front of that limiter is my “sanity” limiter. I use the “sanity” limiter to keep my mix in the smallest possible “level box” that I think is appropriate. I often start the “sanity limiter” at a level that’s 10 dB below the limiter that prevents clipping, and if I raise it more than 3 dB then we’re having a rather louder than average night.

There are other technical factors to consider as well. You may not have full power available because of issues with GBF (Gain Before Feedback). You may have to run a little cool because the band brought a lot of power hungry equipment for lighting, and driving hard could trip a breaker. The audience may have an incredibly low threshold for “loud.”

In the end, “full power” just doesn’t equate with “available power.”

Spend Your Power On Essentials

The problem with chewing up your available output on things that sound cool in the short term is that you end up with a mix that does a poor job of accommodating the basics – basics that actually make or break the long term experience.

What do I mean?

Well, consider that most bands (not all of them, but most) tend to play, you know, songs. That is, music that incorporates lyrics. Ask yourself, what is it that makes the song an actual, recognizable song.

Yup. It’s the vocals.

Think about it. If there were no band playing at all, how would you identify the melody and narrative theme of the musical piece in question?

It’s. The. Vocals.

If you spend your available power on nothing else, spend it on getting the vocals clearly audible.

Next down the line are the instruments that, at any given moment, provide the strongest part of the musical piece’s structure. So, if the vocals are going, you should make sure that the instruments which drive the chord progression are audible. If the vocals aren’t going, and an instrument has stepped in to provide the melody (GUITAR SOLO!), then that’s what gets the nod.

Oh, and if the lead instrument is loud enough without extra help from the PA, then you don’t have to spend any power on it.

From there, your next candidates for a slice of the power budget are the remaining tonal instruments, often the bass. I should note here that there are times when the bass becomes more core to the song than other instruments – you have to know the context you’re working in, and pay attention to what’s going on.

Drums are last.

I don’t have anything against drums – I love drums that sound giant – but if I have to prioritize, drums are last in line (for most songs with a traditional structure).

Now, different strategies are appropriate at different times. For instance, when Stonefed is playing a show and it’s time for Ed’s drum solo, of course I spend my available power on making the drums “big.” The reason is because they’re now the most important musical element. Also, for most bands, I do start out by trying to sweeten the drums and other backline a little bit…it’s just that I’m prepared to yank those faders down if that’s what’s necessary to get the vocals where I think they need to be.

It’s Not Just Overall Levels, Either

I want to close up by mentioning that frequency ranges are also important to consider. This dovetails with the whole “huge drums and bass” thing that I mentioned at the top of this article. Low frequency material is fun and exciting. It can encourage people to dance. It’s a good thing to have.

However, trying to pile up a bunch of deep bass can require spending a lot of your available output power, or can chew up headroom in other parts of your signal chain. You can even fall into the trap of consuming output capacity with signals that your loudspeakers can’t really reproduce.

With drums, you may find that going for a lot of really deep “boom” is counterproductive when compared to getting a nice, complimentary “thud” that sits about half an octave higher. With bass guitars, I’ve often been in situations where an earth-moving rumble wasn’t what I needed. Instead, my power budget was best spent on the octave or two that lived just below the guitars. Heck, in some cases I’ve filtered everything below 1 kHz (really), and just used the PA to give the bass a bit of slap when everything else was in place.

Spend your power on what you actually need, folks. Everything else is optional.