Tag Archives: Monitors

A Monitor Layout For A Rock Show

Sometimes you’re thinking about audio, and sometimes not.

Please Remember:

The opinions expressed are mine only. These opinions do not necessarily reflect anybody else’s opinions. I do not own, operate, manage, or represent any band, venue, or company that I talk about, unless explicitly noted.

monitorsWant to use this image for something else? Great! Click it for the link to a high-res or resolution-independent version.

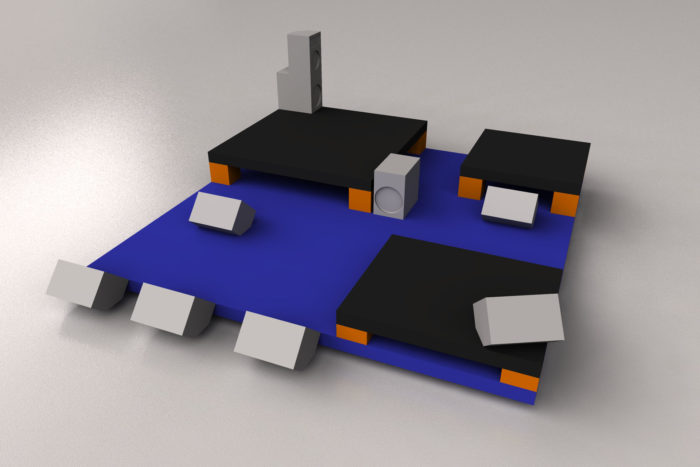
The picture attached to this article is an important reference point for the text. What you’re looking at is a scale drawing of the stage and monitor rig for the Sons Of Nothing: Clarity 10th Anniversary show.

So…why did it all end up like that?

The first thing that drives monitor placement is the stage layout – or, more precisely, where the actual players are going to be. In general, what we want to do with wedges comes down to one, simple rule: We want the loudspeaker output to hit whoever is supposed to be listening to it, while hitting as little of anything else as possible.

Of course, that rule gets bent (or simply taken outside and used for target practice with heavy artillery and wiffle bats) for various reasons, but it’s the starting point.

Down front, the plan was to have up to three people in play at any given moment. A guitarist downstage right, a solo vocal or solo guitar downstage right center, and a bassist parked down center. The down left riser was a dedicated space for a separate “keys and guitar” world. Center right was to be the land of woodwinds.

Upstage was split because of a need to run video. Sons Of Nothing uses projection as a key part of the concert, and in this case, front-projection was the order of the day. That meant that we needed a clear shot for the projector to fire “through” the band and onto the back wall. To get that open space, we put the drum riser off to the stage right side, and the backup-vocal riser went the opposite way.


Now, with the rule that I stated above, the natural inclination would be to always get a loudspeaker delivering a foldback mix as close to the players as could be physically managed. That’s not a bad rule of thumb. In fact, that’s a huge advantage of in-ears; You get to put the monitors so close to the player that they are partially inside their head, and only deliver usable output to that musician.

But an important realization is that live-sound is not actually about the best sound, as divorced from everything else. Rather, what we’re trying to do is create the best show, which is a holistic exercise.

Hence, the three downstage wedges were set on the floor, rather than up on the deck. The difference in distance was negligible, but a couple of very nice advantages were gained. Advantage 1 was that the loudspeakers no longer had as much physical contact with the riser, so they didn’t transfer as much vibration to the stage. Advantage 2 was that rather more of the main riser was available for actual people and the things they need to have to play well – like guitar-effect pedal boards.

A natural tendency is to set a player’s wedge such that it’s centered in front of them. In most circumstances, this is a reasonable idea. With a mono mix, most people like getting the output into both ears equally. There’s a problem, though, when keyboards enter into the equation. Physically, they’re pretty big and solid, and thus are very good at blocking the oh-so-critical “intelligibility frequencies” from a loudspeaker. Plus, keyboards can’t hear. It’s waste of output to fire a wedge into the bottom of a keys setup.

That’s why the keys wedge is off to the side. That placement allowed the sound from the drivers to have a clearer path to an actual human ear. A big help with making that placement work was the use of supercardioid-pattern microphones. Their pickup null points are at an angle to the rear of the mic (rather than straight back) and they have a tighter pattern in general. That helps significantly in being able to get enough output from a box that’s coming in from a diagonal. (With supercardioids and a monitor directly in front of the player, having the mic parallel with the floor helps to get that wedge firing into the least sensitive areas of the pattern.)

I would have liked to have put the keys wedge on the floor, but I was worried that the necessary distance for a good angle would be too much of a tradeoff.


Talking about the upstage folks, it might seem a bit weird that the backup-vocal wedge was set so that the riser partially blocked its output. There is an explanation though. First, I was concerned about chewing up real-estate on that platform, because there wasn’t much to go around. Second, some blockage from the riser was actually helpful. Plenty of sound that needed to get to the vocalists’ ears could still get there, with “splash” from the back wall mostly heading up into the acoustically treated ceiling. If the wedge had been up on the riser with the singers, there would have been a lot more spatter in general, and a lot of those reflections might have headed directly for the vocal mic in keyboard land.

The drumfill was an exercise in compromise. From a purely audio-centric perspective, it would probably have been best to to put things on the stage-left side of the drummer, with the full-range wedge off the sub and pointed upwards. The backup vocalists wouldn’t get blasted with the drummer’s monitor mix, and excess spill would go up into the ceiling. Unfortunately, logistics got in the way of this. Most of the square-footage on the drum riser was needed for…you know…drums, and so the “idealized” drumfill setup was too greedy for space. It also would have made it very hard, or maybe even impossible for the percussionist to enter from stage left as was planned. Stacking the drumfill on the left would have blocked the video.

So, a tall stack on the up-right corner was the solution.


One bit that I haven’t yet discussed is that lonely subwoofer that’s just upstage of center. What the heck is that?

Well, remember that down-center was the bass-player’s territory. As an additional wrinkle, no bass backline was brought in, except for a wireless rig. Such being the case, we needed to ensure that adequate low-end was produced for the folks on stage. Sonically, it would have been better to push the subwoofer downstage a bit (to reduce the time-arrival difference between the low-frequency information and everything else), but it seemed more important overall that it just not be in the way. So, I set the box flush with the drum riser, dialed the internal crossover for about 90 – 100 Hz, pulled the high-pass output to the down-center wedge, and the bassist ended up with a triamped monitor rig that could make some rumble without being run hard.

As far as I could tell, the overall setup was a success. Now, if only the woodwinds monitor hadn’t become unplugged at an unhelpful time…


The Pros And Cons Of Distributed Monitor Mixing

It’s very neat when it works, but it’s not all sunshine, lollipops, and rainbows.

Please Remember:

The opinions expressed are mine only. These opinions do not necessarily reflect anybody else’s opinions. I do not own, operate, manage, or represent any band, venue, or company that I talk about, unless explicitly noted.

powerplayWant to use this image for something else? Great! Click it for the link to a high-res or resolution-independent version.

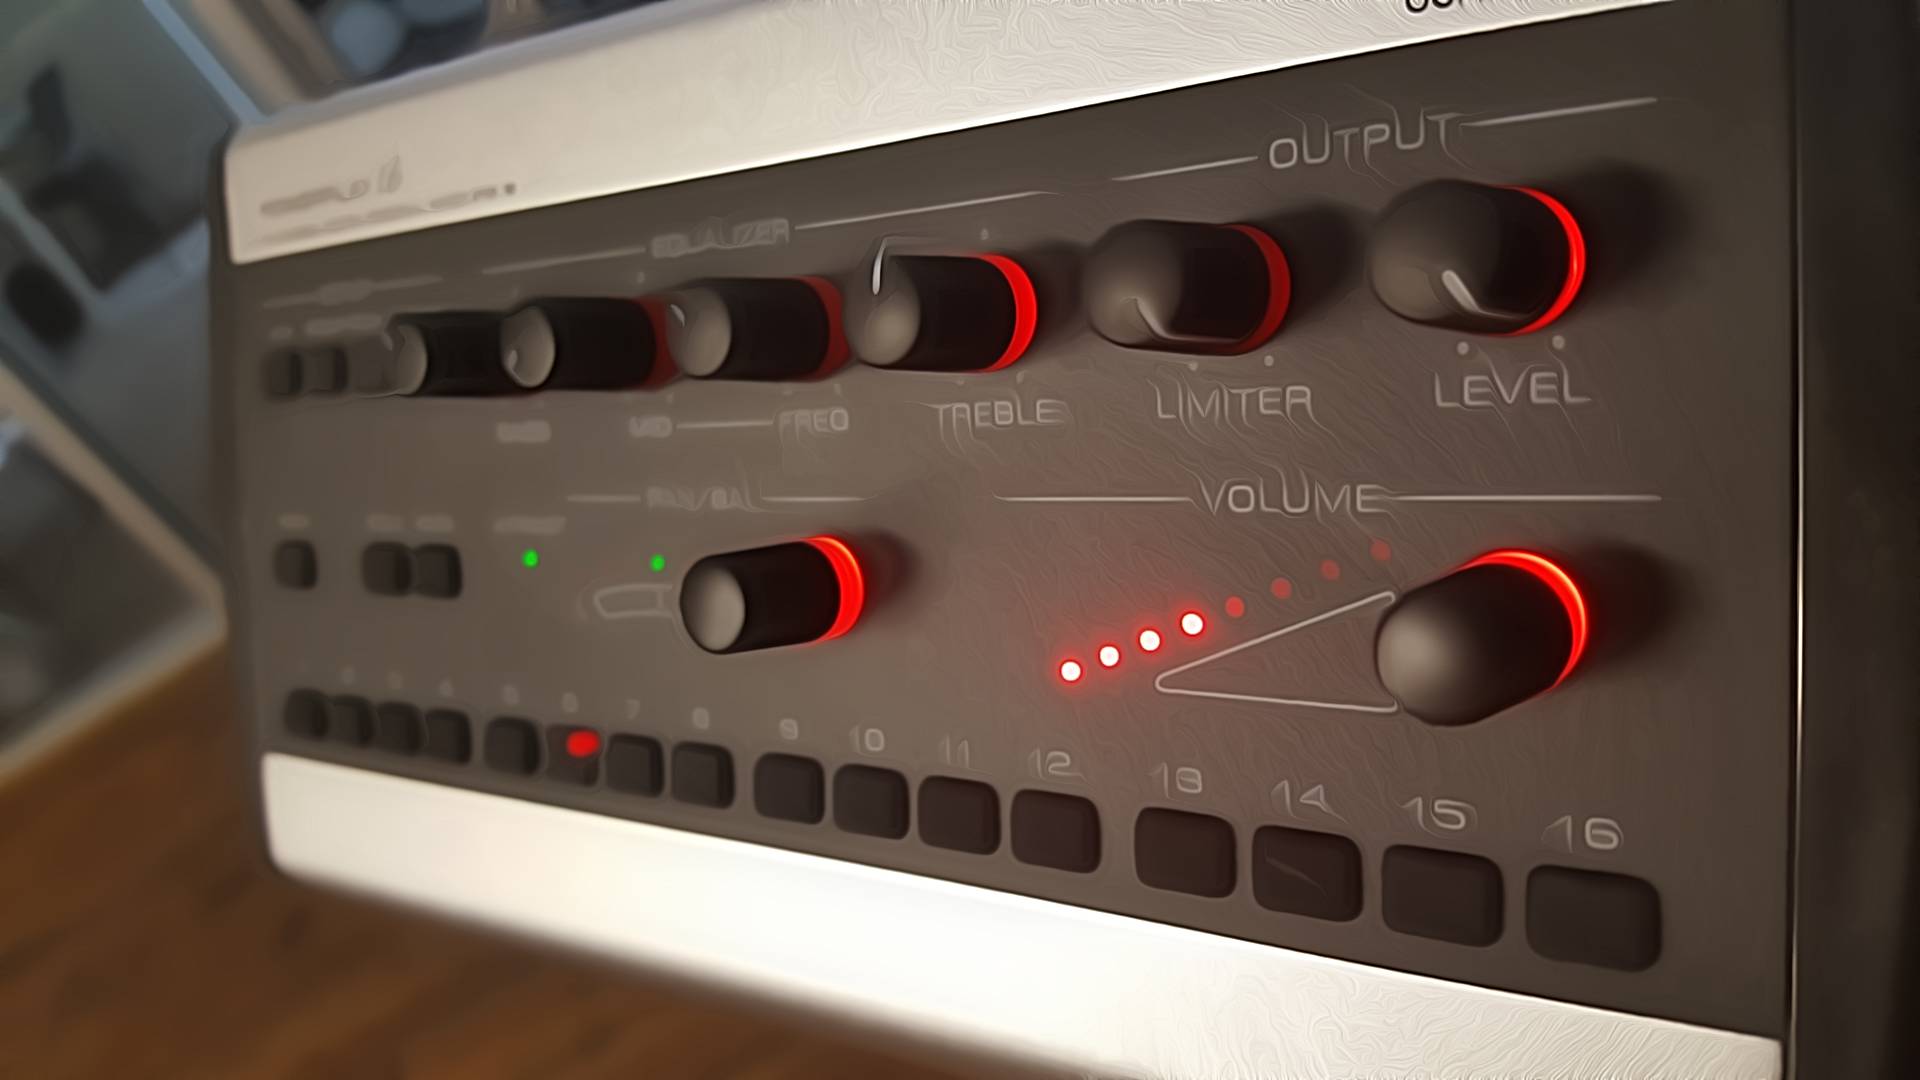
Along with folks who rock the bars and clubs, I also work with musicians who rock for church. Just a few months ago, as City Presbyterian’s worship group was expanding (and needing more help with monitoring), I decided to put the players on a distributed monitor-mix system. What I mean by a “distributed” system is that the mix handling is decentralized. Each musician gets their own mini-mixer, which they use to “run their own show.”

The experience so far has been basically a success, with some minor caveats. The following is a summary of both my direct observations and theoretical musings regarding this particular monitoring solution.


Pro: In-Ear Monitors Become Much Easier For The Engineer

One downside to in-ears is that the isolation tends to require that everyone get a finely tuned mix of many channels. This is especially true when you’re running a quiet stage, where monitor world is required to hear much of anything. What this mandates is a lot of work on behalf of each individual performer, with the workload falling squarely on the shoulders of the audio human.

Distributed monitor mixing takes almost all of the workload off the sound operator, by placing the bulk of the decision making and execution in the hands of individual players. If the lead guitarist wants more backup vocals, they just select the appropriate channel and twist the knob. If they want the tonality of a channel altered, they can futz with it to their heart’s content. Meanwhile, the person driving the console simply continues to work on whatever they were working on, without giving much thought to monitor world.

Con: Monitors Become Harder For The Player

Much like effort and preparation, complexity for the operation of a given system can neither be created nor destroyed. It can only be transferred around. A very, very important thing to remember about distributed monitor mixing is this: You have just taken a great deal of the management and technical complexity involved in mixing monitors, and handed it to someone who may not be prepared for it. Operating a mix-rig in a high-performance, realtime situation is not a trivial task, and it takes a LOT of practice to get good at it. To be sure, a distributed approach simplifies certain things (especially when in-ears essentially delete feedback from the equation), but an inescapable reality is that it also exposes a lot of complexity that the players may have had hidden from them before. Things like sensible gain staging and checking for sane limiter settings are not necessarily instinctual, and may not be a part of a musician’s technical repertoire on the first day.

Also, as the engineer, you can’t just plug in each player’s mixer and mentally check out. You MUST have some concept of how the mixers work, so that you can effectively support your musicians. Read the manual, plug in one of the units, and turn the knobs. Personal mixers may be operated by individual players, but they really are part of the reinforcement rig – and thus, the crew is responsible for at least having some clue about how to wield them.

Pro: You Don’t Necessarily Have To Use In-Ears

I have yet to encounter a personal-mix system that didn’t include some sort of “plain vanilla” line output. If the musicians want to drive a powered wedge (or an amplifier for a passive wedge) with their mixer, they can.

Con: Not Using In-Ears May Cause Trouble

As I said before, mixing in a high-performance situation isn’t an easy thing that humans are naturally prepared to do. Life gets even more hairy in a “closed-loop” situation – i.e., onstage monitoring with mics and loudspeakers. A musician may dial their piece of monitor world (at a bare minimum) into SCREAMING feedback without realizing their danger. They may not recognize how to get themselves out of the conundrum.

And, depending on how your system works, the audio human may not be able to “right the ship” from the mix position.

Even if they don’t get themselves swallowed by a feedback monster, a player can also run their mix so loud that they’re drowning everybody else, including the Front Of House mix…

Pro: Integrated Ecosystems Are Powerful And Easy

As more digital console “ecosystems” come online, adding distributed mixing is becoming incredibly easy. For instance, Behringer’s digital Powerplay products plug right into Ultranet with almost zero fuss. If your console has Ultranet built-in, you don’t have to worry about tapping inserts or direct outs. You just run a Cat5/ Cat6 cable to a distribution module, the module sends data and power over the other Cat5/6 runs, and everything just tends to work.

Con: Once You’ve Picked Your Ecosystem, You’ll Have To Stay There

Integrated digital audio ecosystems make things easy, but they tend to only play nice within the same extended family of products. You can’t run an Ultranet product on an Aviom monitor-distro network, for instance. More universal options do exist, but the universality tends to come with a large price premium. Whenever you go a certain way with a system of personal mixers, you’re making a big commitment. The jump to a different product family may be difficult to do…or just a flat-out expensive replacement, depending upon the system flexibility.

Pro: Everybody Can Have Their Own Mixer

Distributed mixing can be a way to banish all monitor-mix sharing for good. Everybody in the band can not only have their own mix, but their own channel equalization as well. If the guitar player wants the bass to sound one way, and the bass player wants the bass to sound totally different, that option is now very viable. Each musician can build intricate presets inside their own piece of hardware, without necessarily having to consult with anyone else.

Con: Everybody Having Their Own Mixer Is Expensive

Expensive is a relative term, of course. With a Powerplay system, outfitting a five-piece band is about as expensive as buying a couple-three “pretty dang nice,” powered monitor wedges. Other systems involve a lot more money, however. Also, even with an affordable product-line, adding a new member to the band means the expense of adding another personal mixer and attendant accessories.

Pro: Personal Mixing Is Luxurious

When we deployed our distributed system, one of the comments I got was “This is what we’ve always wanted, but couldn’t have. It should always have worked this way.” Everybody getting their own personal, instantly customizable mix is a “big league” sort of setup that is now firmly within reach for almost any band. Under the right circumstances, moving the on-deck show into the right place can transform from a slog to a joy.

Con: Not Everybody May Buy In To The Idea

The adoption of a distributed monitor mixing system is like all personal monitoring: Personal. The problem is that you have to try it to find out if you want to deal with it or not. Unless someone categorically states at the outset that they want no part of individualized mixing, the money has to be spent to let them give it a whirl.

…and they may decide that it’s just not for them, with only 30 minutes of use on their mixer and the money already spent. You just have to be ready for this, and be prepared to treat it as a natural cost of the system. Forcing someone to use a monitoring solution that they dislike is highly counterproductive.

Distributed monitor mixing, like all live-audio solutions, is neither magic nor a panacea. It may be exactly the right choice for you, or it may be a terrible one. As with everything else, there’s homework to be done, and nobody can do it but you. One size does not fit all.


A Guided Tour Of Feedback

It’s all about the total gain from the microphone’s reference point.

Please Remember:

The opinions expressed are mine only. These opinions do not necessarily reflect anybody else’s opinions. I do not own, operate, manage, or represent any band, venue, or company that I talk about, unless explicitly noted.

smoothed-monitorsWant to use this image for something else? Great! Click it for the link to a high-res or resolution-independent version.

This site is mostly about live audio, and as such, I talk about feedback a lot. I’m used to the idea that everybody here has a pretty good idea of what it is.

But, every so often, I’ll do a consulting gig and be reminded that feedback can be a mysterious and unknown force. So, for those of you who are totally flummoxed by feedback monsters, this article exists for your specific benefit.

All Locations Harbor Dragons

The first thing to say is this: Any PA system with real mics on open channels, and in a real room, is experiencing feedback all the time. Always.

Feedback is not a phenomenon which appears and disappears. It may or may not be a problem at any particular moment in time. You may or may not be able to hear anything like it at a given instant. Even so, any PA system that is doing anything with a microphone is guaranteed to be in a feedback loop.

What matters, then, is the behavior of the signal running through that loop. If the signal is decaying into the noise floor before you can notice it, then you DO have feedback, but you DON’T have a feedback problem. If the signal is dropping slowly enough for you to notice some lingering effects, you are beginning to have a problem. If the signal through the feedback loop isn’t dropping at all, then you are definitely having a problem, and if the looped signal level is growing, you have a big problem that is only getting bigger.

Ouroboros

If every PA system is a dragon consuming its own tail – an ouroboros – then how does that self-consuming action take place?

It works like this:

1) A sound is made in the room.
2) At least one microphone converts that sound into electricity.
3) The electricity is passed through a signal chain.
4) At the end of the chain is the microphone’s counterpart, which is a loudspeaker.
5) The loudspeaker converts the signal into a sound in the room.
6) The sound in the room travels through direct and indirect paths to the same microphone(s) as above.
7) The new sound in the room, which is a reproduction of the original event, is converted into electricity.

The loop continues forever, or until the loop is broken in some way. The PA system continually plays a copy of a copy of a copy (etc) of the original sound.

How Much Is The Dragon Being Fed?

What ultimately determines whether or not your feedback dragon is manageable or not is the apparent gain from the microphone’s reference point.

Notice that I did NOT simply say “the gain applied to the microphone.”

The gain applied to the microphone certainly has a direct and immediate influence on the apparent gain from the mic’s frame of reference. If all other variables are held constant, then greater applied gain will reliably move you closer toward an audible feedback issue. Even so, the applied gain is not the final predictor of ringing, howling, screeching, or any other unkind noise.

What really matters is the apparent gain at the capsule(s).


Gain in “absolute” terms is a signal multiplier. A gain of 1, which may be referred to as “unity,” is when the signal level coming out of a system (or system part) is equal in level to the signal going in. A signal level X 1 is the same signal level. A gain of less than 1 (but more than zero) means that signal level drops across the in/ out junction, and a gain of greater than 1 indicates an increase in signal strength.

A gain multiplier of zero means a broken audio circuit. Gain multipliers of less than zero are inverted polarity, with the absolute value relative to 1 being what determines if the signal is of greater or lesser intensity.

Of course, audio humans are more used to gain expressed in decibels. A gain multiplier of 1 is 0 dB, where the input signal (the reference) is equal to the output. Gain multipliers greater than 1 have positive decibel values, and negative dB values are assigned to multipliers less than 1. “Negative infinity” gain is a multiplier of 0.


The apparent gain as referenced by the pertinent microphone(s) is what can also be referred to as “loop gain.” The more the reproduced sonic event “gets back into” the mic, the higher that loop gain appears to be. The loop gain is applied at every iteration through the loop, which each iteration taking some amount of time to occur. If the time for a sonic event to be reproduced and arrive back at the capsule is short, then feedback will build aggressively when the loop gain is positive, but also drop quickly when the loop gain is negative.

Loop gain, as you might expect, increases with greater electronic gain. It also increases as a mic’s polar pattern becomes wider, because the mic has greater sensitivity at any given arrival angle. Closer proximity to a source of reproduced sound also increases apparent gain, due to the apparent intensity of a sound source being higher at shorter distances. Greater room reflectivity is another source of higher loop gain; More of the reproduced sound is being redirected towards the capsule. Lastly, a frequency in phase with itself through the loop will have greater apparent gain than if it’s out of phase.

This is why it’s much, much harder to run monitor world in a small, “live” space than in a large, nicely damped space – or outside. It’s also why a large, reflective object (like a guitar) can suddenly put a system into feedback when all the angles become just right. The sound coming from the monitor hits the guitar, and then gets bounced directly into the most sensitive part of the mic’s polar pattern.

Dragon Taming

With all that on the table, then, how do you get control over such a wild beast?

Obviously, reducing the system’s drive level will help. Pulling the preamp or send level down until the loop gain becomes negative is very effective – and this is a big reason for bands to work WITH each other. Bands that avoid being “too loud for themselves” have fewer incidences of channels being run “hot.” Increasing the distance from the main PA to the microphones is also a good idea (within reason and practicality), as is an overall setup where the low-sensitivity areas of microphone polar patterns are pointed at any and all loudspeakers. In that same vein, using mics with tighter polar patterns can offer a major advantage, as long as the musicians can use those mics effectively. Adding heavy drape to a reflective room may be an option in some cases.

Of course, when all of that’s been done and you still need more level than your feedback monster will let you have, it’s probably time to break out the EQ.

Equalization can be effective with many feedback situations, due to loop gain commonly being notably NOT equal at all frequencies. In almost any situation that you will encounter in real-life, one frequency will end up having the highest loop gain at any particular moment. That frequency, then, will be the one that “rings.”

The utility of EQ is that you can reduce a system’s electronic gain in a selected bandwidth. Preamp levels, fader levels, and send levels are all full-bandwidth controls – but if only a small part of the audible spectrum is responsible for your troubles, it’s much better to address that problem specifically. Equalizers offering smaller bandwidths allow you to make cuts in problem areas without wrecking everything else. At the same time, very narrow filters can be hard to place effectively, and a change in phase over time can push a feedback frequency out of the filter’s effective area.

EQ as a feedback management device – like everything else – is an exercise in tradeoffs. You might be able to pull off some real “magic” in terms of system stability at high gain, but the mics might sound terrible afterwards. You can easily end up applying so many filters that reducing a full-bandwidth control’s level would do basically the same thing.

In general, doing as much as possible to tame your feedback dragon before the EQ gets involved is a very good idea. You can then use equalization to tamp down a couple of problem spots, and be ready to go.


The Story Of A Road Gig, Part 3

Commentary with pictures – or maybe it’s the other way around.

Please Remember:

The opinions expressed are mine only. These opinions do not necessarily reflect anybody else’s opinions. I do not own, operate, manage, or represent any band, venue, or company that I talk about, unless explicitly noted.

road-gig-3Want to use this image for something else? Great! Click it for the link to a high-res or resolution-independent version.
Rather than try to relate the entire story of this overnighter as a narrative, I’ve decided to take the approach of commenting on the various photos that were taken at the gig (or around the process of it). There are, amazingly, some shots where yours truly makes an appearance. Scotty of Eyes Open got ahold of my camera, and, well, there ya go.


X32 Cores

X32 Cores

While it’s not necessarily for the faint of heart, running surfaceless consoles can potentially save you money, weight, and some space. Consoles like this really hammer home what a digital mixer is: A whole lot of software running on specialized hardware. Delete the control hardware, and all the heavy-lifting for audio still remains.

Going surfaceless requires significant homework. You’ll have to get both your “mix brains” and their associated control devices (laptops, tablets, etc.) onto a network and talking to each other. An inexpensive wireless router is really all you need for this, but DO have a fallback option. Also, anything that doesn’t need to be wireless probably shouldn’t be, so use a wired connection to your control gear whenever you can. Ethernet cable is cheap, available almost everywhere, and pretty much stupid-proof.

And, for heaven’s sake, set up meaningful security on your wireless network. Nothing but your consoles and controllers should be connected to it.

I have two X32 cores for more than one reason. Reason #1 is to be able to have separate FOH and monitor worlds with full “first-class” channel counts – 32 inputs each. Reason #2 is that, if one console were to give up the ghost, I could fall back to its counterpart and keep going.

As much as is practical, build mix templates for your show before you leave. The ability to walk up to the show and “just go for it” without having to think through everything on the fly is a big help. Remember to do some meaningful tests on your setup to ensure that it works, and that you know how it works.

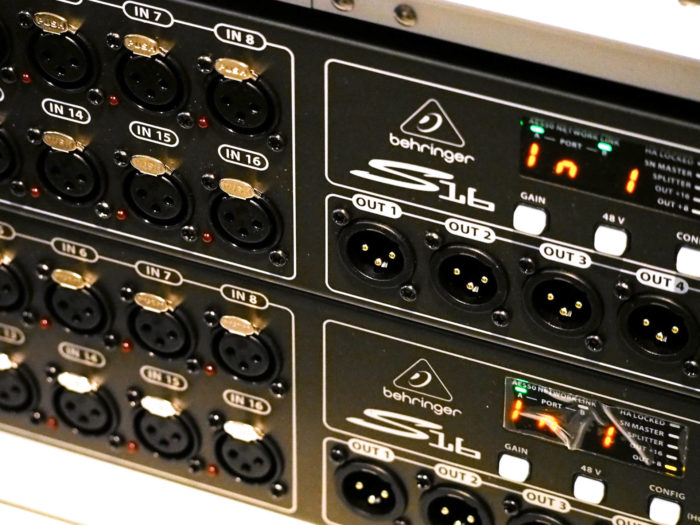
S16 Stageboxes

S16 Stageboxes

Digital stageboxes help you save space and weight by removing the need for a big, heavy, multicore trunk. The irony is that digital stageboxes are rather more expensive than their analog cousins. Your overall cost may be slightly reduced if you get a single unit with all the inputs and outputs you need, but you have to account for the risk of that unit dying on you. Using two boxes to do the job allows you to continue in some way if one of them stops cooperating.

Use the network cabling recommended by the manufacturer. If your digital snake system calls for shielded Cat5e with Ethercon connectors, that’s what you should use. There are plenty of stories out there of people who encountered…interesting results while using connectivity that was not up to spec. (At the same time, I’m not convinced that “super premium” is necessary. GLS Audio makes SSTP ethercon cables that seem pretty darn good, and clock-in at under $1.00/ foot.)

Remember to have spare cables for this high-speed, highly-mission-critical audio network you’re building.

Which One Is Which?

Which One Is Which?

Here we see a common, North-American noise-louderizer with a remote console control, he being somewhat perplexed by how the mix-bus order is now reversed due to his move from FOH to the stage.

Tablets And Monitors

Tablets And Monitors

I am brand new to the whole idea of walking up on deck with a remote, but let me tell you, it’s one of the greatest things since sliced bread. For your initial rough-in of monitor world, it’s downright beautiful to be able to put things together without any guesswork, or running back and forth to a console. Instead, you park yourself in front of a wedge, start dialing things up, and instantly hear the results of your changes. This means that you can actually pick up on the exact point where additional gain on a channel starts to get “weird.”

It’s also beautiful to have the remote when artists are actually on stage. Again, a lot of guesswork and disconnection simply goes away. You can talk to each other naturally, for a start. Even more important, though, is that you can actually hear what the musician is hearing. Problems with a mix don’t have to be described, as you can experience them directly for yourself. Finally, it’s a great bit of “politics;” Musicians who have often dealt with uncaring (or just absent) audio-humans now have one who’s really paying attention – and who’s also very much in the same boat as they are.

As was jokingly mentioned above, you do have to remember that your mix order may be “flipped.” If you numbered your mixes based on how you’re looking at things from FOH, walking up on deck now means that you’re seeing the mirror image.

When putting a system together, don’t be stingy with your monitor mixes. I’ve never regretted having more mixes and wedges available. As I’ve said before, and will probably say again, getting everyone happy on deck means a much better experience at FOH. A recipe for success really is making sure that a big piece of your budget goes to monitor world. Give those drummers “Texas headphones” (a drumfill) if at all possible. They tend to like it.

Scotty And McCrae

Scotty And McCrae

Scotty and McCrae were the guys who brought me out on the trip, and on a practical level, the show would NOT have happened without them. McCrae handled a lot of behind-the-scenes logistical elements in real time, making sure that things like shelter, power, and scheduling were actually working.

Scotty joined with McCrae to form my weekend stage crew. It was a little slice of heaven to work with those guys, because all I had to do was describe what I wanted to happen, and then wait a few minutes. The importance of such a crew, that has a can-do attitude and a real sense of humor, can NOT be overstated. I was able to deliver because (and only because) everybody else did their job.

(Also, a huge “Thank You” goes out to Bayley H. for running the event as a whole, for giving Scotty and me a place to sleep, and for chasing down one of those super-rad Honda generators for us. She was juggling about 80 things all weekend, one of those things being the music, and we were very well taken care of.)

Run!

Run!

Spooked by the sudden noise of a band getting comfortable on deck, a black-footed knob-turner (voluminus maximus) bolts for the safety of FOH.

FOH

FOH
FOH 2

I put FOH control on top of the console case, with monitor world off to the side. The laptops are different colors so that I can tell them apart easily when unpacking them. The trackballs are there because, let’s face it, trackpads are fiddly, imprecise, and (to be both blunt and slightly crass) just tend to suck in general.

Another tip: If your primary monitor-world controller has a case, put the monitor control tablet in that same case. It will make things ever so slightly faster and easier at setup.

Talkback is one of the main reasons to have at least one microphone equipped with a switch. Choose where you want talkback to be routed to, latch the console’s talkback control, and then simply flick the switch on the mic when you want to talk.

Laptops (with good batteries) and a UPS are helpful at FOH, because a power failure means that your audio processing and routing stay up. No, there might not be any audio for them to work on, but they’ll be available immediately when you get the power back.

Troopers

Troopers 1
Troopers 2
Troopers 3
Troopers 4

Katie Ainge and her band were real troopers throughout the show. Over the course of two days, we would have a few technical issues, and we would also get rained on twice. Through it all, they played their best, kept smiling, and kept coming back for more:

Originally, they were only supposed to play on the Friday night. However, a storm ended up rolling in. Katie and company played right up until the rain started falling, only calling a halt because their instruments were getting wet. After a hasty pack up and retreat, after which they could have bailed out with full pay, they elected to stay around and get a full show in on the following morning.

Also, large garbage bags make pretty decent rain protectors for loudspeakers and other gear. They do tend to buzz at certain frequencies, but that’s the least of your worries when water starts falling out of the sky.

We only hung a single overhead. With a well-balanced band, a single mic in the right spot will get everything on the kit without getting swamped by bleed. Also, I mix live audio in mono about 99.9% of the time, and a single mic is always in phase with itself.

Try, Try Again

Try, Try Again

After a frantic night of Scotty and McCrae packing, unpacking, and drying out the gear, the next morning came along with the promise of actually doing the show. Notice that the generator really is NOT in the right place. I should have placed it off to the side of the deck, so that the exhaust would have stayed away from the performers. Oops.

Double Hung

Double Hung

McCrae and Bayley, masters of all they survey.

With the PA deployed as it was, putting the same signal into all four FOH mid-highs probably would not have sounded all that hot. The outer pair was slightly behind the inner pair, which would have resulted in the high end being out of phase alignment. That problem did not come into play, however, because the different pairs were used for different signals. The inner pair was my vocal cluster, and the outer pair was for instruments. This technique borrows both from The Grateful Dead’s “Wall Of Sound,” and Dave Rat’s “double hung” PA deployments – it’s just on a very small scale.

The configuration as pictured and described trades coverage area for power and/ or clarity. We essentially have one, larger PA setup that’s firing in a narrow pattern. (Even so, some walking around proved that you could hear the PA pretty much everywhere in the park proper.) An alternative would be to put the entire mix into all four boxes, but aim the boxes to hit different zones. In that case, we’d be trading power/ clarity for coverage.

For Real This Time

For Real This Time 1
For Real This Time 2
For Real This Time 3
For Real This Time 4

With no rain during the actual show, the retry of the previous night went much more smoothly. We did have a couple of problems with the cables to Katie’s DI, with my suspicion being that the metal on their XLR connectors is inexpensive, soft, and therefore prone to change shape when heated significantly in the sun. (I can’t prove it though – this is just a wild theory.)

In any case, though, it was great to see Katie and her friends bring some really enjoyable tunes to an audience able to stay for the duration.

Afterwards, packing the van, we got another rain shower.

But it was time to go home anyway.


When Do You Want To Sound Good?

Great gigs are the ones that get “picked at.”

Please Remember:

The opinions expressed are mine only. These opinions do not necessarily reflect anybody else’s opinions. I do not own, operate, manage, or represent any band, venue, or company that I talk about, unless explicitly noted.

what-timeWant to use this image for something else? Great! Click it for the link to a high-res or resolution-independent version.

There’s a point where a guys starts repeating himself; I have certainly reached that point here. Nevertheless, repetition of theme without rote regurgitation of content can be useful. So, I’m going to talk some more about time, and gigs, and showing up, and how it impacts success.

And I’m going to do it by borrowing the words of Jason Giron from Floyd Show and Loss of Existence. There was an occasion where a fellow band member asked, “When should we come to soundcheck?”

Jason replied, “When do you want to sound good?”

I tell you, every so often you get to stand next to someone who can perfectly encapsulate a tome of wisdom into a single sentence. This was one of those times for me.


There are plenty of bands, individual musicians, and production humans out there who want to minimize their exposure time when it comes to a gig. This is understandable, because in Western society, time and money sit on either end of an equality symbol. The problem, though, is that minimizing your on-gig time has an alarming tendency to minimize your on-gig success. When it comes to show production, getting the really amazing things to happen requires “picking at it.” Picking at it isn’t time and money efficient, but it’s necessary to create magic.

If you want to really get comfortable with how everybody sounds on a stage with no reinforcement, and truly dial that in so that the future reinforcement will be maximally effective, you have to take the time to pick at it. It doesn’t happen in the space of a minute. You actually have to get up there, play some songs, and figure out how everybody fits around everybody else.

If you want to dial up a truly killer starting point for monitor world and FOH, you have to pick at it. You can’t just throw it all up there, run a few test signals through, and walk off for a bite. You have to actually go up on deck and listen to a real mic through a real wedge. And then listen to a real mic through multiple wedges. At high gain! You also have to listen to real music through the FOH rig. If you want an objective measurement of the system, you have to get out your reference mic and attendant software, and then take a few minutes getting a good trace.

If you want me to create the best monitor mix possible for you in that room, you have to pick at it. We have to go through several iterations of tweak/ listen/ tweak/ listen/ tweak – and we have to be able to do it all with calmness and rationality. Thirty seconds of panicked gesturing from a cold start ain’t gonna get you there, pilgrim.

If you want to build the FOH mix that effectively translates what the band is doing into the house, leveraging and flowing along with the natural sound of the group in the room…You. Have. To. Pick. At. It. Before doors. Or do you want to be futzing around, “finding yourself” for the entirety of the first set? People, please. Bands and audiences deserve better.

As an experienced “Selective Louderization Specialist,” I can tell you that sounding good (and getting everybody truly comfortable) takes at least an hour of work. Bare minimum. (There are plenty of bands that require much more time than that.)

And that hour does NOT start until everybody is in the same room, with all the gear working, and with the entire audio system pre-tuned for the appropriate performance. (A hint for sound people: You have to be really early if you want a fighting chance at this.) It’s not to say that it’s impossible to sound decent in a smaller span of time. It can be done, and sometimes it must be done – but why choose that outcome if it’s optional?

“I’m not required to smack myself in the face with a sharp object, but I’m going to do it! Eugene, hand me that axe!”

Really?

Assuming that it’s going to take no less than 60 minutes of effort to make your show spectacular, I encourage you to ask yourself the “Giron Question.” When do you want to sound good? Figure out when that time is, and then show up a lot earlier than that.


Zen And The Art Of Dialing Things In

Good instruments through neutral signal paths require very little “dialing in,” if any.

Please Remember:

The opinions expressed are mine only. These opinions do not necessarily reflect anybody else’s opinions. I do not own, operate, manage, or represent any band, venue, or company that I talk about, unless explicitly noted.

zenWant to use this image for something else? Great! Click it for the link to a high-res or resolution-independent version.

Not long ago, Lazlo and The Dukes paid me a visit at my regular gig. They were coming off a spectacularly difficult show, and were pleased-as-punch to be in a room with manageable acoustics, a reasonably nice audio rig, and a guy to drive it all. We got settled-in via a piecemeal sort of approach. At one point, we got Steve on deck and ran his dobro through the system. He and I were both pretty happy within the span of about 30 seconds.

Later, Steve gushed about how I “just got it all ‘dialed up’ so fast.” Grateful for the compliment, and also wanting to be accurate about what occurred, I ensured Steve that he was playing a good instrument. I really hadn’t dialed anything in. I pushed up the faders and sends, and by golly, there was a nice-sounding dobro on the end of it all. I did a little experimenting with the channel EQ for FOH, wondering what would happen with a prominent midrange bump, but that was pretty optional.

In terms of “pop-culture Zen,” Steve had gotten dialed in without actually being dialed in.

How?

Step 1: The Instrument Must Be Shaped Like Itself

The finest vocal mics I’ve ever had have been the ones in front of terrific singers. The very best signal chains I’ve ever had for drums have been the ones receiving signals derived from drums that sound killer. I’ve hurriedly hung cheap transducers in front of amazing guitar rigs, and those rigs have always come through nicely.

Whatever the “source” is, it must sound correct in and of itself. If the source uses a pickup system, that system must produce an output which sounds the way the instrument should sound.

That seems reasonable, right? The first rule of Tautology Club is the first rule of Tautology Club.

Especially with modern consoles that have tons of processing available, we can do a lot to patch problems – but that’s all we’re doing. Patching. Covering holes in things that weren’t meant to have holes. Gluing bits down and hoping it all stays together for the duration of the show. Does that sound like a shaky, uncomfortable proposition? It does because it is.

But, if the instrument is making the right noise in the room, by itself, with no extra help, then it can never NOT make the right noise in the room. We can do all kinds of things to overpower and wreck that noise by way of a PA system, but the instrument itself will always be right. In contrast, an instrument which sounds wrong may potentially be beaten into shape with the rest of the rig…but the source still doesn’t sound right. It’s completely dependent on the PA, and if the PA fails to do the job, then you’re just stuck.

An instrument which just plain “sounds good” will require very little (if any) dialing-in, so long as…

Step 2: The Rig Is Shaped Like Everything

Another way to put this is that the instrument must be filled with itself, yet the FOH PA and monitor rig must be emptied of themselves. In technical terms, the transfer function of the PA system’s total acoustical output should ideally be flat “from DC to dog-whistles.”

Let’s say you want to paint a picture. You know that the picture will be very specific, but you don’t know what that picture will be in advance. What color of canvas should you obtain? White, of course. The entire visible spectrum should be reflected by the canvas, with as little emphasis or de-emphasis on any frequency range. This is also the optimal case for a general-purpose audio system. It should impose as little of its own character as is reasonably possible upon the signals passing through.

At a practical level, this means taking the time to tune FOH and monitor world such that they are both “neutral.” Unhyped, that is. Exhibiting as flat a magnitude response as possible. To the extent that this is actually doable, this means that an instrument which is shaped like itself – sonically, I mean – retains that shape when passed through the system. This also means that if there IS a desire to adjust the tonality of the source, the effort necessary to obtain that adjustment is minimized. It is much easier to, say, add midrange to a signal when the basic path for that signal passes the midrange at unity gain. If the midrange is all scooped out (to make the rig sound “crisp, powerful, and aggressive”), then that scoop will have to first be neutralized before anything else can happen. It’s very possible to run out of EQ flexibility before you get your desired result.

Especially when talking about monitor world, this is why I’m a huge advocate for the rig to not sound “good” or “impressive” as much as it sounds “neutral.” If the actual sound of the band in the room is appropriate for the song arrangements, then an uncolored monitor rig will assist in getting everybody what they need without a whole lot of fuss. A monitor rig that’s had a lot of cool-sounding “boom” and “snap” added will, by nature, prioritize sources that emphasize those frequency ranges (and this at the expense of other sources). This can take a good acoustical arrangement and make it poor, or aggravate the heck out of an already not-so-good band configuration. It also tends to lead to feedback problems, because the critical midrange gets lost. Broadband gain is added to compensate, which combines with the effectively positive gain on the low and high-ends, and it all can end with screeching or rumbling as the loop spins out of control.

The ironic thing here is that the “netural” systems end up sounding much more impressive later on, when the show is a success. The rigs that sound impressive with walkup music, on the other hand, sometimes aren’t so nice for the actual show.

So – an audio-human with a rig that is acoustically shaped like nothing is in command of a system that is actually shaped like everything. Under the right circumstances, this means that a signal through the rig will be dialed in without any specific dialing-in being required.


Why Audio Humans Get So Bent Out Of Shape When A Mic Is Cupped

We hate it because it sounds bad, causes feedback, and makes our job harder.

Please Remember:

The opinions expressed are mine only. These opinions do not necessarily reflect anybody else’s opinions. I do not own, operate, manage, or represent any band, venue, or company that I talk about, unless explicitly noted.

[micinfographic]Want to use this image for something else? Great! Click it for the link to a high-res or resolution-independent version.

I recently posted something on my personal Facebook feed. That something was this:

[myface]

A number of people found it funny.

When you really get down to it, though. It’s an “in joke.” The folks who get it have lived through a cupped-mic situation or two, and probably know why it’s a bad idea. For other folks, especially those who have been surprised by being chewed on by an irate sound-craftsperson, the whole thing might not make sense. Why would an audio human get so irritated about how a performer holds a mic? Why is it such a big deal? Why are jokes about mics being cupped such a perennial feature of live-sound forums?

The short answer is that cupped mics sound awful and tend to be feedback monsters. The long answer has to do with why.

The Physics Of How Looking Cool Sounds Bad

Microphones are curious creatures. It might sound counter-intuitive, but creating an omnidirectional mic (a mic that has essentially equal sensitivity at all angles around the element) is actually quite simple. Seal the element in a container that’s closed at the back and sides, and…there you go. Your mic is omni.

Making a directional mic is rather more involved. Directional mics require that the element NOT be housed in a box that’s sealed at the back and sides. Sound actually has to be able to arrive at the rear of the diaphragm, and it has to arrive at such a time that the combination of front and rear pressures causes cancellation. Getting this all to work, and work in a way that sounds decent, is a bear of a problem. It’s such a bear of a problem that you can’t even count on a microphone patent to tell you how it’s done. The details are kept secret – at least, if you’re asking a company like Shure.

But, anyway, the point is that a directional mic is directional because sound can reach the rear of the element. Close off the porting which allows this to happen, and the mic suddenly becomes much more omnidirectional than it was just moments before. Wrapping a hand around the head of the mic is a very efficient way of preventing certain sounds from reaching the back of the capsule, and thus, it’s a very quick way to cause a number of problems.

Feedback

Fighting feedback meaningfully requires that mics be as directional as is practical. The more “screamin’ loud” the monitors and FOH have to get, the more important that directionality becomes. When setting up the show, an audio human inevitably finds a workable equilibrium ratio of gain to feedback. A highly directional mic has much lower gain in the non-sensitive directions than in the sensitive ones. This allows the sound tech to apply more gain in downstream stages (mic pres, monitor sends, FOH faders), as long as those devices result in output that the mic experiences in the “lower-gain detection arc.” At some point, a solution is arrived at – but that solution’s validity requires the gain of all devices to remain the same.

When a mic is cupped such that it becomes more omnidirectional, the established equilibrium is upset. The existing solution is invalidated, because the effective gain of the microphone itself suddenly increases. For instance, a microphone that had a gain of -10 dB at 2 kHz at 180 degrees (degrees from the mic’s front) might now have a gain of -3 dB at 2 kHz at 180 degrees. Although what I’m talking about is frequency specific, the overall result really is not fundamentally different from me reaching up to the mic-pre and adding 7 dB of gain.

Especially for a high-gain show, where the established equilibrium is already hovering close to disaster, cupping the mic will probably push us off the cliff.

Awful Tone

Intentionally omnidirectional mics can be made to sound very natural and uncolored. They don’t rely on resonance tricks to work, so very smooth and extended response is entirely achievable with due care.

Problems arise, however, when a mic becomes unintentionally omnidirectional. Directional mics are carefully tuned – intentionally “colored” – so that the resulting output is pleasant and useful for certain applications. The coloration can even be engineered so that the response is quite flat…as long as the mic element receives sound from the rear in the intended way. Much like the feedback problem I described earlier, the whole thing is a carefully crafted solution that requires the system parameters to remain in their predicted state.

A cupped microphone has its intended tuning disrupted. The mic system’s own resonant solution (which is now invalid), coupled with the resonant chamber formed by the hand around the mic, results in output which is band-limited and “peaky.” Low-frequency information tends to get lost, and the midrange can develop severe “honk” or “quack,” depending on how things shake out. At the high volumes associated with live shows, these narrow peaks of frequencies can range from merely annoying to downright painful. Vocal intelligibility can be wrecked like a ship that’s been dashed on the rocky shores of Maine.

An added bit of irony is that plenty of folks who cup microphones want a rich, powerful vocal sound…and what they end up with is something that resembles the tone of a dollar store clock-radio.

Reduced Output In Severe Cases

The worst-case scenario is when a mic is held so that the ports are obstructed, and the frontside path is ALSO obstructed. This occurs when the person using the mic wraps their whole hand around the grill, and then puts their thumb in the way of their mouth. Along with everything described above, the intervening thumb absorbs enough high-frequency content to make the mic noticeably quieter at frequencies helpful for intelligibility.

So the mic sounds bad, the singer can’t hear it, the whole mess is ready to feedback, the singer wants more monitor, and FOH needs more level.

Lovely.

I think you can see why sound techs get so riled by mic-cuppers. Holding a mic that way is fine if the whole performance is a pantomime. In other situations, though, it’s just bad.


EQ Or Off-Axis?

A case-study in fixing a monitor mix.

Please Remember:

The opinions expressed are mine only. These opinions do not necessarily reflect anybody else’s opinions. I do not own, operate, manage, or represent any band, venue, or company that I talk about, unless explicitly noted.

monitorseverywhereWant to use this image for something else? Great! Click it for the link to a high-res or resolution-independent version.

I’m really interested in monitors. They contribute immensely to the success (or crushing failure) of a show, affect musicians in ways that are often inaudible to me, and tend to require a fair bit of management. I wrote a whole article on the topic of unsuckifying them. Some of the most interesting problems to solve involve monitor mixes, because those problems are a confluence of multiple factors that combine to smash your face in.

You know, like Devastator, the Decepticon super-robot formed by the Constructicons. The GREEN (and purple) super-robot. From the 1980s. It was kind of a pain to put him together, if I remember correctly.

Sorry, what were we talking about again?

Monitors.

So, my regular gig picked up a “rescue” show, because another venue shut down unexpectedly. A group called The StrangeHers was on deck, with Amanda in to play some fiddle. (Amanda is a fiddle player in high demand. If she’s not playing with a band, she is being recruited by that band. I expect that her thrash-metal debut will come shortly.) We were rushing around, trying to get monitor world sorted out. When we got to Amanda, she jumped in with a short, but highly astute question:

“The vocals are loud, but I can’t really make them out. They sound all muddy. Is there a problem with the EQ, or is it something else?”

Indirect

Amanda’s monitor was equalized correctly. The lead vocal was equalized correctly. Well…that is…ELECTRONICALLY. The signal processing software acting as EQ was doing exactly what it should have been doing. Amanda’s problem had to do with effective EQ: The total, acoustical solution for her was incorrect.

In other words, yes, we had an EQ problem, but it wasn’t a problem that would be appropriately fixed with an equalizer.

One of the lessons that live-sound tries to teach – over and over again, with swift and brutal force – is that actually resolving an issue requires addressing whatever is truly precipitating that issue. You can “patch” things by addressing the symptoms, but you won’t have a fix until you get to the true, root cause.

What was precipitating the inappropriate, total EQ for Amanda could be boiled down to one fundamental factor: She wasn’t getting enough “direct” sound.

To start with, she was “off-axis” from all the other monitors she was hearing. Modern loudspeakers for live-sound applications do tend to have nice, tight, pattern control at higher frequencies. As the frequency of the reproduced content decreases, though, the output has more and more of a tendency to just “go everywhere.” Real directivity at low frequencies requires big “boxes,” as the wavelengths involved are quite large. Big boxes, however, are generally not what we want on deck, so we have to deal with what we’ve got. What we’ve got, then, is a reality where standing to the side of a monitor gets you very little in the way of frequency content that contributes to vocal intelligibility (roughly 1 kHz and above), and quite a lot of sound that contributes to vocal “mud.”

Another major factor was that the rest of what Amanda was hearing had been bounced off a boundary at least once. Any “intelligibility zone” material that made it to Amanda’s ears was significantly late when compared to everything else, and probably smeared badly from containing multiple reflections of itself. Compounding that was the issue of a room that contained both people and acoustical treatment. Most anything that was reflected back to the deck was probably missing a lot of high-frequency information. It had been heavily absorbed on the way out and the way back.

Figuring It Out

This is not to say that all of the above snapped instantly into my head when Amanda asked what was wrong. I had to have other clues in order to chase down a fix. Those clues were:

1) Before the show, I had put the mics through the monitors, walked up on deck, and listened to what it all sounded like. For the test, I had a very healthy send level from each vocal mic to the monitors that were directly behind that microphone. Vocal intelligibility was certainly happening at that time, and although things would definitely change as the room changed, the total acoustical solution wouldn’t become unrecognizably different.

2) Nobody else had complained. Although this is hardly the most reliable factor, it does figure in. If the vocals were a muddy mess everywhere, I’m betting that I would have gotten more agreement from the other band members. This suggested that the problem was local to Amanda, and by extension, that a global change (EQ on the vocal channel) would potentially create an incorrect solution for the other folks.

3) On the vocal channel, the send level to the other monitors was high in comparison to the send level to Amanda’s monitor. This was probably my biggest and most immediate clue. When other monitors are getting sends that are +9 dB in relation to another box, the performer is probably hearing mostly the garbled wash from everything OTHER than their own monitor. If the send level to Amanda’s wedge had been high, I might have concluded that the overall EQ for that particular wedge was wrong – although my encouraging, pre-show experience would have suggested that the horn had died at some point. (Ya cain’t fix THAT with an equalizer, pilgrim…)

So, with the clues that I had, I decided to try increasing the send level to Amanda’s monitor to match the send levels to the other monitors. Just like that, Amanda had a LOT more direct sound, everything was copacetic, and off we went.


Building A Small System

A guide to building a simple live-sound rig, from input to output.

Please Remember:

The opinions expressed are mine only. These opinions do not necessarily reflect anybody else’s opinions. I do not own, operate, manage, or represent any band, venue, or company that I talk about, unless explicitly noted.

systembuildingWant to use this image for something else? Great! Click it for the link to a high-res or resolution-independent version.

Every once in a while, I get a request for information on how to create or add-on to a system for live audio. I like to personalize this information, because rigs for show and event production are best built for specific applications. However, there is a point where insisting that everything be approached in a customized way becomes inefficient – a lot of the same ground gets covered repeatedly.

So…

If you’re wondering what I think is required for a “small, basic, but still worthwhile” audio rig, read on. I’ll be including lots of links to vendor pages where you can buy various products.

(We’re going to go in order of signal flow, by the way.)

Input Transducers and Interfaces

For the smallest possible rig, take a distributed approach: With anything other than vocals, have the musician supply their own, personalized sound. Further, seek to avoid the whole issue of putting the output of that sound through the PA. Let a guitar amp make the guitar sound, let the drums just make their own noise in the room, and so on.

Having the ability to put more in the PA increases your potential control over the sound of the show, but outside factors can prevent that potential control from becoming actual control. Also, more inputs means more complexity, and thus more difficulty in system operation. There’s no hard and fast rule of what to be ready to reinforce, but I generally encourage folks – especially folks new to this whole thing – to ease themselves into the maelstrom that is live audio.

Wired Microphones

A decent mic will basically sound like the thing it’s being pointed at. For this reason, don’t agonize about getting specialized mics for everything right off the bat. A good “vocal” mic will be fine for many, many instrument applications. I recommend buying mics with tighter patterns (super or hypercardioid), as they can make the handling of high-gain situations much easier. Tight-pattern mics do require that the musicians – especially the vocalists – be able to use them appropriately. This issue should be considered as something for the musicians to figure out, because no system can fix everything (and a basic rig can fix even less of everything, if you take my meaning).

My current favorite mic is the EV ND767a. You might also consider the Audix OM2. Here’s a comparison of the two at Sweetwater.

Microphone Accessories

Each mic you buy will require an appropriate stand and XLR-Female to XLR-male cable.

Budget stands (like these from OnStage Stands) are just fine… if you can put in the effort to be nice to them. Gator Frameworks also has some promising offerings.

When it comes to cable, don’t overspend and don’t oversave. For a 20+ foot mic cable, paying more than $1.00 per foot is a huge premium for no benefit that I’ve been able to clearly observe. There are perfectly decent cables that can be had for as low as $0.40 per foot when purchased in a bundle. Going much below that, though, is likely to lead to problems.

I’ve been quite happy with cables I’ve gotten from Audiopile and Orange County Speaker. I’ve gotten some REALLY inexpensive cables from Unique Squared that were okay for a good while, but started having problems after a number of uses.

Wireless Mics

One word: Don’t.

Wireless is a pain in the donkey, with the FCC selling off all kinds of UHF spectrum to cellphone and computing companies, and the frequencies used for digital wireless becoming ever more crowded and hostile. Functionally, wireless transmission of audio is far more “fragile” than signal running on a cable, with all kinds of weird things that can happen outside your control.

But no matter what I say, you’re going to buy at least one wireless mic anyway, so…

Buy a digital system that operates in the 2.4 Ghz band if you want a chance at retaining your sanity in the short term. Specifically, look at the XD-V55 systems by Line 6. They’re very reasonably priced, have nice features like remote monitoring of mute status and battery level, and are the best wireless experience I’ve personally had to date.

You can, of course, go up from there.

Wireless Mic Accessories

Handheld wireless mics benefit greatly from having a stand available for every transmitter. Further, each receiver will need a cable to interface with the rest of the system.

Direct Boxes

A direct box is what I class as an “interface,” because it doesn’t convert acoustical events into electrical signals. A DI makes signals that are already electrical play nicely with pro-audio equipment when they might not otherwise. An aspect of this is also isolation, in that the DI creates what you might call an indirect connection between a console and a device. This can be very handy if the sending device (a guitar, keyboard, sampler, whatever) can’t tolerate phantom power, and the console has phantom applied to the signal line in question.

Direct boxes come in two main flavors, passive and active. Active DI boxes require external power of some kind, be that power from the wall, batteries, or phantom from the console. If you’re going to buy DI boxes, buy ACTIVE models. An active DI will work with almost anything, whereas some instrument pickups pair quite badly with passive boxes. You might as well buy units that work everywhere, and thus simplify your life. Expensive models from BSS, Radial, and Countryman are certainly nice, but there’s great value to be had in units from ART and Behringer, especially the “multiple modules in one box” offerings.

DI Box Accessories

Just like a microphone, each DI box will require an XLR-Female to XLR-Male cable. Remember that multi-module DI boxes require a cable for each individual module.

You don’t have to actually mount a rackable DI system, but you might want to. Sweetwater and Audiopile both sell quality rack cases in a huge variety of configurations.

Snakes/ Multicore Connections

Depending upon how you implement the mix and signal processing part of the rig, you may or may not require multicore cabling. If you want to send and receive a bunch of audio signals at a remote location, a snake really is a must. If you merely want to control the processing of signals from a remote location, you might be able to use your console in the same way you would use a traditional snakehead or stagebox.

If you do use a multicore, I suggest getting one that’s a little “overkill” in terms of the number of lines it contains. If a line fails, you’ll have a spare to patch to. “Headless or “fan-to-fan” snakes are a bit cheaper, but less convenient than multicores that terminate one end at a box. (You will always have to hunt for the specific line you want to connect to. It’s like a law of nature, or something.)

Audiopile would be my first choice for buying a snake I was really serious about. I have had good results with Seismic Audio fantail-to-fantail snakes, but my experience with their stagebox offerings has been mixed.

Mixing Consoles and Output Processing

This is where things get REALLY interesting.

Essentially, you have three major choices:

1) Use a relatively simple console where output processing is handled externally, and place all that at a “remote” location.

2) Use a more sophisticated console that encapsulates the output processing, and place the console at a “remote” location.

3) Use a more sophisticated console that encapsulates the output processing, leave the console close to the stage, and control the console from a remote location.

Option one takes up more space and requires more complicated physical patching, but the interface can be easier to understand at an intuitive level. Option two is compact and easy to physically patch, but the whole thing can be less intuitive for an inexperienced operator. Option three is like option two, with the added issue that control can depend entirely on an external device and network connection. If those fail, you may be in big trouble.

In every case, a console with some room to grow in terms of both inputs and outputs is a good idea. Don’t go overboard, though. You’ll end up spending a lot of money to no functional end. Especially if you’re new to all this, keep your monitor sends down to a maximum of four.

Option 1

The Console

Whatever you do, buy a console where the EQ has sweepable mids on the EQ and pre-fader auxiliary sends for each unique monitor mix you want to handle. A Soundcraft EPM8 is probably the minimum you should look for. I’ve been quite pleased with Yamaha’s mid-basic offerings, which have been revamped since I’ve bought one.

Simple, analog consoles “race” in a VERY tight pack, which means that there are lots of little permutations and many viable choices. Mackie, A&H, and Peavey are all worth looking at, and Behringer, while not having the shiniest reputation, has a knack for cramming lots of features into small cost. An XL2400 has what I would consider to be pretty darn flexible routing for a $650 mixer.

Console Accessories

Some consoles can be easily cased up or rackmounted, and some can’t.

You will need patch cables and/ or adapters with appropriate ends to get from your console outputs to your processing, one cable for each channel. As with other cables, high-dollar options really aren’t necessary. Stay somewhere in the $2/ foot range, and you’ll have patch connections that are long enough for some wiggle room and cheap enough that you won’t cry about ’em.

Also, get yourself a decent set of headphones for listening to the console’s solo bus. I have a pair of very-well-loved HD280s, and lots of other options exist. You want to look for closed-back, durable, “un-hyped” phones if you’re doing your own hunting.

The Processing

What you choose for output processing depends greatly on your own personal taste and comfort level. At the minimum, you should have an independent EQ for each mix. A really basic setup might be three mixes – one for the audience, and two monitor mixes for the stage. Things go up from there, of course.

Graphic equalizers, while not my personal favorite, are straightforward for most folks to operate. I generally recommend 31-band models over 15-band units, because you can focus in on a problem area without sledgehammering material that’s not making trouble. Peavey and dBX are good overall bets, but affordable graphics are similar to affordable consoles: All the players are very similar. I do like the features of the Behringer FBQ3102, but I also had one die after a year of use and a bumpy ride in the back of a truck.

If I’m going for an EQ-only solution, I can tell you that I vastly prefer a flexible parametric EQ over a graphic. In that realm, I have been extremely impressed by Behringer’s Feedback Destroyers. To be clear, my experience is that their automated feedback management is mediocre at best – but they are WICKED HANDY when you run them manually. You get a huge number of fully parametric filters at a very low price point. I’ve never had a major problem with any Feedback Destroyer I’ve owned. (Be aware that parametric EQ is more involved than graphic EQ. It’s not quite as “grab-n-go.” There are more choices that you have to make deliberately.)

If you want your processing to include dynamics, and also to let you have a graphic EQ combined with a parametric EQ, then a Behringer DEQ2496 is another killer device. Again, I haven’t found anything else exactly like it “in the wild,” although a Driverack PA2 is actually very close. DEQ2496 units do sometimes have problems with one of the internal connectors getting loose, but it’s an easy fix once you get the cover pulled off the device…and the connector freed from being glued down. (You will very definitely void your warranty if it’s still in effect, but hey, live a little.)

Processing Accessories

You may or may not be able to patch your snake returns (or other output cables) directly to your processing, so some adapters or patch cables might be necessary.

Also, you should definitely rack up any outboard processors you have for your system. It really does help to keep things neat and tidy.

Option 2

The Console

Digital consoles are a great route to take if you want to keep everything in one box. The downside, of course, is that the one box becomes a single point of failure. Then again, in any case, losing the console pretty much ends your day if you don’t have a spare.

Another factor to consider is that the processing available in digital consoles tends to be more fully featured while also being somewhat abstracted. This can make them overwhelming for new users, who simply don’t know what to make of all the options available.

If you’re going to be physically present at the console, you may as well get one that has a control-surface integrated in some way. An X32 Producer is a pretty natural choice, along with offerings from Presonus, Allen & Heath, and QSC.

Console Accessories

As was said earlier, rackmounting or casing the console might be possible. You can decide if you want to go to the expense or not.

The need to buy patch cables or adapters may still be there, depending on the configuration of your snake or other output lines.

And you’ll still want some headphones.

Option 3

The Console

You can leave the console on stage and mix remotely with the consoles detailed above, although the control surface might be a bit of a waste. Affordable digi-mixers that lack a surface are an interesting new product on the scene – just remember to factor in the cost of a remote-control laptop or tablet. Also, be aware that remote control is inherently a bit more “shaky” than being physically present at the mixer. It’s not horribly problematic, of course, but you have to have a contingency plan.

Surfaceless consoles at lower price points are available from Behringer, Soundcraft, and A&H. More expensive units also exist, of course.

Console Accessories

Surfaceless consoles are definitely rackable, and definitely should be.

Remember to buy the necessary patch cables or adapters for the outputs.

…but you can probably skip the headphones, because the consoles don’t currently stream the solo bus to a remote location (that I know of). That’s another downside of the number three option – to access the solo bus, you still have to be physically present at the console’s location.

Output Transducers (Speakers, That Is)

You’ll notice that I didn’t include an option for amps and passive speakers, and there’s a reason for that: This is supposed to be a simple system, and powered speakers are really the way to go to achieve simple.

Also in the service of simple is to keep your monitor wedges and FOH speakers interchangeable. Unless it’s completely inappropriate for your application, having loudspeakers that are all of the same model means that you can expect similar behavior from each box. If a failure occurs, you can swap one box for another and not have to think about it too much.

When buying powered loudspeakers, accept nothing less than an honest-to-goodness, biamped, fully processed unit. There are plenty of powered speakers that are single amped, with no processing outside of a passive crossover that is placed between the amplifier and the drivers. You want something more – something with an active crossover, basic corrective EQ applied at the factory, and an internal limiter. A peak SPL rating of greater than 120 dB @ 1 meter is also a good thing to look for, even with all the “fudging” that marketing departments apply to output numbers.

In terms of specific recommendations, I can say that PVXP12s have done very well for me. I can do “rock and roll” monitors with them in a small space, and I’m confident that they would perform equally well as an FOH unit. There are lots of other possibilities of course, provided by JBL, Mackie, Yamaha, and Behringer (just to name a few).

Loudspeaker Add-Ons

First, make sure you have the necessary cables to get from the console or snake outputs to the loudspeakers. Because speakers tend to be deployed in a rather spread-out fashion, it’s advisable to buy a bit more cable than you think you need. A 50 footer for each loudspeaker is probably a good start.

When it comes to stands for your FOH speakers, it’s good to get something a little nicer. Stands with locking collars and/ or piston assists can be a big help. I’ve used crank stands in the past, and they’re okay, but given a chance I’d make the upgrade to a more technologically advanced support.

The Biggest Accessories Of All

In the end, none of the fancy gear will mean much without power. You don’t have to buy really fancy power-conditioning equipment, but some rackmountable power units help reduce the need to fish around for a bunch of “free range” power taps. Of course, you should still keep a few freely-positionable power taps handy, along with several extension cords that use 14-gauge conductors (or something beefier, like 12-gauge). Powered speakers spread out all over creation have an alarming tendency to need those extension cords.


While there are other sundries and gadgets you can add on, going through the above should get you a working rig. As I said, this is a basic system. It won’t do everything for everybody all the time, but it should provide you with a decent start.

The Puddle Mountain Arc

If you have the space and technical flexibility, a semicircular stage layout can be pretty neat.

Please Remember:

The opinions expressed are mine only. These opinions do not necessarily reflect anybody else’s opinions. I do not own, operate, manage, or represent any band, venue, or company that I talk about, unless explicitly noted.

monitorsWant to use this image for something else? Great! Click it for the link to a high-res or resolution-independent version.
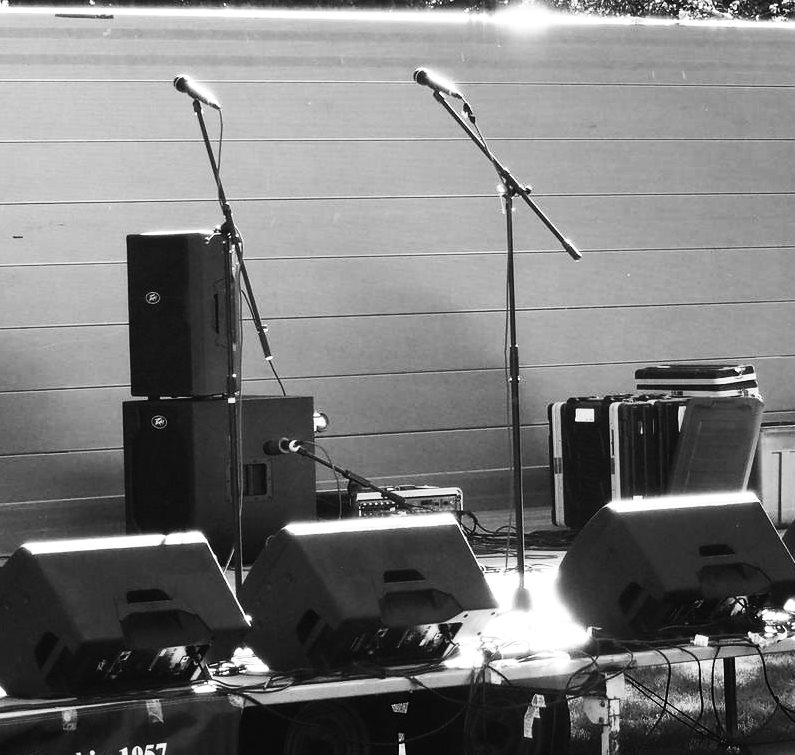
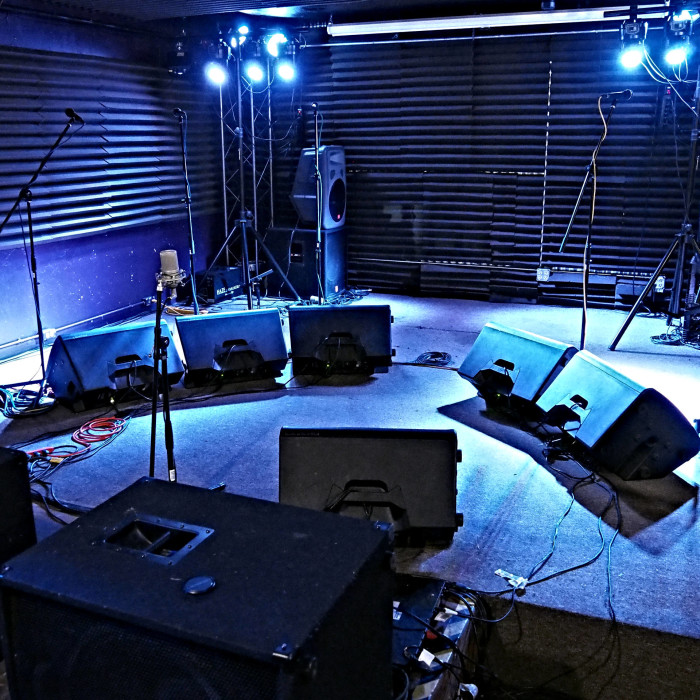
Just last week, my regular gig hosted a show for The Puddle Mountain Ramblers. During the show advance, Amanda proposed an idea.

What if we set up the stage so that the layout was an arc, instead of a straight line?

I thought that was a pretty fine idea, so we went with it. The way it all came together was that fiddle, bass, and banjo were on the stage-right side, the drums were upstage center, and guitar plus another fiddle were on the stage-left side. The setup seemed very effective overall.

Why?

Visibility, Separation, and Such

The main reason for the setup was really to facilitate communication. PMR is a band that derives a good deal of comfort and confidence from the members being able to see what each other player is doing. Also, it’s just generally nice to be able to make eye contact with someone to let them know that it’s their turn for a solo. Setting up in an arc makes this much easier, because you can get essentially unobstructed sightlines from each player to every other player. An added benefit is that all the players are closer together on average, which reduces the difficulty of reading faces, identifying hand movements, and keeping time. (An arc is geometrically more compact than a line. In a linear configuration, the farthest that any two players can be from each other is the entire length of the line. Bend that same line into a circle or circle-segment, and the farthest that any two players can be from each other is the line length divided by pi. That’s a pretty significant “packing.”)

Another benefit of the configuration is (potentially) reduced drum bleed. In a traditional setup, an upstage drumkit is pretty much “firing” into the most sensitive part of all the vocal and instrument mics’ pickup patterns. In an arc layout, with the drums at the center, the direct sound from the kit enters any particular mic at some significant off-axis angle. This bleed reduction can also extend to other vocals and instruments, especially because the mics can easily be at angles greater than 90 degrees relative to other sources.

Of course, it’s important to note that – especially with wide-pattern mics, like SM58s and other cardioids – compacting the band may undo the “off-axis benefit” significantly. This is especially true for bleed from whatever source is commonly at the midpoint of the arc’s circumference, like a drumkit probably would be. For the best chance of bleed reduction, you need tighter-patterned transducers, like an ND767a, or Beta 58, or e845, or OM2, or [insert your favorite, selectively patterned mic here]. Even so, the folks closest to, and at the smallest angle from the drumkit should be the strongest singers in the ensemble, and their miced instruments should be the most able to compete with whatever is loud on deck.

A third “bit of nifty” that comes from an arc setup is that of reduced acoustical crosstalk from monitor wedge to monitor wedge. With all the wedges firing away from each other, instead of in parallel paths, the tendency for any one performer to hear the wedges adjacent to them is reduced. Each monitor mix therefore has more separation than it otherwise might, which can keep things “cleaner” overall. It may also reduce gain-hungry volume wars on the deck.

Downsides

There are some caveats to putting a band on stage in a circle-segment.

The first thing to be aware of is that you tend to lose “down center” as a focal point. It’s not that you can’t put someone in there, but you have to realize that the person you’ve put down-center will no longer get the visibility and communication benefits of the arc. Also, a down-center wedge will probably be very audible to the performers standing up-center from that monitor, so you’ll have to take that into account.

The more isolated that monitor-mix sources become from one another, the more important it becomes that each monitor mix can be customized for individual performers. If you were on in-ears, for instance (the ultimate in isolated monitor feeds), separate mixes for each individual would be almost – if not entirely – mandatory. Increasing the mix-to-mix acoustical isolation pushes you towards that kind of situation. It’s not that shared mixes can’t be done in an arc, it’s just that folks have to be inclined to agree and cooperate.

A corollary to the above is that the show complexity actually tends to go up. More monitor mixes means more to manage, and an arc layout requires more thinking and cable management than a linear setup. You have to have time for a real soundcheck with careful tweaking of mixes. Throw-n-go really isn’t what you want to do when attempting this kind of layout, especially if you haven’t done it before.

Another factor to consider is that “backline” shouldn’t actually be in the back…unless you can afford to waste the space inside the arc. If at all possible, amps and instrument processing setups should utilize the empty space in front of everybody, and “fire” towards the performers (unless it’s absolutely necessary for the amps to combine with or replace the acoustical output of the PA).

If these considerations are factors you can manage, then an arc setup may be a pretty cool thing to try. For some bands, it can help “square the circle” of how to arrange the stage for the best sonic and logistical results, even if pulling it all off isn’t quite as easy as “pi.”

I’ll stop now.