Noisy folk increase your need for PA output.
Please Remember:
The opinions expressed are mine only. These opinions do not necessarily reflect anybody else’s opinions. I do not own, operate, manage, or represent any band, venue, or company that I talk about, unless explicitly noted.

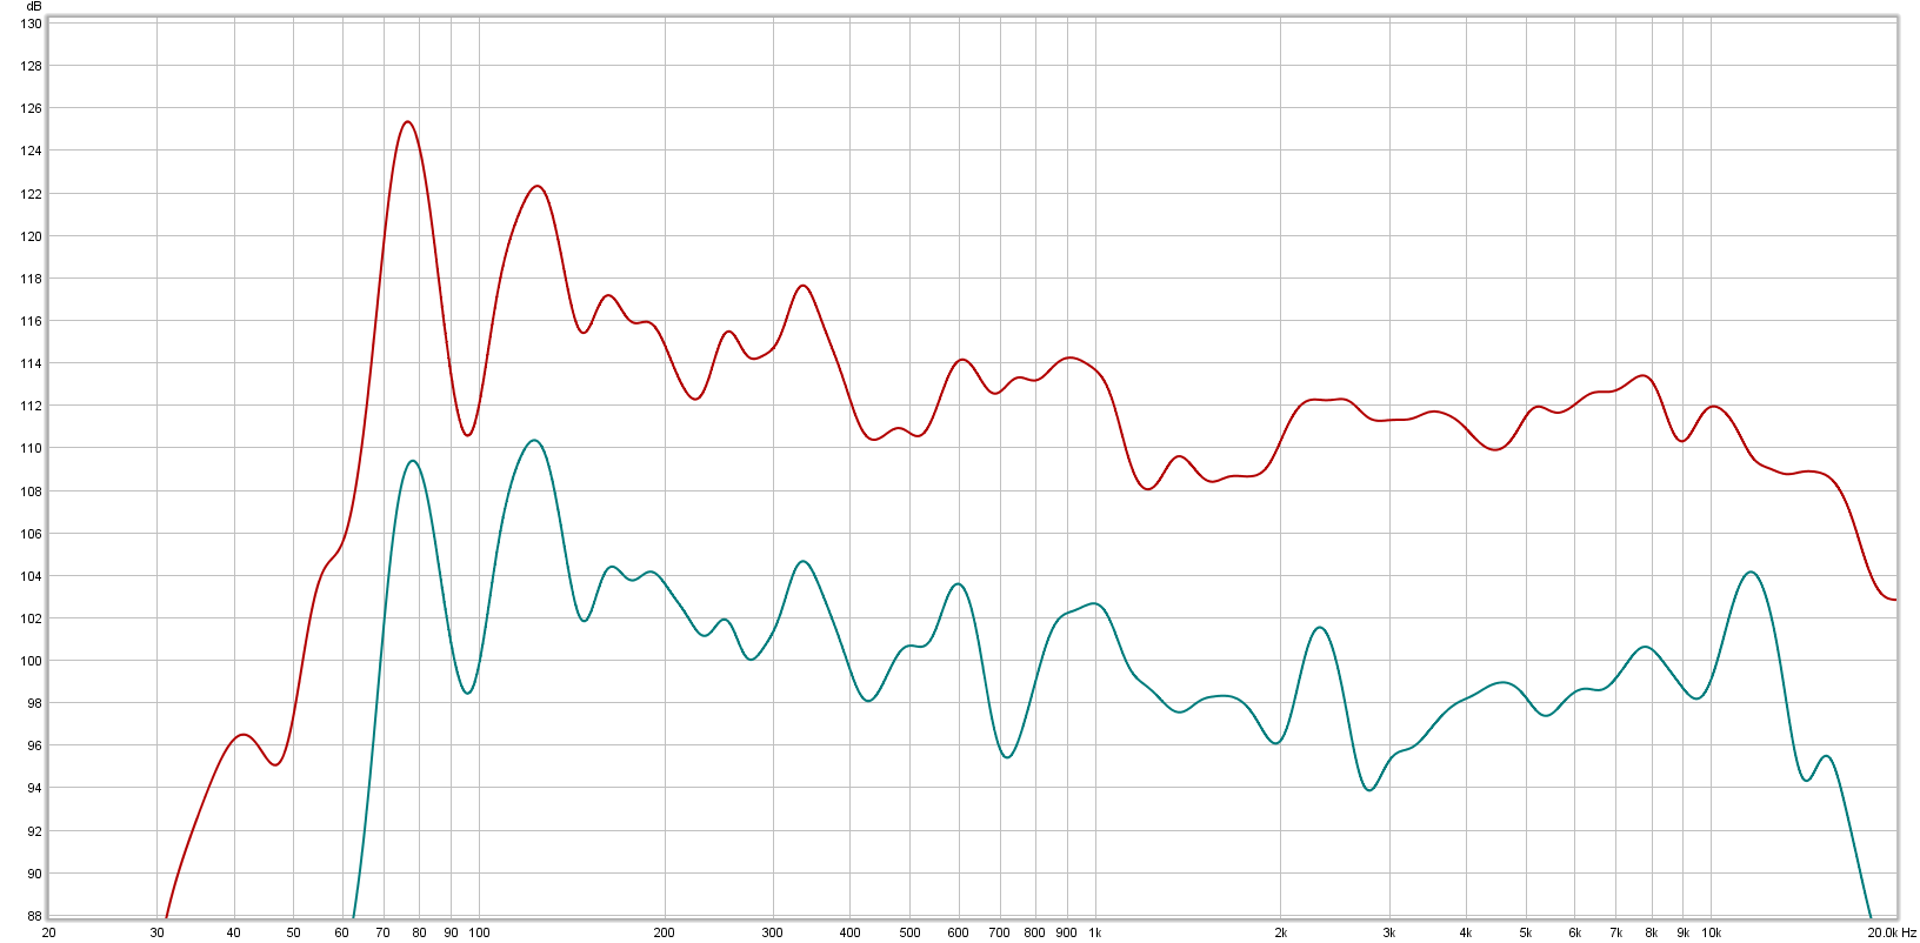
 Want to use this image for something else? Great! Click it for the link to a high-res or resolution-independent version.
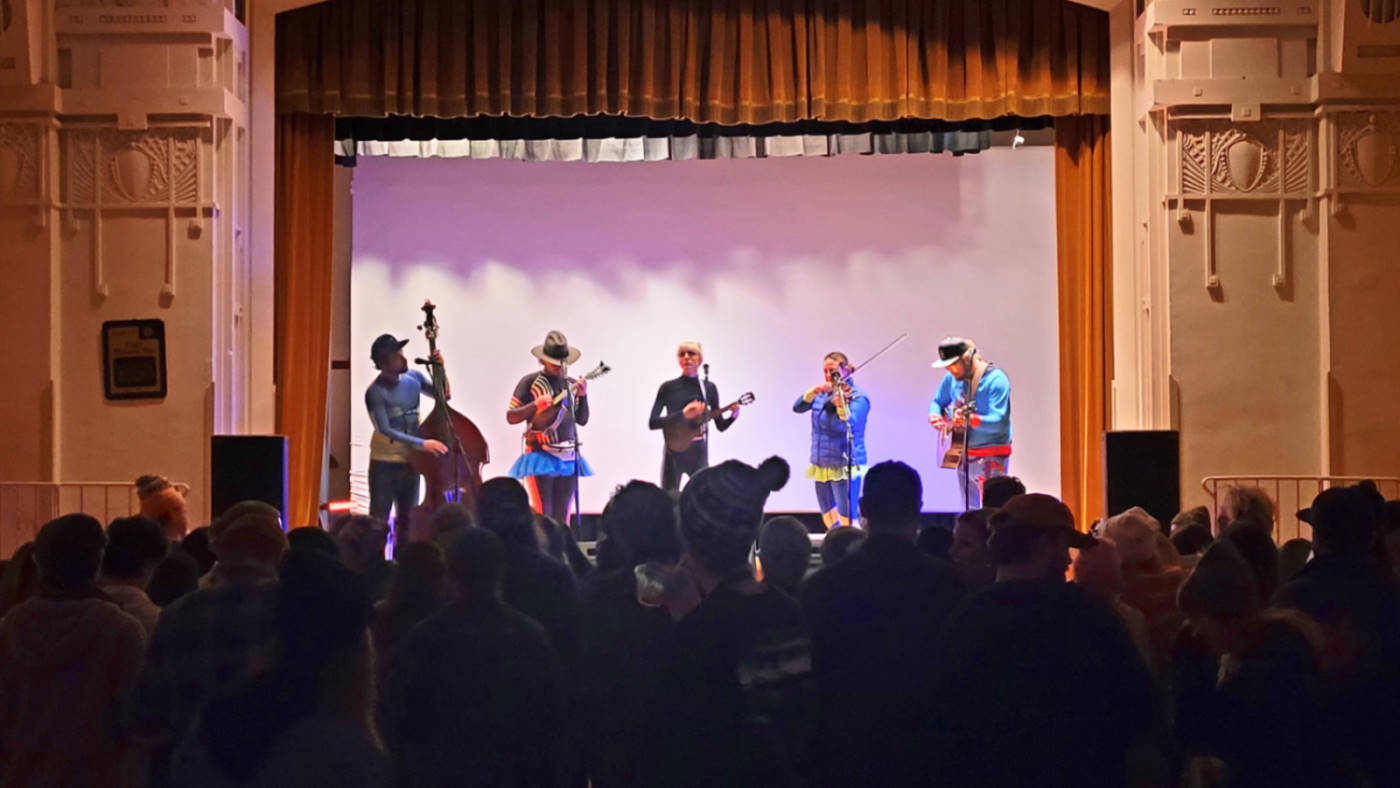
“How…how can this not be loud enough?”
That was my thought as Pixie And The Partygrass Boys launched into their set for the Shredfest afterparty. At soundcheck, I had been concerned that we were running too hot, and also that the overall mud and mush of the room were too much. I had dug a big hole in the midrange trying to fix it, and I had felt pretty successful with the whole endeavor.
That was working against me now.
(I also needed more trim height on the main PA, trim height that simply wasn’t available.)
What had changed, of course, was that we had a gaggle of merry-makers in the room who were there to demonstrate precisely how they were the incarnation of those who ski and party. (You can’t if you don’t, as some of you may well know.) We didn’t have enough of these humans to change the room’s reverb time in any way that I could perceive. What we did have was enough to absorb some of the PA’s output, especially with the loudspeakers having only their HF horns above head-height.
We also had more than enough to make a rather surprising amount of noise in the midrange band of the audible spectrum. You know, human voices and all that.
What I needed was volume. Sheer power. More gain was part of the answer, but I only had so much of that available. Gain before feedback in that room, with the PA deployment on hand, and my original EQ curve applied – well, that was anything but unlimited. What I had as a real option, then, when changing my overall tonal balance. I needed more energy in the “crowd roar” band, because that was the area being masked by all the…you know…crowd roar.
I made my overall EQ solution flatter, and I got on the gas. I got the show about as loud as I could reasonably get it, and it ended up being just about loud enough to get us through. I don’t get into a lot of shoving matches with audience noise, but apparently when I do it works out like this.