Tag Archives: Feedback

Rusty Halos And Screaming Feedback

Your biases can kick your own butt.

Please Remember:

The opinions expressed are mine only. These opinions do not necessarily reflect anybody else’s opinions. I do not own, operate, manage, or represent any band, venue, or company that I talk about, unless explicitly noted.

Want to use this image for something else? Great! Click it for the link to a high-res or resolution-independent version.

I am sometimes hired to go in and fix things.

Such was the case with a recent event at a small but classy amphitheater. The show promoters had brought me in because of severe problems they had encountered on the previous attempt. A year earlier, the show had been badly marred by persistent feedback issues, and there was a real (entirely founded) concern that the house crew was simply not up to the task.

“The monitors were SO LOUD,” it was said to me, and I was sure I could make things better. Firstly, I would be sure to run things at a reasonable volume – and the rest would surely be academic.

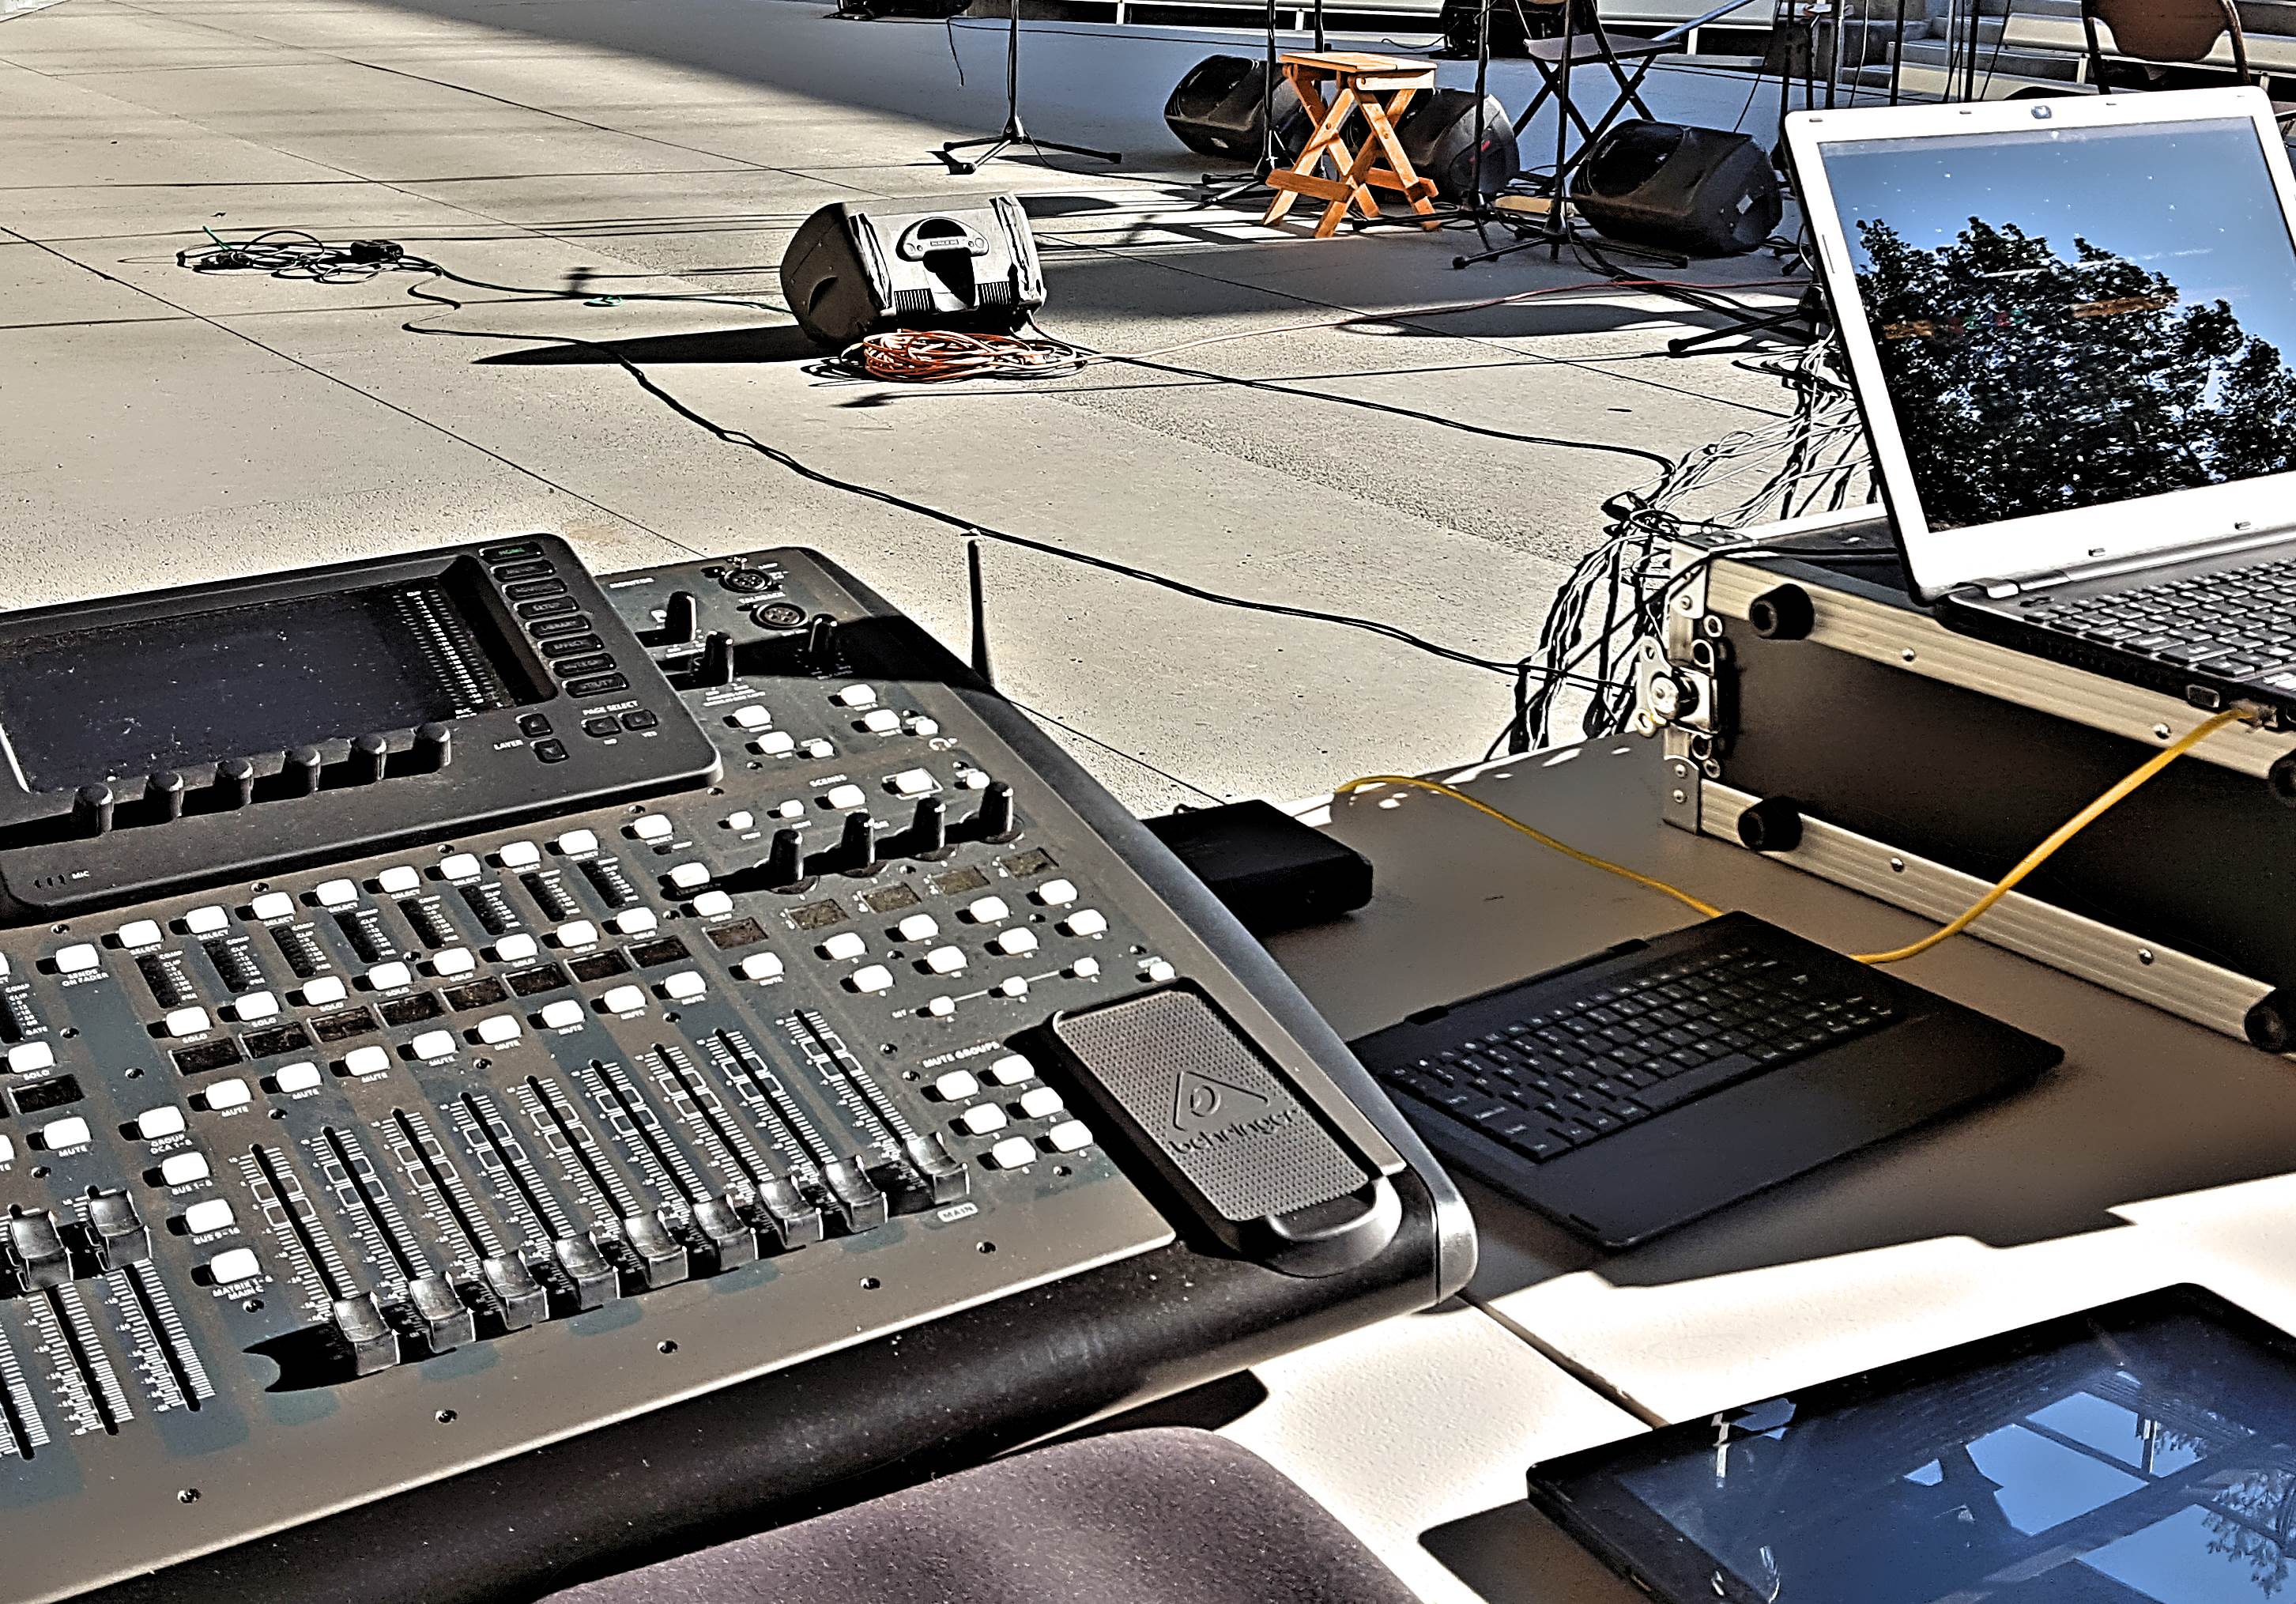
Thus, I got the gig. Then we had a site visit. At the end of the visit, I made a plan: I would take some of the realtime workload off the house FOH engineer by running monitor world. They had all the loudspeaker hardware we needed, so I’d just bring a console and a split. No problem!

The day came, we patched in, and started line checking. Everything was fine, although I felt like I had to be “on the gas” to get a reasonable amount of SPL from the wedges. Nothing truly weird there.

The first act was a couple of tunes in when the trouble started. Feedback started building up, getting progressively worse until a mic on an acoustic guitar blasted off with a shriek that drove the input into clipping. I quietly rolled my eyes at the FOH engineer, thinking that they were winding things up without any necessity. At the same time, the lead performer got on the mic and asked for the gains on everything to be dropped. I did so, not believing that anything was wrong with monitor world, but definitely wanting to make an audible change for the purposes of keeping everybody calm. I mean, hey, FOH was not to be trusted. (This is a general rule. If you’re on monitor duty, FOH is the problem. If you’re on FOH, monitor beach is at fault. If everything is fine for audio, look out! Somebody in lighting is about to screw up.)

Anyway.

Things did indeed settle down, so I thought, “Now we can get monitor world back to where it’s supposed to be. The performers will be happy to hear themselves again.”

*Screeech!*

“Geeze, FOH…” I thought.

The stage manager asked me if there was anything I wanted to relay up to the FOH mix position. “Yeah, let’s pull the whole mix back 6 dB.” Everything seemed okay. I tried to get things back to normal in monitor world, and *Screech!*

Holy crap. The problem was on MY SIDE of the equation! As realization dawned, my brain actually started to work. There was no way that FOH would feed back in that frequency range, unless they were running at a ludicrous volume. It was monitor world. It couldn’t be anything else than monitor world. FOH was just fine…I was the idiot for the day! I had given FOH a “rusty halo,” which is the assumption of continuing inadequacy after a bad experience. Sometimes people deserve a rusty halo, and sometimes not. This was a definite case of “not.”

I’m still not sure quite what happened. The only explanation that seems at all reasonable to me is that the powered wedges we were using somehow underwent an unexpected increase in onboard gain. How that was precipitated, I can’t really guess, though the monitors that seemed to be giving me trouble were exposed to heat and sun until shortly before the trouble began. (A general cooldown of the components in the boxes seems like a farfetched reason to me, but that variable does correlate with the problem appearing. Correlation is not necessarily causation, but still.)

It was revealed later that the monitor wedges we used almost always seem to do something strange to the house crew. We say that it’s a poor craftsman who blames their tools, but if your tool is inadequate or dangerous then you can’t possibly do your best work. My guess is that the personnel at the venue are perfectly adequate to their tasks, and faulty equipment is their downfall. The same thing happened to me as what I imagine happened to them: They had things working perfectly well at soundcheck time, and then the wedges launched themselves into orbit. “The monitors were SO LOUD” had just become part of my own reality, which leads me to believe that I encountered the same issue as they did the previous year.

In the end, though, the important lesson was that I didn’t take the appropriate actions at an appropriate speed, because I was assuming that my side of the mix could not possibly be at fault. No! Your side of the show can ALWAYS be the problem. Look. Listen. Consider. Act.


The Difference Between The Record And The Show

Why is it that the live mix and the album mix end up being done differently?

Please Remember:

The opinions expressed are mine only. These opinions do not necessarily reflect anybody else’s opinions. I do not own, operate, manage, or represent any band, venue, or company that I talk about, unless explicitly noted.

Want to use this image for something else? Great! Click it for the link to a high-res or resolution-independent version.

Jason Knoell runs H2Audio in Utah, and he recently sent me a question that essentially boils down to this: If you have a band with some recordings, you can play those recordings over the same PA in the same room as the upcoming show. Why is it that the live mix of that band, in that room, with that PA might not come together in the same way as the recording? The recording that you just played over the rig? Why would you NOT end up having the same relationship between the drums and guitars, or the guitars and the vocals, or [insert another sonic relationship here].

This is one of those questions where trying to address every tiny little detail isn’t practical. I will, however, try to get into the major factors I can readily identify. Please note that I’m ignoring room acoustics, as those are a common factor between a recording and a live performance being played into the same space.

Magnitude

It’s very likely that the recording you just pumped out over FOH (Front Of House) had a very large amount of separation between the various sources. Sure, the band might have recorded the songs in such a way as to all be together in one room, but even then, the “bleed” factor is very likely to be much smaller than what you get in a live environment. For instance, a band that’s in a single-room recording environment can be set up with gobos (go-betweens) screening the amps and drums. The players can also be physically arranged so that any particular mic has everything else approaching the element from off-axis.

They also probably recorded using headphones for monitors, and overdubbed the “keeper” vocals. They may also have gone for extreme separation and overdubbed EVERYTHING after putting down some basics.

Contrast this with a typical stage, where we’re blasting away with wedge loudspeakers, we have no gobos to speak of, and all the backline is pointed at the sensitive angles of the vocal mics. Effectively, everything is getting into everything else. Even if we oversimplify and look only at the relative magnitudes between sounds, it’s possible to recognize that there’s a much smaller degree of source-to-source distinctiveness. The band’s signals have been smashed together, and even if we “get on the gas” with the vocals, we might also be effectively pushing up part of the drumkit, or the guitars.

Time

Along with magnitude, we also have a time problem. With as much bleed as is likely in play, the oh-so-critical transients that help create vocal and musical intelligibility are very, very smeared. We might have a piece of backline, or a vocal, “arriving” at the listener several times over in quick succession. The recording, on the other hand, has far more sharply defined “timing information.” This can very likely lead to a requirement that vocals and lead parts be mixed rather hotter live than they would be otherwise. That is, I’m convinced that a “conservation of factors” situation exists: If we lose separation cues that come from timing, the only way to make up the deficit is through volume separation.

A factor that can make the timing problems even worse is those wedge monitors we’re using, combined with the PA handling reproduction out front. Not only are all the different sources getting into each other at different times, sources being run at high gain are arriving at their own mics several times significantly (until the loop decay becomes large enough to render the arrivals inaudible). This further “blurs” the timing information we’re working with.

Processing Limits

Because live audio happens in a loop that is partially closed, we can be rather more constrained in what we can do to a signal. For instance, it may be that the optimal choice for vocal separation would simply be a +3 dB, one-octave wide filter at 1 kHz. Unfortunately, that may also be the portion of the loop’s bandwidth that is on the verge of spiraling out of control like a jet with a meth-addicted Pomeranian at the controls. So, again, we can’t get exactly the same mix with the same factors. We might have to actually cut 1 kHz and just give the rest of the signal a big push.

Also, the acoustical contribution of the band limits the effectiveness of our processing. On the recording, a certain amount of compression on the snare might be very effective; All we hear is the playback with that exact dynamics solution applied. With everything live in the room, however, we hear two things: The reproduction with compression, and the original, acoustic sound without any compression at all. In every situation where the in-room sound is a significant factor, what we’re really doing is parallel compression/ EQ/ gating/ etc. Even our mutes are parallel – the band doesn’t simply drop into silence if we close all the channels.


Try as we might, live-sound humans can rarely exert the same amount of control over audio reproduction that a studio engineer has. In general, we are far more at the mercy of our environment. It’s very often impractical for us to simply duplicate the album mix and receive the same result (only louder).

But that’s just part of the fun, if you think about it.


The Pros And Cons Of Distributed Monitor Mixing

It’s very neat when it works, but it’s not all sunshine, lollipops, and rainbows.

Please Remember:

The opinions expressed are mine only. These opinions do not necessarily reflect anybody else’s opinions. I do not own, operate, manage, or represent any band, venue, or company that I talk about, unless explicitly noted.

powerplayWant to use this image for something else? Great! Click it for the link to a high-res or resolution-independent version.

Along with folks who rock the bars and clubs, I also work with musicians who rock for church. Just a few months ago, as City Presbyterian’s worship group was expanding (and needing more help with monitoring), I decided to put the players on a distributed monitor-mix system. What I mean by a “distributed” system is that the mix handling is decentralized. Each musician gets their own mini-mixer, which they use to “run their own show.”

The experience so far has been basically a success, with some minor caveats. The following is a summary of both my direct observations and theoretical musings regarding this particular monitoring solution.


Pro: In-Ear Monitors Become Much Easier For The Engineer

One downside to in-ears is that the isolation tends to require that everyone get a finely tuned mix of many channels. This is especially true when you’re running a quiet stage, where monitor world is required to hear much of anything. What this mandates is a lot of work on behalf of each individual performer, with the workload falling squarely on the shoulders of the audio human.

Distributed monitor mixing takes almost all of the workload off the sound operator, by placing the bulk of the decision making and execution in the hands of individual players. If the lead guitarist wants more backup vocals, they just select the appropriate channel and twist the knob. If they want the tonality of a channel altered, they can futz with it to their heart’s content. Meanwhile, the person driving the console simply continues to work on whatever they were working on, without giving much thought to monitor world.

Con: Monitors Become Harder For The Player

Much like effort and preparation, complexity for the operation of a given system can neither be created nor destroyed. It can only be transferred around. A very, very important thing to remember about distributed monitor mixing is this: You have just taken a great deal of the management and technical complexity involved in mixing monitors, and handed it to someone who may not be prepared for it. Operating a mix-rig in a high-performance, realtime situation is not a trivial task, and it takes a LOT of practice to get good at it. To be sure, a distributed approach simplifies certain things (especially when in-ears essentially delete feedback from the equation), but an inescapable reality is that it also exposes a lot of complexity that the players may have had hidden from them before. Things like sensible gain staging and checking for sane limiter settings are not necessarily instinctual, and may not be a part of a musician’s technical repertoire on the first day.

Also, as the engineer, you can’t just plug in each player’s mixer and mentally check out. You MUST have some concept of how the mixers work, so that you can effectively support your musicians. Read the manual, plug in one of the units, and turn the knobs. Personal mixers may be operated by individual players, but they really are part of the reinforcement rig – and thus, the crew is responsible for at least having some clue about how to wield them.

Pro: You Don’t Necessarily Have To Use In-Ears

I have yet to encounter a personal-mix system that didn’t include some sort of “plain vanilla” line output. If the musicians want to drive a powered wedge (or an amplifier for a passive wedge) with their mixer, they can.

Con: Not Using In-Ears May Cause Trouble

As I said before, mixing in a high-performance situation isn’t an easy thing that humans are naturally prepared to do. Life gets even more hairy in a “closed-loop” situation – i.e., onstage monitoring with mics and loudspeakers. A musician may dial their piece of monitor world (at a bare minimum) into SCREAMING feedback without realizing their danger. They may not recognize how to get themselves out of the conundrum.

And, depending on how your system works, the audio human may not be able to “right the ship” from the mix position.

Even if they don’t get themselves swallowed by a feedback monster, a player can also run their mix so loud that they’re drowning everybody else, including the Front Of House mix…

Pro: Integrated Ecosystems Are Powerful And Easy

As more digital console “ecosystems” come online, adding distributed mixing is becoming incredibly easy. For instance, Behringer’s digital Powerplay products plug right into Ultranet with almost zero fuss. If your console has Ultranet built-in, you don’t have to worry about tapping inserts or direct outs. You just run a Cat5/ Cat6 cable to a distribution module, the module sends data and power over the other Cat5/6 runs, and everything just tends to work.

Con: Once You’ve Picked Your Ecosystem, You’ll Have To Stay There

Integrated digital audio ecosystems make things easy, but they tend to only play nice within the same extended family of products. You can’t run an Ultranet product on an Aviom monitor-distro network, for instance. More universal options do exist, but the universality tends to come with a large price premium. Whenever you go a certain way with a system of personal mixers, you’re making a big commitment. The jump to a different product family may be difficult to do…or just a flat-out expensive replacement, depending upon the system flexibility.

Pro: Everybody Can Have Their Own Mixer

Distributed mixing can be a way to banish all monitor-mix sharing for good. Everybody in the band can not only have their own mix, but their own channel equalization as well. If the guitar player wants the bass to sound one way, and the bass player wants the bass to sound totally different, that option is now very viable. Each musician can build intricate presets inside their own piece of hardware, without necessarily having to consult with anyone else.

Con: Everybody Having Their Own Mixer Is Expensive

Expensive is a relative term, of course. With a Powerplay system, outfitting a five-piece band is about as expensive as buying a couple-three “pretty dang nice,” powered monitor wedges. Other systems involve a lot more money, however. Also, even with an affordable product-line, adding a new member to the band means the expense of adding another personal mixer and attendant accessories.

Pro: Personal Mixing Is Luxurious

When we deployed our distributed system, one of the comments I got was “This is what we’ve always wanted, but couldn’t have. It should always have worked this way.” Everybody getting their own personal, instantly customizable mix is a “big league” sort of setup that is now firmly within reach for almost any band. Under the right circumstances, moving the on-deck show into the right place can transform from a slog to a joy.

Con: Not Everybody May Buy In To The Idea

The adoption of a distributed monitor mixing system is like all personal monitoring: Personal. The problem is that you have to try it to find out if you want to deal with it or not. Unless someone categorically states at the outset that they want no part of individualized mixing, the money has to be spent to let them give it a whirl.

…and they may decide that it’s just not for them, with only 30 minutes of use on their mixer and the money already spent. You just have to be ready for this, and be prepared to treat it as a natural cost of the system. Forcing someone to use a monitoring solution that they dislike is highly counterproductive.

Distributed monitor mixing, like all live-audio solutions, is neither magic nor a panacea. It may be exactly the right choice for you, or it may be a terrible one. As with everything else, there’s homework to be done, and nobody can do it but you. One size does not fit all.


A Guided Tour Of Feedback

It’s all about the total gain from the microphone’s reference point.

Please Remember:

The opinions expressed are mine only. These opinions do not necessarily reflect anybody else’s opinions. I do not own, operate, manage, or represent any band, venue, or company that I talk about, unless explicitly noted.

smoothed-monitorsWant to use this image for something else? Great! Click it for the link to a high-res or resolution-independent version.

This site is mostly about live audio, and as such, I talk about feedback a lot. I’m used to the idea that everybody here has a pretty good idea of what it is.

But, every so often, I’ll do a consulting gig and be reminded that feedback can be a mysterious and unknown force. So, for those of you who are totally flummoxed by feedback monsters, this article exists for your specific benefit.

All Locations Harbor Dragons

The first thing to say is this: Any PA system with real mics on open channels, and in a real room, is experiencing feedback all the time. Always.

Feedback is not a phenomenon which appears and disappears. It may or may not be a problem at any particular moment in time. You may or may not be able to hear anything like it at a given instant. Even so, any PA system that is doing anything with a microphone is guaranteed to be in a feedback loop.

What matters, then, is the behavior of the signal running through that loop. If the signal is decaying into the noise floor before you can notice it, then you DO have feedback, but you DON’T have a feedback problem. If the signal is dropping slowly enough for you to notice some lingering effects, you are beginning to have a problem. If the signal through the feedback loop isn’t dropping at all, then you are definitely having a problem, and if the looped signal level is growing, you have a big problem that is only getting bigger.

Ouroboros

If every PA system is a dragon consuming its own tail – an ouroboros – then how does that self-consuming action take place?

It works like this:

1) A sound is made in the room.
2) At least one microphone converts that sound into electricity.
3) The electricity is passed through a signal chain.
4) At the end of the chain is the microphone’s counterpart, which is a loudspeaker.
5) The loudspeaker converts the signal into a sound in the room.
6) The sound in the room travels through direct and indirect paths to the same microphone(s) as above.
7) The new sound in the room, which is a reproduction of the original event, is converted into electricity.

The loop continues forever, or until the loop is broken in some way. The PA system continually plays a copy of a copy of a copy (etc) of the original sound.

How Much Is The Dragon Being Fed?

What ultimately determines whether or not your feedback dragon is manageable or not is the apparent gain from the microphone’s reference point.

Notice that I did NOT simply say “the gain applied to the microphone.”

The gain applied to the microphone certainly has a direct and immediate influence on the apparent gain from the mic’s frame of reference. If all other variables are held constant, then greater applied gain will reliably move you closer toward an audible feedback issue. Even so, the applied gain is not the final predictor of ringing, howling, screeching, or any other unkind noise.

What really matters is the apparent gain at the capsule(s).


Gain in “absolute” terms is a signal multiplier. A gain of 1, which may be referred to as “unity,” is when the signal level coming out of a system (or system part) is equal in level to the signal going in. A signal level X 1 is the same signal level. A gain of less than 1 (but more than zero) means that signal level drops across the in/ out junction, and a gain of greater than 1 indicates an increase in signal strength.

A gain multiplier of zero means a broken audio circuit. Gain multipliers of less than zero are inverted polarity, with the absolute value relative to 1 being what determines if the signal is of greater or lesser intensity.

Of course, audio humans are more used to gain expressed in decibels. A gain multiplier of 1 is 0 dB, where the input signal (the reference) is equal to the output. Gain multipliers greater than 1 have positive decibel values, and negative dB values are assigned to multipliers less than 1. “Negative infinity” gain is a multiplier of 0.


The apparent gain as referenced by the pertinent microphone(s) is what can also be referred to as “loop gain.” The more the reproduced sonic event “gets back into” the mic, the higher that loop gain appears to be. The loop gain is applied at every iteration through the loop, which each iteration taking some amount of time to occur. If the time for a sonic event to be reproduced and arrive back at the capsule is short, then feedback will build aggressively when the loop gain is positive, but also drop quickly when the loop gain is negative.

Loop gain, as you might expect, increases with greater electronic gain. It also increases as a mic’s polar pattern becomes wider, because the mic has greater sensitivity at any given arrival angle. Closer proximity to a source of reproduced sound also increases apparent gain, due to the apparent intensity of a sound source being higher at shorter distances. Greater room reflectivity is another source of higher loop gain; More of the reproduced sound is being redirected towards the capsule. Lastly, a frequency in phase with itself through the loop will have greater apparent gain than if it’s out of phase.

This is why it’s much, much harder to run monitor world in a small, “live” space than in a large, nicely damped space – or outside. It’s also why a large, reflective object (like a guitar) can suddenly put a system into feedback when all the angles become just right. The sound coming from the monitor hits the guitar, and then gets bounced directly into the most sensitive part of the mic’s polar pattern.

Dragon Taming

With all that on the table, then, how do you get control over such a wild beast?

Obviously, reducing the system’s drive level will help. Pulling the preamp or send level down until the loop gain becomes negative is very effective – and this is a big reason for bands to work WITH each other. Bands that avoid being “too loud for themselves” have fewer incidences of channels being run “hot.” Increasing the distance from the main PA to the microphones is also a good idea (within reason and practicality), as is an overall setup where the low-sensitivity areas of microphone polar patterns are pointed at any and all loudspeakers. In that same vein, using mics with tighter polar patterns can offer a major advantage, as long as the musicians can use those mics effectively. Adding heavy drape to a reflective room may be an option in some cases.

Of course, when all of that’s been done and you still need more level than your feedback monster will let you have, it’s probably time to break out the EQ.

Equalization can be effective with many feedback situations, due to loop gain commonly being notably NOT equal at all frequencies. In almost any situation that you will encounter in real-life, one frequency will end up having the highest loop gain at any particular moment. That frequency, then, will be the one that “rings.”

The utility of EQ is that you can reduce a system’s electronic gain in a selected bandwidth. Preamp levels, fader levels, and send levels are all full-bandwidth controls – but if only a small part of the audible spectrum is responsible for your troubles, it’s much better to address that problem specifically. Equalizers offering smaller bandwidths allow you to make cuts in problem areas without wrecking everything else. At the same time, very narrow filters can be hard to place effectively, and a change in phase over time can push a feedback frequency out of the filter’s effective area.

EQ as a feedback management device – like everything else – is an exercise in tradeoffs. You might be able to pull off some real “magic” in terms of system stability at high gain, but the mics might sound terrible afterwards. You can easily end up applying so many filters that reducing a full-bandwidth control’s level would do basically the same thing.

In general, doing as much as possible to tame your feedback dragon before the EQ gets involved is a very good idea. You can then use equalization to tamp down a couple of problem spots, and be ready to go.


Simple Fixes For Simple Problems

Letting a person change lanes is easier than building them a faster car.

Please Remember:

The opinions expressed are mine only. These opinions do not necessarily reflect anybody else’s opinions. I do not own, operate, manage, or represent any band, venue, or company that I talk about, unless explicitly noted.

Want to use this image for something else? Great! Click it for the link to a high-res or resolution-independent version.

(I forgot to put this up last week. Whoops…)

On ProSoundWeb, a thread was started about harmonica feedback. The thread lasted for two pages, and one topic swerve. All kinds of suggestions were made.

But not a single suggestion was made that maybe, just maybe, the rest of the band might EASE UP A LITTLE and give the harp player some space.

The simple, free solution was drowned in a storm of trying to engineer a way out.

I have been guilty of this. I will probably be guilty of it in the future. Still…

Can we stop this, please?


Why Audio Humans Get So Bent Out Of Shape When A Mic Is Cupped

We hate it because it sounds bad, causes feedback, and makes our job harder.

Please Remember:

The opinions expressed are mine only. These opinions do not necessarily reflect anybody else’s opinions. I do not own, operate, manage, or represent any band, venue, or company that I talk about, unless explicitly noted.

[micinfographic]Want to use this image for something else? Great! Click it for the link to a high-res or resolution-independent version.

I recently posted something on my personal Facebook feed. That something was this:

[myface]

A number of people found it funny.

When you really get down to it, though. It’s an “in joke.” The folks who get it have lived through a cupped-mic situation or two, and probably know why it’s a bad idea. For other folks, especially those who have been surprised by being chewed on by an irate sound-craftsperson, the whole thing might not make sense. Why would an audio human get so irritated about how a performer holds a mic? Why is it such a big deal? Why are jokes about mics being cupped such a perennial feature of live-sound forums?

The short answer is that cupped mics sound awful and tend to be feedback monsters. The long answer has to do with why.

The Physics Of How Looking Cool Sounds Bad

Microphones are curious creatures. It might sound counter-intuitive, but creating an omnidirectional mic (a mic that has essentially equal sensitivity at all angles around the element) is actually quite simple. Seal the element in a container that’s closed at the back and sides, and…there you go. Your mic is omni.

Making a directional mic is rather more involved. Directional mics require that the element NOT be housed in a box that’s sealed at the back and sides. Sound actually has to be able to arrive at the rear of the diaphragm, and it has to arrive at such a time that the combination of front and rear pressures causes cancellation. Getting this all to work, and work in a way that sounds decent, is a bear of a problem. It’s such a bear of a problem that you can’t even count on a microphone patent to tell you how it’s done. The details are kept secret – at least, if you’re asking a company like Shure.

But, anyway, the point is that a directional mic is directional because sound can reach the rear of the element. Close off the porting which allows this to happen, and the mic suddenly becomes much more omnidirectional than it was just moments before. Wrapping a hand around the head of the mic is a very efficient way of preventing certain sounds from reaching the back of the capsule, and thus, it’s a very quick way to cause a number of problems.

Feedback

Fighting feedback meaningfully requires that mics be as directional as is practical. The more “screamin’ loud” the monitors and FOH have to get, the more important that directionality becomes. When setting up the show, an audio human inevitably finds a workable equilibrium ratio of gain to feedback. A highly directional mic has much lower gain in the non-sensitive directions than in the sensitive ones. This allows the sound tech to apply more gain in downstream stages (mic pres, monitor sends, FOH faders), as long as those devices result in output that the mic experiences in the “lower-gain detection arc.” At some point, a solution is arrived at – but that solution’s validity requires the gain of all devices to remain the same.

When a mic is cupped such that it becomes more omnidirectional, the established equilibrium is upset. The existing solution is invalidated, because the effective gain of the microphone itself suddenly increases. For instance, a microphone that had a gain of -10 dB at 2 kHz at 180 degrees (degrees from the mic’s front) might now have a gain of -3 dB at 2 kHz at 180 degrees. Although what I’m talking about is frequency specific, the overall result really is not fundamentally different from me reaching up to the mic-pre and adding 7 dB of gain.

Especially for a high-gain show, where the established equilibrium is already hovering close to disaster, cupping the mic will probably push us off the cliff.

Awful Tone

Intentionally omnidirectional mics can be made to sound very natural and uncolored. They don’t rely on resonance tricks to work, so very smooth and extended response is entirely achievable with due care.

Problems arise, however, when a mic becomes unintentionally omnidirectional. Directional mics are carefully tuned – intentionally “colored” – so that the resulting output is pleasant and useful for certain applications. The coloration can even be engineered so that the response is quite flat…as long as the mic element receives sound from the rear in the intended way. Much like the feedback problem I described earlier, the whole thing is a carefully crafted solution that requires the system parameters to remain in their predicted state.

A cupped microphone has its intended tuning disrupted. The mic system’s own resonant solution (which is now invalid), coupled with the resonant chamber formed by the hand around the mic, results in output which is band-limited and “peaky.” Low-frequency information tends to get lost, and the midrange can develop severe “honk” or “quack,” depending on how things shake out. At the high volumes associated with live shows, these narrow peaks of frequencies can range from merely annoying to downright painful. Vocal intelligibility can be wrecked like a ship that’s been dashed on the rocky shores of Maine.

An added bit of irony is that plenty of folks who cup microphones want a rich, powerful vocal sound…and what they end up with is something that resembles the tone of a dollar store clock-radio.

Reduced Output In Severe Cases

The worst-case scenario is when a mic is held so that the ports are obstructed, and the frontside path is ALSO obstructed. This occurs when the person using the mic wraps their whole hand around the grill, and then puts their thumb in the way of their mouth. Along with everything described above, the intervening thumb absorbs enough high-frequency content to make the mic noticeably quieter at frequencies helpful for intelligibility.

So the mic sounds bad, the singer can’t hear it, the whole mess is ready to feedback, the singer wants more monitor, and FOH needs more level.

Lovely.

I think you can see why sound techs get so riled by mic-cuppers. Holding a mic that way is fine if the whole performance is a pantomime. In other situations, though, it’s just bad.


Infinite Impulse Response

Coupled with being giant, resonant, acoustical circuits, PA systems are also IIR filters.

Please Remember:

The opinions expressed are mine only. These opinions do not necessarily reflect anybody else’s opinions. I do not own, operate, manage, or represent any band, venue, or company that I talk about, unless explicitly noted.

iirWant to use this image for something else? Great! Click it for the link to a high-res or resolution-independent version.

I’ve previously written about how impedance reveals the fabric of the universe. I’ve also written about how PA systems are enormous, tuned circuits implemented in the acoustic domain.

What I haven’t really gotten into is the whole concept of finite versus infinite impulse response. This follows along with the whole “resonant circuit” thing. A resonant circuit useful for audio incorporates some kind of feedback into its design, whether that design is intentional (an equalizer) or accidental (a PA system). Any PA system that amplifies the signals from microphones through loudspeakers which are audible to those same microphones is an IIR filter. That re-entrant sound is the feedback, even if the end result isn’t “feedback” in the traditional, loud, and annoying sense. Even if the PA system uses FIR filters for certain processing needs, the device as a whole exhibits infinite impulse response when viewed mathematically.

What the heck am I talking about?

FIR, IIR

Let’s first consider the key adjectives in the terms we’re using: “Finite” is one, and “infinite” is the other. The meanings aren’t complicated. Something that’s finite has an endpoint, and something that’s infinite does not. The infinite thingamabob just goes on forever.

The next bit to look at is the common subject that our adjectives are modifying. The impulse response of a PA system is what output the system produces when an input signal is applied.

So, if you stick both concepts together, a finite impulse response would mean that the PA system output relative to the input comes to a stop at some point. An infinite impulse response implies that our big stack of sound gear never comes to a stop relative to the input.

At this point, you’re probably thinking that I’ve got myself completely backwards. Isn’t a PA an FIR device? If we don’t have “classic” feedback, doesn’t the system come to a stop after a signal is removed? Well, no – not in the mathematical sense.

Functionally FIR, Mathematically IIR

First, let me talk about a clear exception. It’s entirely possible to use an assemblage of gear that’s recognizable as a PA system in a “playback only” context. The system is used to deliver sound to an audience, but there are no microphones involved in the realtime activity. They’re all muted, or not even present. Plug in any sort of signal source that is essentially impervious to sound pressure waves under normal operation, like a digital media player, and yes: You have a system that exhibits finite impulse response. The signal exiting the loudspeakers is never reintroduced to an input, so there’s no feedback. When the signal stops, the system (if you subtract the inherent, electronic noise floor) settles to a zero point.

But let’s look at some raw math when microphones are involved.

An acoustical signal is presented to a microphone capsule. The microphone converts the acoustical signal to an electrical one, and that electrical signal is then passed on to a whole stack of electronic doodads. The resulting electrical output is handed off to a loudspeaker, and the loudspeaker proceeds to convert the electrical signal into an acoustical signal. Some portion of that acoustical signal is presented to the same microphone capsule.

There’s our feedback loop, right?

Now, in a system that’s been tuned so as to behave itself, the effective gain on a signal traveling through the loop is a multiplier of less than one. (Converted into decibels, that means a gain of less than 0 dB.) Let’s say that the effective gain on the apparent pressure – NOT power – of a signal traversing our loop is 0.3. This means that our microphone “hears” the signal exiting the PA at a level that’s a bit more than 10 dB down from what originally entered the capsule.

If we start with an input sound having an apparent pressure of “1”:

Loop 1 apparent pressure = 0.3 (-10.5 dB)
Loop 2 apparent pressure = 0.09 (-21 dB)
Loop 3 apparent pressure = 0.027 (-31 dB)

Loop 10 apparent pressure = 0.0000059049 (-105 dB)

Loop 100 apparent pressure = 5.15e-53 (-1046 dB)

And so on.

In a mathematical sense, the PA system NEVER STOPS RINGING. (Well, until we hit the appropriate mute button or shut off the power.) The apparent pressure never reaches zero, although it gets very close to zero as time goes on.

And again, this brings us back to the concept of our rig being functionally FIR, even though it’s actually IIR. It is entirely true that, at some point, the decaying signal becomes completely swallowed up in both the acoustical and electrical noise floors. After a number of rounds through the loop, the signal would not be large enough to meaningfully drive an output transducer. As far as humans are concerned, the timescale required for our IIR system to SEEM like an FIR system is small.

Fair enough – but don’t lose your sense of wonder.

Fractal Geometries and Application

Although the behavior of a live-audio rig might not quite fit the strict definition of what mathematicians call an iterated function system, I would argue that – intriguingly – a PA system’s IIR behavior is fractal in nature. The number of loop traversals is infinite, although we may not be able to perceive those traversals after a certain number of iterations. Each traversal of the loop transforms the input in a way which is ultimately self-similar to all previous loop inputs. A large peak may develop in the frequency response, but that peak is a predictable derivation of the original signal, based on the transfer function of the loop. Further, in a sound system that has been set up to be useful, the overall result is “contractive:” The signal’s deviation from silence becomes smaller and smaller, and thus the signal peaks come closer and closer together.

I really do think that the impulse behavior of a concert rig might not be so different from a fractal picture like this:

sonicbutterful

And at the risk of an abrupt stop, I think there’s a practical idea we can derive from this whole discussion.

A system may be IIR in nature, but appear to be FIR after a certain time under normal operating conditions. If so, the transition time to the apparent FIR endpoint should be small enough that the system “ring time” does not perceptibly add to the acoustical environment’s reverb time.

Think about it.


The Glorious Spectrograph

They’re better than other real time analysis systems.

Please Remember:

The opinions expressed are mine only. These opinions do not necessarily reflect anybody else’s opinions. I do not own, operate, manage, or represent any band, venue, or company that I talk about, unless explicitly noted.

thegloriousspectrographWant to use this image for something else? Great! Click it for the link to a high-res or resolution-independent version.

I don’t really know how common it is, but there are at least a few of us who like to do a particular thing with our console solo bus:

We connect some sort of analyzer across the output.

This is really handy, because you can look at different audio paths very easily – no patching required. You do what you have to do to enable “solo” on the appropriate channel(s), and BOOM! What you’ve selected, and ONLY what you’ve selected, is getting chewed on by the analyzer.

The measurement solution that seems to be picked the most often is the conventional RTA. You’ve almost certainly encountered one at some point. Software media players all seem to feature at least one “visualization” that plots signal magnitude versus frequency. Pro-audio versions of the RTA have more frequency bands (often 31, to match up with 1/3 octave graphic EQs), and more objectively useful metering. They’re great for finding frequency areas that are really going out of whack while you’re watching the display, but I have to admit that regular spectrum displays have often failed to be truly useful to me.

It’s mostly because of their two-dimensional nature.

I Need More “Ds,” Please

A bog-standard spectrum analyzer is a device for measuring and displaying two dimensions. One dimension is amplitude, and the other is frequency. These dimensions are plotted in terms of each other at quasi-instantaneous points in time. I say “quasi” because, of course, the display does not react instantaneously. The metering may be capable of reacting very quickly, and it may also have an averaging function to smooth out wild jumpiness. Even so, the device is only meant to show you what’s happening at a particular moment. A moment might last a mere 50ms (enough time to “see” a full cycle of 20 Hz wave), or the moment might be a full-second average. In either case, once the moment has passed, it’s lost. You can’t view it anymore, and the analyzer’s reality no longer includes it meaningfully.

This really isn’t a helpful behavior, ironically because it’s exactly what live production is. A live-show is a series of moments that can’t be stopped and replayed. If you get into a trouble spot at a particular time, and then that problem stops manifesting, you can’t cause that exact event to happen again. Yes, you CAN replicate the overall circumstances in an attempt to make the problem manifest itself again, but you can’t return to the previous event. The “arrow of time,” and all that.

This is where the spectrograph reveals its gloriousness: It’s a three-dimensional device.

You might not believe me, especially if you’re looking at the spectrograph image up there. It doesn’t look 3D. It seems like a flat plot of colors.

A plot of colors.

Colors!

When we think of 3D, we’re used to all of the dimensions being represented spatially. We look for height, width, and depth – or as much depth as we can approximate on displays that don’t actually show it. A spectrograph uses height and width for two dimensions, and displays the third with a color ramp.

The magic of the spectrograph is that it uses the color ramp for the magnitude parameter. This means that height and width can be assigned, in whatever way is most useful, to frequency and TIME.

Time is the key.

Good Timing

With a spectrograph, an event that has been measured is stored and displayed alongside the events that follow it. You can see the sonic imprint of those past events at whatever time you want, as long as the unit hasn’t overwritten that measurement. This is incredibly useful in live-audio, especially as it relates to feedback.

The classic “feedback monster” shows up when a certain frequency’s loop gain (the total gain applied to the signal as it enters a transducer, traverses a signal path, exits another transducer, and re-enters the original transducer) becomes too large. With each pass through the loop, that frequency’s magnitude doesn’t drop as much as is desired, doesn’t drop at all, or even increases. The problem isn’t the frequency in and of itself, and the problem isn’t the frequency’s magnitude in and of itself. The problem is the change in magnitude over time being inappropriate.

There’s that “time” thing again.

On a basic analyzer, a feedback problem only has a chance of being visible if it results in a large enough magnitude that it’s distinguishable from everything else being measured at that moment. At that moment, you can look at the analyzer, make a mental note about which frequency was getting out of hand, and then try to fix it. If the problem disappears because you yanked the fader back, or a guitar player put their hand on their strings, or a mic got temporarily moved to a better spot, all you have to go on is your memory of where the “spike” was. Again, the basic RTA doesn’t show you measurements in terms of time, except within the limitations of its own attack and release rates.

But a spectrograph DOES show you time. Since a feedback problem is a limited range of frequencies that are failing to decay swiftly enough, a spectrograph will show that lack of decay as a distinctive “smear” across the unit’s time axis. If the magnitude of the problem area is large enough, the visual representation is very obvious. Further, the persistence of that representation on the display means that you have some time to freeze the analyzer…at which point you can zero in on exactly where your problem is, so as to kill it with surgical precision. No remembering required.

So, if you’ve got a spectrograph inserted on your solo bus, you can solo up a problem channel, very briefly drive it into feedback, drop the gain, freeze the analyzer, and start fixing things without having to let the system ring for an annoyingly long time. This is a big deal when trying to solve a problem during a show that’s actually running, and it’s also extremely useful when ringing out a monitor rig by yourself. If all this doesn’t make the spectrograph far more glorious than a basic, 2D analyzer, I just don’t know what to do for you.


Transitionally Finicky

Sudden pattern or frequency-response transitions can make audio systems do unexpected things.

Please Remember:

The opinions expressed are mine only. These opinions do not necessarily reflect anybody else’s opinions. I do not own, operate, manage, or represent any band, venue, or company that I talk about, unless explicitly noted.

cardioidWant to use this image for something else? Great! Click it for the link to a high-res or resolution-independent version.

Most of us have probably heard the story of “that nice, sweet dog that suddenly bit Timmy.” If you are, or have been an aviation enthusiast, you’ve probably also heard the stories about aircraft that abruptly departed from controlled flight and crashed. In both cases, everything seemed to be perfectly okay, and then, BOOM! The canine or the airplane turned around and “bit” someone.

This disconcerting behavior can also happen with audio rigs. You’ve got a system that seems nice and stable, and the show’s rolling along, and everybody’s happy –

SCREECH! WHOOOOOOOOOM! SQUAAAAAAAAWWWWWWKKK!

The rig goes into feedback and “bites” you.

As with dogs and aircraft, a sound system always has a reason for doing what it does. If the rig got tipped over the edge of stability, there’s a logical, physical explanation for why. When it comes to an audio system seeming to be just fine, and then suddenly behaving in a terrifying way, I’ve come to believe that there’s a primary factor to look for: Where does some part of the system display an abrupt transition in polar or frequency response?

A Polar Expedition

If you’re not familiar with the concept of polar response, it’s actually a fairly simple concept. It’s the varying sensitivity of a microphone or loudspeaker at different angles around the device. Microphones and loudspeakers are the inverse of each other, and so what the measurement concerns is also inverted. For a microphone, the signal source’s location is variable and the observer’s location is “fixed” – that is, we observe the output of the microphone by looking at the voltage from the outputs. For a loudspeaker, the signal source’s location is fixed (the speaker’s input terminals), and the observer’s relative location is what changes.

In the case of microphones, we tend to assume that the polar pattern is the same for both horizontal and vertical angles. A sound source going off to the left of the mic at some angle is presumed to be picked up with the same sensitivity as a source that is under the mic at the same angle. For loudspeakers, life is more complicated. A great many sound-reinforcement loudspeakers are “asymmetric” regarding the horizontal and vertical planes. Standing off to the right of a loudspeaker at 45 degrees may not get you the same apparent output as standing above the loudspeaker at 45 degrees.

But anyway – let’s talk about transitions in polar response. We’ll stick to mics for this article, because the concepts translate pretty easily to loudspeakers and speaker placement.

Changing Patterns

omni

That picture is of a theoretically perfect, omnidirectional pattern. It’s exactly the same everywhere. It’s transitions are infinitely small, because there aren’t any. As such, an omni polar has very predictable characteristics. If someone suddenly grabs an omni microphone and flips it around, its tendency toward feedback isn’t going to change very much. You can’t “point” an omnidirectional microphone at the monitors, because you can’t point one away from the monitors either. An omni mic “points” everywhere all the time, to the extent that its response pattern is perfect. (Also, when I say “point it at the monitors,” I don’t mean glomming onto the mic and shoving it right up into the monitor wedge’s horn. I’m talking only about the orientation of the mic, not a change in its distance from any particular thing.)

Whether or not you can get generally usable gain-before-feedback with an omni mic is a whole other discussion, and a highly application-dependent one at that.

Now, let’s look at some directional patterns, like a cardioid and supercardioid response. In these pictures, zero degrees (directly on axis) is to the right. The numbers are “pressure units” – NOT decibels. The first picture is side-by-side for greater clarity, whereas the picture with responses overlaid is better for comparison.

sidebyside

overlaid

(Please note that, in manufacturer specs, the supercardioid “tail” is flipped around to provide a more intuitive graph.)

Directional responses are great for live-sound mics, because they give us a shot at hotter monitor levels before feedback stops the fun. There’s a tradeoff, though. Both cardioid (blue) and supercardioid (red) responses are more “finicky” than omni, because their feedback rejection is dependent upon the mic’s orientation. Point the mic in the right direction, and everything’s great. If somebody twists that mic around so that it’s pointing at a monitor, and you might have a problem. The problem can even be worsened by you being able to squeeze more gain into your signal flow: Suddenly, all that extra gain – which was counteracted by the mic’s orientation – is now applied without attenuation. Thus, feedback can build far more aggressively.

What about a comparison between cardioid and supercardioid?

The first thing to see is that I’ve scaled the graphs so that “2 pressure units” is an overall reference. We’ll call that 0 dB, and I’ll quietly do the math to transform the other values into decibels.

Cardioid

Supercardioid

0 degrees (On Axis) 0 dB 0 db
30 degrees -0.6 dB -0.8 dB
60 degrees -2.5 dB -3.5 dB
90 degrees -6.0 dB -9.5 dB
120 degrees -12.0 dB -177.1 dB
150 degrees -23.5 dB -12.2 dB
180 degrees -259.4 dB -9.5 dB

The cardioid does have a single, deep null, but overall the response transitions gently towards the front. The supercardioid, on the other hand, has a deep null that occurs in the midst of the front-to-back transition, along with a tighter pattern in general. This is great for getting better gain before feedback, but only for as long as the mic is oriented correctly. If the mic is sideways in comparison to a monitor, and then abruptly turned to face that same wedge, it’s as if you gunned the monitor feed +9.5 dB. That’s 3.5 dB more than the cardioid, and might be enough to push things over the edge.

There’s also the whole issue of when someone “cups” a mic such that it bevaves largely like an omni. The degree to which this is a problem depends on how far away from omnidirectional the mic was to start with. A highly directional mic that changes to an omni has undergone a HUGE and abrupt transition. Supercardioids (and similarly patterned transducers) tend to be less forgiving of being cupped, because they have a tighter pattern than a cardioid. The change they undergo is more pronounced, and again, they may have also been run at higher gain. As such, the problem tends to be compounded.

Feeling Peaky

In much the same way as polar patterns, smooth frequency response is more forgiving than responses with narrow peaks. For instance, here are a couple of graphs of theoretical microphone frequency responses. Which one do you think would be tougher to manage, in terms of feedback?

frequency1

frequency2

I will certainly grant you that a 10 dB transition in mic response is rarely what you want in any case, but look at the difference in the rate of change between the two graphs. One has a relatively gentle 3 dB per octave slope. The other rockets away at 10 dB per octave. The response with a large dy/dx (there’s that calculus thing again) is more likely to suddenly hit you with aggressive, unexpected feedback than the gentler slope – speaking on average, of course. Each system that mic goes through also has its own transfer function, and that transfer function may help you or hurt you when it combines with the mic’s response.

Where things get REALLY hairy is when you have even steeper peaks. They might not even top out at the same magnitude as what I’ve presented here, but that doesn’t stop them from being pernicious little creatures.

See, when fighting feedback, we prefer to use very narrow filters. Their steep transitions allow us to select and cut only a small portion of the audible spectrum, which makes those filters hard to hear. The problem, though, is when a similarly steep peak gets introduced into a device’s frequency response. That “hard to hear-ness” is still in effect, but the peak represents positive apparent gain rather than negative. With very little warning, feedback can take off like Maverick and Goose feeling the need, the need for speed. (Name the movie.)

I had a peakiness experience happen to me recently with an otherwise very nifty carbon-fiber guitar. The instrument sounded nice, seemingly having no strange resonances at all, but it would squeal at 1kHz like nobody’s business…and with no warning. It would be fine, and then go nuts. We eventually killed the problem, but it took all of us by surprise.

If you’re having weird system stability problems that are hard to pin down, start looking for devices (and acoustical phenomena, too!) that display abrupt transitions in either broadband sensitivity or their frequency curves. Their finickiness might just be the source of your issues.


What Just Changed?

If an acoustical environment changes significantly, you may start to have mysterious problems.

Please Remember:

The opinions expressed are mine only. These opinions do not necessarily reflect anybody else’s opinions. I do not own, operate, manage, or represent any band, venue, or company that I talk about, unless explicitly noted.

screenWant to use this image for something else? Great! Click it for the link to a high-res or resolution-independent version.

Just recently, I was working a show for Citizen Hypocrisy. I did my usual prep, which includes tamping down the “hotspots” in vocal mics – gain before feedback being important, and all that.

Everything seemed copacetic, even the mic for the drumkit vocal. There was clarity, decent volume, and no ringing. The band got in the room and set up their gear. This time around, an experiment was conducted: A psychedelic background video was set to play in a loop as a backdrop. We eventually did a quick, “just in time” soundcheck, and we were off.

As things kicked into gear, I noticed something. I was getting high frequency feedback from one of the mics, it wasn’t running away by any means, but it was audible and annoying. I thought to myself, “We did just give DJ’s microphone a push in monitor world. I probably need to pull the top-end back a bit.” I did just that…but the feedback continued. I started soloing things into my headphones.

“Huh, guitar-Gary’s mic seems okay. DJ’s mic is picking up the feedback, but it doesn’t seem to be actually part of that loop. That leaves…*unsolos DJ’s mic, solos drum-Gary’s mic* Well, THERE’S the problem.”

The mic for vocals at the drumkit? It was squeaking like a pissed-off mouse. I hammered the offending frequency with a notch filter, and that was it.

But why hadn’t I noticed the problem when I was getting things baselined for the night? Gary hadn’t changed the orientation of the mic so that it was pointing at the drumfill, and neither the input gain nor send gains had changed, so why had the problem cropped up?

The answer: Between my setup and actually getting the show moving in earnest, we had changed the venue’s acoustical characteristics, especially as they concerned the offending microphone. We had deployed the screen behind the drums.

Rolling With The Changes

Citizen Hypocrisy was playing at my regular gig. Under conditions where we are NOT running video, the upstage wall is a mass of acoustical wedge foam. For most purposes, high-mid and high frequency content is soaked up by the treatment, never to be heard again. However, when we are running video, the screen drops in front of the foam. For high frequencies, the screen is basically a giant, relatively efficient reflector. My initial monitor-EQ solution was built for the situation where the upstage wall was an absorber. When the screen came down, that solution was partially invalidated. Luckily, what had to be addressed was merely the effective gain of a very narrow frequency range. We hadn’t run into a “showstopper bug,” but we had still encountered a problem.

The upshot of all this is:

Any change to a show’s acoustical environment, whether by way of surface absorption, diffusion, and reflectance, or by way of changes in atmospheric conditions, can invalidate a mix solution to some degree.

Now, you don’t have to panic. My feeling is that we sometimes overstate the level of vigilance required in regards to acoustical changes at a show. You just have to keep listening, and keep your brain turned on. If the acoustical environment changes, and you hear something you don’t like, then try to do something about it. If you don’t hear anything you don’t like, there’s no reason to find something to do.

For instance, at my regular gig, putting more people into the room is almost always an automatic improvement. I don’t have to change much (if anything at all), because the added absorption makes the mix sound better.

On the reverse side, I once ran a summer show for Puddlestone where I suddenly had a “feedback monster” where one hadn’t existed for a couple of hours. The feedback problem coincided with the air conditioning finally getting a real handle on the temperature in the room. My guess is that some sort of acoustical refraction was occurring, where it was actually hotter near the floor where all the humans were. For the first couple of hours, some amount of sound was bending up and away from us. When the AC really took hold, it might have been that the refraction “flattened out” enough to get a significant amount of energy back into the mics. (My explanation could also be totally incorrect, but it seems plausible.) Obviously, I had to make a modification in accordance with the problem, which I did.

In all cases, if things were working before, and suddenly are no longer working as well, a good question to ask yourself is: “What changed between when the mix solution was correct, and now, when it seems incorrect?” It’s science! You identify the variable(s) that got tweaked, and then manage the variables under your control in order to bring things back into equilibrium. If you have to re-solve your mix equation, then that’s what you do.

And then you go back to enjoying the show.

Until something else changes.