Tag Archives: Science

Getting Total Control Of Loud Is Even More Loud

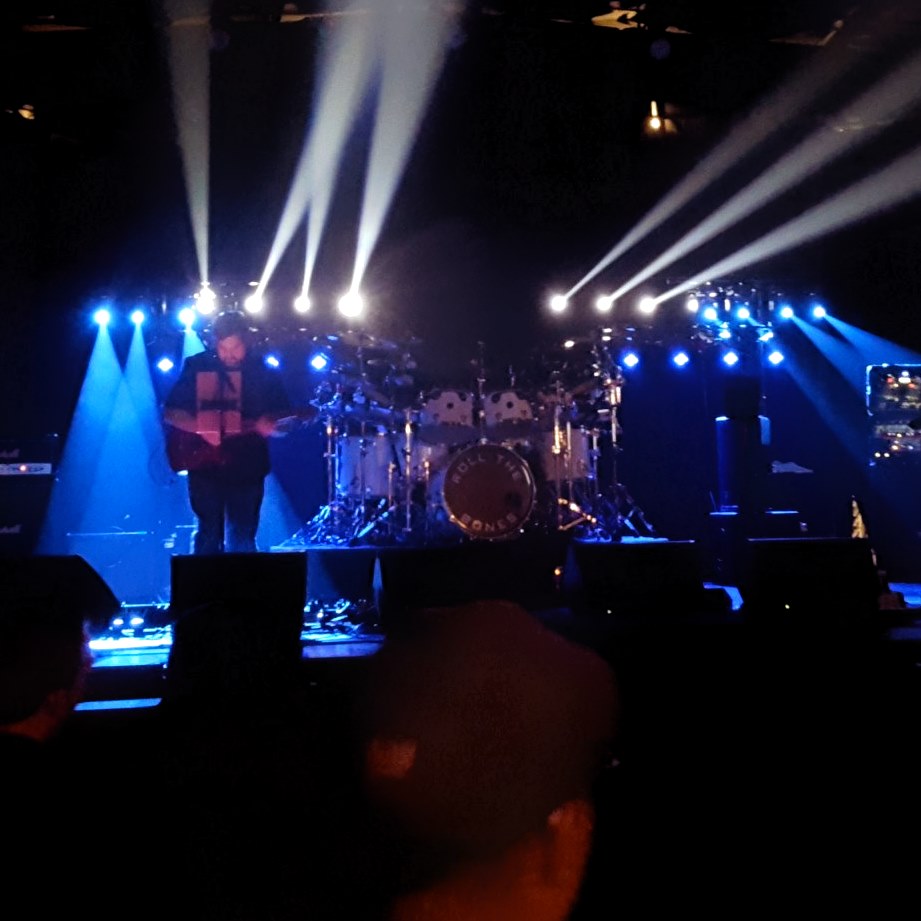
Pushing 10 dB ahead of stage garble can be punishing for the crowd.

Please Remember:

The opinions expressed are mine only. These opinions do not necessarily reflect anybody else’s opinions. I do not own, operate, manage, or represent any band, venue, or company that I talk about, unless explicitly noted.

Want to use this image for something else? Great! Click it for the link to a high-res or resolution-independent version.

I believe it was Mark Hellinger who once said that audio engineers don’t feel like they’ve got real control over a show until the PA is 10 dB louder than everything else. I’m pretty sure he was right, both due to my own experience and a bit of SPL math.

When adding SPL levels, you use the formula: 10 * log10(10^SPLa/10 + 10^SPLb/10 + …) to get your answer. So, if the sound from the stage is 100 dB SPL, and the PA is also making 100 dB SPL, you get 10 * log10(10^10 + 10^10), or 103 dB SPL. The implication there – beyond things simply getting louder – is that the sonic contribution from the stage is quite large in proportion to the FOH PA system. Wind up FOH to 110 dB SPL, and something curious happens. You end up with 10 * log10(10^10 + 10^11), or 110.4 dB. See that? The 110 dB from FOH essentially overwhelms the wash from the deck.

Great, right?

But think about how loud that is. Then, think about how loud it is if the band is REALLY cookin’, and monitor world is on the gas. You might have a band making 105 dB SPL or more. Thus, if you want to “get control” with FOH, you have to get things barking at 7 – 10 dB above that level. One hundred and fifteen decibels across the board (not just subwoofer material) is not much fun to most folks.

You have to watch out for your tendency to try for an FOH takeover all the time. It will often be your first instinct. It’s often mine. Even though I’ve managed to put it somewhat into check, I still have a strong bent towards guessing too high. I especially guess too high when there’s a lot of musically uncorrelated noise, like audience chatter. That’s not what I want to listen to, and I unconsciously build my mix around drowning out the conversation. Sometimes, folks are okay with that. At other times…not so much.

Be mindful of the numbers. Try to be careful. Have the idea that not being in total control of the sonic experience is okay, because the cost of total control may be marked discomfort for everyone around you.


If You Can Hear It, You Can Measure It

Sound is a physical phenomenon, and is therefore quantifiable through measurement.

Please Remember:

The opinions expressed are mine only. These opinions do not necessarily reflect anybody else’s opinions. I do not own, operate, manage, or represent any band, venue, or company that I talk about, unless explicitly noted.

Want to use this image for something else? Great! Click it for the link to a high-res or resolution-independent version.

I’m going to start by saying this: Something being measurable does NOT require the exclusion of a sense of beauty, wonder, and awe about it. Measuring doesn’t destroy all that. It merely informs it.

The next thing I’m going to say is that it drives me CRAZY how, in an industry that is all physics all the time, we manage to convince ourselves that there are extra-logical explanations for “stuff sounding better.” Horsefeathers! If your ears detected a real difference – a difference not generated entirely by your mind – then that difference can be measured and quantified. Don’t get me wrong! It might be very hard to measure and quantify. Designing the experiment might very well be non-trivial. You might not know what you’re looking for. Your human hearing system might be able to deal with contaminants to the measurement that a single microphone might not handle well.

But whatever the difference is, if it’s real, it can definitely be described in terms of magnitude, frequency, and phase.

Take this statement: “We need to run the system through [x], because [person] ran their system through [x], and it all sounded a lot better.”

That’s fair to say. In this business, perception matters. But ask yourself, why did you like the system better when [x] was involved? There has to be a physical reason, assuming the system actually sounded different. If you deluded yourself into thinking there was a difference (because [x] is much more expensive than [y]), that’s a whole other discussion. Disregarding that possibility…

Did the system seem louder? As long as the overall SPL isn’t uncomfortable, and all other things are equal, audio humans tend to perceive a louder rig as being better. If something was actually louder, that can be measured. (Probably with tremendous ease and simplicity.)

Maybe the basic system tuning solution created with [x] was just fundamentally better than what you’ve done with [y]. It’s entirely possible that you’ve gotten into a rut with the magnitude response that you tend to dial up with [y], and the other operator naturally arrives at something different. You like that something different. That something different is entirely measurable on a frequency response trace.

Maybe it wasn’t [x] at all. Maybe you were in a different room, and you liked the acoustics better. Maybe the different room has less “splatter,” or maybe it causes a low-frequency buildup that you enjoy. An RT60 measurement might reveal the difference, as might a waterfall plot, or maybe we’re right back to the basic magnitude vs. frequency trace again.

Maybe the deployment of the system was a little different, and a couple of boxes arrived and combined in a way you preferred. Maybe it’s time to look at your phase measurements…or frequency response, again, some more.

The basic human hearing input apparatus does not have capabilities which are difficult for modern technology to meet or exceed. If you’re reading this, you very probably can no longer hear the entire theoretical bandwidth that humans can handle. Measurement mics which can sense that entire bandwidth (and maybe more) can be had for less than $100 US. What can’t be easily replicated is the giant, pattern-synthesizing computer that we keep locked inside our skulls. That’s not really relevant, though, because imagination isn’t hearing. It’s imagination. Imagination can’t be measured, but real events in the world can be. What matters in audio, what we have a chance of controlling, are those real events.


Three Reasons I Was Disappointed In My Lighting Design

Beam width, alignment, and angles really do matter.

Please Remember:

The opinions expressed are mine only. These opinions do not necessarily reflect anybody else’s opinions. I do not own, operate, manage, or represent any band, venue, or company that I talk about, unless explicitly noted.

Want to use this image for something else? Great! Click it for the link to a high-res or resolution-independent version.

Just last week, a long-in-the-planning show with Roll The Bones came to fruition. I was out at FOH, running both audio and lighting. I can say that the gig went decently, but I didn’t quite satisfy my own hopes in the lighting department. The results weren’t terrible by any means, it’s just that there was a failure to “spark” in my own imagination.

So, what went wrong?

Beam Diameter

Luminous flux (brightness, in other words) is important for a lighting design to have impact, but it’s not the only factor in play. Nifty aerial effects that hold up across various lighting positions require both brightness and larger beam cross-sections. That is to say, if you want it to look like a big column of light is blasting out from somewhere upstage – guess what? You need to have a fixture that will spit out a collimated stream of photons with a large beam diameter.

I had made the decision to try some mini-beams that I found online. They’re very affordable, and actually a bit surprising in terms of output. Based on my informal measurements, they can still manage to deliver 100 lux (about the minimum lighting for working in an office) at a distance of 80 feet. The tradeoff, though, is that the beam diameter is small. As such, when fired through haze, you don’t end up with a large total volume of illuminated airborne particles along a line extending from your eye. Practically speaking, this means that the beams look pretty darn okay when they’re pointed generally in your direction, but lose impact in a hurry as the light is pointed away at larger angles.

Alignment Issues

I really like things to be geometrically neat and tidy, but I couldn’t get the mini-beam portion of the setup to stay horizontally aligned. I would make adjustments, and things would seem okay for a bit, but within a few minutes I’d have one or two fixtures out of whack again. (You can really see the effect of this in the picture above.) My guess is that there were two problems in play:

1) I really did not have nearly enough torque applied on the wing-nuts holding the lights to their O clamps.

2) The mini-beam bases have so little mass compared to the moving head that the whole assembly is very sensitive to movement in general.

So everything was skiddy-whompus all the time, and it drove me crazy.

The Math: It Wasn’t Done

The biggest overall problem was directly attributable to me. I was so worried about getting light in people’s eyes that I programmed the whole show with a general reference angle of roughly 45 degrees. In other words, if I wasn’t shooting the lights parallel to the floor or higher, they were at about 45 degrees of tilt or lower. At the time, in my head, that made sense, but in practice it robbed the whole show of maximum impact. If I would have bothered to do the tiniest bit of trigonometry, I would have realized that – for a trim height of about 8 feet – a nearly 70 degree angle is required for the lights to be pointed at a stage’s front edge that’s 20 feet away from the light hangs.

The tangent of 45 degrees is 1, meaning that the light aiming point is at the end of a line that’s just the same length as the trim height. In practice, this worked out to my whole show being far too oblique to have much “wow” factor. The washes were mostly hitting empty deck instead of people, and the spots were doing the same thing…which also reduced their effectiveness as an aerial visual.

The good news is that when you know what’s wrong you can fix it. I have another big show coming up very soon, and I am determined to learn from my mistakes in time.


I’ve Never Disliked The Sound Of A Console

There are plenty of controls I didn’t like, though…

Please Remember:

The opinions expressed are mine only. These opinions do not necessarily reflect anybody else’s opinions. I do not own, operate, manage, or represent any band, venue, or company that I talk about, unless explicitly noted.

Want to use this image for something else? Great! Click it for the link to a high-res or resolution-independent version.

I’ve talked about this before, but it’s on my mind again.

As of today, I’ve clocked nearly 24 years of involvement in live audio. In that time, I’ve had hands-on time with mixers by Ramsa, Peavey, JBL, Behringer, Soundcraft, A&H, Yamaha, Tascam, Avid, Solid State Logic, Amek, Neve, and…ah…and…at least one more that I can’t remember for some reason. Some of them were worth tens of dollars. Some of them were worth tens or even hundreds of thousands of dollars. Some of them were analog. Some of them were digital.

I never once had a problem with how any of them “sounded.” I have never been in a situation with a real band in a real room and said to myself, “Gee, this would sound so much better if I had a [consoleName].”

I’ve disliked control layouts, though. I’ve wondered why the big, fancy, industry darling didn’t have conveniences that a console costing less than 1/10th of it had. I’ve encountered fixed-width midrange EQs that were metaphorical equivalents to carving a turkey with a tractor-trailer hauling 17 tons of other, very alive and extremely enraged turkeys bent on world domination HUMANS, YOUR HUBRIS WILL END YOU! WE ARE COMING! GOBBLEGOBBLEGOBBLE!

Sorry, what were we talking about?

Yes, I’ve encountered some consoles that sounded terrible because an internal connection had worked loose, or a button contact was grunged up. When everything was working, though, all the mixers in my experience have passed audio just as well as anything else. Then, that audio hit outboard processing, loudspeakers, and acoustical environments, and all bets were off. There are plenty of people who might ask, “What console do we need to buy to make this place sound better?” and I might answer:

“Forget the console. You need a bulldozer, municipal construction permits, an architecture firm, and a bunch of money to build a room that’s actually suited to live music.”

I can not recall a single instance in my life where I disliked the sound of a show and could confidently attribute that dislike to a deficiency in the basic audio-handling properties of a mixing desk. Operators, input/ output transduction, and environmental factors are sonic influencers possessing orders of magnitude more significance.


Comparisons Of Some Powered Loudspeakers

Let’s measure some boxes!

Please Remember:

The opinions expressed are mine only. These opinions do not necessarily reflect anybody else’s opinions. I do not own, operate, manage, or represent any band, venue, or company that I talk about, unless explicitly noted.

Want to use this image for something else? Great! Click it for the link to a high-res or resolution-independent version.

Over time, I’ve become more and more interested in how different products compare to each other in an objective sense. This is one reason why I put together the The Great, Quantitative, Live-Mic Shootout. What I’m especially intrigued about right now is loudspeakers – especially those that come packaged with their own internal amplification and DSP. Being able to quantify value for money in regards to these units seems like a nifty exercise, especially as there seems to be a significant amount of performance available at relatively low cost.

Over time, I’ve used a variety of powered loudspeakers in my work, and I have on hand a few different models. That’s why I tested what I tested – they were conveniently within reach!

Testing Notes

1) The measurement mic and loudspeaker under test were set up to mimic a situation where the listener was using the loudspeaker as a stage monitor.

2) A 1-second, looping, logarithmic sweep was used to determine the drive level where the loudspeaker’s electronics reached maximum output (meaning that a peak/ limit/ clip indicator clearly illuminated for roughly half a second).

3) Measurements underwent 1/6th octave smoothing for the sake of readability.

4) These comparisons are mostly concerned with a “music-critical band,” which I define as the range from 75 Hz to 10,000 Hz. This definition is based on the idea that the information required for both creating music live and enjoying reproduced sound is mostly contained within that passband.

5) “Volume” is the number of cubic inches contained within a rectangular prism just large enough to enclose the loudspeaker. (In other words, how big of a box just fits around the loudspeaker.)

6) “Flatness Deviation” is the difference in SPL between the lowest recorded level and highest recorded level in the music-critical band. A lower flatness deviation number indicates greater accuracy.

6) Similarly to #5, “Phase Flatness Deviation” is the difference between the highest phase and lowest phase degrees recorded in the music-critical band. (The phase trace is a generated, minimum-phase graph).

8) Distortion is the measured THD % at 1 kHz.

9) When available, in-box processing was set to be as minimal as possible (i.e., flat EQ).

Test Results And Comments (In Order Of Price)

Alto TS312

Acquisition Cost: $299
Volume: 4565 in^3
Mass: 36 lbs
Magnitude And Phase:
Flatness Deviation: 12 dB
Phase Flatness Deviation: 166 degrees
Peak SPL: 119.6 dB
Distortion @ 1 kHz: 1.1%
Comments: Good bang vs. buck ratio. Highly compact, competitive weight. Surprisingly decent performer, with respectable output and distortion characteristics. Lacks the “super-tuned” flatness of a Yamaha DBR, and not as clean as the JBL Eon. Simplified back panel lacks features, but also is hard to set incorrectly. Would have liked a “thru” option, but the push-button ability to lift signal ground is nice to have.

Peavey PVXP12

Acquisition Cost: $399
Volume: 5917 in^3
Mass: 43 lbs
Magnitude And Phase:
Flatness Deviation: 14 dB
Phase Flatness Deviation: 230 degrees
Peak SPL: 123.8 dB
Distortion @ 1 kHz: 1.61%
Comments: High output at limit, but the manufacturer allows for rather more distortion compared to other products. Not factory-tuned quite as flat as other boxes, with an output peak that reads well as a “single number” performance metric…but also sits in a frequency range that tends to be irritating at high volume and troublesome for feedback. The enclosure is hefty and bulky in comparison to similar offerings.

JBL Eon 612

Acquisition Cost: $449
Volume: 4970 in^3
Mass: 33 lbs
Magnitude And Phase:
Flatness Deviation: 11 dB
Phase Flatness Deviation: 145 degrees
Peak SPL: 114.3 dB
Distortion @ 1 kHz: 0.596%
Comments: Relatively low output, but also tuned to a more more flat solution than some (and with rather lower distortion). Has some compactness and weight advantages. Lots of digital bells and whistles, but the utility of the features varies widely across different user needs. (For instance, I would prefer trading more power and an even flatter tuning for the Bluetooth control connectivity.) Not particularly enamored of the “boot-up” time required for all the electronics to register as ready for operation.

Yamaha DBR 12

Acquisition Cost: $499
Volume: 4805 in^3
Mass: 34.8 lbs
Magnitude And Phase:
Flatness Deviation: 10.6 dB
Phase Flatness Deviation: 180 degrees
Peak SPL: 119.5 dB
Distortion @ 1 kHz: 0.606%
Comments: Good output at low distortion. Compact box in comparison to others. Competitive in terms of weight. Slightly more expensive than other offerings, commensurate with its improved performance. Measures very well in the “intelligibility zone” of its frequency response. Very pleased with the simple and robust selector switches for most operations.


In Defense Of Smoothing Your Traces

In the end, you have to be able to read a graph for the graph to be useful.

Please Remember:

The opinions expressed are mine only. These opinions do not necessarily reflect anybody else’s opinions. I do not own, operate, manage, or represent any band, venue, or company that I talk about, unless explicitly noted.

Want to use this image for something else? Great! Click it for the link to a high-res or resolution-independent version.

There are people out there who insist that, when measuring an audio system, you should never smooth the trace. The argument is that you might miss some weird anomaly that gets filtered out by the averaging – and, in any case, the purpose of graphing a transfer function isn’t for the picture to look nice.

I think that’s an understandable sentiment, especially because it’s a thought uttered by people who I think are knowledgeable, respectable, and worth working alongside. At the same time, though, I can’t fully embrace their thinking. I very regularly apply 1/6th octave smoothing to measurements, and I do it for a very specific reason: I do indeed want to see the anomalies that matter, and I need to be able to clearly contextualize them.

The featured image on this article is an example of why I think the way I do. I’ve got a bit of a science-project going, and part of that project involved measuring a Yamaha DBR12. The traces you see in the picture are the same measurement, with the bottom one being smoothed. The unsmoothed trace is very hard to read for all the visual noise it presents, which makes it difficult to make any sort of decision about what corrections to make. the smoothed trace gives me a lot more to go on. I can see that 90 Hz – 150 Hz could come down a bit, with 2 kHz – 7.5 kHz maybe needing a bit of a bump to achieve maximum flatness.

So, I say, smooth those traces…but don’t oversmooth them! You want to suppress the information overload without losing the ability to find things that stand out. The 1/6th octave option seems to be the right compromise for me, with 1/12th still being more detail than is useful and 1/3rd getting into the area where too much gets lost.

And here’s another wrinkle: I support unsmoothed traces when you’re measuring devices that ignore acoustics, like the transfer function of a mixing console from input to output. In such a case, you should expect a very, very linear transfer function, and so the ability to spot tiny deviations is a must. The difficulty is when you’re in a situation where there a gazillion deviations, and they all appear significant. In such a case, which I’ve found to be the norm for measurements that involve acoustics, filtering to find what’s actually significant to the operation of an audio system is helpful.


The Compression Factor

Don’t forget that “accidental” dynamics processing is a big part of guitar tone.

Please Remember:

The opinions expressed are mine only. These opinions do not necessarily reflect anybody else’s opinions. I do not own, operate, manage, or represent any band, venue, or company that I talk about, unless explicitly noted.

Want to use this image for something else? Great! Click it for the link to a high-res or resolution-independent version.

Not so long ago, I was watching a YouTube video of Eddie Van Halen playing a guitar solo. I was struck by something as I took in the performance: Eddie’s guitar tone wasn’t very heavily distorted, but it was MASSIVE. The instrument sounded about fifty feet tall, with a tremendous amount of perceived power behind even the highest notes.

I realized in those moments that I’ve tended to forget a very important component of the quest for “ultimate guitar-tone bliss.” That component is dynamics; To be more specific, compression, and what it does to the sound of a guitar.

We certainly can’t ignore purely tonal components. Harmonic distortion – however it’s precipitated – is key to the signature sounds of rock and roll six-strings. At the same time, distortion doesn’t occur in a vacuum (though it may occur in vacuum tubes…sorry, I had to). When an audio circuit, or something pretending to be an audio circuit distorts, there is a necessary dynamic element involved. Some device is unable to produce output voltage that fully tracks the input voltage. Insufficient voltage can be swung at an output, and the device clips at its maximum. The audio doodad in question becomes a brickwall limiter with hyperfast attack and release, where the threshold is the maximum voltage the device can deliver.

When that comes into play, there are a good number of non-distortion related elements that become critical. Sounds that would be lost against an aggressive pick attack are smashed into clear audibility. Indeed, the guitar “gets more sustain,” because what would normally drop into the environmental noise floor is now running much hotter, where it’s easy to hear. Notes that would jump ahead of others in a chord are now rather closer to their counterparts, affecting our perception of how that chord is voiced…even if only in subtle ways.

My point in all this is to remind myself, and others, that tone is more than just the magnitude response of the amp and cabinet. It’s more than the proportion of generated harmonics to the original signal. The natural compression, or lack thereof, inside the totality of a guitar circuit has profound consequences.

And, as a parting idea, I wonder what would happen if a guitarist intentionally experimented with more consciously separating the compression aspect from the distortion. That is, if they started by playing around with compression and limiting that operated very cleanly, and then gradually added harmonic distortion components on top of it all – post the dynamics. If anybody does some experiments in that area, please do record it and put it on social media. I’d be interested to hear what you come up with, in any case.


A Plan For Delays

I think this should probably work. Maybe.

Please Remember:

The opinions expressed are mine only. These opinions do not necessarily reflect anybody else’s opinions. I do not own, operate, manage, or represent any band, venue, or company that I talk about, unless explicitly noted.

Want to use this image for something else? Great! Click it for the link to a high-res or resolution-independent version.

Last year, I did a show at Gallivan Plaza that really ought to have had delays, but didn’t. As a result, the folks sitting on the upper tiers of lawn didn’t get quite as much volume as they would have liked. This year, I intend to try to fix that problem. Of course, deploying delays is NOT as simple as saying “we’ll just deploy delays.” There’s a bit of doing involved, and I figured I would set out my mental process here, before actually having a go.

Then, after all is said and done, we can review. Exciting, no?

So, here’s the idea:

A) Set primary FOH as a “double-hung” system. Cluster the subs down center, prep to put vocals through the inner pair of full-range boxes, and prep to send everything else to the outer pair. Drive the main PA with L/R output.

B) Have the FOH tent sit on the concrete pad about 60 feet from the stage.

C) At roughly an 80 foot distance, place the delays. The PA SPL in full-space at that point is expected to be down about 28 dB from the close-range (3 feet/ 1 meter) SPL.

D) Place a mic directly in front of one side of the main PA, and another mic in the center of the audience space, at the 80-foot line. (The propagation time to the delays will be slightly different depending on where people sit, so a center position should be a decent compromise.) Using both mics, record an impulse being reproduced only by the main PA. Analyze the recording to find the delay between the mics.

E) Send L/R to Matrix 1, assign Matrix 1 to an output, then apply the measured delay to that output. Connect the output to the delays. Also, consider blending the subwoofer feed into Matrix 1 if necessary.

F) Set an initial drive level to the delays so that their SPL level is +6 dB when compared to the output of the main PA. The added volume should help mask phase errors with the delays for listeners in front of the delay speakers, due to the contribution from the main PA being of much reduced significance…but it may also be possible that the added volume will be a problem for people sitting between the delays and the main PA. “Seasoning to taste” will be necessary. (For people sitting between the main PA and the delays, the time correction actually makes the delays seem to be MORE out of alignment than less, so the delays being more audible is a problem.)

So, there you go! I’ll let everybody know how this works. Or how it doesn’t.


The Other Problem With All Those Open Mics

It’s not just feedback – it’s sound quality in general.

Please Remember:

The opinions expressed are mine only. These opinions do not necessarily reflect anybody else’s opinions. I do not own, operate, manage, or represent any band, venue, or company that I talk about, unless explicitly noted.

Want to use this image for something else? Great! Click it for the link to a high-res or resolution-independent version.

Sound craftspersons commonly moan and groan about having a ton of open mics – especially vocal mics – on their stages. The biggest gripe, of course, is feedback. Every single sound-to-voltage transducer on deck increases the system’s “loop gain” when their channel is open. More loop gain makes things more unstable.

There’s another complaint to be had, though. It’s the composite problem where bleed causes “defocus,” headroom consumption, and poor overall mix tone.

To be both snarky AND up-front for a bit, let me say that I almost always offer up an enormous, mental eye-roll when someone says, “There are [x] of us, and we all sing.” My instant judgement is: “Actually, there are [x] of you, and maybe two of you can actually sing. The rest of you can carry a tune, but don’t really have the power or consistency to compete with a rock band.” And inevitably, it’s a situation where people only vocalize when the fancy takes them, so I have to leave all those channels open and CRANKED, just in case someone has a two second harmony part here or there.

So, why all the snarking and sighing?

It’s because, in a live-sound situation, signal-to-noise is a fraught topic. That is, the concept goes beyond the traditional measure of random electronic voltage versus the desired signal in the circuit, and ends up in artistic and acoustical territory. In an environment with a real band in a real room, the sound that corresponds to the channel label (Lead Vocal, for instance) is the signal, and absolutely everything else is noise.

Absolutely.

Everything.

Else.

…and there’s a lot of noise, noise which is also considered signal when you get to the channel that’s supposed to be carrying it.

Anyway, you’ve got all these vocal mics, and they’re all wound up hot, and a very large percentage of the time they are amplifying a bunch of information that isn’t vocals. That’s the bleed problem, and it leads to the other issues I mentioned:

1) “Defocus” – Where other sounds on stage, especially percussive ones, end up having multiple arrivals due to going through their close-up mics AND the other mics spread around. The problem gets worse in more acoustically live settings, because the other open mics also amplify the indirect sound that arrives at a different time than the direct sound which ALSO arrived at a different time. This transient-smearing can make a mix much harder to “parse” for musical information, because the boundaries between different musical elements are no longer as well defined.

2) Headroom Consumption – Have you ever driven a system to its limits with, say, drums…through the vocal mics? I have, on more occasions than I care to remember. All the noise flowing through those open channels uses up your power budget very quickly. You end up with no room to make those big, fun, transients, because you’ve soaked up all your headroom with a continuous wash of everything except what you actually want. A further side-effect of all this is that your mix feels uncomfortably loud, because everything is smashed together without enough contrast.

3) Poor Overall Mix Tone – All the bleed being amplified tends to cause a buildup of midrange and high-frequency energy that can make a mix teeth-clenchingly uncomfortable for audiences. Sure, you can slap an EQ on everything, but now you’ve messed with your vocal intelligibility, so…

Now, of course, there are things you can do. You can get a a set list with pointers on who’s doing what. You can aggressively run mutes, assuming good sight lines and a fair amount of rehearsal time. You can try to isolate your mics in various ways. You can use rehearsal time to figure out how to get the backline down to a level that works well with what the vocalists can deliver.

But in the end, the best approach has been (and will always continue to be) vocalists with excellent power and tone, and the giving of vocal mics only to those people.


Tuning A VerTec System

You can do a lot by simply treating it like everything else you’ve worked on.

Please Remember:

The opinions expressed are mine only. These opinions do not necessarily reflect anybody else’s opinions. I do not own, operate, manage, or represent any band, venue, or company that I talk about, unless explicitly noted.

Want to use this image for something else? Great! Click it for the link to a high-res or resolution-independent version.

I’m sorry that I haven’t been around much lately – I’ve been busy. Very busy. So busy that I’ve been saying “No” to things a lot.

One element of my busyness has been being turned loose on a VERY classy room in Park City. For the moment, I won’t name it here, although you may have heard of it. (Not naming it here might be a little ridiculous, actually. Anybody can get on my Facebook page and see what I’m doing. Well, anyway…) It’s a little too big to classify as a small venue in my own personal taxonomy, but hey, as we’re all learning, many of the lessons in this business scale up and down.

A task I was allowed to undertake was re-tuning the installed VerTec system. Some big complaints about it were an overabundance of “honk” and “boom,” and the hope was that I could do something to alleviate those problems. I believe I have mostly succeeded in making the rig better, and it was most definitely not an exotic process. I slapped a measurement mic in front of the FOH mix position, ran Room EQ Wizard, and got to work. The measurement traces confirmed what could be heard: The system was very heavy on the midrange, with some troublesome peaks in the subwoofer zone. After a bit of doing, we are where we are now, which is a much flatter place.

The main key, I can say, was to get over my own intimidation. VerTec, or really any similar system, looks hairy because of all the boxes involved. The thing to remember, though, is that for any given coverage zone the boxes are meant to combine into one big source. If you’re going to fret over something, fret over each overall zone of coverage, not the individual array elements. Pick your battles. As Bob McCarthy might say, decide what to tune for and ignore the rest. In my case, I had it pretty easy, because I chose to tune for the main room and not worry specifically about the boxes angled to hit people standing near the hangs. I didn’t have any outfills, infills, or other such coverage areas to consider.

A barrier that I encountered was that we’re locked out of part of the system management processor. With that being the case, I didn’t have the ability to adjust individual bandpass input or output levels. I did have EQ access, though, so that’s what I did all my work with. Was that an ideal situation? No, but what I’ve discovered over the years is that getting the basic magnitude response of a system to behave is the primary battle. I’m not saying other things don’t matter here. I’m not saying that adjusting bandpass gain by way of an EQ isn’t a kludge. I’m not recommending that, but I am saying that you might have to do it sometime, and it won’t ruin your life. Do what you can with the tools you have.

In the end, even with an imperfect approach, the system’s listenability has improved. We seem to be getting compliments on the sound in the room at a regular pace now. I’m certainly looking forward to next spring, when I plan to do another tuning that will start with tweaking amplifier gains first, but for now we seem to be in business.