Tag Archives: Electric Guitar

The Compression Factor

Don’t forget that “accidental” dynamics processing is a big part of guitar tone.

Please Remember:

The opinions expressed are mine only. These opinions do not necessarily reflect anybody else’s opinions. I do not own, operate, manage, or represent any band, venue, or company that I talk about, unless explicitly noted.

Want to use this image for something else? Great! Click it for the link to a high-res or resolution-independent version.

Not so long ago, I was watching a YouTube video of Eddie Van Halen playing a guitar solo. I was struck by something as I took in the performance: Eddie’s guitar tone wasn’t very heavily distorted, but it was MASSIVE. The instrument sounded about fifty feet tall, with a tremendous amount of perceived power behind even the highest notes.

I realized in those moments that I’ve tended to forget a very important component of the quest for “ultimate guitar-tone bliss.” That component is dynamics; To be more specific, compression, and what it does to the sound of a guitar.

We certainly can’t ignore purely tonal components. Harmonic distortion – however it’s precipitated – is key to the signature sounds of rock and roll six-strings. At the same time, distortion doesn’t occur in a vacuum (though it may occur in vacuum tubes…sorry, I had to). When an audio circuit, or something pretending to be an audio circuit distorts, there is a necessary dynamic element involved. Some device is unable to produce output voltage that fully tracks the input voltage. Insufficient voltage can be swung at an output, and the device clips at its maximum. The audio doodad in question becomes a brickwall limiter with hyperfast attack and release, where the threshold is the maximum voltage the device can deliver.

When that comes into play, there are a good number of non-distortion related elements that become critical. Sounds that would be lost against an aggressive pick attack are smashed into clear audibility. Indeed, the guitar “gets more sustain,” because what would normally drop into the environmental noise floor is now running much hotter, where it’s easy to hear. Notes that would jump ahead of others in a chord are now rather closer to their counterparts, affecting our perception of how that chord is voiced…even if only in subtle ways.

My point in all this is to remind myself, and others, that tone is more than just the magnitude response of the amp and cabinet. It’s more than the proportion of generated harmonics to the original signal. The natural compression, or lack thereof, inside the totality of a guitar circuit has profound consequences.

And, as a parting idea, I wonder what would happen if a guitarist intentionally experimented with more consciously separating the compression aspect from the distortion. That is, if they started by playing around with compression and limiting that operated very cleanly, and then gradually added harmonic distortion components on top of it all – post the dynamics. If anybody does some experiments in that area, please do record it and put it on social media. I’d be interested to hear what you come up with, in any case.


The Number The Knob’s Pointing Toward Doesn’t Matter

A “Schwilly” article on how too loud is too loud, no matter what number the amp is set to.

Please Remember:

The opinions expressed are mine only. These opinions do not necessarily reflect anybody else’s opinions. I do not own, operate, manage, or represent any band, venue, or company that I talk about, unless explicitly noted.

Want to use this image for something else? Great! Click it for the link to a high-res or resolution-independent version.

“If the amplifier doesn’t sound good until most people think it’s too loud to sound good, then the amplifier doesn’t actually sound good.”


Read the whole thing here!


Case Study: Creating A Virtual Guitar Rig In An Emergency

Distortion + filtering = something that can pass as a guitar amplifier in an emergency.

Please Remember:

The opinions expressed are mine only. These opinions do not necessarily reflect anybody else’s opinions. I do not own, operate, manage, or represent any band, venue, or company that I talk about, unless explicitly noted.

Want to use this image for something else? Great! Click it for the link to a high-res or resolution-independent version.

The Video

The Script

Imagine the scene: You’re setting up a band that has exactly one player with an electric guitar. They get to the gig, and suddenly discover a problem: The power supply for their setup has been left at home. Nobody has a spare, because it’s a specialized power supply – and nobody else plays an electric guitar anyway. The musician in question has no way to get a guitar sound without their rig.

At all.

As in, what they have that you can work with is a guitar and a cable. That’s it.

So, what do you do?

Well, in the worst-case scenario, you just find a direct box, run the guitar completely dry, and limp through it all as best you can.

But that’s not your only option. If you’re willing to get a little creative, you can do better than just having everybody grit their teeth and suffer. To get creative, you need to be able to take their guitar rig apart and put it back together again.

Metaphorically, I mean. You can put the screwdriver away.

What I’m getting at is this question: If you break the guitar rig into signal-processing blocks, what does each block do?

When it comes right down to it, a super-simple guitar amp amounts to three things: Some amount of distortion (including no distortion at all), tone controls, and an output filter stack.
The first two parts might make sense, but what’s that third bit?

The output filtering is either an actual loudspeaker, or something that simulates a loudspeaker for a direct feed. If you remove a speaker’s conversion of electricity to sound pressure waves, what’s left over is essentially a non-adjustable equalizer. Take a look at this frequency-response plot for a 12″ guitar speaker by Eminence: It’s basically a 100 Hz to 5 kHz bandpass filter with some extra bumps and dips.

It’s a fair point to note that different guitar amps and amp sims may have these different blocks happening in different orders. Some might forget about the tone-control block entirely. Some might have additional processing available.

Now then.

The first thing to do is to find an active DI, if you can. Active DI boxes have very high input impedances, which (in short) means that just about any guitar pickup will drive that input without a problem.

Next, if you’re as lucky as I am, you have at your disposal a digital console with a guitar-amp simulation effect. The simulator puts all the processing I talked about into a handy package that gets inserted into a channel.

What if you’re not so lucky, though?

The first component is distortion. If you can’t get distortion that’s basically agreeable, you should skip it entirely. If you must generate your own clipping, your best bet is to find some analog device that you can drive hard. Overloading a digital device almost always sounds terrible, unless that digital device is meant to simulate some other type of circuit.
For instance, if you can dig up an analog mini-mixer, you can drive the snot out of both the input and output sides to get a good bit of crunch. (You can also use far less gain on either or both ends, if you prefer.)

Of course, the result of that sounds pretty terrible. The distortion products are unfiltered, so there’s a huge amount of information up in the high reaches of the audible spectrum. To fix that, let’s put some guitar-speaker-esque filtering across the whole business. A high and low-pass filter, plus a parametric boost in the high mids will help us recreate what a 12″ driver might do.
Now that we’ve done that, we can add another parametric filter to act as our tone control.

And there we go! It may not be the greatest guitar sound ever created, but this is an emergency and it’s better than nothing.

There is one more wrinkle, though, and that’s monitoring. Under normal circumstances, our personal monitoring network gets its signals just after each channel’s head amp. Usually that’s great, because nothing I do with a channel that’s post the mic pre ends up directly affecting the monitors. In this case, however, it was important for me to switch the “monitor pick point” on the guitar channel to a spot that was post all my channel processing – but still pre-fader.

In your case, this may not be a problem at all.

But what if it is, and you don’t have very much flexibility in picking where your monitor sends come from?

If you’re in a real bind, you could switch the monitor send on the guitar channel to be post-fader. Set the fader at a point you can live with, and then assign the channel output to an otherwise unused subgroup. Put the subgroup through the main mix, and use the subgroup fader as your main-mix level control for the guitar. You’ll still be able to tweak the level of the guitar in the mix, but the monitor mixes won’t be directly affected if you do.


Why Chaining Distortion Doesn’t Sound So Great

More dirt is not necessarily cool dirt.

Please Remember:

The opinions expressed are mine only. These opinions do not necessarily reflect anybody else’s opinions. I do not own, operate, manage, or represent any band, venue, or company that I talk about, unless explicitly noted.

ampsWant to use this image for something else? Great! Click it for the link to a high-res or resolution-independent version.

One day, just before Fats closed, I was talking with Christian from Blue Zen. We were discussing the pursuit of tone, and a discovery that Christian had made (with the help of Gary at Guitar Czar). Christian had been trying to get more drive from his amp, which already had a fair bit of crunch happening. So, he had put a distortion pedal between the guitar and the amplifier input.

He hadn’t liked the results. He found the sound to be too scratchy and thin.

Upon consultation with Gary, the distortion pedal had been removed, and a much cleaner boost substituted. Christian was definitely happier.

But why hadn’t the original solution worked?

The Frequency Domain

Distortion can be something of a complex creature, but it does have a “simple” form. The simple form is harmonic distortion. Harmonic distortion occurs when the transfer function of an audio chain becomes nonlinear, and a tone is passed with additional products that follow a mathematical pattern: For a given frequency in a signal, the generated products are integer multiples of that frequency.

Integers are “whole” numbers, so, for a 200 Hz tone undergoing harmonic distortion, additional tones are generated at 200 Hz X 2, 3, 4, 5, 6, etc. Different circuits generate the additional tones at different intensities, and which pattern you prefer is a matter of taste.

For example, here’s an RTA trace of a 200 Hz tone being run through a saturation plugin.

pure-tone-distortion

(The odd-numbered harmonics are definitely favored by this particular saturation processor’s virtual circuit.)

The thing is that harmonics are always higher in frequency than the fundamental. The “hotter” the harmonic content, the more the signal’s overall frequency response “tilts” toward the high end. As distortion piles up, the overall timbre of a signal can start to overwhelm the lower-frequency information, resulting in a sound that is no longer “warm,” “thick,” “fat,” “chunky,” “creamy,” or whatever adjective you like to use.

Take a look at this transfer function trace comparing a signal run through one distortion stage and two distortion stages. The top end is very pronounced, with plenty of energy that’s not much more than “fizz” or “hiss”:

transfer-function-dualdistortion

If you chain distortion into distortion, you’re quite likely to just pile up more and more harmonic content, thus emphasizing the high end more than you’d prefer. There’s more to it than that, though. Look at this RTA trace of a tone being run through chained saturation plugins:

pure-tone-doubledistortion

To make things easier to see, you can also take a look at this overlay of the two traces:

pure-tone-overlay

There’s noticeably more energy in the high-end, and the distortion products are also present at many more frequencies. The original harmonic distortion tones are being distorted themselves, and there may also be some intermodulation distortion occurring. Intermodulation distortion is also a nonlinearity in a system’s transfer function, but the additional tones aren’t multiples of the original tones. Rather, they are sums and differences.

IM distortion is generally thought to sound pretty ugly when compared to harmonic distortion.

So, yes, chaining distortion does give you more drive, but it can also give you way more “dirt” than you actually want. If you like the sound of your amp’s crunch, and want more of it, you’re better off finding a way to run your clean signal at a higher (but still clean) level. As the amp saturates, the distortion products will go up – but at least it will be only one set of distortion products.

Dynamic Range

The other problem with heaping distortion on top of distortion is that of emphasizing all kinds of noises that you’d prefer not to. Distortion is, for all intents and purposes, a “dirty” limiter. Limiting, being an extreme form of compression, reduces dynamic range (the difference between high and low amplitude signals). This can be very handy up to a point. Being able to crank up quieter sounds means that tricks like high-speed runs and pinch-harmonics are easier to pull off effectively.

There’s a point, though, where sounds that you’d prefer to de-emphasize are smashed right up into the things you do want to hear. To use a metaphor, the problem with holding the ceiling steady and raising the floor is that you eventually get that nasty old carpet in your face. The noise of your pickups and instrument processors? Loud. Your picking? Loud. Your finger movement on the strings? Loud. Any other sloppiness? Loud.

Running distortion into distortion is a very effective way to make what you’d prefer to be quiet into a screaming vortex of noise.

Is Chaining Distortion Wrong?

I want to close with this point.

Chaining distortion is not “wrong.” You shouldn’t be scared to try it as a science experiment, or to get a wild effect.

The point of all this is merely to say that serial distortion is not the best practice for a certain, common application – the application of merely running a given circuit at a higher level. For that particular result, which is quite commonly desired, you will be far better served by feeding the circuit with more “clean” gain. In all likelihood, your control over your sound will be more fine-grained, and also more predictable overall.


Buzzkill

Ridding yourself of hum and buzz is like all other troubleshooting: You have to isolate the problem to fix it.

Please Remember:

The opinions expressed are mine only. These opinions do not necessarily reflect anybody else’s opinions. I do not own, operate, manage, or represent any band, venue, or company that I talk about, unless explicitly noted.

buzzkillWant to use this image for something else? Great! Click it for the link to a high-res or resolution-independent version.

Not all hums and buzzes are equally bad. Honeybees hum and buzz, but they’re super-helpful creatures that are generally interested in being left alone and making honey. Wasps, like the one pictured above, are aggressive jerks.

Of course, this site isn’t about insects. It’s about audio, where hum and buzz mean problems. Unwanted noise. Blech.

I recently got an email from a friend who wanted to know how to de-buzzify (I just made that word up) a powered mixer. When you mercilessly distill what I told him, you come up with a basic truth that covers all of troubleshooting:

The probability of an effective fix for a problem is directly proportional to your ability to isolate the problem.

Solitude

The importance of finding the exact location of a fault is something that I don’t believe I can overemphasize. It’s the key to all the problem-solving I’ve ever had to do. It doesn’t matter if the problem is related to audio signal flow, car trouble, or computer programming; if you can actually nail down the location of the problem, you’ve got a real shot at an effective (and elegant) fix.

The reverse is also true. The less able you are to pinpoint your conundrum’s place of residence, the more likely you are to end up doing surgery with a sledgehammer. If you can’t zero-in on a root cause, you end up “fixing” a certain amount of things that aren’t actually being troublesome. The good news is that you can usually take an iterative approach. All problems begin with “this system isn’t working as I expected,” which is a completely non-specific view – but they don’t have to end there. The key is to progressively determine whether each interrelated part of the system is contributing to the issue or not. There are lots of ways to do this, but all the possible methods are essentially an expression of one question:

“Is the output of this part of the system what I expect it to be?”

So…here’s a way to apply this to buzz and hum problems.

Desperately Seeking Silence

Talking in depth about the exact electrical whys and wherefores surrounding strange and unwanted noises is a little bit beyond my experience. At a general level, though, the terminology of “ground loop” provides a major clue. Voltage that should be taking a direct path to ground is instead taking a “looping” or “circuitous” path. A common cause of this is equipment receiving mains (“wall”) power from two different circuits, where each path to mains ground has a significantly different impedance. There is now a voltage potential between the two pieces of gear.

Bzzzzzzzz….

You can also have a situation where two device’s audio grounds are interconnected such that there is a potential between the two devices.

Hmmmmmmzzzzzzzz…

Anyway.

The first thing to do is to decide what piece of equipment you’re testing against. Maybe it’s a mixing console. Maybe it’s an amplifier. Whatever it is, you are asking the question from before:

“Is the output of this part of the system what I expect it to be?”

Or, more specifically…

“I expect this device’s output to be quiet, unless an audio signal is present. Is that the case?”

To answer that question, you need isolation.


WARNING: At NO point should you do anything to disconnect the mains-power/ safety grounds from your equipment. It’s there to prevent you from dying if the equipment chassis should become energized. In fact, as a start, try to verify that the mains-power sockets you are using actually DO provide a connection to “earth.” If they don’t, stop using them until they’re fixed. You may even find that your noise problem goes away.


To get isolation, start by disconnecting as much as you possibly can from the DUT (the Device Under Test). Of course, you’ve got to have some kind of way to monitor the output, so that might mean that you can’t disconnect everything. As much as possible, try to ensure that all mains-power grounds offer the same impedance – if it must stay connected, and it requires mains power, get all the power to connect to the same socket. A multi-outlet power tap can come in handy for this.

Is the output what you expect?

If yes, then something which was connected to your DUT’s input has a good chance of being the problem. At this point, if possible, treat each potential culprit as a secondary DUT in turn. If feasible, connect each suspect directly to your monitoring solution. If the ground loop manifests itself, and the suspect device requires mains power, try getting power from the same tap that the primary DUT is on. If the loop goes away, you’ve established that the two devices in play were likely having an “unequal impedance to ground” problem. If the loop stays in effect, you can jump back up to the beginning of this process and try again, but with the gear you had just plugged in as the new, primary DUT. You can keep doing this, “moving up the stack” of things to test until you finally isolate the piece of gear that’s being evil. (IMPORTANT: Any piece of the chain could be your problem source. This includes cables. You may need to pack a lunch if you have a lot of potential loop-causers to go through.)

If you can’t get the buzz to manifest when adding things back one at a time, then you might have a multi-device interaction. If possible, work through every possible combination of input connections until you get your noise to happen.

But what if the output on the original DUT was NOT what you expected, even with everything pulled off the output side?

At that point, you know that an input device isn’t the source of your trouble with this particular DUT. This is good – your problem is becoming isolated to a smaller and smaller pool of possibilities.

Try to find an alternate way to connect to your monitoring solution, like a different cable. If the problem goes away, that locates the cable as the menace. If you’re switching the connection, and the noise remains with no audio path, then the monitoring system has the problem and you need to restart with a new DUT. (If you’ve got a mixer connected to an amp and a speaker, and a ground loop stays audible when the mixer-to-amp connection is broken, then the amp is your noise source.)

If you’ve tried all that and you still have the buzz, it’s time to try a different circuit. Get as far away from the original mains-power socket as you can, and reproduce the minimal setup. If the ground-loop goes away, then you may have a site-wiring issue that’s local to the original socket(s). If the problem doesn’t go away, it’s time to take a field-trip to another building. It’s possible to have a site-wide electrical problem.

If the loop still won’t resolve, it’s very likely that your DUT has an internal fault that needs attention. Whether that means repair or replace is an exercise left to the reader.

Hopefully, you don’t get to that point – but you won’t figure out if you ARE at that point unless you can isolate your problem.


How To Spend A Ton Of Money

Really loading up your credit cards is easily done. Just keep trying to solve problems by modifying variables unrelated to those problems.

Please Remember:

The opinions expressed are mine only. These opinions do not necessarily reflect anybody else’s opinions. I do not own, operate, manage, or represent any band, venue, or company that I talk about, unless explicitly noted.

differentmicpresWant to use this image for something else? Great! Click it for the link to a high-res or resolution-independent version.

The room was an acoustically hostile firestorm of reflections and standing waves.

The band’s backline was barely functional.

The guitar amps had all the midrange dialed out.

A really expensive console with different mic pres would have TOTALLY fixed all that.

Right?


Alan Parsons Is Absolutely Correct. And Wrong.

Live sound is not the studio, and it’s dangerous to treat it as such.

Please Remember:

The opinions expressed are mine only. These opinions do not necessarily reflect anybody else’s opinions. I do not own, operate, manage, or represent any band, venue, or company that I talk about, unless explicitly noted.

closemicWant to use this image for something else? Great! Click it for the link to a high-res or resolution-independent version.

This article is the “closing vertex” of my semi-intentional “Gain, Stability, And The Best Holistic Show” trilogy.

I’m here to agree and disagree with Alan Parsons. Yes, that Parsons. The guy who engineered “Dark Side of the Moon.” A studio engineer with a career that most of us daydream about. An audio craftsperson who truly lives up to the title in the best way.

I am NOT here to trash the guy.

What I am here to do is to talk about a disagreement I have regarding the application of a specific bit of theory. It was a bit of theory that was first presented to me by the late Tim Hollinger (whom I greatly miss). Tim told me about an article he read where Alan Parsons explained why he (Parsons) mics guitar cabinets from a distance. Part of Parsons’ rationale is that nobody listens to guitar amps with their ear right up against the speaker, and also that guitar players are so loud that he doesn’t have a bleed problem.

I don’t know if the Premier Guitar article I found is the same one that Tim read, but it might be. You can read it here. The pertinent section is below the black and white picture of Parsons working in the studio.

Alan Parsons Is Academically Right

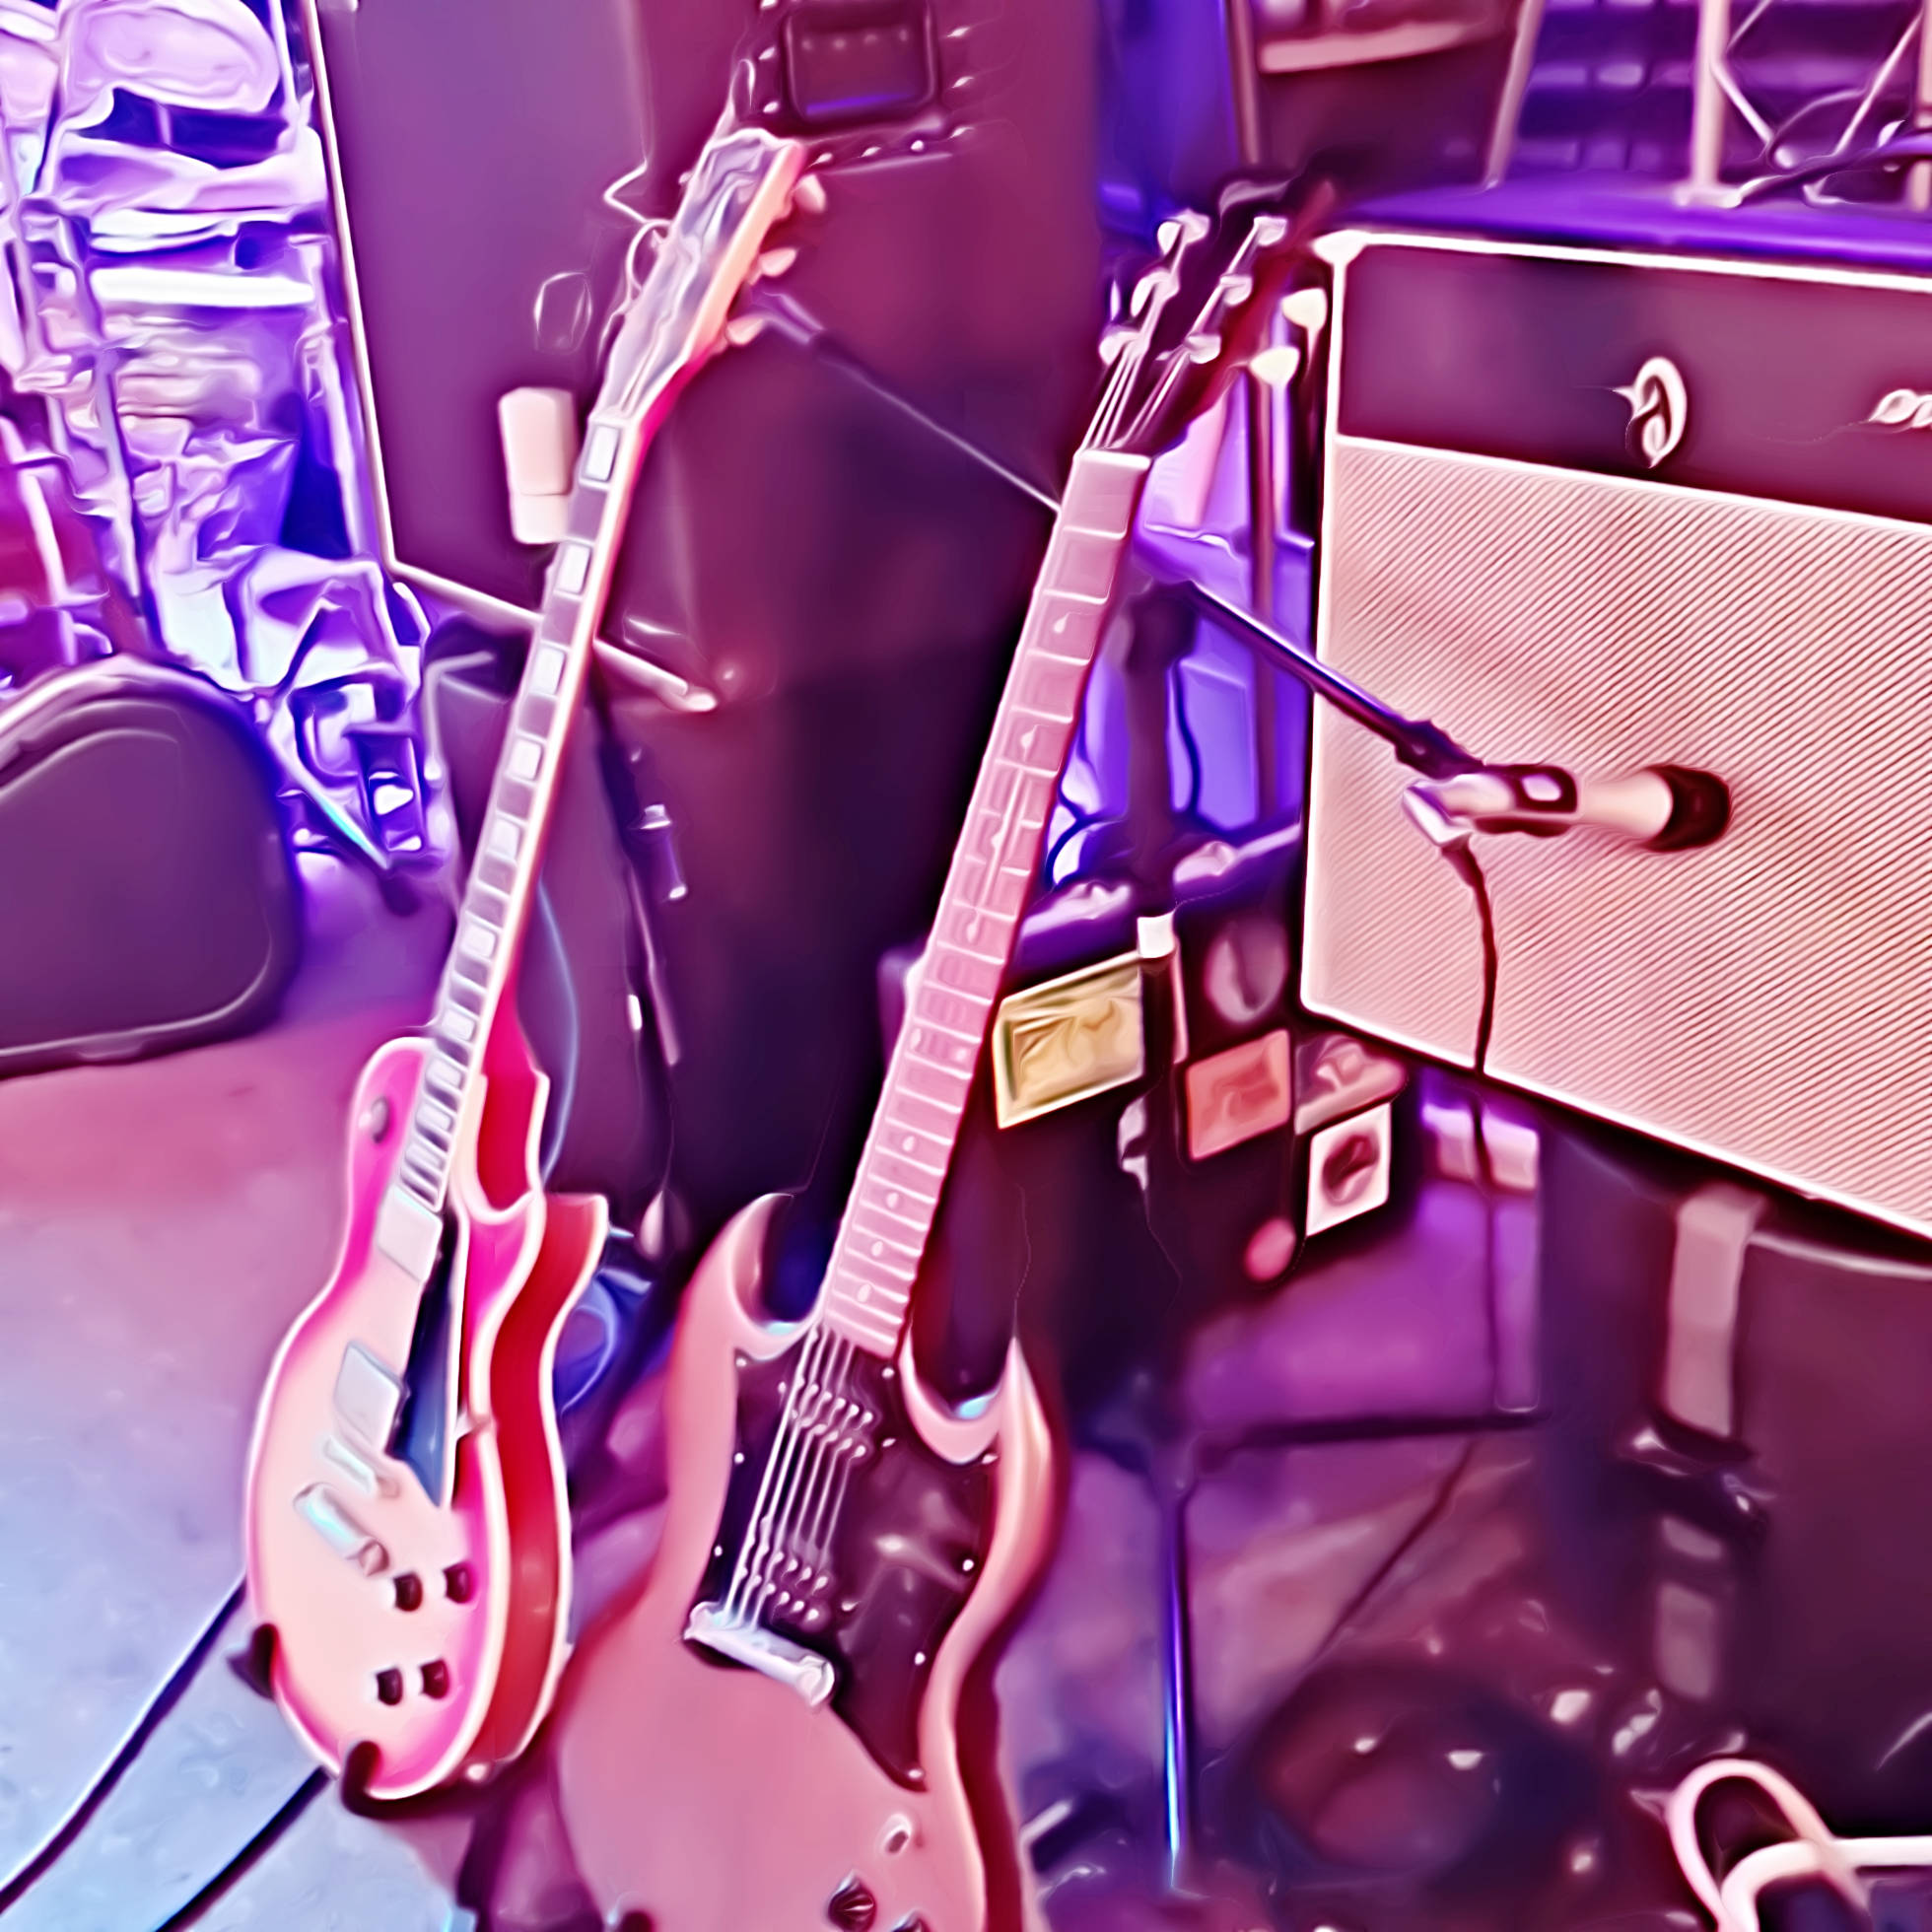
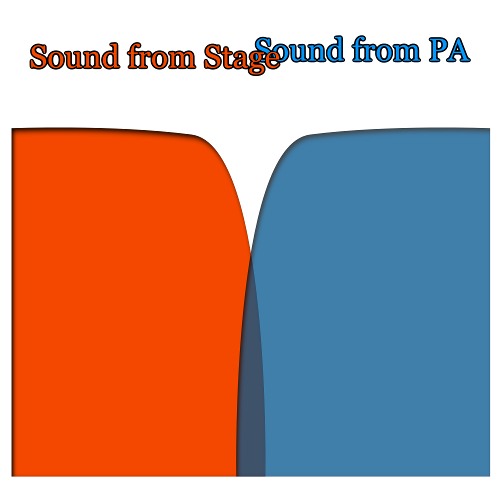
I don’t know of any guitar player who listens to their rig with an ear pressed up to the grill cloth. I can also tell you that, in lots of small-venue cases, a LOT of what the audience hears is the entirety of the guitar cab. A close-miced version of that sound might also be present in the PA, but it’s not the totality of the acoustical “solution.”

Also, yes, there are plenty of guitar players who run their rigs “hot.” Move a mic 18 inches from the cab when working with a player like that, and bleed might not be too problematic in a recording context, even if everybody’s in the same (largish) room. Solo the channel into a pair of headphones, and you’ll probably go, “Yup, there’s plenty of guitar in that mic.”

There’s not much to say about the correctness of Alan Parsons’ factual assertions, because they’re…well…correct.

The Problem Is Application

So, if Parsons is accurate about his rationale, how can there be a disagreement?

It’s pretty easy actually, and it comes from a statement that Parsons makes in the article I linked above: “Live sound engineers just don’t seem to get it.”

Parsons is correct about that too. Really! Concert-sound humans, in a live context, DON’T “get” studio recording applications. The disciplines are different. In precisely the same way, I can say that studio engineers don’t “get” live sound applications in the live context. This all comes back to what I’ve said in earlier articles: The live-audio craftsperson’s job is to produce the best holistic show possible at the lowest practicable gain. The studio craftsperson’s job is to capture the best possible sound for later reproduction. These goals are not always fully compatible, especially in a small-venue context.

(And before you write me hate-mail, it’s entirely possible for an audio human to become competent in both studio and live disciplines. What I’m getting at here is that each discipline ultimately has separate priorities.)

Obviously, there are some specifics that need addressing here. The divergent needs of the studio and live disciplines take different roads at a number of junctions.

I Don’t Want To Mic The Room, Thanks

In the studio, getting some great “ambience” is a prized piece of both the recording process and the choosing of a recording space. The very best studios have rooms that enhance the sound of the various sources put into them. Grabbing a bit of this along with the correct dose of the “direct” sound from a source is something to be desired. It enhances the playback of that recording, which takes place at another time in another room – or is delivered directly to a person’s ear canal, in the case of headphones.

But this is not at ALL what I want as a live-audio practitioner.

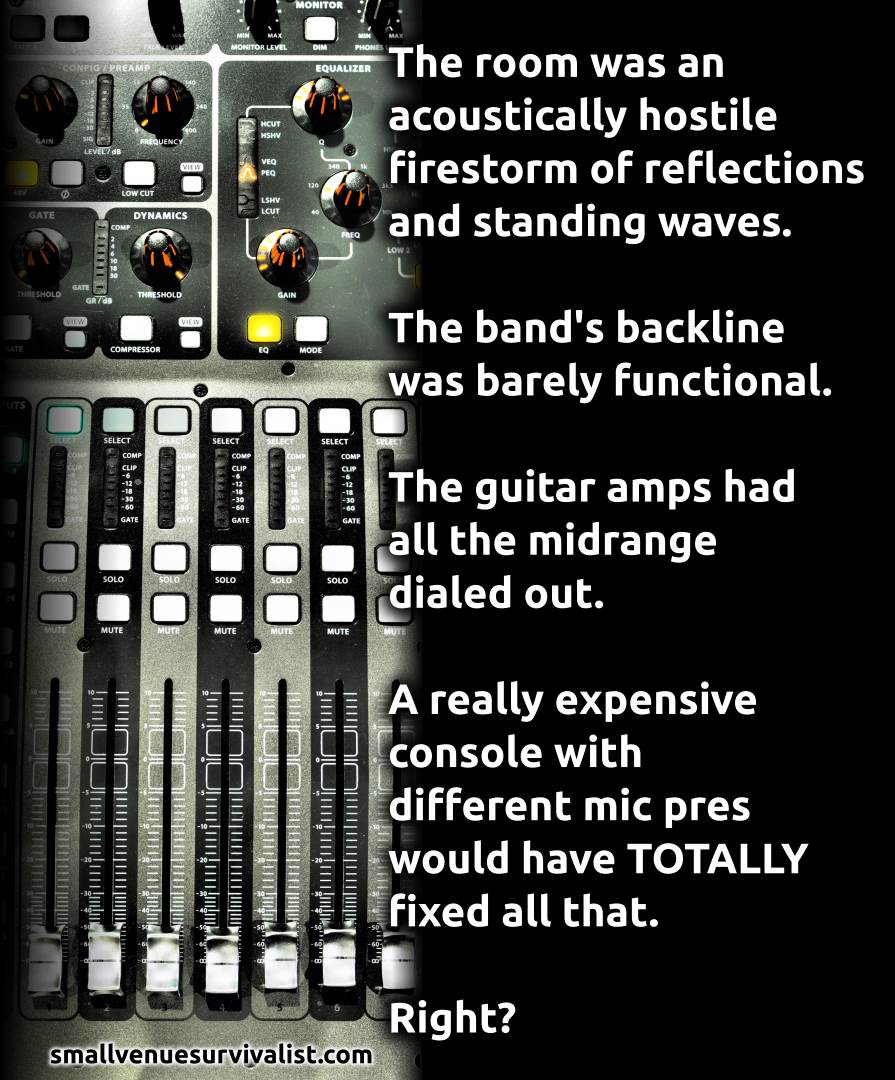
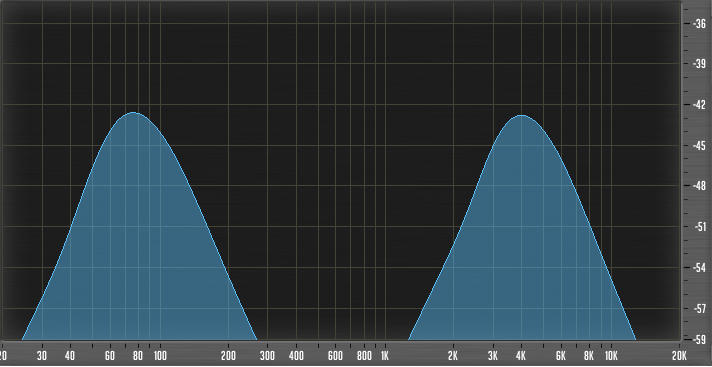
For me, more often than not, a really beautiful-sounding room is an unlikely thing to encounter. There are such things as venues with tremendously desirable acoustics, but most of the time, a venue is primarily built to satisfy the logistics of getting lots of people into one space in whatever way is practical. In general, I regard any environmental acoustics to be a hostile element. Even a relatively nice room is troublesome, because it still causes me to have to deal with multiple, indirect arrivals which smear and garble the overall sound of the show. Unlike in a recording context, I am guaranteed to hear the ambience of the room.

Lots of it.

Too much, in fact.

I do NOT want any more of it to get captured and shot out of the PA, thanks very much. I don’t need my problems to be compounded. In the very often occurring case that I need to forge a total solution by combining room sound with PA sound, I want the sound in the PA to NOT reinforce the “room tone” at all. I’ve already got the sound of the room. What I need is something else.

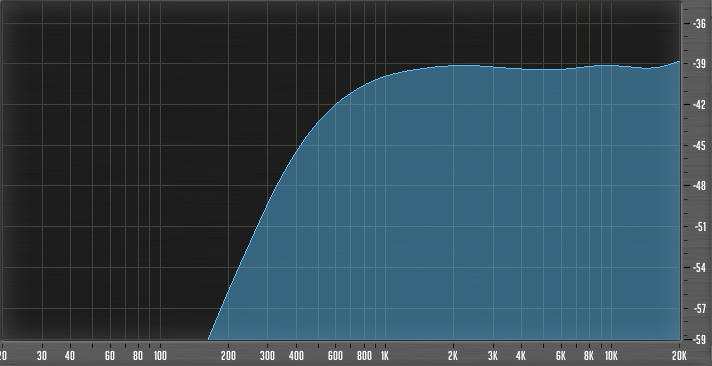
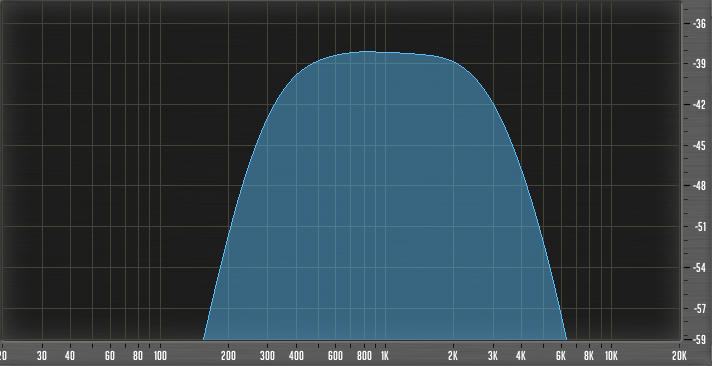
Close micing prevents my transducers from capturing “the room” and passing that signal on to the rest of the system.

Specificity Is My Friend

For a recording engineer, a bit of “bleed” from the drumkit (and everything else) is not necessarily a bad thing. For me, though, it’s counterproductive. If I need more guitar because the drums are too strong, I do NOT want any more drums at ALL. I want guitar only, or vice versa.

Especially in small-venue live-sound, you tend to have sources that are very close together (often much closer than they would be in a nice studio), and loud wedges instead of headphones. On a large stage, this problem is mitigated somewhat, but that’s not what I tend to run into. Also, in a studio, it’s very possible to arrange the band such that directional microphone nulls help to minimize the effects of bleed. Small venues and expectations of what a band’s setup is “supposed” to look like often get in the way of doing this live.

In any case, live show bleed tends to be much more severe than what a studio engineer might encounter. This compounds the “I need more this, not that” problem above.

As an example, I recently worked with a band where the drummer specifically asked for his kit to be miced with overheads. I happily obliged, because I wanted to be accommodating. (Part of producing the best holistic show is to have comfortable, happy musicians.) At soundcheck, I took a quick guess at where the overheads should be. I wouldn’t say that we could really hear them, but hey, we had a decent total solution in the room pretty much immediately. I didn’t really think about the overheads much. About halfway through the show, though, I got curious. I soloed the overheads into my headphones.

In order to get the drum monitors where he wanted them, we had so much guitar and bass coming through that they almost swamped the drums in the overheads.(!) The overheads were basically useless as drum reinforcement, because they would pretty much end up reinforcing everything ELSE.

If a mic is going to be useful for live sound reinforcement, specificity is critical. Pulling a mic away from a source is counterproductive to that discrimination, so I prefer not to do it.

Lowest Practicable Gain

In general, higher gain is not a problem for studio folks. Yes, it might result in greater noise, and it can also reduce electronic component bandwidth, but it’s really a very small issue in the grand scheme of things.

In live audio, higher gain is an enemy. Because microphones encounter sounds that they have already picked up and passed along to the rest of the PA, they exist in a feedback loop. As the gain applied to the mic goes up, the more likely it is that the feedback loop will destabilize and ring. If I can have lower gain, I will take it, even if that means a slightly unnatural sound.

Now, you might not think that feedback would be a problem with a source as loud as a guitar amp can be, but you also may not have been in situations that I’ve encountered. I have been in situations where players, even with reasonably loud amplifiers, have asked for a metric ton of level from the monitors. Yes, I’ve gotten feedback from mics on guitar amps. (And yes, we should have just turned up the amplifiers in the first place, but these situations developed in the middle of fluid shows where stopping to talk wasn’t really an option. Look, it’s complicated.)

Even if the chance of feedback is unlikely – as it usually is with louder sources – I do NOT want to do anything that causes me to have to run a signal path at higher gain. Close micing increases the apparent sound pressure level at the transducer capsule, which allows me to run at lower gain for a given signal strength.

The overall point of this is pretty simple: The desires of recording techs and the needs of live-sound humans don’t always intersect in a pretty way. When I disagree with Alan Parsons, it’s not because he doesn’t have his facts straight, and it’s not that I’m somehow more knowledgeable than he is. I disagree because applying his area of discipline to mine simply isn’t appropriate in the specific context of his comments, and the specific live-show contexts I tend to encounter.


The Acoustic Crossover

If you don’t need it, don’t spend power (or volume) on it.

Please Remember:

The opinions expressed are mine only. These opinions do not necessarily reflect anybody else’s opinions. I do not own, operate, manage, or represent any band, venue, or company that I talk about, unless explicitly noted.

For loudspeakers, a crossover is used to separate full-range audio into multiple “passbands,” with each passband being appropriate for a certain enclosure or driver. For instance, there’s no need to send a whole bunch of high-frequency information to a large-diameter speaker if you’ve also got a handy device that’s better for top-end. On the flipside, failing to filter low-frequency information is a good way to wreck a “meant for HF” output transducer.

A beautifully implemented crossover creates a smooth transition from box to box and driver to driver. Crossovers can also help with getting the maximum performance out of an amplifier/ loudspeaker chain – again, because pushing material to a driver that can’t reproduce it is a waste of power.

Most of the time, we think of a crossover as an electrical device. Whether the filter network is a bunch of passive components at the end of a speaker cable, or a DSP sitting in front of the amplifiers, the mental image of a crossover is that of a signal processor.

…but remember how I’ve talked about acoustical resonant circuits? The reality of the pro-audio life, especially in small rooms, is that the behaviors of electrical devices show up in acoustical form all the time. In the past few years, I’ve found that creating acoustical crossovers between the stage wash and the FOH (Front of House) PA can be incredibly useful.

Why This Matters In Small Rooms

In a small venue, you don’t always have a lot of power to spare. It’s rarely practical to deploy a PA system that can operate at “nothing more than a brisk walk” for most of the show. Instead, you’re probably using a LOT of the audio rig’s capability at any given time.

Even if you have a good deal of power to spare, you often don’t have very much volume to spare. A small venue gets loud in a big hurry – not only because of acoustics, but because the average audience member is “pretty dang close” to the stage and PA.

Taken together, these issues present hat-explodingly good reasons to avoid chewing up your power and/ or SPL budget with audio that you just don’t need. Traditionally, dealing with this has taken the form of not reinforcing entire sources or channels. (This can oftentimes, and unfortunately, be appropriate. I’ve done several shows where one person was so loud that everyone EXCEPT them was in the PA.) An “all-or-nothing per channel” approach is sometimes a bit too much, though. What can be better is to use powerful and dramatic, yet judiciously applied subtractive EQ.

Aggressive Filtration

A good way to illustrate what I mean by “powerful and dramatic, yet judiciously applied subtractive EQ” is to show you some analysis traces. For instance, here’s my starting point for a vocal HPF (High Pass Filter):

vocalfilter

The filter frequency is 500 Hz. Effectively, I’m chucking out everything at or below about 250 Hz.

“But, doesn’t that sound really thin,” you ask?

Indeed, it does sound a bit thin at times. If I don’t have a lot of monitor wash, or the singer doesn’t have a voice that’s rich in low-mid, or if they just don’t want to get right up on the mic, then I need to roll my filter down. On the other hand, in situations where the monitors were loud, the vocalists had strong voices, and they had their lips stuck to the mics, I’ve had HPF filters up as high as 1 kHz or more.

The point is that the stage-wash often gives me everything I need for low-mid in the vocals, so why duplicate that energy in the FOH PA? If I create a nice transition between the PA and what’s already in the room, I only have to spend power on what I need for clarity.

Now, here’s a trace for a guitar amp:

guitarfilter

Of course, you don’t necessarily need something as extreme as this all the time. What’s great about filtering a guitar like this, though, is that you’ve thrown away everything except the “soul” of the instrument – 400 Hz to 2 kHz. Especially with “overly scooped” guitar sounds, what you need for the guitar to actually sit in the live mix is more midrange than what you’re getting. Of course, you could turn up the ENTIRE guitar to get what you need – but why? You’ll be killing the audience. It’s much better to “just turn up the mids” without turning up anything else.

…and even if the guitar is only really in the PA during solos, this kind of filter can still be a good thing to implement. If you have to REALLY get on the gas for a lead part, you can avoid tearing people’s heads off with piercing high end – as well as avoid stomping all over the rhythm player and the bassist.

By combining a highly filtered sound with the stage volume, you effectively get to EQ the guitar without having to completely overwhelm the natural sound from the amp. (This is just an acoustical version of what multiband equalizers do anyway. You select a frequency range to work on, and everything else is left alone. Whether this happens purely with electrical signals or in combination with acoustic events is relevant, but ultimately a secondary issue.)

Now, how about a kick drum?

kickfilter

Again, this kind of thing isn’t appropriate in all contexts. You wouldn’t do this for a jazz gig…but in a LOT of other situations, what you need from the kick drum is “thump” and an appropriately placed “pop” or “click.”

And that’s it.

In a small venue, reproducing much of a rock or pop kick’s midrange is unhelpful. All you do is run over everything else, which makes you turn up everything else, which makes your whole mix REALLY LOUD.

Instead, you can create an acoustical crossover to sweeten the kick “just enough,” without getting any louder than necessary.

All Wet

Saving power and volume also applies for situations where you want effects to come from the PA. It’s very easy to get too loud when you want to put reverb, delay, or even chorus on something. The reason for this is because these effects have a “dry” (unprocessed) component, that has to be blended properly with the “wet” sound. What can happen, then, is that you end up pushing the entire sound up too far – because you want to hear the effects. The “dry” sound in the signal combines with the “dry” sound in the room, which makes for an acoustical result that isn’t as “wet” as you wanted…so, you push the volume until the “dry” sound through the PA overwhelms the sound in the room.

That can be pretty loud.

Instead of brute force, though, you can just tilt the “wet” ratio much further in favor of the effect.

In fact, I’ve been in some situations where, say, a snare drum was in exactly the right place without any help from the PA. In that case, I set up my routing so that the snare reverb was 100% wet – no “dry” signal at all. I already had all the “dry” sound I needed from the snare in the room, and so I just turned up the “all wet” reverb until the total, acoustical result was what I wanted.

The bottom line with all this is that, in a small space, you can get pretty darn decent sound without a screaming-loud PA. You just have to use the sound that you already have, and very selectively add the bits that need a little help. The more fine-grained you can be with the creation of this acoustic crossover, the more you can bend the total acoustical result to your will…within reason, of course.


It’s Called “A Band”

A Small Venue Survivalist Saturday Suggestion

Please Remember:

The opinions expressed are mine only. These opinions do not necessarily reflect anybody else’s opinions. I do not own, operate, manage, or represent any band, venue, or company that I talk about, unless explicitly noted.

This thing that you’re involved in is called “a band.”

It is not called “the sound of your amp’s power tubes saturating while a few other people hang out on stage for no discernible reason.”


The Elephant vs. The Garden Hose

If you make your production fit a small venue, it will fit anywhere.

Please Remember:

The opinions expressed are mine only. These opinions do not necessarily reflect anybody else’s opinions. I do not own, operate, manage, or represent any band, venue, or company that I talk about, unless explicitly noted.

A while ago, I was a participant on Harmony Central’s live-sound forums. On those forums, a few people emerged as authoritative, experienced professionals who could be counted on as voices of reason. One of those people was W. M. Hellinger. Besides being the proprietor of audiopile.net (one of my favorite places to shop for audio cable), he was a regular dispenser of plain-old, hard-won, good sense. In my recollection, Mr. Hellinger could almost always be counted on to provide some gem of “in-the-trenches” wisdom, often related as an anecdote or amusing metaphor. One of his most memorable was offered in a thread regarding methods for working with a loud drummer:

“…if you’re having problems trying to stuff an elephant down a gardenhose, then either the elephant is too large or the garden hose is too small or maybe elephants were never meant to be stuffed down garden hoses, and it’s time to re-think the project.” Full context available here.

Poetry. Audio-cowboy poetry, but poetry just the same.

…and, like many other great metaphors, there’s a lot of meaning packed into it.

Elephants Are Hard To Compact

On several occasions, I’ve encountered acts with what I’ve come to call “Warped Tour-itis.” I don’t have anything against Warped Tour, or the bands that play on it, but I swear that the groups I’ve had the most struggles with would fit into the event perfectly. These are the bands that are trying to fit an auditorium or shed show into an enclosed place that seats 200 people or fewer.

Their show was built to be the size of an elephant (in one way or another), and when faced with a “garden hose” of a venue, there’s no way to downscale. They just try to get through by force of will.

Now, sure, their physical setup might fit, but what usually doesn’t fit is the volume.

  • The drummer hits as hard as he possibly can. Especially the cymbals. All the time. His snare sounds like a firearm. (I’m not joking. One of these guys once smacked his snare while standing behind me, and I swear that it sounded like he had discharged a pistol.) It’s all about “being intense” and having “great energy” – which would be super fun if it didn’t hurt to be in the room with the guy.
  • The guitar players have all-tube heads, which sport big wattage. Those heads are connected to either a half or full-stack of cabs, and the rigs “just don’t sound right” if dialed back to anything less than “crushing.” Of course, if they could dial their amps back, they’d just get run over by the drummer. Even so, they want a lot of their rig in the their monitor wedge. And a lot of the other guitar player. And a lot of kick and snare, because they can’t hear the drums anymore. Plus some bass.
  • The bass player has at least one 8×10, powered by a massive head. It’s Ampeg, of course. The head is vintage, vintage being a synonym for “runs hot and weighs as much as the trailer it rides in.” The amount of energy produced by the bass stack is formidable. The bottom octave is felt as much as heard. Whatever subs are available to the PA, they’re overmatched by 6-10 dB.
  • The vocalist has to do the “scream” thing. There is literally no other option, except for when the guitarists have switched to their clean channel. At any other time, vocal-chord threatening volume is required.

Anyway, you get the point.

The band would sound great if they were in an open-air venue, and the average listener was a minimum of 50 feet from the barricade. In a small space, though, the results are uncomfortable. Or downright deafening.

…and the thing is, the “elephant” can’t be compacted.

The drummer’s kit is built specifically to be a certain volume. He can’t switch for a quieter snare, for instance, because he only has the “holy grail” snare that he poured all his money into. His muscle-memory is built around playing at full tilt, with sticks of a certain weight. It’s almost impossible for him to “turn down.”

The guitar rigs, in the same way, are built to get a certain tone at a certain level. In all likelihood, the guitarists invested all their setup money into those stacks. They have no alternative but to use them, and even with master volume controls onboard, they have to keep up with the (essentially fixed volume) drummer.

It’s the same for the bass player, because he has to keep up with the guitars, and it’s not as though the vocalist can scream at a “front-parlor appropriate” volume.

The elephant simply can not be scaled down to fit the garden hose – not at a moment’s notice, anyway.

The faulty logic in play is “if we create a show that works at large scale, then we’re ready for anything.” This seems reasonable, but it’s actually incorrect. It’s a forgivable mistake, because I’m fairly sure that all of us in live-music have made it. We assume that the band is the vehicle that carries the show, and a huge vehicle can carry any size of show. The truth is that the show (or, more correctly, the show’s context) is the vehicle for the band, and a band that’s too “large” will overwhelm the vehicle.

So – what to do?

Elephants Are Remarkably Easy To Expand

If the situation really is that you have to fit into a variety of garden hoses, then the solution is simple:

Make the elephant small enough to fit through the smallest hose you’re going to encounter.

If your show can run comfortably in a small club, then a competent crew can scale that show up to auditorium or shed-gig size when it comes time. When you get invited to that big show, the show itself will have the resources necessary to make the act big enough to fll a much larger garden hose.

If you’ve invested your time and money into a drumkit and play style that works nicely in a small club, you can be mic’ed up and reinforced for pretty much any number of people. When it’s time to play in a tiny room again, all you have to do is what you’ve always done.

If you’ve invested in a guitar or bass rig that sounds great at small-venue volume, then you’ll sound just as great when the amp gets sent through a PA sized appropriately for the show. (I’m not kidding. One of the biggest, most raging-awesome “PanterrrrRRRRAAAAAA!” guitar tones I’ve ever heard was the result of micing a Roland cube. I’ve had lunch boxes bigger than that thing.)

If your show is exciting, and yet manageable in a space the size of a postage stamp, then there won’t be any insurmountable issues to be found in making it happen on a huge stage. Sure, you might not take advantage of the whole area all at once, but that’s not what actually makes shows great.

The bottom line is that show production – audio, lighting, staging, logistics, whatever – is primarily an additive activity. Making things larger than life is pretty much what all the technology is built around, because that’s how the laws of physics work. Subtractive techniques are few in number and difficult to implement.

Small elephants fit down small garden hoses, and when you’re just starting out, the small hoses are what you’ll need to fit your show into. Small doesn’t mean “dinky” or “boring.” It just means compact.

So, build the most amazing, travel-sized elephant that you possibly can.