Tag Archives: Console

I’ve Never Disliked The Sound Of A Console

There are plenty of controls I didn’t like, though…

Please Remember:

The opinions expressed are mine only. These opinions do not necessarily reflect anybody else’s opinions. I do not own, operate, manage, or represent any band, venue, or company that I talk about, unless explicitly noted.

Want to use this image for something else? Great! Click it for the link to a high-res or resolution-independent version.

I’ve talked about this before, but it’s on my mind again.

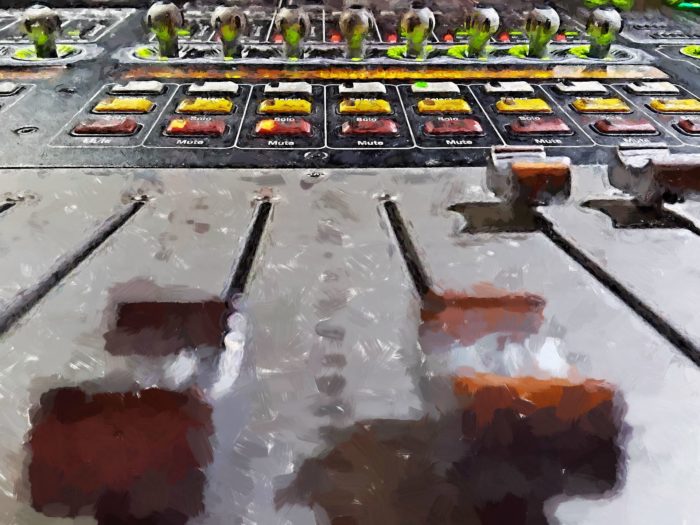
As of today, I’ve clocked nearly 24 years of involvement in live audio. In that time, I’ve had hands-on time with mixers by Ramsa, Peavey, JBL, Behringer, Soundcraft, A&H, Yamaha, Tascam, Avid, Solid State Logic, Amek, Neve, and…ah…and…at least one more that I can’t remember for some reason. Some of them were worth tens of dollars. Some of them were worth tens or even hundreds of thousands of dollars. Some of them were analog. Some of them were digital.

I never once had a problem with how any of them “sounded.” I have never been in a situation with a real band in a real room and said to myself, “Gee, this would sound so much better if I had a [consoleName].”

I’ve disliked control layouts, though. I’ve wondered why the big, fancy, industry darling didn’t have conveniences that a console costing less than 1/10th of it had. I’ve encountered fixed-width midrange EQs that were metaphorical equivalents to carving a turkey with a tractor-trailer hauling 17 tons of other, very alive and extremely enraged turkeys bent on world domination HUMANS, YOUR HUBRIS WILL END YOU! WE ARE COMING! GOBBLEGOBBLEGOBBLE!

Sorry, what were we talking about?

Yes, I’ve encountered some consoles that sounded terrible because an internal connection had worked loose, or a button contact was grunged up. When everything was working, though, all the mixers in my experience have passed audio just as well as anything else. Then, that audio hit outboard processing, loudspeakers, and acoustical environments, and all bets were off. There are plenty of people who might ask, “What console do we need to buy to make this place sound better?” and I might answer:

“Forget the console. You need a bulldozer, municipal construction permits, an architecture firm, and a bunch of money to build a room that’s actually suited to live music.”

I can not recall a single instance in my life where I disliked the sound of a show and could confidently attribute that dislike to a deficiency in the basic audio-handling properties of a mixing desk. Operators, input/ output transduction, and environmental factors are sonic influencers possessing orders of magnitude more significance.


The POTH Commentaries – VCAs/DCAs

VCA/ DCA control is very handy, especially for “non-homogenous” routing situations.

Please Remember:

The opinions expressed are mine only. These opinions do not necessarily reflect anybody else’s opinions. I do not own, operate, manage, or represent any band, venue, or company that I talk about, unless explicitly noted.

Want to use this image for something else? Great! Click it for the link to a high-res or resolution-independent version.

Author’s Note: This article is the first in a short series that addresses concepts and happenings related to Pigs Over The Horizon, a Pink Floyd tribute starring Advent Horizon and Friends.


When you start working with more full-featured consoles, you’ll likely run across something you might not have seen before. It’s a control feature called the VCA, or sometimes DCA on digital desks. What is this strange creature? What is it good for?

First off: A VCA is a Voltage Controlled Amplifier. The “D” comes in as a way to say that the same concept is being applied in the digital realm. (In my opinion, a digital system has it much easier, because you don’t have to work with analog circuit logic and the complexities of components or circuit layouts that come with that whole business.) The whole notion rests squarely on how it’s possible to build gain stages that modify the applied change to an audio signal in proportion to a separately applied control signal. If you have a number of control signal generators available, and can choose which control signal to apply to other gain stages, then you end up with a number of VCA/ DCA assignments. Connect a fader to the control signal generator such that the control signal is modified by that fader, and you have a VCA that’s intuitive to manage.

The VCA/ DCA concept, then, is that of a control group. When you assign faders to a control group, you are directing the console to maintain the relative balance that you set amongst those faders, while also giving you an overall level control for all of those channels at once.

“Like routing all those channels through a bus?” you ask.

Yes and no. The magic of the VCA/ DCA is that you get bus-like level management, but your routing is unaffected. In other words, VCA/ DCA groups are control groups independent of audio signal considerations. This was a big deal for me with Pigs Over The Horizon, because of how we did the playback FX.

The playback FX were in surround. Two channels were routed up front (in mono, actually), with two more channels that were sent directly to surround left and surround right, respectively. Once the surround channels were “lined up” with respect to each other and the feeds to the front, I didn’t want to change that relationship – but I DID want to be able to ride the overall FX cue volume if I had to.

I couldn’t achieve what I wanted by busing the four FX channels together; They would all have ended up going to a single destination, with no way to separate them back out to get surround again. By assigning them to a DCA group, though, it was a cinch. The routing didn’t change at all, but my ability to grab one control and regulate the overall volume of the unchanged balance was established.

Of course, busing is still a very important tool. You need it whenever you DO want to get a bunch of sources to flow to a single destination. This might not just be for simple combining. You might want to process a whole bunch of channels with exactly the same EQ and compression, for example, and then send them off to the main output. If that’s not what you’re after, though, a VCA/ DCA group is a great choice. You don’t chew up a bus just for the simple task of grouped volume control, and if you change your mind on the routing later it’s not a big deal. Your grouped controls stay grouped, no matter where you send them, again, because of that “independence” factor. The VCA/ DCA has nothing to do with where signals are coming from or where they’re going – it only changes the gain applied.

I personally am not as heavy a user of VCA/ DCA groups as some other audio humans, but I see them as a handy tool that I may end up leveraging more in the future. I’m glad I know what they are, because they’re a great problem solver. If your console has them, I definitely recommend becoming familiar with their usage. The day may come when you need ’em!


The Pro-Audio Guide For People Who Know Nothing About Pro-Audio, Part 5

Buses are what put the “mixing” in mixing consoles.

Please Remember:

The opinions expressed are mine only. These opinions do not necessarily reflect anybody else’s opinions. I do not own, operate, manage, or represent any band, venue, or company that I talk about, unless explicitly noted.

Want to use this image for something else? Great! Click it for the link to a high-res or resolution-independent version.

“The most common destination for a channel’s signal is a bus. Buses are really what make a mixer a mixer: They’re signal lines meant to carry and combine a number of individual channel signals fed into them.”


I wrote this article for Schwilly Family Musicians. The rest of it is available for free, right here.


Gig Log: USIC Fundraiser (March 10, 2018)

Acoustic-o-rama.

Please Remember:

The opinions expressed are mine only. These opinions do not necessarily reflect anybody else’s opinions. I do not own, operate, manage, or represent any band, venue, or company that I talk about, unless explicitly noted.

Want to use this image for something else? Great! Click it for the link to a high-res or resolution-independent version.

I’ve been asked if I can start writing up gig-logs. Thoughts about shows can be a bit of a touchy subject; When things don’t go well, folks can think they’re getting the blame. At the same time, treated carefully, there’s likely to be a wealth of teachable moments packed into any retrospective of a production.

So, yeah – let’s give this a try!

What Went Well

  • Advance information was key: I knew beforehand that I would have a healthy number of inputs and monitor mixes to contend with – AND that most of the heavy lifting would be done with instrument mics. Not having to figure things out at the last minute made life much smoother.
  • Lessons learned from others’ experiences are helpful: One of the best pieces of advice I’ve gleaned regarding “instrument mic” shows is that you should be very, very wary of making monitor world too loud right out of the gate. Start quiet, and then add on as needed. I’m pretty sure this concept saved my butt later. (I think this concept is true for every kind of show, actually, but shows with a lot of mics will kill you much faster if you forget.)
  • Build the show file at home: As per my usual, I walked into the space with a USB stick that had basic FOH and monitor-world console configurations preloaded. As soon as I was ready, I called up my scenes. I was then in a place where I could make “grab-n-go” tweaks without having to look at every parameter on everything. Having your routing, scribble strips, high-pass filters, channel compressor ratio/ timing parameters, and basic monitor-bus EQs in place will save you a LOT of time at the show.
  • Save your back: Putting the digital stagebox on a chair was one of the best ideas ever. I didn’t have to bend all the way down to interact with it, which was a lot faster and a lot more comfortable than the alternative.

What Could Have Been Better

  • Perishable skills are perishable: It took me a minute to get my head re-wrapped around thinking about two separate consoles that have to be recalled individually. I haven’t had to do that since the summer, so I’m out of practice and a little slow. I also tend to forget that acoustic instruments have solid output, but also tend to be farther from a mic than a “rock” vocal. Consequently, you have to be willing to get on the gas a bit more if folks really want to hear the monitors. If you haven’t done this kind of work in a while, you might be a bit surprised.
  • Scheduling is hard: I gave myself four hours to load-in, power, set, and line-check an 18 input show with five monitor mixes, a “double-hung” PA, and two light trees driven with DMX. I just barely got to “soundcheck ready” in time. I need to spec more of a setup buffer when I’m flying solo.
  • Almost but not quite: I’m used to being able to grab a direct-input instrument and put it confidently front and center when a solo comes up. With miced instruments, I have to be more ginger. Certain lead parts didn’t pop out in quite the way I had hoped.
  • That wall, though: The room is actually pretty okay, but I can’t say I’m a fan of the big, blank, flat wall right behind the stage as an acoustical feature.

Conclusion

The show came off well, with an appreciative crowd and musicians who seemed pretty happy when it was all said and done. I call that a win!


The Pro-Audio Guide For People Who Know Nothing About Pro-Audio, Part 3

Onward to the microphone preamp…or trim.

Please Remember:

The opinions expressed are mine only. These opinions do not necessarily reflect anybody else’s opinions. I do not own, operate, manage, or represent any band, venue, or company that I talk about, unless explicitly noted.

Want to use this image for something else? Great! Click it for the link to a high-res or resolution-independent version.

“Signals at mic-level may require large, positive gain changes to correctly drive downstream electronics, and so a jack that can be connected to a microphone preamp is needed in that case.”

Read the whole thing, free, at Schwilly Family Musicians.


Console Questions

A few simple queries can get you going on just about any console.

Please Remember:

The opinions expressed are mine only. These opinions do not necessarily reflect anybody else’s opinions. I do not own, operate, manage, or represent any band, venue, or company that I talk about, unless explicitly noted.

Want to use this image for something else? Great! Click it for the link to a high-res or resolution-independent version.

Back when I was in school, we were introduced to “The Four Console Questions.” The idea behind the questions was that, if you walked up to a strange mixer, you could get answers to the questions and be able to get work done. Mixing desks come in many varieties, but there aren’t very many truly different ways to build them that make sense. In any case, all the basic concepts have to essentially stay the same. If a console can’t take some number “a” of audio inputs, and route those inputs to some number “o” of outputs, you don’t have a mixing console anyway.

With the growing commonality of digital mix systems, I feel that the essential “console questions” need some expansion and tweaking. As such, here’s my take on the material that was presented to me over a decade and a half (GEEZE!) ago.

1. Do I Know What I Want To Do?

You might say that this isn’t a console question at all, but in truth, it’s THE most important one. If you don’t know what you want to do with the console, then knowing a bunch of information about the console’s operation won’t help you one iota. The unfortunate reality is that many people try to engage in this whole exercise backwards; They don’t know what they want to accomplish, but they figure that learning the mixer’s whys and wherefores will help them figure it out.

Certainly, learning about a new feature that you haven’t had access to previously can lead you to new techniques. However, at a bedrock level, you have to have some preconceived notion of what you want to accomplish with the tool. Do you want to get a vocal into the FOH PA? Do you want to get three electric guitars, a kazoo, and a capybara playing Tibetan singing-bowls into 12 different monitor mixes?

You have to know your application.

2. How Do I Correctly Clock The Console?

For an analog console, the answer to this is always: “No clock is required.”

For a digital rig, though, it’s very important. I just recently befuddled myself for an agonizing minute with why a digital console wasn’t showing any input. Whoops! It was because I had set it to receive external clock from a master console a few weeks before, and hadn’t returned it to internal clocking now that it was on its own.

You need to know how to indicate to the console which clock source and sample rate is appropriate for the current situation.

3. How Do I Choose What Inputs Are Available To The Channels?

This is particularly important with consoles that support both on-board input and remote stageboxes. You will very likely have to pick and choose which of those options is available to an individual channel or group of channels. What you need to discover is how those selections are accomplished.

4. How Do I Connect A Particular Input To A Particular Channel?

You might think this was covered in the previous question, but it wasn’t. Your global input options aren’t the end of the story. Many consoles will let you do per-channel “soft-patching,” which is the connection of a certain available signal to a certain channel without having to change a physical connection. Whether on a remote stagebox or directly at the desk, input 1 may NOT necessarily be appearing on channel 1. You have to find out how those connections are chosen.

5. How Do I Insert Channel Processing?

In some situations, this means a physical insert connection that may be automatically enabled…or not. In other cases, this means the enabling and disabling of per-channel dynamics and/ or EQ, and maybe even other DSP processing available onboard in some way. You will need to know how that takes place, and with all the possible variations that might have to do with your particular application, it is CRITICAL that you know what you want to do.

6. How Do I Route A Channel To An Auxiliary, Mix Bus, Or The Main Bus?

Sometimes, this is dead-simple and “locked in.” You might have four auxiliaries and four submix buses implemented in hardware, such that they can only be auxiliary or mix buses, with the same knobs always pushing the same aux and a routing matrix with pan-based bus selection. On the other hand, you might have a pool of buses that can behave in various ways depending on global configuration, per-channel configuration, or both.

So, you’ll need to figure out what you’ve got, and how to connect a given channel to a given bus so that you get the results you want.

7. How Do I Insert Bus Processing?

This might be just like question 5, or wildly different. You will need to sort out which reality is currently in play.

8. How Do I Connect A Given Signal To A Physical Output?

Just because you have a signal running to a bus, there’s no guarantee that the bus is actually going to transfer signal to any other piece of equipment. Especially in the digital world, there may be another layer of patching to assign signals to either digital or analog outputs. Bus 1 might be on output 7, because six matrices might be connected to the first six outputs. Maybe output 16 is a pre-fader direct out from channel 4.

You’ll have to figure out where all that gets specified.


Obviously, there’s more to being a whiz at any particular console than eight basic questions. However, if you can get a given signal into the desk, through some processing, combined with other signals you want to combine, and then off to the next destination, you can at least make some real noise in the room.


The Unterminated Line

If nothing’s connected and there’s still a lot of noise, you might want to call the repair shop.

Please Remember:

The opinions expressed are mine only. These opinions do not necessarily reflect anybody else’s opinions. I do not own, operate, manage, or represent any band, venue, or company that I talk about, unless explicitly noted.

Want to use this image for something else? Great! Click it for the link to a high-res or resolution-independent version.

“I thought we fixed the noise on the drum-brain inputs?” I mused aloud, as one of the channels in question hummed like hymenoptera in flight. I had come in to help with another rehearsal for the band called SALT, and I was perplexed. We had previously chased down a bit of noise that was due to a ground loop; Getting everything connected to a common earthing conductor seemed to have helped.

Yet here we were, channel two stubbornly buzzing away.

Another change to the power distribution scheme didn’t help.

Then, I disconnected the cables from the drum-brain. Suddenly – the noise continued, unchanged. Curious. I pulled the connections at the mixer side. Abruptly, nothing happened. Or rather, the noise continued to happen. Oh, dear.


When chasing unwanted noise, disconnecting things is one of your most powerful tools. As you move along a signal chain, you can break the connection at successive places. When you open the circuit and the noise stops, you know that the supplier of your spurious signal is upstream of the break.

Disconnecting the cable to the mixer input should have resulted in relative silence. An unterminated line, that is, an input that is NOT connected to upstream electronics, should be very quiet in this day and age. If something unexplained is driving a console input hard enough to show up on an input meter, yanking out the patch should yield a big drop in the visible and audible level. When that didn’t happen, logic dictated an uncomfortable reality:

1) The problem was still audible, and sounded the same.

3) The input meter was unchanged, continuing to show electrical activity.

4) Muting the input stopped the noise.

5) The problem was, therefore, post the signal cable and pre the channel mute.

In a digital console, this strongly indicates that something to do with the analog input has suffered some sort of failure. Maybe the jack’s internals weren’t quite up to spec. Maybe a solder joint was just good enough to make it through Quality Control, but then let go after some time passed.

In any case, we didn’t have a problem we could fix directly. Luckily, we had some spare channels at the other end of the input count, so we moved the drum-brain connections there. The result was a pair of inputs that were free of the annoying hum, which was nice.

But if you looked at the meter for channel two, there it still was: A surprisingly large amount of input on an unterminated line.


More Features VS Groundwork

In this case, groundwork won: There wasn’t a compelling reason to lose it.

Please Remember:

The opinions expressed are mine only. These opinions do not necessarily reflect anybody else’s opinions. I do not own, operate, manage, or represent any band, venue, or company that I talk about, unless explicitly noted.

Want to use this image for something else? Great! Click it for the link to a high-res or resolution-independent version.

The Video

The Summary

If you have significant prep that’s already done for one mixing system, you might want to avoid losing that effort – even if it would be to put a more powerful/ flexible mix rig into play.


Console Envy

When it comes to sound quality, any console capable of doing the show will probably be fine.

Please Remember:

The opinions expressed are mine only. These opinions do not necessarily reflect anybody else’s opinions. I do not own, operate, manage, or represent any band, venue, or company that I talk about, unless explicitly noted.

Want to use this image for something else? Great! Click it for the link to a high-res or resolution-independent version.

The Video

The Summary

Which console sounds best? The one with the features you need. If an inexpensive mixer has all the necessary features for your shows, spending more doesn’t have much of a point.


Case Study: Creating A Virtual Guitar Rig In An Emergency

Distortion + filtering = something that can pass as a guitar amplifier in an emergency.

Please Remember:

The opinions expressed are mine only. These opinions do not necessarily reflect anybody else’s opinions. I do not own, operate, manage, or represent any band, venue, or company that I talk about, unless explicitly noted.

Want to use this image for something else? Great! Click it for the link to a high-res or resolution-independent version.

The Video

The Script

Imagine the scene: You’re setting up a band that has exactly one player with an electric guitar. They get to the gig, and suddenly discover a problem: The power supply for their setup has been left at home. Nobody has a spare, because it’s a specialized power supply – and nobody else plays an electric guitar anyway. The musician in question has no way to get a guitar sound without their rig.

At all.

As in, what they have that you can work with is a guitar and a cable. That’s it.

So, what do you do?

Well, in the worst-case scenario, you just find a direct box, run the guitar completely dry, and limp through it all as best you can.

But that’s not your only option. If you’re willing to get a little creative, you can do better than just having everybody grit their teeth and suffer. To get creative, you need to be able to take their guitar rig apart and put it back together again.

Metaphorically, I mean. You can put the screwdriver away.

What I’m getting at is this question: If you break the guitar rig into signal-processing blocks, what does each block do?

When it comes right down to it, a super-simple guitar amp amounts to three things: Some amount of distortion (including no distortion at all), tone controls, and an output filter stack.
The first two parts might make sense, but what’s that third bit?

The output filtering is either an actual loudspeaker, or something that simulates a loudspeaker for a direct feed. If you remove a speaker’s conversion of electricity to sound pressure waves, what’s left over is essentially a non-adjustable equalizer. Take a look at this frequency-response plot for a 12″ guitar speaker by Eminence: It’s basically a 100 Hz to 5 kHz bandpass filter with some extra bumps and dips.

It’s a fair point to note that different guitar amps and amp sims may have these different blocks happening in different orders. Some might forget about the tone-control block entirely. Some might have additional processing available.

Now then.

The first thing to do is to find an active DI, if you can. Active DI boxes have very high input impedances, which (in short) means that just about any guitar pickup will drive that input without a problem.

Next, if you’re as lucky as I am, you have at your disposal a digital console with a guitar-amp simulation effect. The simulator puts all the processing I talked about into a handy package that gets inserted into a channel.

What if you’re not so lucky, though?

The first component is distortion. If you can’t get distortion that’s basically agreeable, you should skip it entirely. If you must generate your own clipping, your best bet is to find some analog device that you can drive hard. Overloading a digital device almost always sounds terrible, unless that digital device is meant to simulate some other type of circuit.
For instance, if you can dig up an analog mini-mixer, you can drive the snot out of both the input and output sides to get a good bit of crunch. (You can also use far less gain on either or both ends, if you prefer.)

Of course, the result of that sounds pretty terrible. The distortion products are unfiltered, so there’s a huge amount of information up in the high reaches of the audible spectrum. To fix that, let’s put some guitar-speaker-esque filtering across the whole business. A high and low-pass filter, plus a parametric boost in the high mids will help us recreate what a 12″ driver might do.
Now that we’ve done that, we can add another parametric filter to act as our tone control.

And there we go! It may not be the greatest guitar sound ever created, but this is an emergency and it’s better than nothing.

There is one more wrinkle, though, and that’s monitoring. Under normal circumstances, our personal monitoring network gets its signals just after each channel’s head amp. Usually that’s great, because nothing I do with a channel that’s post the mic pre ends up directly affecting the monitors. In this case, however, it was important for me to switch the “monitor pick point” on the guitar channel to a spot that was post all my channel processing – but still pre-fader.

In your case, this may not be a problem at all.

But what if it is, and you don’t have very much flexibility in picking where your monitor sends come from?

If you’re in a real bind, you could switch the monitor send on the guitar channel to be post-fader. Set the fader at a point you can live with, and then assign the channel output to an otherwise unused subgroup. Put the subgroup through the main mix, and use the subgroup fader as your main-mix level control for the guitar. You’ll still be able to tweak the level of the guitar in the mix, but the monitor mixes won’t be directly affected if you do.