Tag Archives: Lighting

Three Reasons I Was Disappointed In My Lighting Design

Beam width, alignment, and angles really do matter.

Please Remember:

The opinions expressed are mine only. These opinions do not necessarily reflect anybody else’s opinions. I do not own, operate, manage, or represent any band, venue, or company that I talk about, unless explicitly noted.

Want to use this image for something else? Great! Click it for the link to a high-res or resolution-independent version.

Just last week, a long-in-the-planning show with Roll The Bones came to fruition. I was out at FOH, running both audio and lighting. I can say that the gig went decently, but I didn’t quite satisfy my own hopes in the lighting department. The results weren’t terrible by any means, it’s just that there was a failure to “spark” in my own imagination.

So, what went wrong?

Beam Diameter

Luminous flux (brightness, in other words) is important for a lighting design to have impact, but it’s not the only factor in play. Nifty aerial effects that hold up across various lighting positions require both brightness and larger beam cross-sections. That is to say, if you want it to look like a big column of light is blasting out from somewhere upstage – guess what? You need to have a fixture that will spit out a collimated stream of photons with a large beam diameter.

I had made the decision to try some mini-beams that I found online. They’re very affordable, and actually a bit surprising in terms of output. Based on my informal measurements, they can still manage to deliver 100 lux (about the minimum lighting for working in an office) at a distance of 80 feet. The tradeoff, though, is that the beam diameter is small. As such, when fired through haze, you don’t end up with a large total volume of illuminated airborne particles along a line extending from your eye. Practically speaking, this means that the beams look pretty darn okay when they’re pointed generally in your direction, but lose impact in a hurry as the light is pointed away at larger angles.

Alignment Issues

I really like things to be geometrically neat and tidy, but I couldn’t get the mini-beam portion of the setup to stay horizontally aligned. I would make adjustments, and things would seem okay for a bit, but within a few minutes I’d have one or two fixtures out of whack again. (You can really see the effect of this in the picture above.) My guess is that there were two problems in play:

1) I really did not have nearly enough torque applied on the wing-nuts holding the lights to their O clamps.

2) The mini-beam bases have so little mass compared to the moving head that the whole assembly is very sensitive to movement in general.

So everything was skiddy-whompus all the time, and it drove me crazy.

The Math: It Wasn’t Done

The biggest overall problem was directly attributable to me. I was so worried about getting light in people’s eyes that I programmed the whole show with a general reference angle of roughly 45 degrees. In other words, if I wasn’t shooting the lights parallel to the floor or higher, they were at about 45 degrees of tilt or lower. At the time, in my head, that made sense, but in practice it robbed the whole show of maximum impact. If I would have bothered to do the tiniest bit of trigonometry, I would have realized that – for a trim height of about 8 feet – a nearly 70 degree angle is required for the lights to be pointed at a stage’s front edge that’s 20 feet away from the light hangs.

The tangent of 45 degrees is 1, meaning that the light aiming point is at the end of a line that’s just the same length as the trim height. In practice, this worked out to my whole show being far too oblique to have much “wow” factor. The washes were mostly hitting empty deck instead of people, and the spots were doing the same thing…which also reduced their effectiveness as an aerial visual.

The good news is that when you know what’s wrong you can fix it. I have another big show coming up very soon, and I am determined to learn from my mistakes in time.


How Much Light For Your Dollar?

Measurements and observations regarding a handful of relatively inexpensive LED PARs.

Please Remember:

The opinions expressed are mine only. These opinions do not necessarily reflect anybody else’s opinions. I do not own, operate, manage, or represent any band, venue, or company that I talk about, unless explicitly noted.

box_of_lightsWant to use this image for something else? Great! Click it for the link to a high-res or resolution-independent version.

I’m in the process of getting ready for a pretty special show. The album “Clarity” by Sons Of Nothing is turning 10, and a number of us are trying to put together one smasher of a party.

Of course, that means video.

And our master of all things videographic is concerned about having enough light. We can’t have anybody in the band who’s permanently stuck in “shadow.” You only get one chance to shoot a 10th anniversary concert, and we want to get it right.

As such, I’m looking at how to beef up my available lighting instruments. It’s been a long while since I’ve truly gone shopping for that old mainstay of small-venue lighting, the LED wash PAR, but I do take a look around every so often. There’s a lot to see, and most of it isn’t very well documented. Lighting manufacturers love to tell you how many diodes are in a luminaire, and they also like to tell you how much power the thing consumes, but there appears to be something of an allergy to coughing up output numbers.

Lux, that is. Lumens per square meter. The actual effectiveness of a light at…you know…LIGHTING things.

So, I thought to myself, “Self, wouldn’t it be interesting to buy some inexpensive lights and make an attempt at some objective measurement?”

I agreed with myself. I especially agreed because Android 4.4 devices can run a cool little Google App called “Science Journal.” The software translates the output from a phone’s ambient light sensor into units of lux. For free (plus the cost of the phone, of course). Neat!

I got onto Amazon, found myself a lighting brand (GBGS) that had numerous fixtures available for fulfillment by Amazon, and spent a few dollars. The reason for choosing fulfillment from Amazon basically comes down to this: I wanted to avoid dealing with an unknown in terms of shipping time. Small vendors can sometimes take a while to pack and ship an order. Amazon, on the other hand, is fast.

The Experiment

Step 1: Find a hallway that can be made as dark as possible – ideally, dark enough that a light meter registers 0 lux.

Step 2: At one end, put the light meter on a stand. (A mic stand with a friction clip is actually pretty good at holding a smartphone, by the way.)

Step 3: At the other end, situate a lighting stand with the “fixture under test” clamped firmly to that stand.

Step 4: Measure the distance from the lighting stand to the light meter position. (In my case, the distance was 19 feet.)

Step 5: Darken the hallway.

Step 6: Set the fixture under test to maximum output using a DMX controller.

Step 7: Allow the fixture to operate at full power for roughly 10 minutes, in case light output is reduced as the fixture’s heat increases.

Step 8: Ensure the fixture under test is aimed directly at the light meter.

Step 9: Note the value indicated by the meter.

Important Notes

A relatively long distance between the light and the meter is recommended. This is so that any positioning variance introduced by placing and replacing either the lights or the meter has a reduced effect. At close range, a small variance in distance can skew a measurement noticeably. At longer distances, that same variance value has almost no effect. A four-inch length difference at 19 feet is about a 2% error, whereas that same length differential at 3 feet is an 11% error.

It’s important to note that the hallway used for the measurement had white walls. This may have pushed the readings higher, as – similarly to audio – energy that would otherwise be lost to absorption is re-emitted and potentially measurable.

It was somewhat difficult to get a “steady” measurement using the phone as a meter. As such, I have estimated lux readings that are slightly lower than the peak numbers I observed.

These fixtures may or may not be suitable for your application. These tests cannot meaningfully speak to durability, reliability, acceptability in a given setting, and so on.

The calculation for 1 meter lux was as follows:

19′ = 5.7912 m

5.7912 = 2^2.53 (2.53 doublings of distance from 1m)

Assumed inverse square law for intensity; For each doubling of distance, intensity quadruples.

Multiply 19′ lux by 4^2.53 (33.53)

Calculated 1 meter lux values are just that – calculated. LED PAR lights are not a point-source of light, and so do not behave like one. It requires a certain distance from the fixture for all the emitters to combine and appear as though they are a single source of light.

The Data

The data display requires Javascript to work. I’m sorry about that – I personally dislike it when sites can’t display content without Javascript. However, for the moment I’m backed into a corner by the way that WordPress works with PHP, so Javascript it is.


Ascending sort by:


The Rise And Fall Of A Small Venue – Part 3

2011 was when the settling in got really serious.

Please Remember:

The opinions expressed are mine only. These opinions do not necessarily reflect anybody else’s opinions. I do not own, operate, manage, or represent any band, venue, or company that I talk about, unless explicitly noted.

upgradesWant to use this image for something else? Great! Click it for the link to a high-res or resolution-independent version.

One day, Mario and I couldn’t take it anymore.

Fats without acoustical treatment was an earth-shattering, punishing experience, and the excitement at the newness of the place was starting to wear off. People were beginning to complain. We weren’t enjoying things as much as we could have been. On one especially loud night, we looked at each other and knew that something had to change.

So, I suggested to Mario that some acoustical treatment might help. I figured that something would be better than nothing, so I proposed a relatively small amount of inexpensive “wedge” foam. Mario was even more receptive to the idea than I had hoped. I was pretty nervous about floating an idea that would cost money, but I shouldn’t have been. As I’ve said before, there was a real enthusiasm in play. We ended up calling a workday, and I walked in to see that about two and a half times what I had asked for had been ordered in.

After the foam went up on the walls, Fats was never the same.

In a great way.

At first, I was reluctant to say that the treatment was really doing much. I didn’t want to overplay the contribution. In the end, though, I’m pretty danged certain that treating the space was one of the greatest “post overhaul” investments that the Fats basement ever had. It made me seem like far more of a sound ninja than I actually am, because it made my job markedly easier.

Seriously, folks. If you fix one thing about a venue, fix the acoustics. I’ll take an okay PA in a great room over a great PA in a tough room any day of the week…and twice on Sundays. I’ve never done a truly quantitative analysis on this sort of thing, but my best guess is that the influence of the space on the sound of a show is at least an order of magnitude more important than the gear involved. (Assuming that any given choice of gear is capable of handling the necessary fundamentals, of course. A half-busted boombox from the Five-And-Dime won’t do any show a favor.)

The same drive for improvement that caused the manifestation of the acoustical treatment also enabled another huge improvement: The custom-built digital console that ended up running the bulk of Fats shows. Mario and Mishell stopped by my family home for a dinner meeting, a meal that took our relationship from “friendly bosses and employee” to “friends.” A lot of hopes and desires for what Fats could become were shared that evening, but the big one for me was an upgrade to the mix rig. I had been nursing the idea of a computer-based console for a while, but now I actually had the income necessary to try it. At the same time, it was a real risk. The chances of it not working to satisfaction were significant.

Mario and Mishell promised to back me up if the experiment ultimately failed, and that gave me the confidence to jump in.

The experiment did end up working, though, and what we got was a virtual desk which could compete with an Avid console in certain respects. I mixed a LOT of shows on that rig, and it’s now very difficult for me to imagine doing serious work with anything that’s less capable.


The year of 2011 was also the year that I met Floyd Show.

Floyd Show, AKA “Tim Hollinger knows more about Pink Floyd than Pink Floyd,” was one of those precious rarities that only comes along once in a great while. They were an ambitious project, with a LOT of people and gear involved. There was so much to them that they initially declined to play at Fats – we didn’t have enough space.

Well, dangit, Mishell wanted some Floyd Show, so Mario extended the stage.

It was completely worth it. From soup to nuts, it was worth it. It was worth it to meet all the players in the changing lineup. It was worth it to work on a show that required multiple techs to operate smoothly. It was worth it to load in and set up all day. It was worth it to make music and friendships with people who respected and adored the source material to a fanatical degree. It was worth it to put in all the effort, and then get to stand back and say, “Check THIS out!”

If you didn’t have a sense of pride after constructing a Floyd Show gig, you couldn’t possibly have been paying attention.

That first time that Floyd Show started playing, Mishell, Mario, and me all had our jaws smack the floor. It was as though the real thing had been crammed into a Sugarhouse basement. There was a sort of unreal magic to what happened at that first night, even though we had to submix a bunch of channels. (We didn’t have the new FOH setup yet.) On subsequent nights, I would feel disappointed that the same magic hadn’t quite happened again.

With Floyd Show, you were in the presence of folks (especially Tim), who made you want to do more and more for the production. When Tim asked if it might be possible to mix things in quad-surround, what do you think I said? And, of course, we did. We got the routing figured out, ran cable, and put FX behind the audience. We also talked about how cool it would be have to some real, honest-to-goodness, moving-head lights. I got it into my mind that it would be great to surprise the group at one show with some kind of intelligent lighting setup. I started putting plans into place. I was going to blow everybody’s minds.

Before I could pull it off, Tim passed away suddenly. No more would I hear the refrain when he came down Fats’ stairs: “What’s up, Danny? Do you have your toolkit, man?” (The dude’s guitar rig was always broke, and he always got it fixed before downbeat.) The unending stories about how Pink Floyd’s albums were created, and the jokes about technical problems being all David Gilmour’s fault, halted into silence with the abruptness of a tape machine that had stopped with a bang.

Of course, all of Tim’s friends put together an epic show to bid Mr. Hollinger (and the band, because he WAS the band) a fond farewell. The result was as unforgettable as could be imagined, with days of preparation leading up to a roaring finale that – finally – recaptured the elusive spirit which had permeated the very first night. We had bottled the lightning once again, and on the day where we absolutely had to do so.

Plus, I had those moving lights. I sprang for them a little bit early, because I knew that I might not have any more chances, ever, to do a gig with Floyd Show.

The house was packed.

The players were on point.

The mix cooperated beautifully.

It was incredible.

It was the show I had so wanted to do with Tim.

Floyd Show Folks (18 Different Ones)

the-floyd-show-and-yours-truly

Pigs (3 Different Ones)


The Priorities List

An enumeration of critical tasks and considerations for making a live show work.

Please Remember:

The opinions expressed are mine only. These opinions do not necessarily reflect anybody else’s opinions. I do not own, operate, manage, or represent any band, venue, or company that I talk about, unless explicitly noted.

prioritiesWant to use this image for something else? Great! Click it for the link to a high-res or resolution-independent version.

If you look at any desk that I use, you might not think that I have an ordered mind. It can be a little scary, I admit. I am of the opinion, however, that I’m capable of imposing order on certain parts of my mind – especially when there’s a show to be done. This is important, because I think that really pulling off a show requires some kind of plan. It doesn’t have to be written out in detail, but it has to exist in some form. You can’t just throw things together at random and expect them to work. A clear idea of what’s truly important is a really helpful sort of thing.

It did strike me one day that it might be interesting to attempt putting my basic, mental plan down in writing.

So, here you go.

The Pre-Game

Early Is The New On-Time

My general philosophy is that, if you’re early enough, you remove the need to worry about “the critical path.” The critical path is the shortest sequence of tasks necessary to complete a project successfully. Our project is the show, and the critical path for the show is the minimum necessary to survive the night.

Sometimes, that’s all you can do – but do you really want the bare minimum to be your best practice?

Nah.

The critical path for the show might be two vocal mics and a bit of level in the monitors, but that’s not really “full-service” and this IS a service industry. We have other things we can do…if we have the time. So create the time.

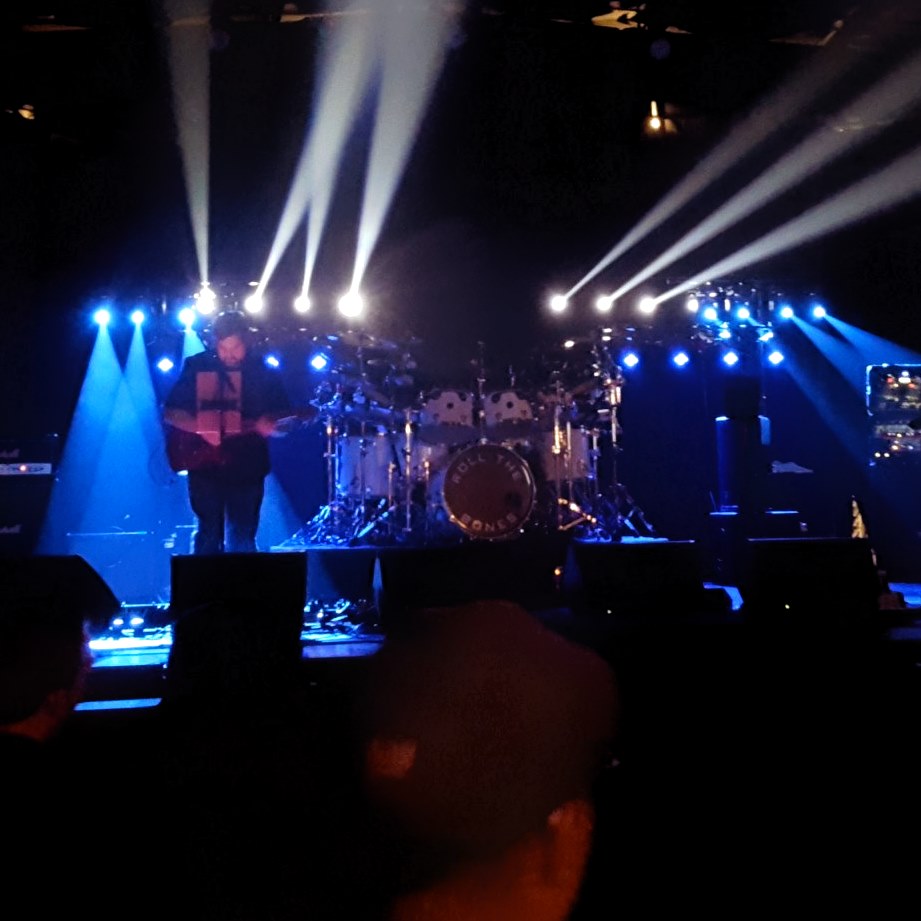
Make The Stage A Place You Want To Be On

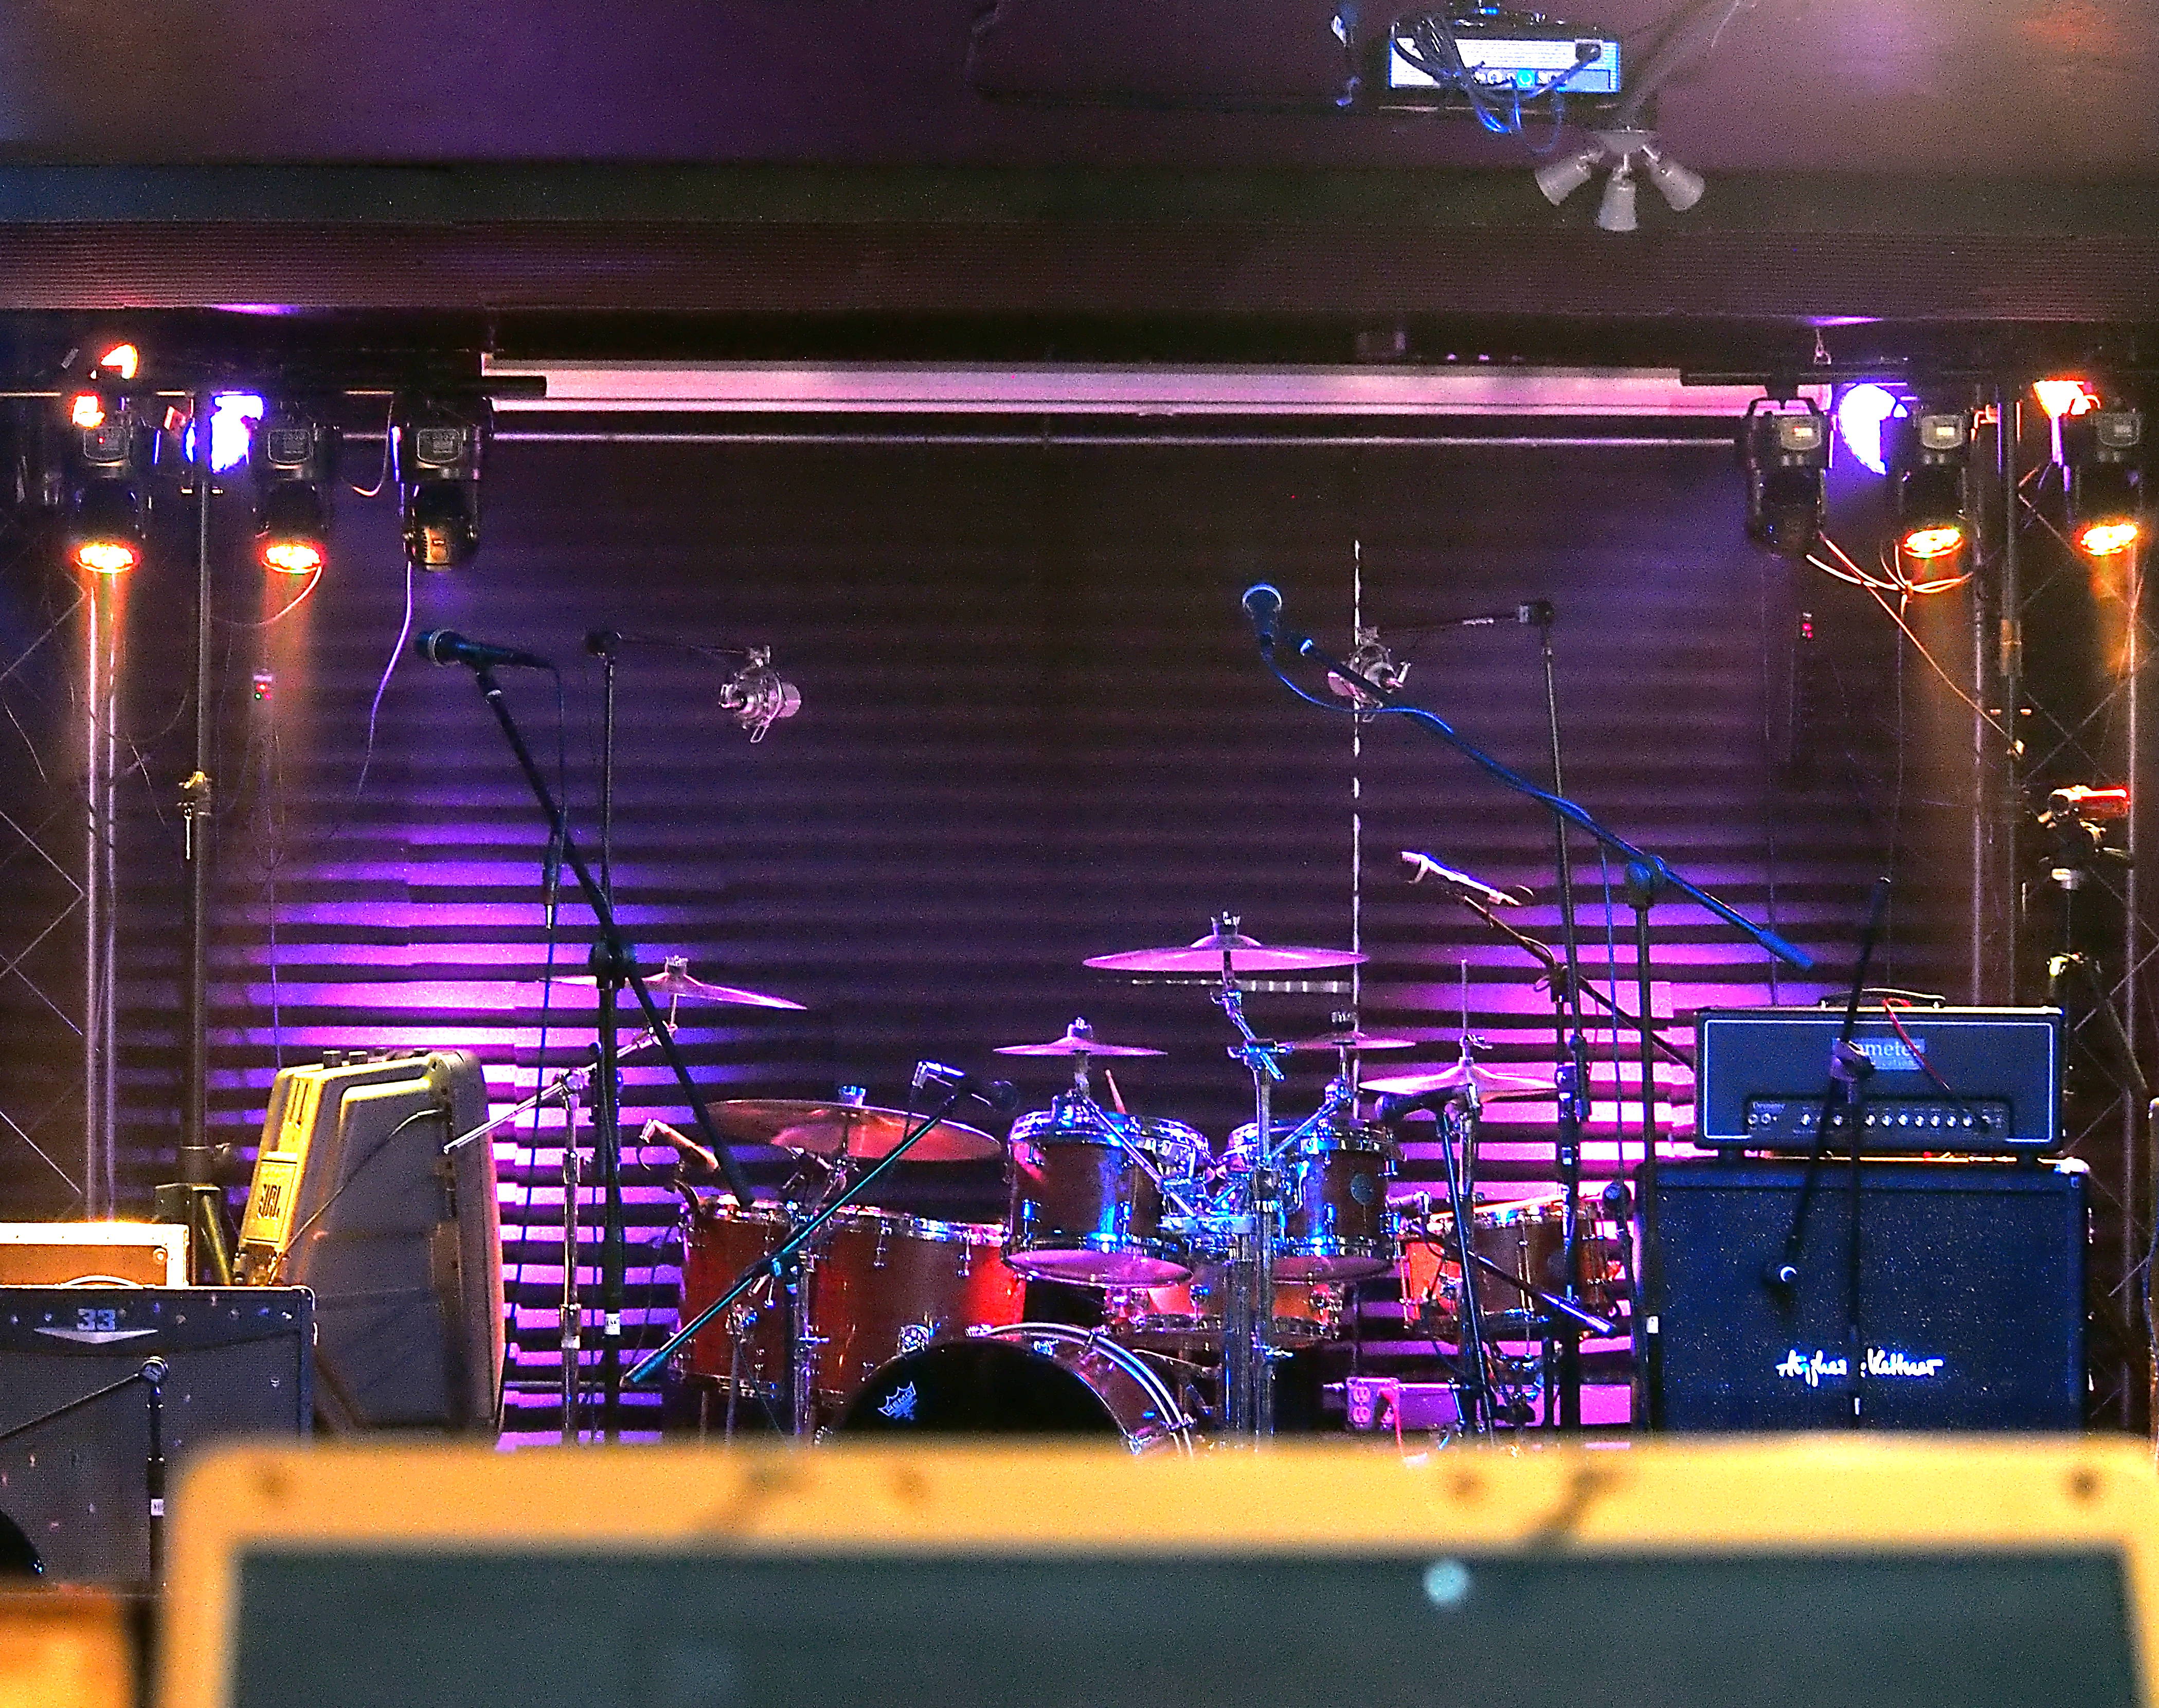
Oh my. That stage is a mess, isn’t it? Cables are going everywhere from last night’s chaos, there’s gum stuck to various things, trash is strewn around, there’s a beverage glass jammed in a corner, and there’s a pile of wood fragments from that drummer whose hero is apparently Animal from “The Muppet Show.”

Guess whose responsibility it is to clean that up and make the stage look nice?

That’s right.

YOU have to have comfortable, happy musicians in order to do your job properly, and part of making people comfortable is presenting them with a working space that’s as nice as possible. So, get after it. You’ll be fine if you wash your hands afterwards.

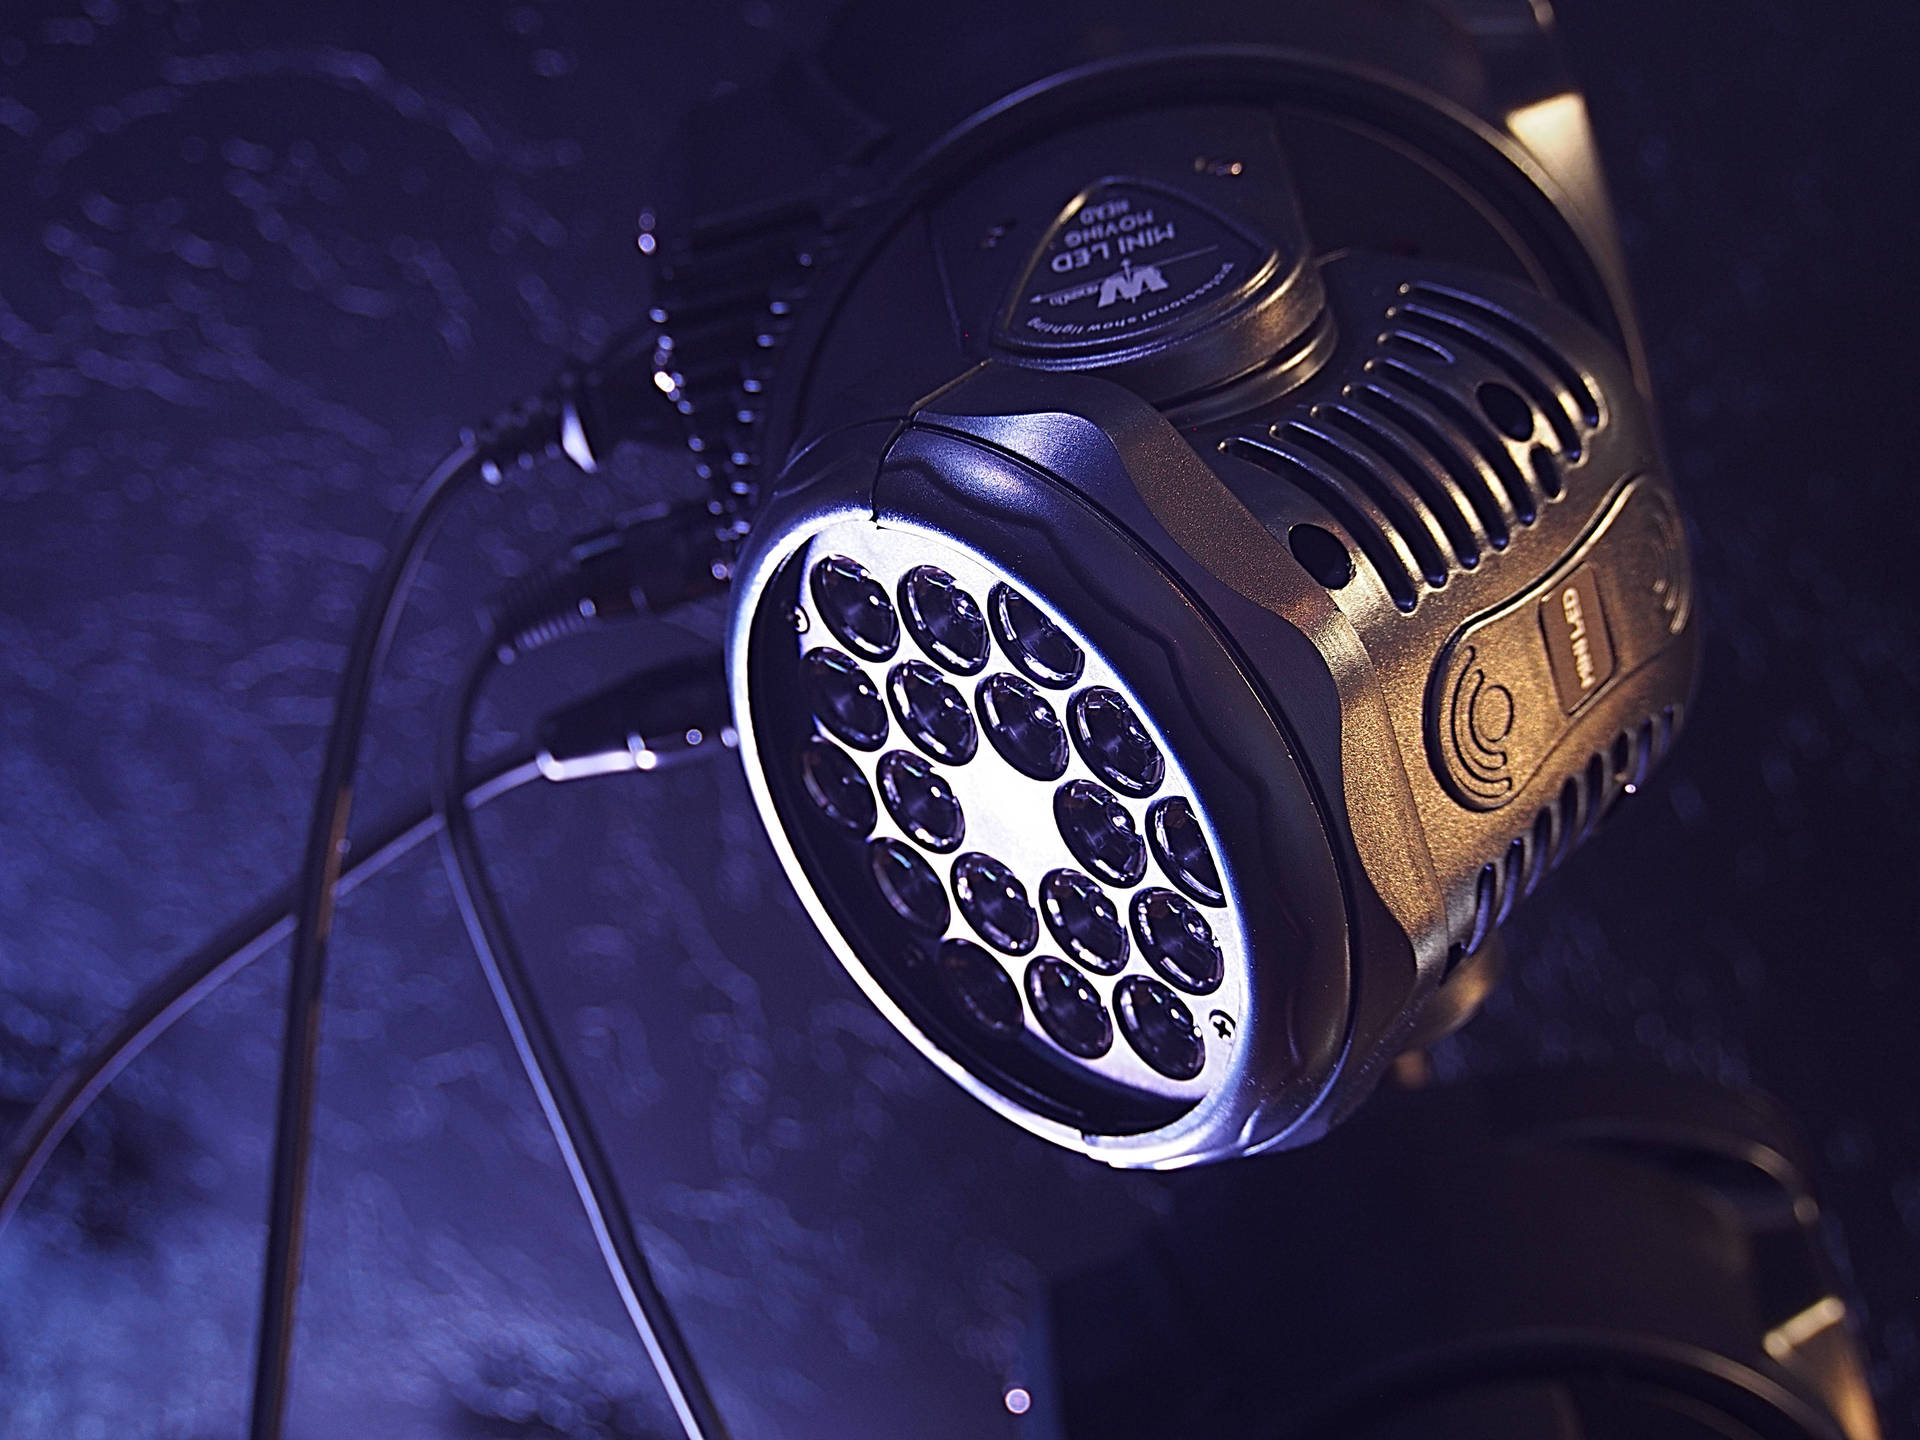
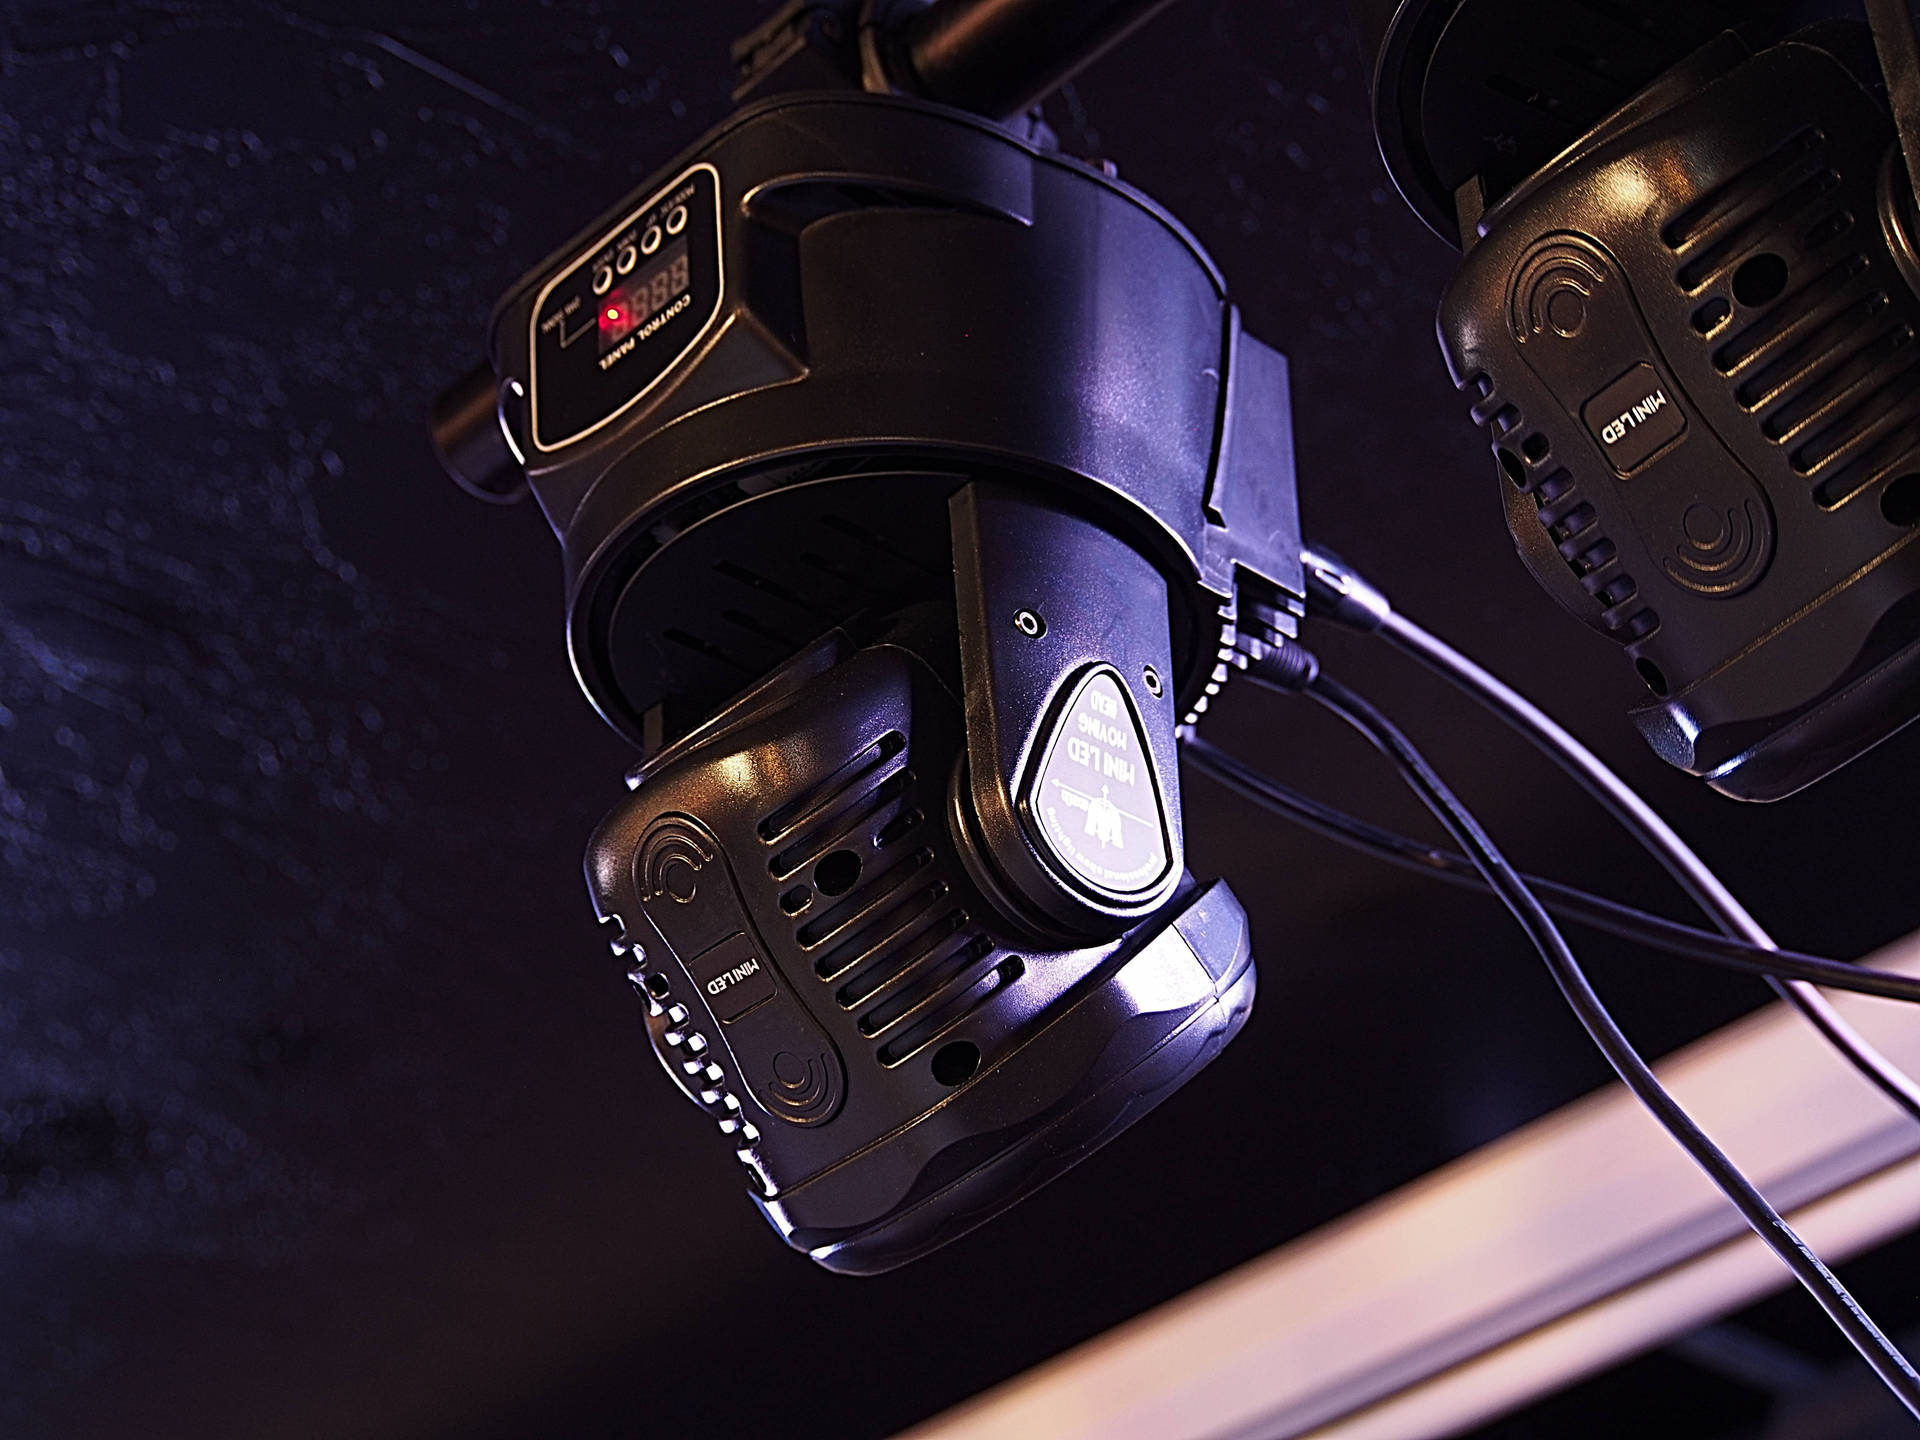
Be Ready To Put Everything Through Some Part Of The Rig

Yes, it might be true that you technically don’t have to mic the amps or the drums to make the FOH mix work. However, just because you don’t need something in FOH doesn’t mean it won’t be wanted in monitor world. If you’ve got the inputs, plug things into them. Have the option available. The musicians will probably appreciate it, and that counts for a lot.

Also, make sure your gear is working during the course of setup. If a mic, cable, lighting instrument, loudspeaker, or whatever else is not cooperating, now is the time to find out. It’s easier to fix a problem before soundcheck rather than during, and much, much easier to fix a problem before the actual show is rolling.

A Tsunami Of Vocal

Vocals are often THE critical thing to get right in monitor world, so take the time to get a baseline sound that’s essentially pleasant, focused on the critical midrange instead of extreme low and high frequency “fru-fru,” and LOUD. You should take your basic cue from this chunk of Iggy Pop’s tour rider. (That’s where I got the “tsunami of vocal” bit.)

Now, yes, not everything will ultimately require “rock show” vocals in the monitors, but you have to be ready. You have to be prepared for situations where the ultimate volume isn’t that high, but the monitor-world loop gain is cranked. Start with the assumption that you need full-blown-rock-show level in the monitors, and make that work as well as you can. Make sure to kill your feedback problems as dead as they can possibly be killed. Test with all your vocal channels unmuted, because the total gain of the entire setup really does matter. A little bit of ringing is NOT acceptable. Do things as correctly as you know how.

If you’re particularly lucky, the musicians will be thoroughly impressed, and then ask you to turn things down. If you’re not particularly lucky, at least you’ll be prepared. (I have nothing against luck, and I acknowledge its ability to trump almost every other factor, but it’s not something you can plan on.)

Everything Else

For mics meant for other sources, you still have to have some idea of how they’ll work in monitor world. You do need to establish some kind of tuning to ward off their major problems regarding mixes for the deck. Your favorite instrument mic may have a tendency to ring at a certain frequency when you’re in a high-gain situation, so you need to get that under control. It’s possible that you’ll only have to take a look at the issue a few times – but you have to take that look.

Just as with vocals, the primary goal is to be able to supply the monitors with sound that’s basically nice to listen to, without a lot of “pre-emphasis” on any particular frequency range, and with plenty of level available. Run up the send level of an instrument mic and talk into it. Does it wound weird? Fix it.

Not On The Fly

Make sure your mixing console and/ or lighting system has “sane” presets applied. You want to be able to push things up in a hurry and have a result that is basically okay. Starting completely from scratch is a fun thing when you have rehearsal time and a single band to invest all your energy in, but that doesn’t happen so often in the small-venue world. (It’s especially rare when the venue signs your paycheck instead of an individual act or tour package.)

From a sonic perspective, if a mic is pointed at something and you push the fader up, the resulting sound should be a believable facsimile of that thing. From a lighting perspective, you should have several basic “looks” or “moods” that you can summon without having to think about it too much.

Don’t worry about your presets not being exactly right for everything. If they’re not helpful, you’ll recognize it and take steps to correct it (or learn to). If your preset works for the average case, it’s a good preset and will save you time. Dealing with something truly crazy has to be done on a case-by-case basis anyway, but the average stuff is what you’ll run across the most. That’s why it’s average.

Get The Band In The Room

I often say that loading the band in “is the job.” If the band isn’t in the room, and their gear isn’t in the room, then there isn’t going to be much of a show, right? So, get your hands dirty. Find some heavy stuff and move it. Not only does this help you actually get the show moving, it is often highly appreciated by the musicians. It’s a great way to actually show them that you’re all on the same team. It’s also a great way to prevent the band from getting fatigued before they’ve even played a note.

Also, to a certain extent, helping with the load in gives you a chance to really see the gear you’re going to be working with. If you see four toms for the drum kit, but you only have mics for three, you can make a note to get out another mic without having to be asked first. Did you run an XLR for the bass amp, but it doesn’t have an XLR direct out? Now you know, and you have a bit of time to get out a DI or set up a microphone.

But the main thing is to be helpful and facilitate the musicians being pleased.

Happy, comfortable musicians. Let that be your mantra.

Downbeat and Beyond

What’s Needed On Deck?

Your first priority is to get the stage sounding the way the musicians need it to sound. If they are comfortable and can play their best, then they will deliver the best show possible. Mixing FOH around what’s required for the musicians to deliver is a perfectly acceptable compromise. Forcing the sound on deck to conform to FOH in such a way that the actual performance is harmed? That is not an acceptable compromise.

This goes for lighting, too. If that super-moody light cue with the lasers prevents the players from seeing something they need to see, that just doesn’t work.

If the musicians are truly “in the zone” and fired up, that will translate to the audience. It will translate even if every production factor isn’t exactly where you might want it. You might not get to call your favorite light cues, or FOH might not be as clean and punchy as you might want, but the crowd is still very likely to be happy.

Vocals/ Melody, Then Everything Else

Anyone who tells you that drums and bass are the foundation of a mix is dead wrong. (There, I said it.) The foundation of the sound is the vocals. If there aren’t any vocals – either generally or just at some particular point – the foundation of the music passes to whatever carries the melodic theme.

I can prove my assertion about the vocals.

“Your head is humming and it won’t go – in case you don´t know
The piper’s calling you to join him
Dear lady can you hear the wind blow and did you know
Your stairway lies on the whispering wind?”

What song is that? That’s right! It’s “Stairway To Heaven” by Led Zeppelin. Amazing that you knew that without any music being played. Maybe it’s because you could understand the vocals?

I’m not saying that “Stairway” (or any other song) isn’t a total package. I’m not saying that the iconic guitar intro doesn’t matter. I’m not saying that the rhythm section is unimportant. The way the song builds to a thundering climax is a great bit of fun, and a major part of the song’s overall success.

What I AM saying is that if the vocals or key melodic elements – like a guitar solo – are lost while you try to dial up a crushing drum-n-bass tone, then you’ve got your priorities wrong.

Adjust For The Sake Of The Show

If you’re going to make a sonic change, that’s great. If you’re going to make a lighting change, that’s great.

But make sure you can easily justify that change in terms of serving the actual show. There’s a piece of advice that was given by Dave Rat which I particularly agree with:

Don’t fiddle.

That is, don’t make changes for the sake of making changes. Your existence at the audio or lighting console is justified by the need for an operator to be present and conscious; no further justification is required. If the EQ on the vocal channel is working, and you can’t supply a reason to change it other than “I have to change something,” then keep your paws off the EQ. If the light cue looks fine, and you’re worried that you should flash some PARs or twirl some movers because, you know, you’ve got all these buttons and knobs… Really. It’s okay. Leave it alone.

Of course, if the light cue looks okay, and changing to another cue will totally punctuate the transition to the song’s bridge, then PUNCH THEM BUTTONS, COWBOY!

Context matters.

I do support the idea of experiments. If you want to try something because you’re curious, then that’s a good thing. However, take the time to figure out how to do the experiment without calling a lot of attention to what you’re attempting. Be as subtle as you can. “Roll” things in and out instead of jumping around, if possible.

By extension, this also means that you don’t have to drive everything all the time. Let the music ebb and flow. The balance amongst all the parts doesn’t have to stay exactly the same all the time. Having that balance change just might be part of the ride. There’s no need to manage all the faders all the time. They will continue to exist even if you don’t touch them.

Breathe.

Try To Keep The Audience Happy

This one’s tricky, because you have to have a certain amount of confidence in your production decisions. You have to know when certain requests aren’t physically possible, or really aren’t in the best interests of the show at large.

Even so, do your best to be aware of the audience’s needs. If the crowd is running for the exits while holding their ears, then ask yourself if you’re being unnecessarily loud. If somebody asks for more bass/ less snare/ a different approach to the top end on the vocals/ whatever, then try to accommodate them if you can. This stuff is subjective, and if you can make one more person happy without wrecking the experience for everyone else, you might as well try it. The worst that can happen is that everybody else will hate the adjustment, and ask you to put things back to where they were.

This goes for lighting folks as well. Watch what happens when you call different cues, especially the ones that put light directly into the audience. If a bunch of people suddenly look unhappy, change to a different cue and don’t call the offender again.

Aftermath

Socialization

Once the show is over, you still need to keep the band happy. Try not to rush them out of the venue. Let them talk to the folks who came out, because that will help them build their audience. It’s also nice for players to just generally depressurize after all the excitement. Don’t run the post-show playback (if any) too loud. Giving everybody some time to unwind is just a courteous thing to do, if it’s feasible.

Load Out

The performers are probably rather tired after all the excitement, so the after-show is another great time to help with the moving of heavy objects. This further cements the idea that you and the band are on the same team, with an emphasis on building a good relationship for the next gig.

Further, this means that you can be on point to ensure that the gear is watched. Gear has a nasty tendency to get stolen in the post-show chaos, so keep an eye on things. If the load-out is a multi-trip affair, and it looks like gear might be left unattended, then stay where everybody else isn’t. You might just prevent something from “walking off.” Then, when somebody else returns, you can make another trip with a heavy object.

Setup Begins At Teardown

If you do nothing else, grab the grilles and pop-filter inserts off the vocal mics and wash them thoroughly. A nice, fresh, non-smelly vocal mic is much more hygienic, and also communicates (in a subtle way) that you care about the performers’ comfort.

If you know that someone else has to use the stage before you come back, then you have to clean up now. Get the cables wrapped and the trash picked up.

It’s ideal, of course, to get cleaned up even if you don’t strictly have to. Something might come up before the next show, meaning that you’ll have less time than you planned for. No matter what happens, leave the stage in a condition that you can manage even if you don’t have all the time you want for the next show’s prep.

Now, loop back to the top and do it all again…


Some Basic Music Theory For Lighting Humans

You gotta know where “one” is.

Please Remember:

The opinions expressed are mine only. These opinions do not necessarily reflect anybody else’s opinions. I do not own, operate, manage, or represent any band, venue, or company that I talk about, unless explicitly noted.

musical lightsWant to use this image for something else? Great! Click it for the link to a high-res or resolution-independent version.

The “big boss” at my regular gig is a drummer. He loves the “technical” end of playing the instrument – all the subtle and not subtle things that percussion can do to drive a song. We once had a conversation regarding “strange” grooves and weird time-signatures, and he related to me a tiny piece of advice that had revolutionized his thinking:

“You just gotta know where ‘one’ is.”

In his drumming context, even the most bizarre phrasing could be managed and worked into a tune, just as long as the drummer maintained an awareness of when everything was supposed to resolve, sync up, and start over. If the player knew when one musical pattern was about to give way to another, there was very little chance of getting lost or confused. The tune might get very complex and off-center, but there would always be a moment when everything “locked up” again and anchored the music.

So, what does this have to do with people who build and drive light shows?

Timely Event Acknowledgement

If you’ve ever seen a show where the lighting had nothing at all to do with the music, you probably didn’t enjoy it very much. Lights flashing at random, with chases just randomly switching up haphazardly aren’t much of a show. It gets into the realm of visual noise – information entering the eye that’s disorganized and hard to pattern-match. If it’s bad enough, the light “show” never ends up correlating with the music at all, and is internally random enough that the brain just ignores it.

On the other hand, light shows that acknowledge musical events, and acknowledge those events at the right time, are tremendously fun and bring the entire experience up to a new artistic height.

The key to that is timing, and the key to timing is understanding a little bit about how music is constructed.

A Turn Of Phrase

Most of the music that you’re likely to run into is built using “phrases.” Phrases are often discernible as repeated patterns or modified patterns of musical events, although more complex music has phrasing which isn’t always based on readily identifiable repetition. In music that most people find to be “easy to listen to,” phrase boundaries occur at very specific and predictable points in time: The beginnings and ends of measures or “bars.” Each bar is subdivided into a number of beats, which are a sort of internal, logical synchronization for musical events inside each bar.

If all of this sounds confusing, you don’t need to worry. You probably already have a workable grasp of all this in an intuitive sense. For instance, if I describe some bog-standard techno music as going “thud, thud, thud, thud,” and you can imagine bobbing your head in sync with each “thud,” then you know what beats are. In this particular case, each “thud” is a beat. There are multiple thuds per bar, and within each bar is enough space for at least one musical phrase. You might have a very fast phrase between the first beat and the second, or a longer phrase that takes up half the bar, or an even longer phrase that takes up the whole bar…or a much, much longer musical idea that develops over several bars before coming to a logical conclusion.

For a slightly more involved example, take a listen to this short excerpt of The Floyd Show playing the bridge bridge from “Pigs: Three Different Ones.”

I don’t know how Pink Floyd formally represents the music, but what I hear are two bars of four beats each. (Musical timing using four beats per measure is so ubiquitous that it’s even called “common time,” but be aware that all kinds of other timing schemes exist. You might hear music built around three, six, seven, or even other numbers of beats per bar.)

The drums play a repeating pattern that cycles every two beats. The “major” kick hits are on beats one and three. The snare hits are on two and four.

The lead guitar plays non repeating phrases. The first phrase is a higher note with vibrato, that lasts through the first bar. The second phrases is a lower note that lasts through the second bar.

The rhythm guitar plays a repeating phrase, itself constructed of repeating sub-phrases, with each complete phrase cycling once per measure.

The bass plays four phrases of increasing complexity. Each phrase lasts the better part of two beats, with “pickup notes” especially audible before the bulk of the last phrase. (You might say that pickup notes are like taking an audible breath before speaking.)

The point of describing all of this is so that you can use multiple elements to help figure out where each bar starts. The start of the bar is “where one is,” and provides you the reference point for the other beats in the bar. If you’re going to call a different light cue or start a different chase, it’s musically appropriate to call that cue in exact sync with a beat. It’s even more musically appropriate to call that cue in sync with the first beat of a bar.

Calling light cues in a way that acknowledges the timing of the music has a way of making things look right, which is especially helpful if you’re – to put it bluntly – pulling the show out of your rear. The show might not have been synchronized in advance, but to the audience, it LOOKS like it was. This increases the show’s perceived production values, and that’s something we always want, right?

As you get more and more practice, it will become easier for you to “feel” the timing of a song without having heard it before.

Additional Ideas

If you want to try for still greater heights, try to get a sense for when major parts of a song are transitioning into other sections. It’s not always the case, but it’s true (often enough to be useful) that these transitions can be musically telegraphed. Listen to what happens in this next excerpt from “Pigs,” at around 10.5 seconds or so:

The musicians break off from the phrasing patterns they’ve been using, and use a “fill” to signal that a different musical section is coming up.

Different sections of a song tend to have different emotional themes, and using the lighting rig to punctuate that major musical shift at exactly the right moment is A Very Cool Thing To Do™. In a way, this is the ultimate case of “knowing where one is.” Not only is the cue-call on the beat, and on the first beat of a measure, but it’s on the first beat of the measure that’s the first measure in a larger musical thought.

This same basic premise can be used as a guide when calling cues over a song that starts with a count-in. It’s the ultimate signal for a big transition: The one from “not playing a song” to “playing a song.” It also gives you the timing on a silver platter. The drummer clicks the sticks together on what will become the beat, and you can watch to see if it looks like the percussionist’s next step is to hit the drums…or keep counting.

Not all count-ins are as obvious, it’s true. At the same time, you can listen for clues that come together to give you a pretty good picture of what’s going to happen. If other musicians are seemingly wrapping up musical thoughts as they play to the end of phrases, and the drummer starts doing something to “feel” the timing they’ll have to keep, then it’s a good bet that the song is about to go full-tilt-boogie. Again, an example from “Pigs:”

About four seconds in, you start to hear the drummer count in with the hat. The patterns you hear in the other instruments’ phrases give you a clue that you’re probably going to hear eight clicks on the hat before the big drum accent occurs. If the phrases don’t seem to be about to finish a full cycle when compared to what’s already happened, it’s probably not quite time for the big musical shift to take place.

A final thing to listen for is a musical phrase that I mentioned earlier: A “pickup.” Pickups are lead-ins to phrases that occur before the measure where the “phrase proper” actually resides. Here’s the beginning of “Have A Cigar:”

Depending on how you count it, the snare-tom pickup that leads into the first beat of the next bar happens entirely within the fourth beat. The kick-hit is where the first beat of the next measure actually is, and the pickup gives you a small window of time where you can prepare to call the cue precisely.

(Of course, nothing beats actually knowing the songs. Nailing everything with no prep at all is pretty darn difficult.)

Getting Out Of Major Trouble

So.

What happens if you’re really struggling? You can’t seem to get synced up with the musicians, and the songs are all over the map. You can’t figure out what’s going on. What can you do?

Frankly, it’s almost always safe to do less, and do it more slowly. There’s nothing awful about calling a single static cue at the start of each song. If the fade time on that cue is set so that the lighting transition is very gradual, you don’t have to worry much about calling that cue on the beat. Sharp, yet “sparse” lighting transitions become jarring if they don’t sync with the music, but gentle transitions tend to sit in the background of the audience’s perception anyway.

If you can’t figure out where “one” is, that’s okay. Adopt a strategy that’s makes it unnecessary to know, and you’ll most likely get through in a decent fashion.

Otherwise, feel the beat, and let ‘er rip!


DMX: Yes, It’s A Network

A simple lighting-control setup might not seem like a network, but it is.

Please Remember:

The opinions expressed are mine only. These opinions do not necessarily reflect anybody else’s opinions. I do not own, operate, manage, or represent any band, venue, or company that I talk about, unless explicitly noted.

dmxWant to use this image for something else? Great! Click it for the link to a high-res or resolution-independent version.

In an age where everything is connected to everything else, we’re used to the idea of a data network. We hardly give a second thought to computers, tablets, phones, and an ever-growing host of other things talking to each other in an orderly fashion. We live in a world of managed communication.

We’re so used to modern, managed networks that we can fail to see that other communication protocols also fit the definitions used for data networks. While this doesn’t prevent us from using those protocols, we end up understanding less about them than we otherwise might. In the world of entertainment, for instance, I’d wager that a good number of us deploy DMX lighting control without conceiving of it as a data net. I certainly didn’t think of it that way at first.

But if we’re willing to look at things a bit more deeply, we gain tools to understand what’s going on when a system is working correctly – and we also gain ammunition to use when troubleshooting. To that end, I’d like to present some of my observations about DMX networking. These observations are not a primer on basic setup, nor will they directly fix an issue that you’re having. They may, however, help you to grasp a basic setup or suss out a problem.

Bus Fare

A basic thing to understand about a simple DMX network is that it uses a “bus” topology. In electronics, a bus is a common conduction line. Networks using a bus topology, then, connect various nodes (lighting fixtures and dimmers, for example) to a single “data pipe.” If the bus becomes interrupted at a point, all nodes downstream of the break are unable to receive or send communication. However, nodes upstream of the problem can be just fine. If a lighting rig loses control of half the fixtures due to a cable being broken or accidentally yanked, the still-connected half should still receive control.

With a bus connection, an important concept is that each node can be completely non-dependent on the other nodes – with the exception of whatever node handles the original data transmission. As long as the common signal line stays intact, the removal of a non-transmitting device has no necessary effect on other devices. Pull a light “off the line,” make sure the cable is reconnected, and all the other lights will continue working.

Larger, more complex DMX networks can make some use of a star (or star-like) topology. Active DMX splitters receive signals from a DMX bus, and then retransmit those signals along additional signal lines. Each line then becomes a bus along which a number of fixtures can be connected. If the splitter is operating correctly, a problem with any single “child” bus will not directly affect any other child bus or the parent signal line.

This Connection Is Connectionless

When a DMX controller is talking to a fixture, it’s using a connectionless protocol.

“Wait a second,” you might be saying, “lights and dimmers have to be connected to the DMX signal line in order to work. How can DMX be connectionless?”

What I mean by this is that DMX is connectionless in the logical sense. Yes, each node has to be physically connected to the signal line, but a DMX controller and a DMX-enabled fixture don’t negotiate any communication parameters with each other. In the world of DMX, data transmission occurs on a “ready or not, here it comes” basis. If the controller is told to transmit a number of instructions for, say, DMX channel 10, then those instructions are transmitted whether a node is listening for instructions on channel 10 or not.

This isn’t to say there aren’t connection parameters, of course. It’s just that the connection parameters are not determined by communication over the network media. All the necessary connection configuration is stored in the devices used. The DMX controller is built to communicate in accordance with the DMX standard, as are the lights and dimmers. Further, the lights and dimmers are set up by the user to listen on a pre-arranged set of channels. Once all this is set, the only way to change it (on a simple DMX network) is to do so by hand.

We’re Out Of State

Simple DMX, being connectionless, is also stateless. Because the DMX controller has no knowledge of whether a fixture is receiving or not, any communication that gets sent has to be completely “understandable” without regard to any prior communication. Also, the controller is ignorant of the fixture’s actual control state. This necessitates that any request for a certain control state (what color the fixture should be producing, where the fixture should be pointing, etc.) has to be fully self-contained in order to be reliable. For example, to guarantee that an RGB fixture is set to produce a yellow color, the non-zero red and green intensities have to be requested alongside a request for a blue intensity of zero. If the blue-at-zero request is not sent, then the current dimming level of the blue emitters will not change.

This might seem surprising, especially if you use DMX software that shows you the supposed control state of the fixtures. You might have signaled your fixtures to give you an amber color, with the software showing the fixtures as producing that color, and the fixtures themselves physically producing the correct color. It seems that the software knows the control state of the fixtures, but it doesn’t if the DMX network is a simple one. The software knows what information has been supposedly sent, and what that information should mean…if everything is working as expected. The light-control program is simply making the powerful assumption that the control state of the lights matches the requests that were sent. It does not actually know what’s happening down the line.

A Parting Word

You may have noticed that, at several points, I have qualified my descriptions with the idea that they apply to a “simple” DMX network. This is because there are protocols and technologies that can be used in conjunction with DMX that have a great deal more functionality. For instance, it’s entirely possible – using Art-Net – to encapsulate DMX data so that it can be transmitted using Ethernet-based equipment and Internet protocol. RDM allows for DMX controllers to actually know something about a fixture’s state. This article’s scope doesn’t include these concepts, because the point was to discuss the “plain vanilla” DMX networks that are commonly found in small-venues.


A Review Of Generic, 18×3 Watt, Moving-Head Washes

They’re pretty okay, if a little “cheap.”

Please Remember:

The opinions expressed are mine only. These opinions do not necessarily reflect anybody else’s opinions. I do not own, operate, manage, or represent any band, venue, or company that I talk about, unless explicitly noted.

minimovers1Want to use this image for something else? Great! Click it for the link to a high-res or resolution-independent version.

If you’re a regular reader, you may remember my article about the lighting upgrade that took a lot longer than I thought it would. The main players in that upgrade were unbranded (generic, in other words) moving-head wash lights.

Unbranded lights are a way to get a lot of bang for your buck, but you do have to be cautious. The units may not be fundamentally different from what you would get from Chauvet, American DJ, Blizzard, or whoever. However, there’s also the possibility that you’re getting a variant which a factory is producing on its own. Maybe that factory used to build the units sold by the “name brands,” and then kept building lights after the line was removed from the brand’s catalog. Maybe they never built a branded unit, but got the plans and parts specs independently.

The point is that you don’t know exactly what’s going on. You also don’t know how big a part was played by the brand’s own quality control routine. It’s possible that the actual manufacturers have a high rate of “failures” or “unsatisfactories,” but end-users were unaware of the issues because the “labeled vendor” was aggressively weeding out the bad units.

If you’re going to buy generics, you need to have a tolerance for risk. If a particular factory can build and ship, say, 500 lights per month, and their failure rate is seven percent, then there are 35 chances that month for you to get a bad light. In one year, the factory might ship over 400 luminaires with a problem. That’s a lot of opportunities for a pissed-off customer to publicly say that the lights aren’t worth buying, but a seven percent rate of unsatisfactory units is probably pretty reasonable in modern manufacturing. (Notice that I said “probably.” I’m not a manufacturing process engineer. I’m a stage-production dude.)

Anyway.

The units I purchased seem to be very similar (or even fundamentally the same) as what Blizzard Lighting sold as the original Flurry Wash. All the basic specifications – from LED count and power draw to maximum pan and tilt – seem to be equivalent. Actual, Blizzard-labeled Flurry Washes seem to retail at about $350, plus or minus 15%. One of my favored vendors sells a generic version for $239. The units currently in service were purchased from DJStageLights, at a cost of only $125 per light.

The Good

minimovers2Want to use this image for something else? Great! Click it for the link to a high-res or resolution-independent version.

A major convenience feature of the lights I bought is the control-panel. Panels of this nature display DMX addresses as decimal-notated numbers – as in, the numbers we’re used to counting with. If you want DMX address 59, then you just dial up 59 and go. You don’t have to convert from binary to decimal as you would with DIP switches, so the only thing you have to stop and think about is which address you actually want. By the same token, these displays make the setting of options easier, because the option can be displayed with a linguistic identifier. You don’t have to remember (or look up) which switch corresponds to, say, reverse tilt. You just start paging through the options, looking for something like “rTilt.”

I’m a big fan of control systems that explain themselves. It’s not that learning to count in binary isn’t a nice bit of mental exercise, it’s just that counting in binary isn’t really at the core of what constitutes competency as a lighting person.

One of my nagging fears about the lights was that they might display strange, jarring glitches in their movement. I’m pleased to say that the pan and tilt operations on these units are smooth, almost always predictable in outcome (more on that later), not subject to starting and stopping without commands, and “fast enough.” No, the heads won’t go from one positional extreme to another in the space of an eyeblink – but what do you want for $125?

In a small-venue context, the most impressive feature of these luminaires is probably their output. I’m basically quoting another staff member at my regular gig when I say, “They’ve got a pretty fair amount of firepower.” For use as an occasional special effect or show-end accent, I have some “blinder” cues written. These movers are bright enough that I consider holding the cue for more than a few seconds as being inconsiderate of the audience.

For a more objective view of the output of the lights, I decided to use my camera as a non-calibrated light meter. What I mean is that, with the camera in manual mode, I can light an area with different fixtures and compare the measured exposure values. I don’t get a lux reading, but I do get a relative reading that’s both quantitative and meaningful.

For this test, I set up one of the mini-movers to illuminate the same target area as one of my Chauvet RGBA SlimPAR 64 lights. I set things up so that the overall throw distance for each light was as similar as practicable. I shut off the other lights in the room, and then set up my camera. The exposure was set so that a picture of the target area would have an exposure value of “0.0” when the mini-mover was in use. I then kept the same camera settings, and illuminated the target area with the SlimPar. Here’s what I got:

minimoverThe output of the mini moving head.
rgbaparThe output of the SlimPAR 64.

The camera’s measurement was that the mini-mover was 1.3 stops brighter than the SlimPar, which is about two and a half times more powerful when you do the conversion. This tracks closely with the published specs for the SlimPar and the Flurry Wash, which respectively are 5300 lux and 11560 lux at one meter.

The Not As Good

minimovers3Want to use this image for something else? Great! Click it for the link to a high-res or resolution-independent version.

There’s a certain point where a cheap light displays its cheapness. We’ve come a long way in terms of what can be accomplished at low cost, but there are still noticeable differences between units that sit on different, metaphorical shelves.

To begin at the most basic level, you need to be aware that the dimming on these units is anything but smooth. The “stepping” from brightness level to brightness level as you fade between colors and global intensities is VERY noticeable. If you must have silky-smooth fade behavior, you need to buy something else.

Another thing to keep in mind is that, while the movement on the units is overwhelmingly predictable and repeatable, not every light will be perfect at all times. If a light is run all the way to the pan or tilt “stops,” there’s a chance that it will get slightly miscalibrated. It’s not that the unit will end up pointing in a direction that’s completely wrong, it’s just that it can end up being a little off. For me, this issue has always been fixable via a fixture reset – but unfortunately, I can’t find a way to initiate that reset via a DMX command. You either have to power-cycle the light, or get up to the control panel and invoke a reset. (Be warned that invoking a reset at the panel may also set the DMX address back to the default.)

For shows like mine, an occasional position miscalibration isn’t a big problem. For other shows, it might be a dealbreaker.

As a final point, the QC on these generic luminaires seems to be a bit lacking. Getting the mounting brackets onto the light bases is a chore, because the holes for the bolts are just a touch “out of position.” You’ll eventually get the bracket attached, but you’ll probably have to resort to profanity in the process. Also, the control panels seem to be a weak link on these lights. Out of eight purchased units, I have six actually in service. This is because one of the lights has a control panel that doesn’t communicate properly with the rest of the light, and so I can’t get the lighting computer to talk to that luminaire. For the sake of symmetry, that means that I had to pull down a working unit on the other side of the stage.

Also, one of the operating units is also having minor troubles with its control panel. The problems don’t constitute a fatal error, though. (Plus, with having had to pull a working light off the line, I do have a fully functional spare.)

In a certain sense, you might say that these lights don’t actually cost $125 per piece. When you factor in the issue of having to buy more than you need (to cover the possibility of failures), each working unit will probably represent about $167.

That’s still rather inexpensive for a moving-head light, though.

If you need lights that could be used in a “varsity level” theater or arena setting, luminaires like these aren’t the right choice. However, these unbranded mini-movers are perfectly usable as serious, pro-sumer devices if you understand their limitations.


It Always Costs More And Takes Longer Than You Think

The story of a lighting upgrade.

Please Remember:

The opinions expressed are mine only. These opinions do not necessarily reflect anybody else’s opinions. I do not own, operate, manage, or represent any band, venue, or company that I talk about, unless explicitly noted.

lightupgradeWant to use this image for something else? Great! Click it for the link to a high-res or resolution-independent version.

My dad has a list of maxims about life, with one of the most memorable being “It always costs more and takes longer than you think.” I’ve never doubted that particular piece of Papa’s wisdom, but it’s not often that it’s so perfectly demonstrated in practical reality. There’s a bit of a tale here, if you haven’t guessed:

This last weekend was the final (as far as is currently planned) Floyd Show.

Floyd Show was a Utah-based tribute act that performed (what else?) the music of Pink Floyd. They were fronted by Tim Hollinger, a monstrously talented guy who probably knew more about Pink Floyd than Pink Floyd did. Tim loved to push the boundaries of what could be achieved in a small-venue setting, and this caused his productions to be what I can only describe as “deliciously challenging.” Working on a gig that takes a day or more to setup, with the stage packed full of people and gear, and the mix being done in quadrophonic surround is the kind of unbridled hilarity that I live for.

And then, Tim unexpectedly passed away.

It was decided that there would be one more gig to “close the shop.” This would be the last, planned chance to work on the biggest production show that comes through my regular job. (Roll The Bones, our local Rush tribute, will now take the top spot.) Since this was the last chance, and I had been wanting to install a lighting upgrade to – among other reasons – do Floyd Show justice, the announcement of the show prompted a “rush to completion.” Yes, I had wanted to wait longer, but this was it. There might never be another opportunity to do a night that came close to what I had wanted to do with Tim at the helm.

I wanted to have plenty of time to get things working, so I started the upgrade a month before downbeat.

The upgrade was finished about four hours before the show started.

Trial Balloons

A partial reason that everything took a while is because I was being cautious.

I wanted to use moving-head wash lights, but what I wanted in terms of equipment hasn’t really been a priority for the mainstream light manufacturers. Moving-head spots that use optics to create a sharp-edged beam are everywhere. Spendy ($400+) movers built around some kind of soft-edge beam are only slightly less common than dirt. This is all fine and dandy, but truly entry-level moving-heads are basically “off the radar” for even ADJ and Chauvet. I checked with my favorite “off-the-wall and discounted” lighting vendor, and they had the fixture that I wanted…but at a price point that was too close to the next step up to be much of a differentiation.

I checked with some Ebay vendors, and behold! The fixture I wanted was available at a price that was commensurate with what it could do.

Even so, as I said, I wanted to be cautious. I wanted to buy just a couple of units at first, so that if what I got was utter rubbish I would be able to recover in time. I got my first shipment, and the news was good and bad.

On the good side, the lights had a LOT more output than I expected. I had figured that they would outdo the RGBA “puck-pars” that were currently hanging at the venue, but I was pretty surprised at just how much “firepower” a cheap mover could have. (A relatively tight beam angle helps greatly, of course.) Both units moved well, responded to their control panels, and could successfully reset themselves in a reliable fashion.

The bad news was that one of the units refused to shut off its blue LEDs under any circumstances.

I figured that this was just an odd fluke, and I contacted the vendor about a return. It took a couple of days to get things sorted out, but the whole shootin’-match satisfied me enough that the vendor got the sale for the rest of the fixtures. Back to the source went the problem child, and just like that, only three weeks of lead-time remained.

Stand and Deliver

What I had also discovered when I was testing my “trial balloon” fixtures was that mounting them to the installed, vertical stage truss wouldn’t be the greatest idea. The topmost light would have decent trim height, but other units hung below wouldn’t be in the best spot for maximum usability. This is where the “it costs more than you think” starts to come in. I had considered that light stands might be necessary, but I had managed to convince myself that the new toys might not truly require them.

Wrong!

I needed DMX cable anyway, so I visited my aforementioned “off-the-wall and discounted” gear vendor. I found some better-than-entry-level trees and placed my order.

Great – except that the warehouse wasn’t in a hurry to get things shipped. It was days before my order was on a truck. By the time all the lights and the stands were in my possession, I had only two-weeks of lead time.

Nuts

When I ordered the stands, I had assumed that the included mounting hardware would do a satisfactory job at clamping the lights to the crossbars.

Nope.

Getting the fixture bracket secured to the crossbar was an impossible task with the bolts and wingnuts supplied. The luminaires aren’t really heavy, but even a not-too-heavy light can be a bit much when you need to hold it in the air, maneuver it so that a non-captive bolt goes through a hole in a bracket, and then keep the whole shebang still while you fumble with washers and wingnuts in a small space. In theory, it all works. In practice, not so much.

I needed to order O-clamps. More cost.

One week of “lead” remained. After that, it would be the week of the show. The gear had to arrive on time, and it had to work, or things would get REALLY tight and REALLY spendy.

This was not the time to go through a discount vendor. It was time to call someone who would ship in a day – so, I did. Through a minor misadventure, I actually got upgraded shipping. That was an important help.

Down To The Wire

My clamps arrived in time for the weekend preceding the big gig. I then proceeded to realize that I’m the dumbest guy to ever hang a light in this town.

See, I hadn’t worked with O-clamps before. It didn’t take long to figure out the rock-bottom basics (they’re not complicated creatures), but I didn’t exactly take note of every functional thing about them. I managed to get the first light hung. Then, I tried to clamp the second light – to no avail. No matter how I tried, I could not get the clamp to close sufficiently for the retention bolt to be swung into position.

“Cheap crap,” I thought.

“I can fix this,” I thought.

I yanked one of the inserts out of the offending clamp, which made internal diameter wider. I then folded over a napkin to put in place of the insert, which allowed the clamp to close more tightly with just finger-pressure. This allowed me to swing the retention bolt up, and then tighten the whole assembly. It wasn’t pretty, but it did work. “I’m resourceful!” I congratulated myself.

The next clamp didn’t need all that falderol, but the fourth did. The fifth clamp was fine out of the box, but the sixth was a pain.

It was while I was struggling with clamp #6 that I made an important discovery: The nut tightening the retention bolt could be loosened a great deal before it came off the assembly. By pure luck, I had loosened the nut sufficiently on some of the clamps to allow me to use them as intended. On the others, I simply hadn’t gone far enough. There was NOTHING WRONG with the clamps – the problem was the idiot using them. (Me, in other words.)

All of my futzing had cost me time, but I was able to get all the lights ignited and a few basic cues built. I figured that the next evening would allow me the time to get more done…except I misjudged how early I would need to arrive, especially because the band was coming in early themselves to prep for a video shoot. The lights were re-hung, and a few more cues were programmed, but I still wasn’t where I wanted to be when I had to switch gears to tasks that were “mission critical for RIGHT NOW.”

I figured that our scheduled, Floyd Show prep-day would afford me all the remaining time needed to get the lights programmed.

Can you see where this is going?

Prep-day arrived, and I went in promptly after lunch. Even so, the “must do this now” portion of what I had to accomplish (which mostly amounted to a clear stage) took until the first musician arrived. We moved the light trees, which caused a latent problem in the electronics of one of the fixtures to reveal itself. I reworked my hang to fix the issue, and by the time all that was done, the rest of the players were in the room. It was time to do other things, again.

Those other things revealed that there were some pretty rough edges around the sonic part of the show, but it was getting rather late and there was no time to fix them.

So everything got pushed into the next day.

It was about 2:00 PM on show-day when I finally started programming the light show in earnest. It was about 5:00 when I had what I needed.

Downbeat was at 9:00 PM.

It always costs more and takes longer than you think.


Work The Angles

A wider beam lets you cover more area, but with less intensity (if all things are equal).

Please Remember:

The opinions expressed are mine only. These opinions do not necessarily reflect anybody else’s opinions. I do not own, operate, manage, or represent any band, venue, or company that I talk about, unless explicitly noted.

Want to use this image for something else? Great! Click it for the link to a high-res or resolution-independent version.

We’re getting close to a time where I might be able to buy a couple of lighting fixtures. It’s been a while since I’ve updated the illumination at my main gig, and my feet are getting itchy. This functionally means that I spend inordinate amounts of time looking at the same lists of products over and over. Hey, you never know – something might change unexpectedly. (Seeing a vendor get new inventory excites me. Toys are rad. Let’s not pretend that they aren’t.)

Whenever you buy a piece of “tech” gear, you inevitably look at the spec sheet. Spec sheets are a great place for manufacturers to fudge, obfuscate, boast, and otherwise engage in Mark-Twainian truth stretching, but they do have their place. Unless they’re completely falsified, you can use a product’s specifications to get a ballpark estimate of whether or not it will meet your needs.

But you have to know what you’re looking for, and perhaps more importantly, you have to know how various product aspects interact. The interaction is key because it profoundly affects how useful or not useful a given offering is for your application.

One thing that gets both audio and lighting buyers in trouble is to ignore the interaction factor and just focus on a single number. In particular, both audio and lighting humans can become overly fixated on power. That is, the question of how many watts a device can consume. It’s not bad to start by looking at the power, but a place where you can get in trouble is to ignore how that power is used or delivered.

For instance, let’s take a couple of similar, hypothetical loudspeakers that are on a “let’s buy something” shortlist. One can handle 500 watts continuous, and the other can handle 1000 watts continuous. Easy choice, right? Well…what if the 500-watt box is 4 dB more sensitive in the frequency range we need? In that case, the 1000 watt box isn’t actually superior. Sure, it handles more power, but if both boxes are at full tilt it’s actually going to have ever-so-slightly LESS acoustical output than the 500-watt offering. It’s not just the power that matters. It’s what that power ultimately results in that’s useful (or not).

There are, of course, lots of other wrinkles beyond just brute-force output, but I needed a simple example.

Lighting is similar. If you’re dealing with essentially comparable fixtures, then more power equals more light. Where you can get tripped up, though, is when what you THINK are comparable fixtures aren’t actually. If you live in a realm dominated by LED-powered luminaires, you’re in a world where the boundaries are still being poked and prodded. The average output-per-watt next year may well be an improvement over this year, so simply comparing two fixtures’ LED-engine power draws won’t tell you the whole story.

There’s something else, though. Something that can have a dramatic effect on whether or not a fixture is correct for your application. It can be a bit insidious, because it can occur in two fixtures that have the same light source, the same body, the same control features, and basically the same price.

The “it” I’m referring to is the optics involved in the light. Change the optics around and one light will be fine for you, where the other might be a bad choice. It all comes down to angles.

Why?

The Lumen Starts Fights, But Lux Finishes Them

The number of lumens produced by a light source (incandescent, LED, fluorescent, whatever) is a measure of how much visible light that thing is emitting. The lumen measurement is thoroughly disinterested in whether or not that energy is actually traveling in a useful direction, or focused into a beam, or anything else. It means only that a certain amount of human-visible radiation is flowing out of an emitter.

A 1000 lumen emitter spits out 1000 lumens whether you’re right next to it, or huddled in a cave on some other planet in another galaxy. The reference frame (the location of the observer vs. the location of the emitter) is essentially irrelevant.

This is different from lux.

Lux is the amount of visible light that is meeting a given surface. For lux, the reference frame matters a lot, and that makes lux much more useful as a measure of whether a light fixture will actually work for a given application. Lux is derived from lumens, in that it describes lumens per square meter. In a certain sense, lux tells you how much of a light’s output is available to do something useful for you after that light has traveled to where you need it.

Yeah, okay, great. Why does this mean that optics matter so much?

Well, look at that description of lux again. If you have the same number of lumens, but you spread them out over a greater area, the lux drops. If you focus 1000 lumens worth of visible radiation into one square meter, you have 1000 lux. If the beam spread changes such that those 1000 lumens are spread over two square meters, you have 500 lux. That’s a significant difference in how much a focus target (a performer, a sweet-looking drumkit, a rad guitar, etc.) is being illuminated.

Let me give you a more concrete example. There’s some math involved, but it’s worthwhile math.

The Difference Between 13 and 26

There’s a certain entry-level “moving head” spotlight available these days that comes in different variants. One variant uses optics that create a 13 degree beam, and the other has optics that produce a 26 degree beam. A person could look at the form factors of the different variants, as well as the rated wattage of their emitters, and conclude that the lights are the same – but that would be incorrect. The lights will not have the same performance, because the optics are different.

I don’t want to assume anything specific about the lumens generated by the fixtures’ light engines, so this might get a little abstract. Even so, the point here is comparison and not exact numbers, to that’s fine.

So, let’s call the lumens generated by the fixtures’ LEDs “Output.” The question is, how much of that output is available to do cool-lookin’ stuff? That question is answered by how much output we get per unit of area, or lux (if we’re using lumens and square meters). The question now is how to figure out the area the light is covering.

The first thing to determine is the shape of the area we’re trying to calculate. To make things easier, let’s just assume that the light hits “dead on.” If the light beam is a cone, then a “dead on” illumination at some point along the beam results in a circular cross-section.

beamandtarget

crosssection

Since the cross-section is a circle, there is only one unknown required to get its area: The radius. The radius is proportional to the beam’s throw-length, because a cone’s absolute radius increases in proportion to the cone’s height. Neat – but how do we figure it all out? Well, if you use your imagination (and squint a bit), you can start to see that a conical light-beam is a sort of “lathed” right-triangle, and that triangle has a base with a length that is, in fact, the radius we need.

triangle

If only there were some way to analyze a right-triangle to get the numbers we need.

Trigonometry to the rescue! (We say it “trig-onometry,” but what we really mean is “trigon-ometry.” It’s all about measuring trigons – polygons with three sides. Triangles, in other words.)

Let’s start with something we can arbitrarily define, like the throw-length. Let’s say that our focus target is about five meters from our light (a bit over 15 feet). To find the proportion between the base/ radius length and the height/ throw, with us also knowing the beam angle (13 degrees), the most handy trigonometric function is probably tangent.

There’s a wrinkle, though. The angle we need to use with respect to tangent is NOT 13 degrees. Thirteen degrees in the “full” beam angle, but our triangle cuts the beam in half. What we need to use is the beam angle divided by two.

So, here’s how it all works (by the way – someone should definitely check my math):


Tan(13/2) = 0.114 (The radius is 0.114 X the throw-distance)

0.114 X 5m throw = 0.570m radius

(0.570m radius)^2 X pi = 1.02m squared


So, the 13 degree light has “Output”/1.02 available for doing cool stuff when you’re 5 meters away.

What about the 26 degree light?


Tan(26/2) = 0.231 (The radius is 0.231 X the throw-distance)

0.231 X 5m throw = 1.154m radius

(1.154m radius)^2 X pi = 4.186m squared


At the same distance, the 26 degree light has “Output”/4.186 available for lighting things.

In other words, the 26 degree variant will cover more area, but will also have an apparent brightness that is about one-quarter of the 13 degree light. Again, both lights might look the same. The LED at their hearts might be exactly the same thing.

But they simply will not perform the same way, which means that you might not be able to successfully interchange them in the context of your application.

Read those spec-sheets carefully.

Consider the interactions.

Work the angles.


Out Of Lighting Ideas? Go Look At Art.

Artwork and photos can give you great ideas for your light show.

Please Remember:

The opinions expressed are mine only. These opinions do not necessarily reflect anybody else’s opinions. I do not own, operate, manage, or represent any band, venue, or company that I talk about, unless explicitly noted.

I have an inordinate love for sci-fi concept art. It’s embarrassing, in a way. Drive me over to a gallery full of “serious” paintings, and I’ll be bored in about 20 minutes. Let me load up an online collection of spaceships, planets, and giant robots, and I’ll be there ALL FREAKIN’ DAY.

I think I like the art I like because the practitioners are great with making things dramatic. Huge scale. Great use of contrast. Exciting color schemes.

You know, all the stuff that makes a light design stand the test of time.

I think that it’s easy to fall into a couple of thought traps:

1: An exciting light show means a light show that’s moving all the time.

2: Stage lighting is somehow removed from other artistic disciplines.

Neither of those two points is true.

Every Picture Has A “Light Cue”

Take a look at this piece of art:


Overwhelming Thunder by *LordDoomhammer on deviantART

Is it animated? No. Is it exciting? You bet!

There’s a lot of light in the piece, but there’s plenty of shade, too. There’s also this great interplay between cool color (the blue engines and missile trails) and warm tones (the reds and golds in the background). The saturated colors “shout” at you, and yet the whole thing stays balanced. There’s detail in the piece, but it doesn’t become a chaotic barrage of information.

So – there’s the first point. Animated light cues are neat, and have their place, but you can set a very dramatic scene by bringing the lights up and leaving them alone for a song or two. You just have to do a bit of work to create a look that invites attention without being annoying or “busy.”

The second point is also in play. It’s tempting to pass off the picture as being unrelated to anything else. It’s easy to do that.

But…can’t you see the rock show that’s going on in that picture? Just for a minute, pretend that you’re not looking at spaceships. Pretend that there’s a drum riser in the background, guitar and bass players in the midground, and a singer up front. The song is a “middle piece” in a set that’s a little darker and mellower than their other tunes. Call that up in your mind.

See?

The drummer is highlighted by the warm colors. Golden hues are reflecting off the cymbals and stands. The faces of the mid and downstage band members are visible, but shaded. Strong, pale-orange colors from side and top fixtures provide rim-lighting that accentuates the movement of the band. Piercing, yet saturated beams of blue lance out through the fog and haze.

That’s a rock show, right?

The thing is, a little bit of deconstruction can net you a tremendous stack of ideas to use when designing a light show. Because all visual art is a representation of light (when you get down to it), all you’ve got to do is take the time to ask yourself, “How would this look in the context of a live performance?”

It’s not all about direct mimicry, either. For instance, I usually use more front light than this piece, but I can definitely get some notions from it in regards to an overall color scheme. Yellows, whites, and reds seem like they’d be good for a high-energy tune.


Rebel Medium Frigate by *MotoTsume on deviantART

…and, if I need some general pointers on how to get greens and deep oranges to work together, I can spend some time looking at this picture:


Ceahlau – Durau 89 by ~cipriany on deviantART

Art will speak volumes about lighting rock shows, if you just let it. I’m not a “classically trained” lighting tech/ designer/ whatever, so how do you think I get ideas like using a warm key light with cool accents?


Pleasant Company by *LordDoomhammer on deviantART

If making your light show interesting has got you stumped, just go cruising around an art site for a while. If you’re willing to do a little thinking, you won’t be stumped for long.