Tag Archives: Microphones

The Other Problem With All Those Open Mics

It’s not just feedback – it’s sound quality in general.

Please Remember:

The opinions expressed are mine only. These opinions do not necessarily reflect anybody else’s opinions. I do not own, operate, manage, or represent any band, venue, or company that I talk about, unless explicitly noted.

Want to use this image for something else? Great! Click it for the link to a high-res or resolution-independent version.

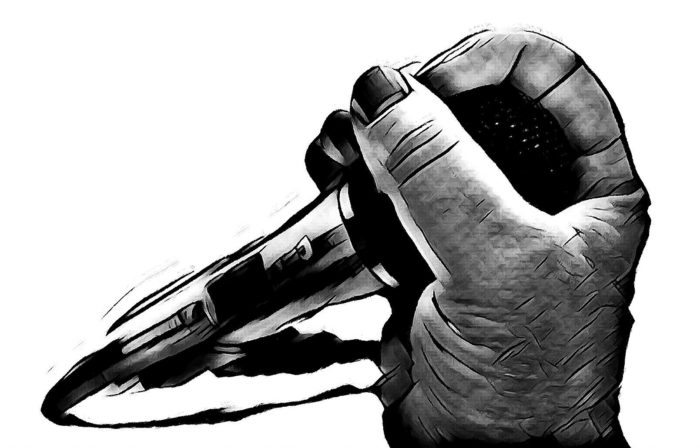
Sound craftspersons commonly moan and groan about having a ton of open mics – especially vocal mics – on their stages. The biggest gripe, of course, is feedback. Every single sound-to-voltage transducer on deck increases the system’s “loop gain” when their channel is open. More loop gain makes things more unstable.

There’s another complaint to be had, though. It’s the composite problem where bleed causes “defocus,” headroom consumption, and poor overall mix tone.

To be both snarky AND up-front for a bit, let me say that I almost always offer up an enormous, mental eye-roll when someone says, “There are [x] of us, and we all sing.” My instant judgement is: “Actually, there are [x] of you, and maybe two of you can actually sing. The rest of you can carry a tune, but don’t really have the power or consistency to compete with a rock band.” And inevitably, it’s a situation where people only vocalize when the fancy takes them, so I have to leave all those channels open and CRANKED, just in case someone has a two second harmony part here or there.

So, why all the snarking and sighing?

It’s because, in a live-sound situation, signal-to-noise is a fraught topic. That is, the concept goes beyond the traditional measure of random electronic voltage versus the desired signal in the circuit, and ends up in artistic and acoustical territory. In an environment with a real band in a real room, the sound that corresponds to the channel label (Lead Vocal, for instance) is the signal, and absolutely everything else is noise.

Absolutely.

Everything.

Else.

…and there’s a lot of noise, noise which is also considered signal when you get to the channel that’s supposed to be carrying it.

Anyway, you’ve got all these vocal mics, and they’re all wound up hot, and a very large percentage of the time they are amplifying a bunch of information that isn’t vocals. That’s the bleed problem, and it leads to the other issues I mentioned:

1) “Defocus” – Where other sounds on stage, especially percussive ones, end up having multiple arrivals due to going through their close-up mics AND the other mics spread around. The problem gets worse in more acoustically live settings, because the other open mics also amplify the indirect sound that arrives at a different time than the direct sound which ALSO arrived at a different time. This transient-smearing can make a mix much harder to “parse” for musical information, because the boundaries between different musical elements are no longer as well defined.

2) Headroom Consumption – Have you ever driven a system to its limits with, say, drums…through the vocal mics? I have, on more occasions than I care to remember. All the noise flowing through those open channels uses up your power budget very quickly. You end up with no room to make those big, fun, transients, because you’ve soaked up all your headroom with a continuous wash of everything except what you actually want. A further side-effect of all this is that your mix feels uncomfortably loud, because everything is smashed together without enough contrast.

3) Poor Overall Mix Tone – All the bleed being amplified tends to cause a buildup of midrange and high-frequency energy that can make a mix teeth-clenchingly uncomfortable for audiences. Sure, you can slap an EQ on everything, but now you’ve messed with your vocal intelligibility, so…

Now, of course, there are things you can do. You can get a a set list with pointers on who’s doing what. You can aggressively run mutes, assuming good sight lines and a fair amount of rehearsal time. You can try to isolate your mics in various ways. You can use rehearsal time to figure out how to get the backline down to a level that works well with what the vocalists can deliver.

But in the end, the best approach has been (and will always continue to be) vocalists with excellent power and tone, and the giving of vocal mics only to those people.
Micing A Saw

Contact transducers are really nifty, but take some doing to use.

Please Remember:

The opinions expressed are mine only. These opinions do not necessarily reflect anybody else’s opinions. I do not own, operate, manage, or represent any band, venue, or company that I talk about, unless explicitly noted.

Want to use this image for something else? Great! Click it for the link to a high-res or resolution-independent version.

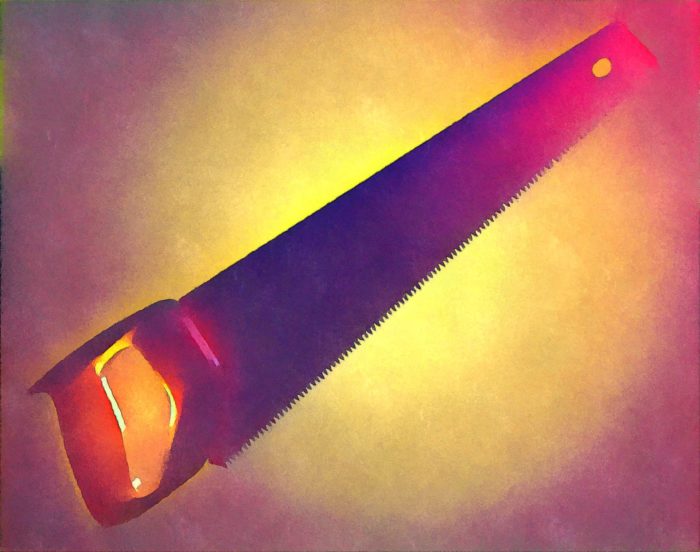
You may eventually be asked to transduce the noises produced by a saw. I’m not talking about sound effects for film, here. I’m talking about music. A handsaw with a sufficiently manipulable blade can be played very effectively with a violin bow. The resulting emanations are what I would call “a wood-shop Theremin.”

I have effectively captured these sonic events with regular microphones. As with anything else, a unit that basically sounds like the thing it’s pointed at will generally be fine. The troublesome element really is that saws don’t have the kind of body that creates a lot of output. Their resulting lack of SPL can pose a challenge when they’re put into an ensemble, because almost anything else is going to be much, much louder.

As a result of the above, I have, (for years) wanted to try using a contact transducer on a musical saw. I finally got my chance a couple of weeks ago. I was very pleased with the outcome, because I could actually hear some of what the saw was doing in the context of a very busy band.

The key to the whole thing was a Dean Markley Artist Transducer. It’s essentially a gussied-up piezo, with the element potted in some kind of polymer that sits in a wooden surround. The bottom of the pickup has that poster-tack Silly Putty applied, so you can temporarily stick the thing to a surface. As with any piezo-based transducer, you’ll want to connect it through an active DI box; The ultra-high impedance of the op-amp will stop you from loading down the pickup.

Contact micing lives and dies on placement, even more so than regular microphones. Parking the transducer in a bad spot can get you very strange results, but there’s more to the story: The pickup’s physical contact changes the vibrational behavior of the surface that it’s connected to. As such, you want to find a spot where you’ll get good transfer of the instrument’s movement, while avoiding a placement that dampens that same vibration. With a saw, that means that you’ll probably want to search for a place that’s as close to the handle as possible. This serves the dual purpose of keeping the transducer and cable out of the way, while also allowing the blade to move freely.

You will also want to make sure that you have the ability to DRASTICALLY reduce the high-frequency output of the saw channel. (A freely sweepable low-pass filter is the best case.) I’m starting to form a theory that vibrating surfaces and air create a sort of acoustical inductor – a device that impedes high-frequency output. Take away the transition to air-carried waves, and a lot of information that you’re not used to hearing comes into play. The bow scraping against the blade is hard to hear with traditional micing, but a contact mic really brings that sound through. We ended up rolling the filter down rather far…like, 1 kHz far, before a result was created that wasn’t too jarring.

All of this takes some work and planning, certainly, but the end result of much, much, MUCH improved gain-before-feedback can be tremendously helpful. Consider getting a contact transducer for your box-of-goodies. It might prove to be a highly handy tool one day.


That Fibber, Myself

I was never going to buy wireless gear again. Until…

Please Remember:

The opinions expressed are mine only. These opinions do not necessarily reflect anybody else’s opinions. I do not own, operate, manage, or represent any band, venue, or company that I talk about, unless explicitly noted.

Want to use this image for something else? Great! Click it for the link to a high-res or resolution-independent version.

There is a taxonomy of falsehood. For instance, a particularly awful and hurtful falsity might be “a lie from hell.” Slightly less severe versions might be “a fib from heck,” or “a half-truth from West Jordan.” “Tall-tales from Hyrum” never really hurt anyone, as is the case for a “whopper from Utah County.”

In any case, I thought I was telling the truth when I said – to many people, repeatedly and emphatically – that I would never again put my own money into wireless audio. I was adamant. Determined. Resolute now to defend fair honor upon the glorious field of contest, I say to thee, Knights of the West, STAND!

Yeah, well, you can see how that turned out. Maybe what I said was “a fiction from Erda.” I’m not really sure.

Here’s what happened. I subcontract for a local production provider. A New Years Eve show had been on the books for quite a while, only for it to suddenly vanish in a cloud of miscommunication. The provider scrambled (thank you!) to find a show for me to do, so that I’d have a job that night (thank you!). Normally, we’d have time to handle some coordination for the show advance, but this was a situation where haste was demanded. The provider thought that I had a couple of wireless handhelds available. The show was specced, booked, and advanced. About a day and a half before downbeat, I got the input list.

A strict requirement was at least one wireless handheld. Eeeeep!

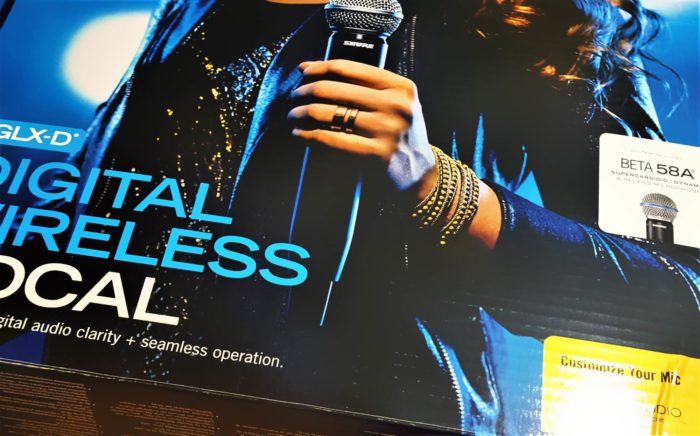
It was too late to cross-rent from one of our shared connections. My favorite place to buy or rent “right now” items was closed for inventory. I grabbed my credit card and drove to The Geometric Centroid of Strummed Instruments. (Think about it.) I was in and out in a jiffy, carrying with me a Beta58 Shure GLXD system. As much as the 2.4 Ghz band is becoming a minefield, I went with a digital system; If I was going to spend the money, I did NOT want a unit operating in a part of the spectrum that the FCC would end up auctioning or re-apportioning.

I could have gotten something significantly cheaper, but I wouldn’t have been as confident in it. My imperative was to bring good gear to the show. If I brought something from the bargain-bin, and it ended up messing the bed, that would be hard to excuse. If a better unit misbehaved, I could at least say that I did my due diligence.

In any case, the show had to go on. I’m still not a fan of wireless. I still don’t intend to add to my inventory of audio-over-airwaves devices. Even, so, you sometimes have to bend yourself around what a client needs in a short timeframe. It’s just a part of the life. Of course, after the show, my brand-new transmitter had lipstick embedded in the grille, but that’s a whole other topic…


The Pro-Audio Guide For People Who Know Nothing About Pro-Audio, Part 1

A series I’m starting on Schwilly Family Musicians.

Please Remember:

The opinions expressed are mine only. These opinions do not necessarily reflect anybody else’s opinions. I do not own, operate, manage, or represent any band, venue, or company that I talk about, unless explicitly noted.

Want to use this image for something else? Great! Click it for the link to a high-res or resolution-independent version.

From the article:

“The fundamental key to all audio production is that we MUST have sound information in the form of electricity. Certain instruments, like synthesizers and sample players don’t produce any actual sound at all; They go straight to producing electricity.

For actual sound, though, we have to perform a conversion, or “transduction.” Transduction, especially input transduction, is THE most important part of audio production. If the conversion from sound to electricity is poor, nothing happening down the line will be able to fully compensate.”


Read the whole thing here, for free!


The Great, Quantitative, Live-Mic Shootout

A tool to help figure out what (inexpensive) mic to buy.

Please Remember:

The opinions expressed are mine only. These opinions do not necessarily reflect anybody else’s opinions. I do not own, operate, manage, or represent any band, venue, or company that I talk about, unless explicitly noted.

Want to use this image for something else? Great! Click it for the link to a high-res or resolution-independent version.

See that link up there in the header?

It takes you to The Great, Quantitative, Live-Mic Shootout, just like this link does. (Courtesy of the Department of Redundancy Department.)

And that’s a big deal, because I’ve been thinking and dreaming about doing that very research project for the past four years. Yup! The Small Venue Survivalist is four years old now. Thanks to my Patreon supporters, past and present, for helping to make this idea a reality.

I invite you to go over and take a look.


The Grand Experiment

A plan for an objective comparison of the SM58 to various other “live sound” microphones.

Please Remember:

The opinions expressed are mine only. These opinions do not necessarily reflect anybody else’s opinions. I do not own, operate, manage, or represent any band, venue, or company that I talk about, unless explicitly noted.

Want to use this image for something else? Great! Click it for the link to a high-res or resolution-independent version.

Purpose And Explanation

Ever since The Small Venue Survivalist became a reality, I have wanted to do a big experiment. I’ve been itching to round up a bunch of microphones that can be purchased for either below, or slightly above the price point of the SM58, and then to objectively compare them to an SM58. (The Shure SM58 continues to be an industry standard microphone that is recognized and accepted everywhere as a sound-reinforcement tool.)

The key word above is “objectively.” Finding subjective microphone comparisons isn’t too hard. Sweetwater just put together (in 2017) a massive studio-mic shootout, and it was subjective. That is, the measurement data is audio files that you must listen to. This isn’t a bad thing, and it makes sense for studio mics – what matters most is how the mic sounds to you. Listening tests are everywhere, and they have their place.

In live audio, though, the mic’s sound is only one factor amongst many important variables. Further, these variables can be quantified. Resistance to mechanically-induced noise can be expressed as a decibel number. So can resistance to wind noise. So can feedback rejection. Knowing how different transducers stack up to one another is critical for making good purchasing decisions, and yet this kind of quantitative information just doesn’t seem to be available.

So, it seems that some attempt at compiling such measurements might be helpful.

Planned Experimental Procedure

Measure Proximity Effect

1) Generate a 100Hz tone through a loudspeaker at a repeatable SPL.

2) Place the microphone such that it is pointed directly at the center of the driver producing the tone. The front of the grill should be 6 inches from the loudspeaker baffle.

3) Establish an input level from the microphone, and note the value.

4) Without changing the orientation of the microphone relative to the driver, move the microphone to a point where the front of the grill is 1 inch from the loudspeaker baffle.

5) Note the difference in the input level, relative to the level obtained in step 3.

Assumptions: Microphones with greater resistance to proximity effect will exhibit a smaller level differential. Greater proximity effect resistance is considered desirable.

Establish “Equivalent Gain” For Further Testing

1) Place a monitor loudspeaker on the floor, and position the microphone on a tripod stand. The stand leg nearest the monitor should be at a repeatable distance, at least 1 foot from the monitor enclosure.

2) Set the height of the microphone stand to a repeatable position that would be appropriate for an average-height performer.

3) Changing the height of the microphone as little as possible, point the microphone directly at the center of the monitor.

4) Generate pink-noise through the monitor at a repeatable SPL.

5) Using a meter capable of RMS averaging, establish a -40 dBFS RMS input level.

Measure Mechanical Noise Susceptibility

1) Set the microphone such that it is parallel to the floor.

2) Directly above the point where the microphone grill meets the body, hold a solid, semi-rigid object (like an eraser, or small rubber ball) at a repeatable distance at least 1 inch over the mic.

3) Allow the object to fall and strike the microphone.

4) Note the peak input level created by the strike.

Assumptions: Microphones with greater resistance to mechanically induced noise will exhibit a lower input level. Greater resistance to mechanically induced noise is considered desirable.

Measure Wind Noise Susceptibility

1) Position the microphone on the stand such that it is parallel to the floor.

2) Place a small fan (or other source of airflow which has repeatable windspeed and air displacement volume) 6 inches from the mic’s grill.

3) Activate the fan for 10 seconds. Note the peak input level created.

Assumptions: Microphones with greater resistance to wind noise will exhibit a lower input level. Greater resistance to wind noise is considered desirable.

Measure Feedback Resistance

1) Set the microphone in a working position. For cardioid mics, the rear of the microphone should be pointed directly at the monitor. For supercardioid and hypercardioid mics, the the microphone should be parallel with the floor.

2a) SM58 ONLY: Set a send level to the monitor that is just below noticeable ringing/ feedback.

2b) Use the send level determined in 2a to create loop-gain for the microphone.

3) Set a delay of 1000ms to the monitor.

4) Begin a recording of the mic’s output.

5) Generate a 500ms burst of pink-noise through the monitor. Allow the delayed feedback loop to sound several times.

6) Stop the recording, and make note of the peak level of the first repeat of the loop.

Assumptions: Microphones with greater feedback resistance will exhibit a lower input level on the first repeat. Greater feedback resistance is considered desirable.

Measure Cupping Resistance

1) Mute the send from the microphone to the monitor.

2) Obtain a frequency magnitude measurement of the microphone in the working position, using the monitor as the test audio source.

3) Place a hand around as much of the mic’s windscreen as is possible.

4) Re-run the frequency magnitude measurement.

5) On the “cupped” measurement, note the difference between the highest response peak, and that frequency’s level on the normal measurement.

Assumptions: Microphones with greater cupping resistance will exhibit a smaller level differential between the highest peak of the cupped response and that frequency’s magnitude on the normal trace. Greater cupping resistance is considered desirable.


Measuring A Cupped Mic

What you might think would happen isn’t what happens.

Please Remember:

The opinions expressed are mine only. These opinions do not necessarily reflect anybody else’s opinions. I do not own, operate, manage, or represent any band, venue, or company that I talk about, unless explicitly noted.

Want to use this image for something else? Great! Click it for the link to a high-res or resolution-independent version.

The most popular article on this site to date is the one where I talk about why cupping a vocal mic is generally a “bad things category” sort of experience. In that piece, I explain some general issues with wrapping one’s hand around a microphone grill, but there’s something I didn’t do:

I didn’t measure anything.

That reality finally dawned on me, so I decided to do a quck-n-dirty experiment on how a microphone’s transfer function changes when cupping comes into play. Different mics will do different things, so any measurement is only valid for one mic in one situation. However, even if the results can’t truly be generalized, they are illuminating.

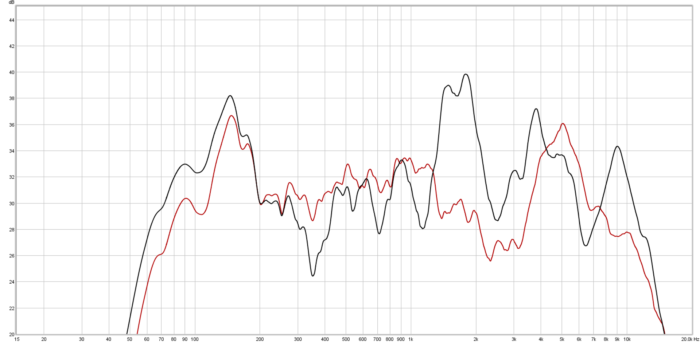
In the following picture, the red trace is a mic pointing away from a speaker, as you would want to happen in monitor-world. The black trace is the mic in the same position, except with my hand covering a large portion of the windscreen mesh.

You would think that covering a large part of the mic’s business-end would kill off a lot of midrange and high-frequency information, but the measurement says otherwise. The high-mid and HF information is actually rather hotter, with large peaks at 1800 Hz, 3900 Hz, and 9000 Hz. The low frequency response below 200 Hz is also given a small kick in the pants. Overall, the microphone transfer function is “wild,” with more pronounced differences between peaks and dips.

The upshot? The transducer’s feedback characteristics get harder to manage, and the sonic characteristics of the unit begin to favor the most annoying parts of the audible spectrum.

Like I said, this experiment is only valid for one mic (a Sennheiser e822s that I had handy). At the same time, my experience is that other mics have “cupping behavior” which is not entirely dissimilar.


How To Buy A Microphone For Live Performance

A guest-post for Schwilly Family Musicians

Please Remember:

The opinions expressed are mine only. These opinions do not necessarily reflect anybody else’s opinions. I do not own, operate, manage, or represent any band, venue, or company that I talk about, unless explicitly noted.

vintage_microphone-wallpaper-1280x800

From the article: “At the same time, though, a LOT of mics that are great for recording are a giant ball of trouble for live audio. Sure, they sound perfect when you’re in a vocal booth with headphones on, but that’s at least one whole universe removed from the brutal world of concert sound. They’re too fragile, too finicky, too heavy, their pickup patterns are too wide, and you can’t get close enough to them to leverage your vocal power.”


The whole thing is available for free, so go ahead and take a gander.


I Am SO Over Wireless

Another “Schwilly” article.

Please Remember:

The opinions expressed are mine only. These opinions do not necessarily reflect anybody else’s opinions. I do not own, operate, manage, or represent any band, venue, or company that I talk about, unless explicitly noted.

wirelessWant to use this image for something else? Great! Click it for the link to a high-res or resolution-independent version.

“If you are an audio person or a musician, someone you know will eventually want to do things involving audio (or data representing audio) and radio waves. They will think that such an idea is brilliant. They will think it will be so very nifty to be un-tethered and free, wild like the stallions and mares which once loped across the mighty plains of America’s central expanse, majestic in their equine kingship ov-

Yeah. About that. Don’t believe it. Wireless is a pain in the donkey.”


Read the whole thing for free at Schwilly Family Musicians.


The Loudest Thing At The Capsule Always Wins

Mics are not “smart,” and they can’t “reach.” Whatever pressure event is happening at the capsule is what they turn into electricity.

Please Remember:

The opinions expressed are mine only. These opinions do not necessarily reflect anybody else’s opinions. I do not own, operate, manage, or represent any band, venue, or company that I talk about, unless explicitly noted.

loudestthingwinsWant to use this image for something else? Great! Click it for the link to a high-res or resolution-independent version.

“A big, sort of “omnibus” myth is that microphones have some sort of magical ability to discriminate between what you want them to pick up and everything else. This myth manifests in such (understandable but spurious) notions like mics with higher sensitivity being necessary for quiet singers. The idea is that higher sensitivity allows the mic to “reach” farther from itself, and grab the sound of the vocalist. Also, the thought includes a guess that feedback might be reduced, because less post-mic gain is applied.

Like I said, this is understandable, but inaccurate.”


The entire article is available, for free, at Schwilly Family Musicians.