Tag Archives: Science

Monitor World – Is “More” Better?

Often, the answer is “nope.”

Please Remember:

The opinions expressed are mine only. These opinions do not necessarily reflect anybody else’s opinions. I do not own, operate, manage, or represent any band, venue, or company that I talk about, unless explicitly noted.

Want to use this image for something else? Great! Click it for the link to a high-res or resolution-independent version.

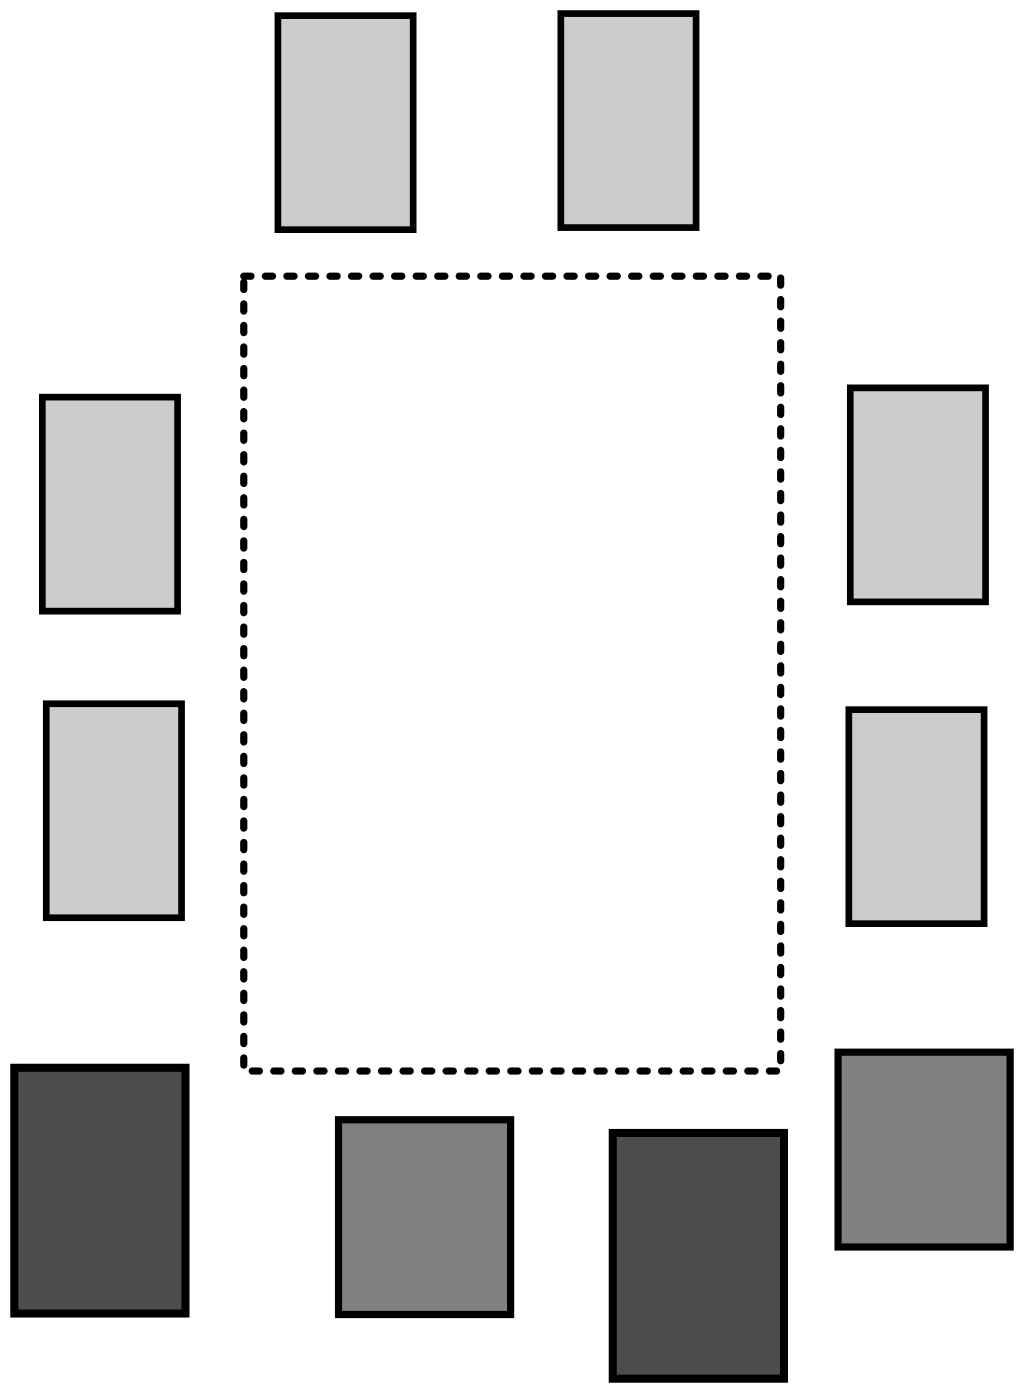
Monitor world is a PA system, just like FOH is a PA system. The only difference is that monitor world handles a few very small audiences, and FOH usually deals with one comparatively large audience. All the helpful AND problematic physics considerations are the same.

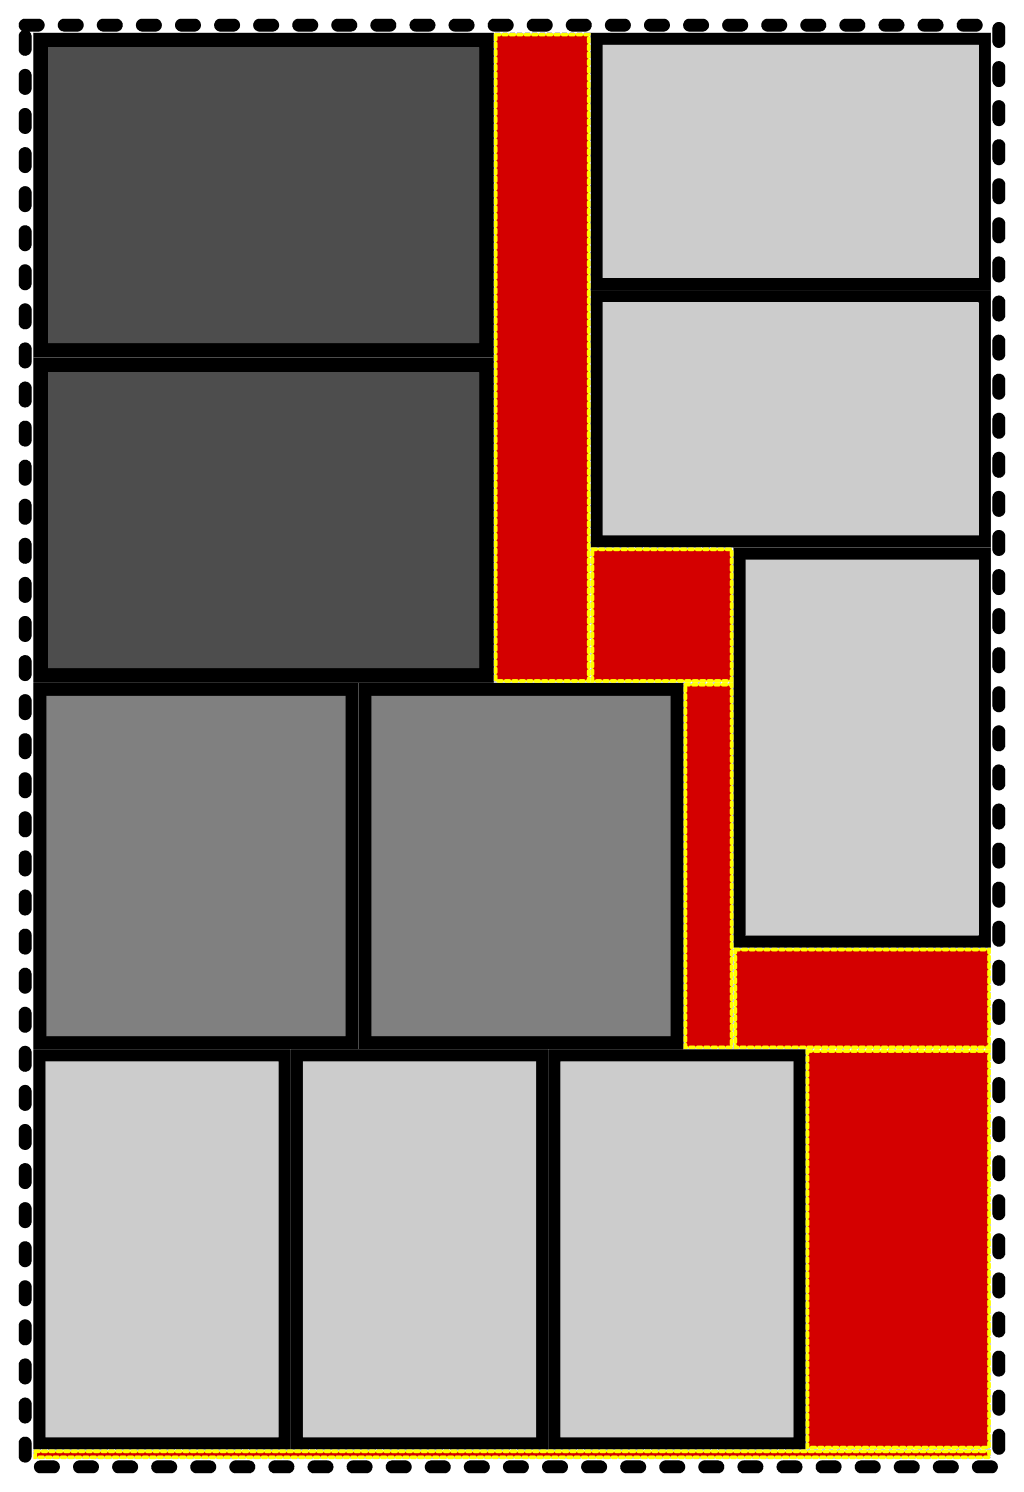
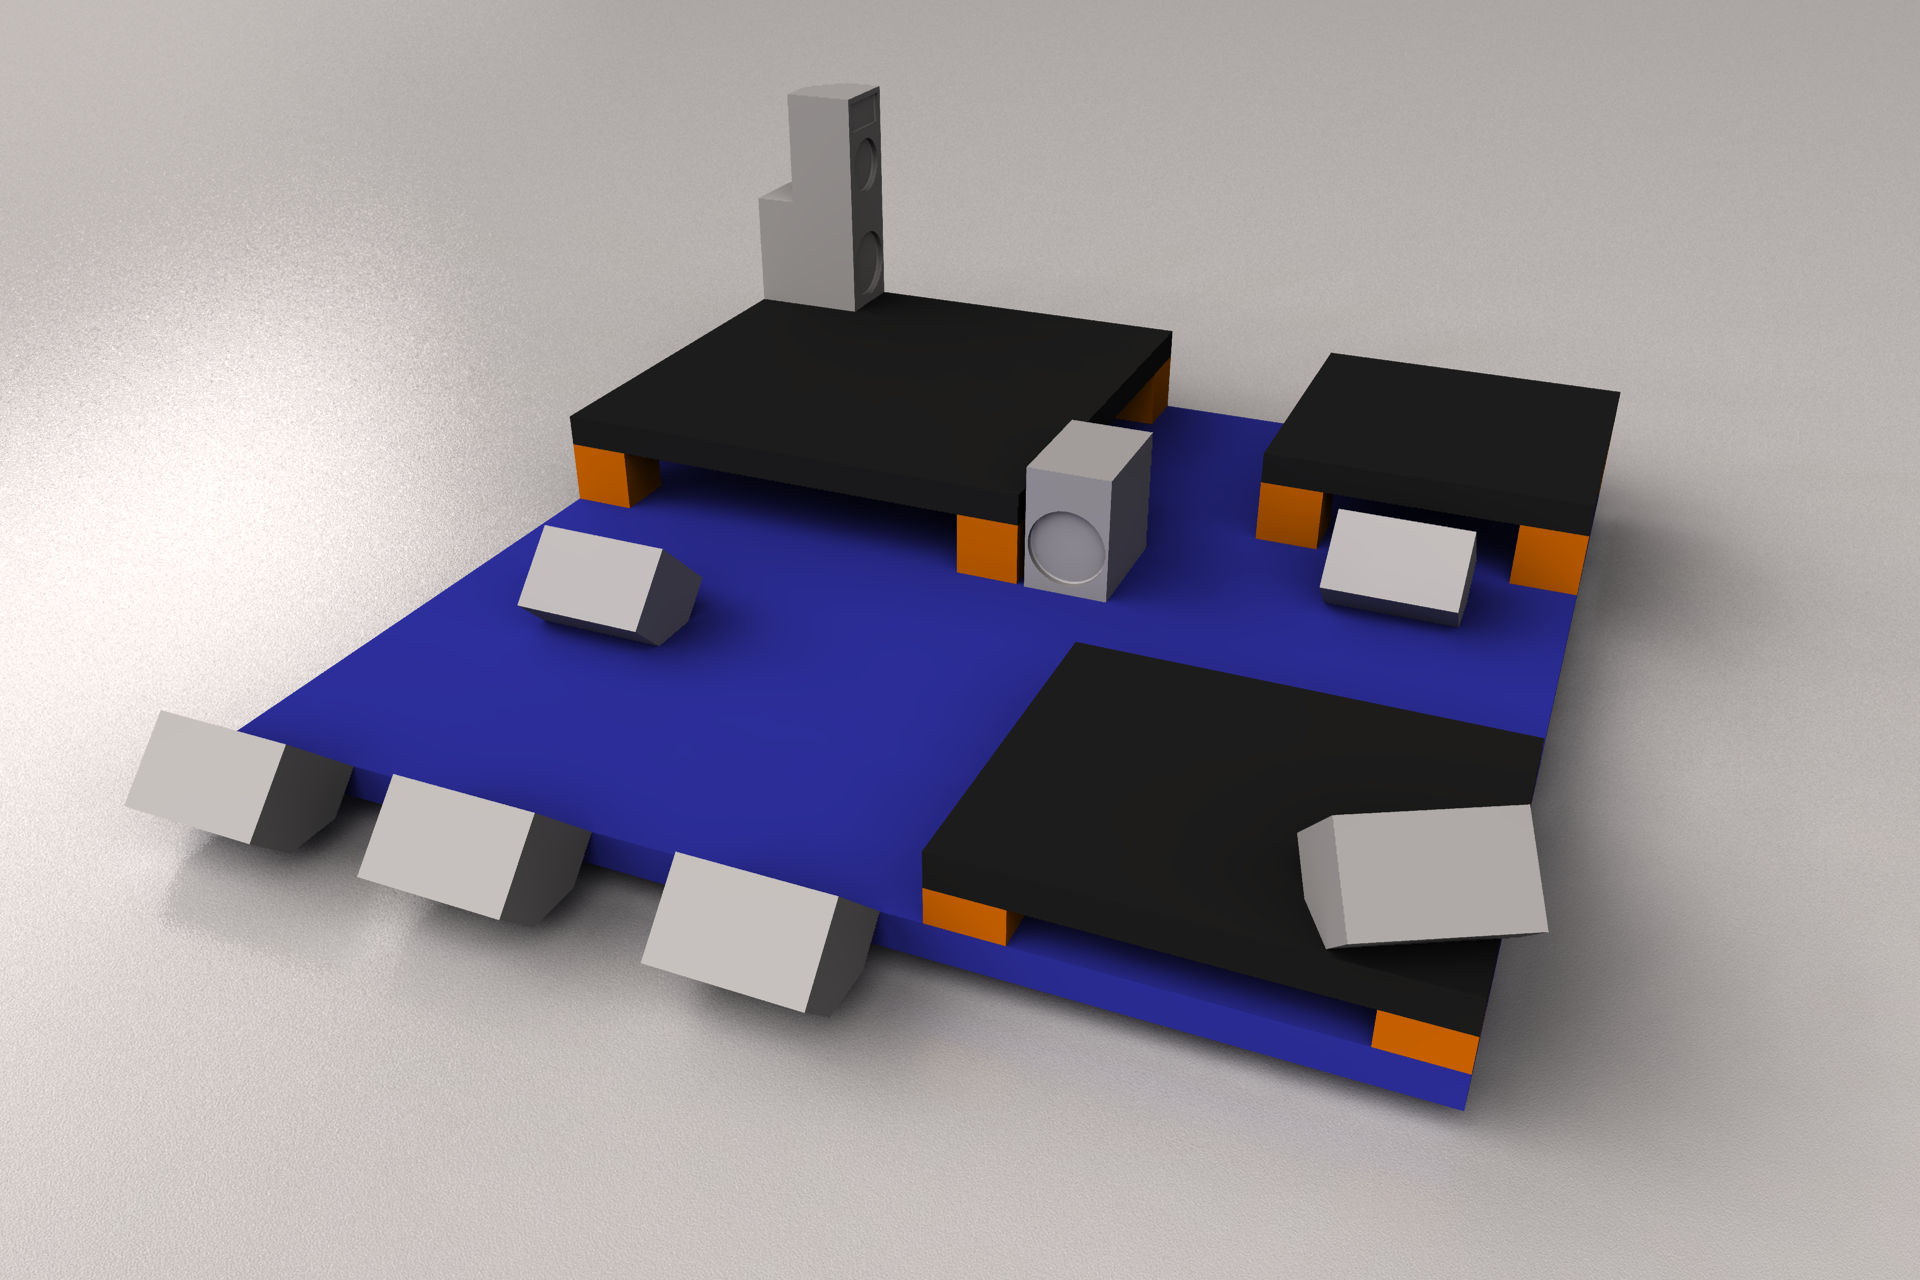
This being the case, the stage is yet another place where simply piling up more and more boxes (all doing the same thing) to get “more” can be counterproductive. A vocalist wants more vocal, but their monitor is already doing everything it can, so you add another box. Does it look impressive? Yes! Is it louder? Yes! Is it better?

Yea- er…well…wait a second…

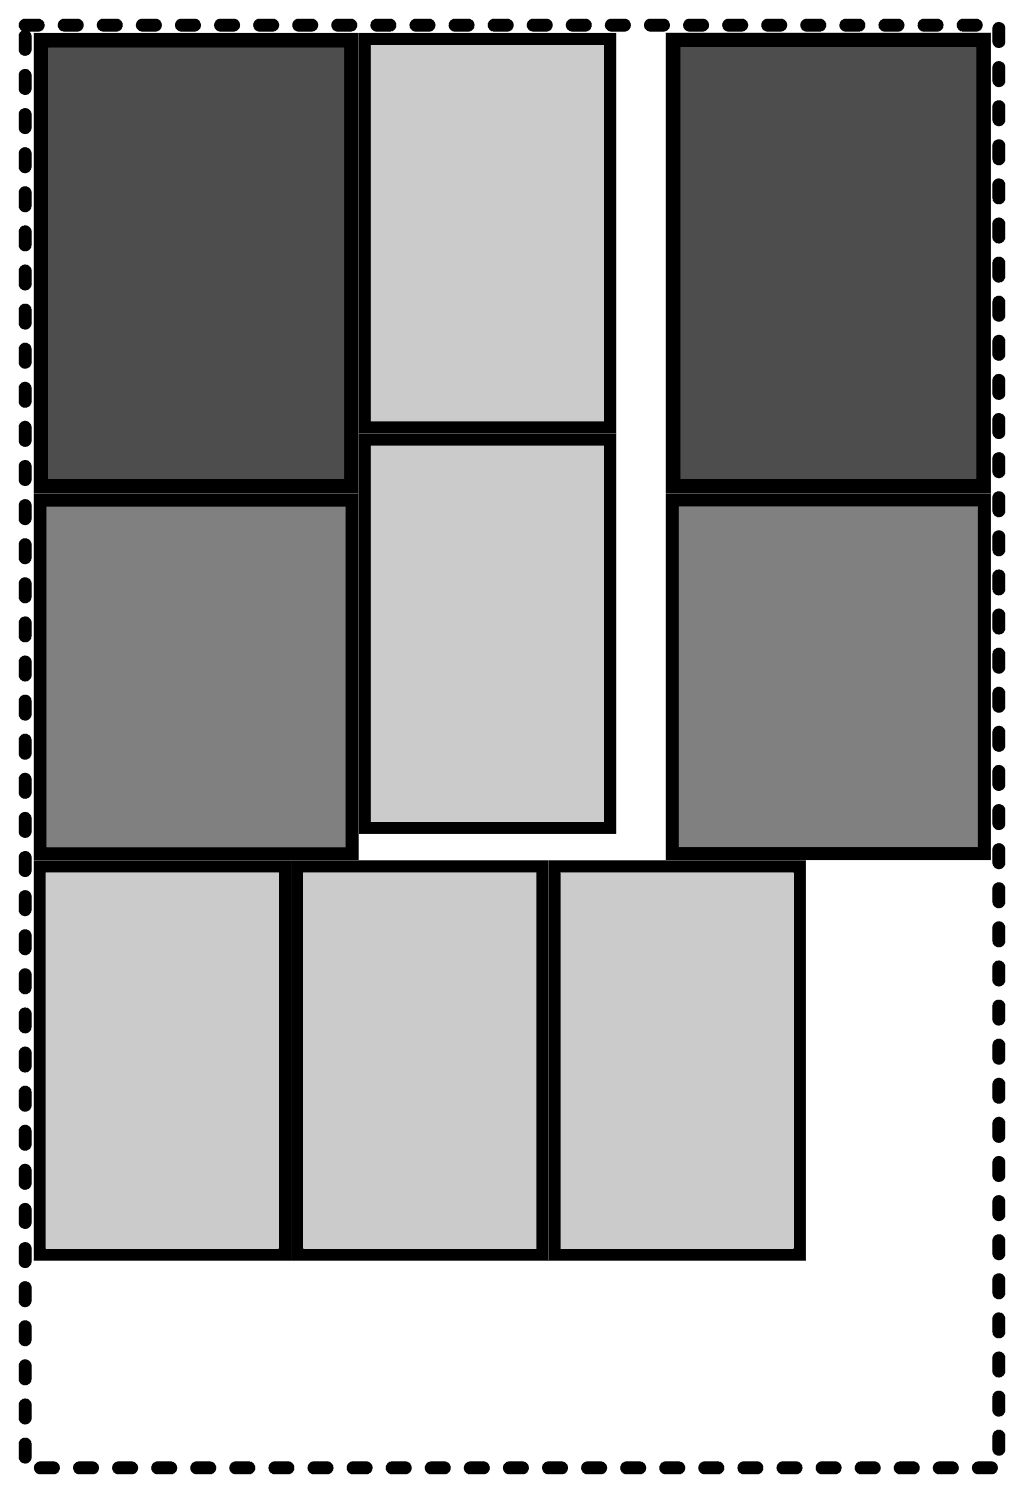
What you very well might end up with is a different set of issues. If the singer isn’t precisely situated between the wedges, the wedge outputs arrive at different times. This means that all kinds of destructive phase weirdness might be happening, and that can lead to intelligibility issues. The vocal range is very easy to louse up with time-arrival differences, and a sensation of “garble” can lead to a player wanting even MORE monitor level in compensation. In that instance, you haven’t actually gotten anywhere; Monitor world is louder, but it’s not any easier to hear in the information-processing sense. You also have greater effective loop-gain with that extra volume rocketing around, which destabilizes your system.

Plus, the low-frequency information still does combine well, which can lead to a troublesome buildup of mud. This goes double for everybody who’s off-axis (and that’s probably just about everybody who isn’t the intended audience of those wedges). That makes them want their own mixes to be hotter, which compounds all your problems even more.

And, of course, there’s even more bleed into FOH.

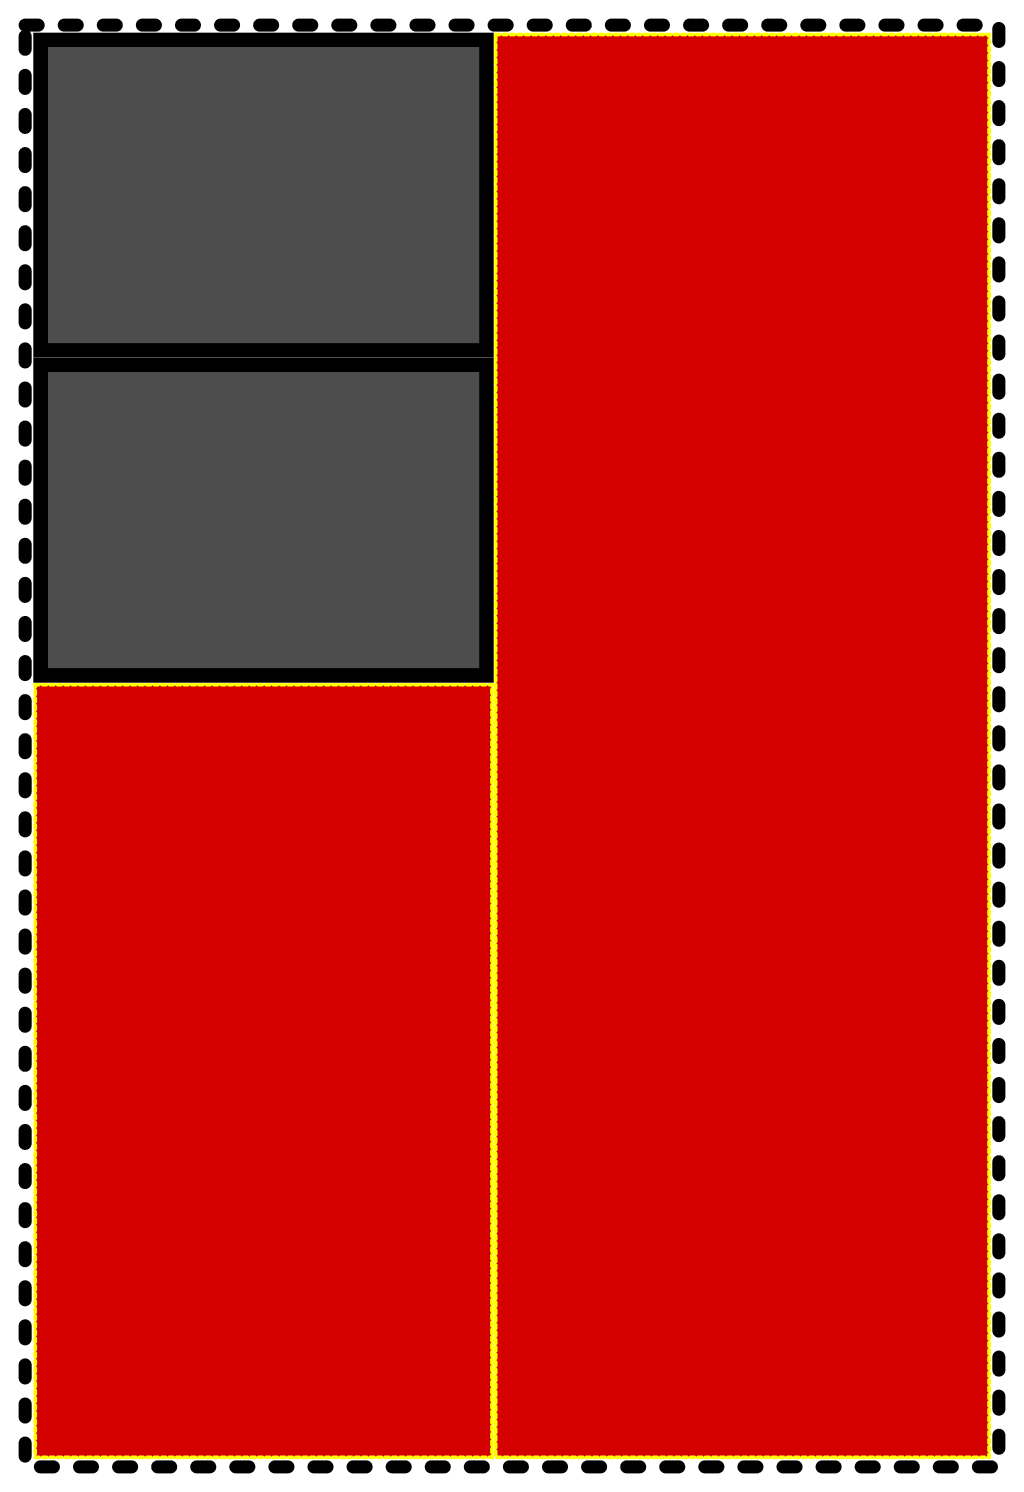
The brutal reality is that, for any single sound that a given player needs to hear, that signal will always sound better coming from a single box that “can get loud enough.” More wedges (all producing the same output) can only combine less and less coherently as you add more of them.

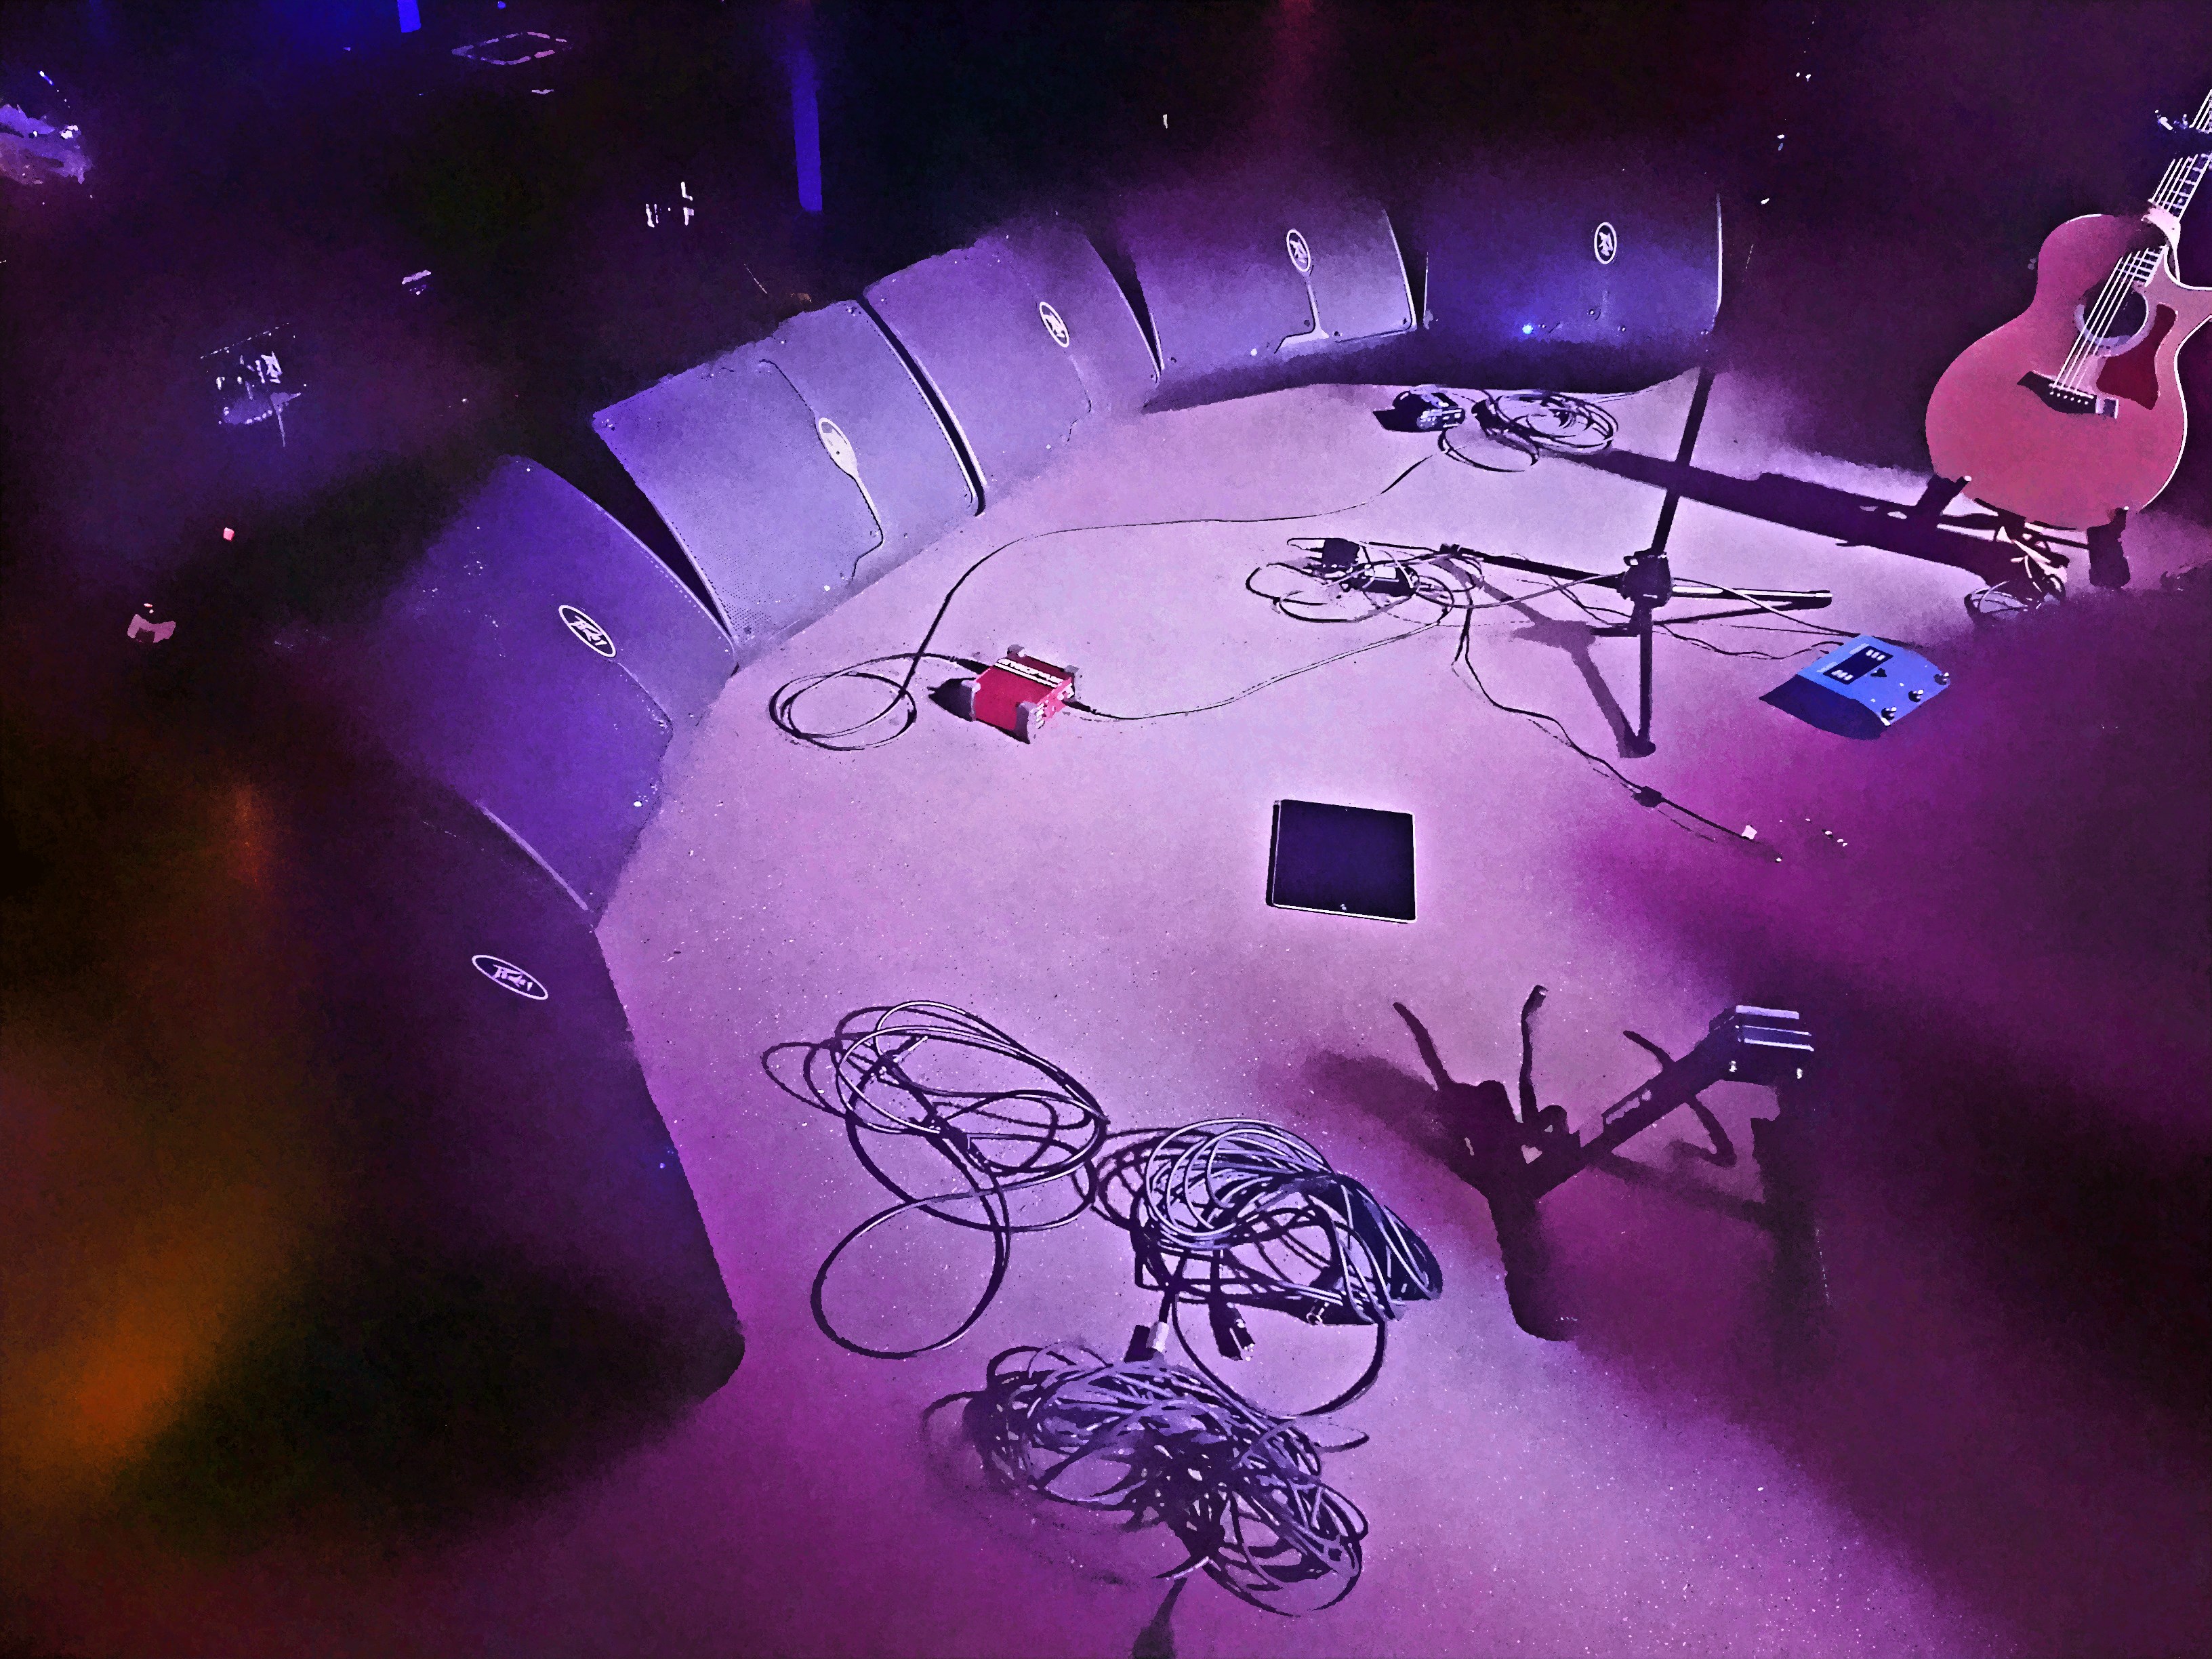
“But, Danny,” you protest, “you’ve done dual wedges for people. You’ve even rolled out some really excessive deployments, like the one in the article picture. Who are you to tell folks not to do that kind of thing?”

Fair point! In response:

1) It’s because I’ve tried some strange monitor solutions that I can say they weren’t necessarily improvements over simpler approaches.

2) Sometimes you do things that look cool, accepting that you’ll have to deal with some sonic downsides as a result.

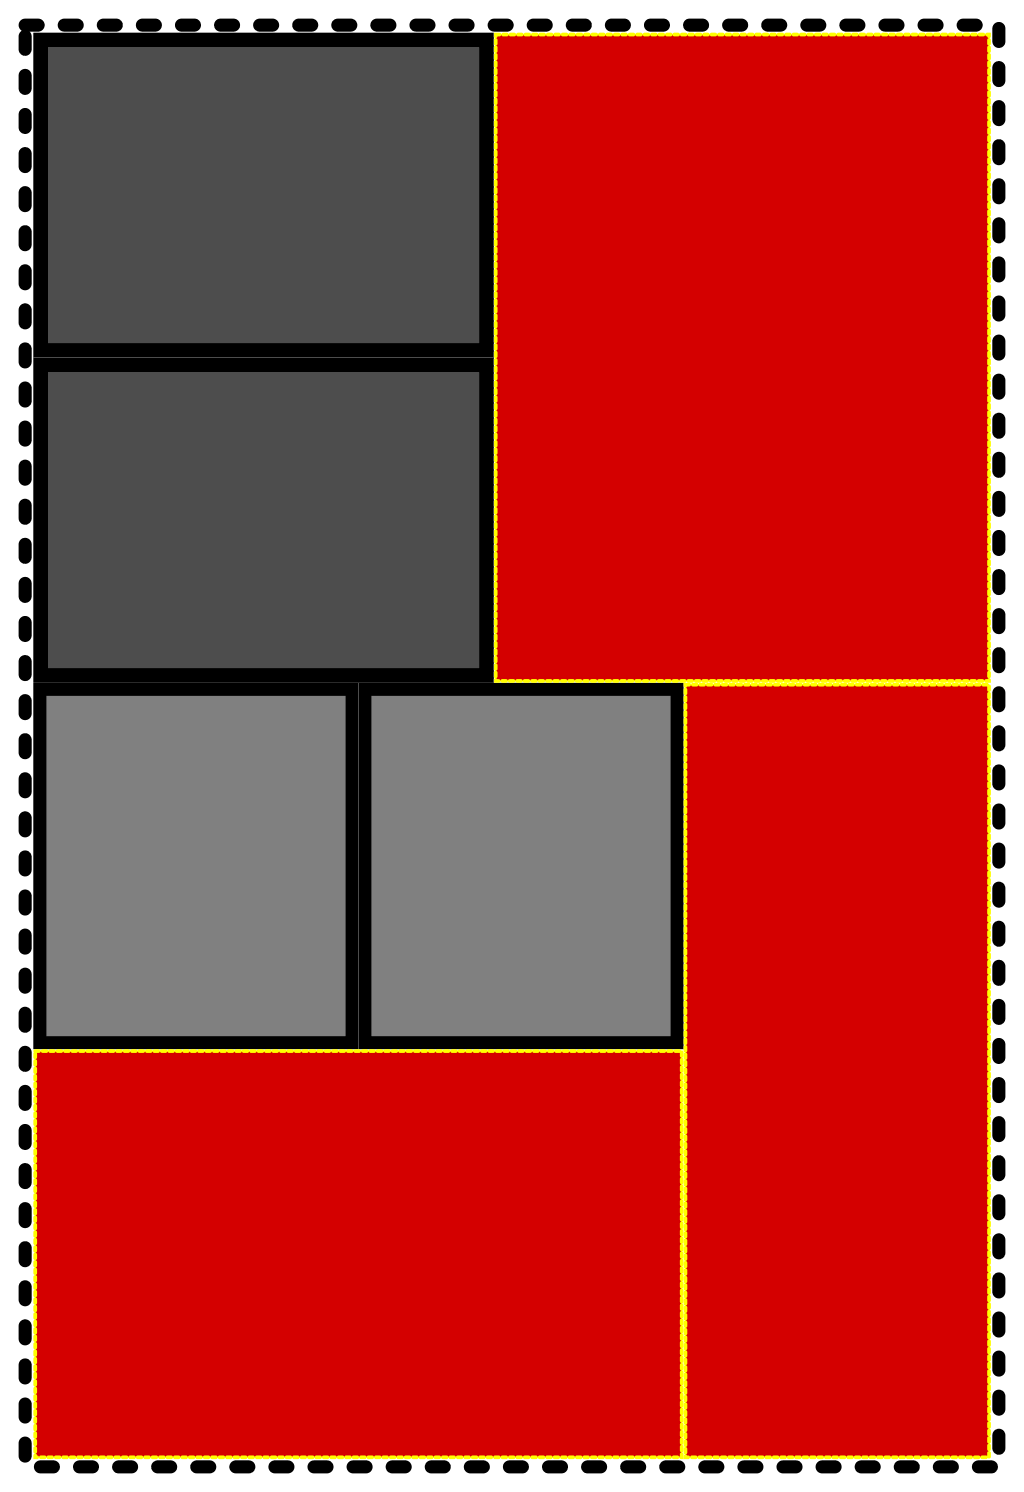
3) Just because you’ve piled up a bunch of wedges, it doesn’t require you to put the exact same thing through each enclosure. Somebody might have two boxes in front of them, but one might be for vocals only and the other for instruments only.

With some bands, especially those who are naturally well balanced and don’t need a ton of monitor gain, the extra fun-factor and volume bump can trade off favorably with the coherence foibles. As the rest of this article indicates, yes, I am in the camp that says that a single box will always “measure better.” However, there’s more to life than just “measuring better.” If you have some room to compromise, you can be a little weird without hurting anything too badly.

Audio is an exercise in compromise. If you know what the compromise factors are, you can make an informed judgement. If you know that throwing a bunch of boxes at a problem might cause you other problems, then you’ve got more knowledge available to help you make the right decision for a fix.


You Don’t Just Need A Bigger Amp

Headroom is a holistic thing. If you run out of it in one place, getting more of it somewhere else isn’t enough.

Please Remember:

The opinions expressed are mine only. These opinions do not necessarily reflect anybody else’s opinions. I do not own, operate, manage, or represent any band, venue, or company that I talk about, unless explicitly noted.

Want to use this image for something else? Great! Click it for the link to a high-res or resolution-independent version.

The Video

The Script

Let’s say that an audio human has a mixing console that’s feeding a loudspeaker system. (That makes sense, right? Most of us do that a lot.) This loudspeaker system is nifty because it’s magic. It never clips. The only limit on output is how much voltage the console can deliver.

The weird bit is that the console can’t really swing much voltage at its outputs. It clips at a peak of 1 volt. Another weird thing is that the console doesn’t have any inboard mic pres. Those are separate. (I know this is really strange, but I’m trying to make a point.)

Our aforementioned audio human just happens to have a mic pre that also reaches its maximum output at a 1 volt peak. They connect a signal source to the preamp, crank the pre until it’s just barely under clipping, set a fader at 0 dB, and…it’s not loud enough.

So, what do they do?

If you said, “They need a console with more output capability,” you’re exactly right.

It wouldn’t make any sense to buy a mic pre with more output, right? If the console output clips at 1 volt, what good does it do to have a mic pre that will deliver 12 volts into the console? You can drive the signal to the mix outputs a lot harder, but all that gets you is more distortion.

Obtaining and connecting an upstream device with more output is kinda absurd, frankly. It’s not a solution at all. The console output is the limiting factor.

But here’s the thing.

People take this actually non-sensical approach with amps and speakers all the time. Some of the confusion is understandable. Amplifier and speaker power ratings aren’t necessarily intuitive, for one, and passive speakers don’t have level meters as a rule. There’s also all the complexity involved with trying to describe the limits of a multi-device speaker enclosure with a single number.

I get that there’s nuance involved here.

But here’s the thing. Speakers, like everything else, have a maximum undistorted output point. It’s a peak level – a point beyond which there is no more “instantaneous” sound pressure to be had. If you have, say, a loudspeaker that can handle a peak input of 1000 watts, and an amplifier that can put a 1000 watt peak input through that box…you’re there. Your system is maximized. Any more available amplifier power is wasted on both driver distortion AND the chance that you might wreck your speaker.

But people see those nasty little clip lights on their amps, and think: “Gosh, I need to buy a more powerful amplifier!” They get obsessed with headroom, but in this compartmentalized way that only involves the amp.

Actually, unless the amp’s peak (NOT CONTINUOUS – PEAK)…unless the amp’s peak output is half (or less) of the speaker’s maximum peak rating, you do NOT need a larger amp. Getting a more powerful amplifier only gets you more headroom in the amplifier, when what you actually want is more headroom throughout the entire system output section.

What you need is a speaker that gets louder for the same amount of input. Or a bigger amplifier AND a speaker that can handle the additional power. Or just “more PA” in general – although that’s a whole other can of worms in itself.


The Decibel…And You

Logarithmic scales are groovy.

Please Remember:

The opinions expressed are mine only. These opinions do not necessarily reflect anybody else’s opinions. I do not own, operate, manage, or represent any band, venue, or company that I talk about, unless explicitly noted.

Want to use this image for something else? Great! Click it for the link to a high-res or resolution-independent version.

The video:

About the music playing underneath the narration:

Frost Waltz by Kevin MacLeod is licensed under a Creative Commons Attribution license (https://creativecommons.org/licenses/by/4.0/)
Source: http://incompetech.com/music/royalty-free/index.html?isrc=USUAN1100516
Artist: http://incompetech.com/

Here’s the narration script, if you like:

The decibel – what is it?

The decibel is a nonlinear unit of measure created by Bell Telephone Laboratories. In telecommunications systems and professional audio applications, it is often necessary to compare large differences in measured power. This can be inconvenient with linear units.

The decibel solves this problem using a logarithmic scale. No, no, not phat beats being produced by striking a piece of wood at regular intervals. The logarithm: The inverse of an exponent. Logarithmic scales compact large, linear ranges of values into a much more manageable form. The logarithm used by the decibel is concerned with powers of 10, hence it is a base-10 logarithm. Be sure that any decibel calculations you perform use a base-10 logarithm; Some mathematics systems default to the natural logarithm instead.

The decibel is a unit that describes a power ratio. As such, you should be aware of three main rules for the use of this unit: First, that the decibel has no meaning unless a reference point is designated. Second, this reference point is the denominator for the ratio, and thus, must not be zero. Third, logarithms are only valid for ratios with a positive value. A decibel value can be negative, but the input ratio must not be.

All sorts of reference points for decibels exist. There is dBW, which references one watt of power. There is dBu, which references 0.775 volts RMS, un-terminated. There is dBSPL, which references 20 micro Pascals, the threshold of human hearing at 1 Khz.

For a power ratio, the decibel value is the 10 times the base-10 logarithm of the ratio. A ratio of one – that is, the reference point itself, is always zero decibels. Ratios greater than one give positive decibel values, whereas ratios less than one give negative results.

But wait, you say! Professional audio is often concerned with voltage, yet the decibel is concerned with power. How can we square that circle?

Remember that voltage can be related to power in various ways. One such form is this: Power equals voltage squared over resistance. Because we are concerned with the ratio of voltages, and not the actual power value, we can set the resistances as being equal to one. This leaves us with voltage squared over voltage squared. This may seem clumsy to calculate, but never fear! The same result may be obtained by multiplying the base-10 logarithm of the simple voltage ratio by 20 instead of 10. Isn’t that swell?

The decibel is a versatile unit of measure that can be adapted to many needs in the professional audio world. Know it, and use it well.


Why Are Faders Labeled Like That?

Gain multipliers are hard to read.

Please Remember:

The opinions expressed are mine only. These opinions do not necessarily reflect anybody else’s opinions. I do not own, operate, manage, or represent any band, venue, or company that I talk about, unless explicitly noted.

Want to use this image for something else? Great! Click it for the link to a high-res or resolution-independent version.

I’ve done a lot of typing on this site, and I’m worried that it’s getting stale – so, how about some video?


Panning

Localization is a great idea, but it’s not my top priority at FOH.

Please Remember:

The opinions expressed are mine only. These opinions do not necessarily reflect anybody else’s opinions. I do not own, operate, manage, or represent any band, venue, or company that I talk about, unless explicitly noted.

Want to use this image for something else? Great! Click it for the link to a high-res or resolution-independent version.

As an FOH guy, I haven’t really given two hoots about regular stereo for many years. Since I also sit in the monitor-beach chair, though, I find stereo – or rather, multichannel output, interesting and helpful on occasion.

Why the difference?

Your Friend, Localization

Let’s start by saying that “localization” is a good thing. A listener being able to recognize a specific point in space where a particular sound comes from is very useful when many sounds are happening together. It increases perceived clarity and/ or intelligibility; Instead of hearing one giant sound that has to be picked apart, it’s far more mentally apparent that multiple sounds are combining into a whole.

When localization gets tossed out the window, volume and tone are pretty much all you have available for differentiation of sources. This can lead to a volume war, or just high-volume in general, because it’s tougher to get any particular source to really stand out. The fewer differences you have available, the bigger the remaining differences have to be in order to generate contrast.

The thing with localization, though, is that its helpfulness erodes as the consistency of its perception decreases. In other words, it’s best when the entire intended audience is getting the same experience.

Everybody Getting The Show That’s Right For Them

In monitor world, consistency of perception is generally not much of a problem. I’m basically mixing for an audience of one, multiple times over. Even with wedges and fills all banging away and bleeding into one another, we can construct a (relatively) small number of solutions that are “as right as possible” for each band member. Very nifty things are possible with enough boxes and sends. For instance, everybody in the downstage line might get two wedges. Wedge one might be just vocals, with each singer’s mic emphasized in their own mix, and the others faded into the background. Wedge two could be reserved for instruments only. With the vocals having their own position in space, they become easier to differentiate from everything else. These benefits of localization are consistent and maximized, because everybody has a solution that’s built for just them (and then balanced with all the other solutions happening on deck).

So, that’s monitor world. Do you see the potential problem with FOH?

In monitor world, assuming I have the resources, I get to hit each listener with at least one box each.

At FOH, I have to hit MANY listeners in many positions with only a few localized boxes in total. (A PA can be built of arrayed speakers, of course, but you generally don’t separately perceive each element in an array.)

This creates a consistency problem. The folks sitting right down the center of the venue are usually in a great position to hear all the localized boxes. Start getting significantly off to one side or another, though, and that begins to fall apart. More and more, one “side” of the PA tends to get emphasized as the audible, direct source, with the other side dropping off. If different channels are significantly panned around, then, the panning can be a large contributor to different people getting a very different, and possibly incorrect “solution.”

It’s not that the people in the center never get a different show than the people off to the sides anyway, it’s that trying to mix in stereo can make that difference even bigger.

As much as is practicable, I want to be mixing the same show for everybody in the seats. That means that each speaker/ array/ side is producing the same show. (Now, if I get to have a dedicated center box or array that hits everybody equally and lets me localize vocals, well, that’s something.)

Another reason that I don’t generally expend energy on stereo mixing for FOH is because the stage tends to work against me. In plenty of cases, a particular source on deck is VERY audible, even with the PA, and basically seems to be localized in the center. This tends to collapse any stereo effect that might be going on, unless the PA gets wound up enough to be far louder than the on-stage source. Quite often, that amount of volume would be overwhelming to the people in the seats.

Caveats

First, I want to make sure that I’m NOT saying that mixing a live show in stereo is “wrong.” I don’t advise it, and I generally think that it’s not the best use of limited resources, but hey – if it’s working for you, and you like it, and it’s not causing you any problems, then that’s your thing.

Also, Dave Rat is a proponent of using relatively subtle differences from one PA “side” to another to help reduce comb-filtering issues in the middle. I think that’s an astute observation and solution on his part. For me, it’s not quite worth worrying about, but maybe it is for you.


Basic Power Distro Pointers

It’s all about impedance – either to ground, or to the load.

Please Remember:

The opinions expressed are mine only. These opinions do not necessarily reflect anybody else’s opinions. I do not own, operate, manage, or represent any band, venue, or company that I talk about, unless explicitly noted.

Want to use this image for something else? Great! Click it for the link to a high-res or resolution-independent version.

Power distribution is a huge subject in concert production, and there’s no way for me to truly do it justice here. Especially when you get into the electrical supply issues for big shows, the topic can get pretty hairy.

Of course, we’re talking about small shows, so that makes things easier. Even so, please be aware of two major points:

1) Handling electricity correctly is absolutely critical to life and safety. Don’t take anything I say and run off towards some sort of homebrew, half-baked solution that can get someone killed. Making something in your garage to fix one problem is very likely to expose you to some other – potentially lethal – problem.

In fact, there’s the first pointer for small-venue power distro: If you made it yourself and you’re not an actual electrician, it doesn’t belong in the mains-power chain. If you ARE an actual electrician, it still might not belong in the chain. If you can’t buy it in an assembled form from a reputable vendor, plugging it into the wall is probably a bad idea.

2) This is not some sort of exhaustive discussion about everything that can possibly go wrong (or right) with power. This is just a few points that I’ve found helpful over the years.

Impedance To Ground Should Be As Low As Possible

A valid connection to ground is imperative for safety. Removing or bypassing the ground connection to “get on with the show” creates a situation where the impedance to ground is effectively infinite. That’s a very, very, VERY bad thing. If you don’t have a reliable, permanently attached, and code-compliant connection to ground, there’s no reason to go any further. Keep your power disconnected until that problem is fixed.

Electricity is very reliable about following the path of least resistance to a 0-volt reference point, that is, “ground” or “earth.” Solid, low-impedance connections to ground are a kind of insurance against accidents. If, say, a piece of equipment suddenly suffers a fault where the case becomes “hot,” a sufficiently low-impedance connection to ground allows a large current to flow across the connected supply circuit. This doesn’t seem helpful, until you realize that large currents are what trip breakers. The (hopefully) enormous surge pops the breaker or blows the fuse, in an effort to prevent people from dying.

An unreliable or absent connection to ground means that YOU may suddenly be the path to ground with the lowest impedance. Such a condition may end poorly for you.

Impedance To Ground Should Be Equal For Everything

Actually getting this exactly right is pretty close to impossible, however, it’s something to consider if you’re having a stubborn hum or buzz problem.

The issue for us audio humans is that our gear all gets connected together in some way. Although this interconnection doesn’t directly involve mains power, the connections to the main power service are definitely a factor. If you’re in the very common situation of the mixing console and other control gear being powered from a different outlet (and, very possibly, a completely different circuit) than the gear “on deck,” different pieces of gear can have multiple paths to ground. If the available pathways have impedances that differ significantly, current can end up flowing back around the various electrical junctions involved.

(Buzzzzzzzz…)

Since good, low-impedance connections to ground are critical to safety, one solution to this conundrum is to maintain connectivity to ground while using the fewest outlets and circuits practicable. For instance, getting an offending device to use the same circuit as non-problematic devices may help. You have an even better chance if you can use the same outlet box. You must NOT overload an outlet or circuit in the process of trying to achieve quietude, however. Safety has to win all contests of priority. If safety requires that you use multiple outlets and circuits, and you end up with some noise, you just have to live with it.

Resistance To Load Should Be As Low As Possible

Wire has resistance. It may be very low, but it is definitely not zero. Resistance increases in proportion to wire length, and increases in inverse proportion to wire cross-section. In other words, 100 feet of high-gauge (thin) wire resists current more than 1 foot of low-gauge wire.

Resistance causes electrical power to be wasted as heat, and causes noticeable voltage drops across long runs of supply cable. Cable offering too much resistance for the application can overheat under heavy use. This can cause a short, or even a fire.

So, very simply, use the shortest length and lowest gauge of mains power cabling that you can. Keep in mind that everything you connect in series is adding to the length of your run; The 15-foot pigtail on that power-strip counts!

Also, remember that any power cord in direct connection to the wall MUST be rated to carry the entire load that might be present on that connection. “Branches” to individual devices down the line can use lighter-gauge cable, because that single cable doesn’t have to manage the full load on the circuit. The feed to those branches, including any power strip or multitap involved, must be capable of safely operating with the full wattage of the circuit flowing across it. (Speaking generally, “14/3” electrical cable is sufficient for most small-venue power distribution applications. Going down to 16/3 is fine for branching from a multitap, but avoid using that cable for the direct run from the wall.)


As I said, this isn’t everything there is to know about power distro. However, you might find these tips to useful as you go along.


The Mathematical Key To Truck Pack Tetris

The emptiness is as important as what is filled, grasshopper.

Please Remember:

The opinions expressed are mine only. These opinions do not necessarily reflect anybody else’s opinions. I do not own, operate, manage, or represent any band, venue, or company that I talk about, unless explicitly noted.

3dtetrisWant to use this image for something else? Great! Click it for the link to a high-res or resolution-independent version.

The world of live audio has many frustrating moments wrapped inside it, but very few of those moments is as frustrating as when the cargo vehicle refuses to wrap enough gear inside of itself. If you haven’t come to the end of your cargo space with one more box left to go inside, you may not actually have done this job.

Those of us who have spent a significant time either generating or augmenting musical noises will, generally, have gotten an intuitive grasp of “truck packing.” It’s basically 3D Tetris. You try to find nooks and crannies that might fit your gear, and then you rotate and relocate that gear to wedge into the hole you found. This process is repeated until you run out of gear to pack, or you run out of room (at 1 AM, with snow falling, a flood of tears welling up in your eyes, and a growing urge to sit down with an alcoholic beverage so as to re-examine your life).

Sometimes you run out of room because you simply have too much gear for the truck, van, SUV, moose-powered sleigh, or jet-equipped platypus. At other times, though, you get stymied due to bad math. Packing is applied geometry, and geometry, like all regular math, runs on a system of predictable rules.

The key rule to getting the most out of your cargo space can’t be talked about until we establish the meta-rule, however:

All cargo-packing must be done in a way that allows the cargo vehicle to be operated safely. If a mathematically perfect pack prevents the vehicle from being operated safely, the pack must be changed.

So, there’s the meta-rule. Here’s the key bit of math, assuming that you start with the largest items first (they have the least flexibility in terms of finding a space to squeeze into):

At any point in the pack, the remaining cargo space can be subdivided into one more more volumes described by a rectangular prism (a cubic or rectangular box). Each imaginary box of remaining space should be as large as possible; The number of imaginary boxes should be as few as possible.

In real life, this is a 3D problem. However, to make it easier to visualize, I’ll show some 2D examples. Below is our 2D cargo vehicle, with 2D roadcases strewn all around. If we can arrange the cases such that they are inside the dotted outline of our cargo vehicle, we can get to the gig.

empty

Our first try doesn’t go so well. There are supposed to be six of those light grey boxes, but we only got five in the van. The pack looks very efficient and orderly, but it doesn’t work.

oops

But, if we’re careful about continually maximizing the remaining, contiguous space during the pack, we actually make it. It’s important to note that concessions have to be made for other, physical practicalities, like generally being able to load the vehicle from the front to the back.

step1

step2

step3

step4

step5

The end result doesn’t look as orderly as our first try, but it actually lets us transport all the necessary boxes.


Treatment VS Soundproofing

Another guest post for Schwilly Family Musicians.

Please Remember:

The opinions expressed are mine only. These opinions do not necessarily reflect anybody else’s opinions. I do not own, operate, manage, or represent any band, venue, or company that I talk about, unless explicitly noted.

studioWant to use this image for something else? Great! Click it for the link to a high-res or resolution-independent version.

“It’s actually a fairly simple distinction, at least as I’ve come to understand it. Acoustical treatment is modifying the behavior of sound within a space. Soundproofing is preventing the transfer of acoustical events between spaces.”


The entire article is available, for free, right here.


A Monitor Layout For A Rock Show

Sometimes you’re thinking about audio, and sometimes not.

Please Remember:

The opinions expressed are mine only. These opinions do not necessarily reflect anybody else’s opinions. I do not own, operate, manage, or represent any band, venue, or company that I talk about, unless explicitly noted.

monitorsWant to use this image for something else? Great! Click it for the link to a high-res or resolution-independent version.

The picture attached to this article is an important reference point for the text. What you’re looking at is a scale drawing of the stage and monitor rig for the Sons Of Nothing: Clarity 10th Anniversary show.

So…why did it all end up like that?

The first thing that drives monitor placement is the stage layout – or, more precisely, where the actual players are going to be. In general, what we want to do with wedges comes down to one, simple rule: We want the loudspeaker output to hit whoever is supposed to be listening to it, while hitting as little of anything else as possible.

Of course, that rule gets bent (or simply taken outside and used for target practice with heavy artillery and wiffle bats) for various reasons, but it’s the starting point.

Down front, the plan was to have up to three people in play at any given moment. A guitarist downstage right, a solo vocal or solo guitar downstage right center, and a bassist parked down center. The down left riser was a dedicated space for a separate “keys and guitar” world. Center right was to be the land of woodwinds.

Upstage was split because of a need to run video. Sons Of Nothing uses projection as a key part of the concert, and in this case, front-projection was the order of the day. That meant that we needed a clear shot for the projector to fire “through” the band and onto the back wall. To get that open space, we put the drum riser off to the stage right side, and the backup-vocal riser went the opposite way.


Now, with the rule that I stated above, the natural inclination would be to always get a loudspeaker delivering a foldback mix as close to the players as could be physically managed. That’s not a bad rule of thumb. In fact, that’s a huge advantage of in-ears; You get to put the monitors so close to the player that they are partially inside their head, and only deliver usable output to that musician.

But an important realization is that live-sound is not actually about the best sound, as divorced from everything else. Rather, what we’re trying to do is create the best show, which is a holistic exercise.

Hence, the three downstage wedges were set on the floor, rather than up on the deck. The difference in distance was negligible, but a couple of very nice advantages were gained. Advantage 1 was that the loudspeakers no longer had as much physical contact with the riser, so they didn’t transfer as much vibration to the stage. Advantage 2 was that rather more of the main riser was available for actual people and the things they need to have to play well – like guitar-effect pedal boards.

A natural tendency is to set a player’s wedge such that it’s centered in front of them. In most circumstances, this is a reasonable idea. With a mono mix, most people like getting the output into both ears equally. There’s a problem, though, when keyboards enter into the equation. Physically, they’re pretty big and solid, and thus are very good at blocking the oh-so-critical “intelligibility frequencies” from a loudspeaker. Plus, keyboards can’t hear. It’s waste of output to fire a wedge into the bottom of a keys setup.

That’s why the keys wedge is off to the side. That placement allowed the sound from the drivers to have a clearer path to an actual human ear. A big help with making that placement work was the use of supercardioid-pattern microphones. Their pickup null points are at an angle to the rear of the mic (rather than straight back) and they have a tighter pattern in general. That helps significantly in being able to get enough output from a box that’s coming in from a diagonal. (With supercardioids and a monitor directly in front of the player, having the mic parallel with the floor helps to get that wedge firing into the least sensitive areas of the pattern.)

I would have liked to have put the keys wedge on the floor, but I was worried that the necessary distance for a good angle would be too much of a tradeoff.


Talking about the upstage folks, it might seem a bit weird that the backup-vocal wedge was set so that the riser partially blocked its output. There is an explanation though. First, I was concerned about chewing up real-estate on that platform, because there wasn’t much to go around. Second, some blockage from the riser was actually helpful. Plenty of sound that needed to get to the vocalists’ ears could still get there, with “splash” from the back wall mostly heading up into the acoustically treated ceiling. If the wedge had been up on the riser with the singers, there would have been a lot more spatter in general, and a lot of those reflections might have headed directly for the vocal mic in keyboard land.

The drumfill was an exercise in compromise. From a purely audio-centric perspective, it would probably have been best to to put things on the stage-left side of the drummer, with the full-range wedge off the sub and pointed upwards. The backup vocalists wouldn’t get blasted with the drummer’s monitor mix, and excess spill would go up into the ceiling. Unfortunately, logistics got in the way of this. Most of the square-footage on the drum riser was needed for…you know…drums, and so the “idealized” drumfill setup was too greedy for space. It also would have made it very hard, or maybe even impossible for the percussionist to enter from stage left as was planned. Stacking the drumfill on the left would have blocked the video.

So, a tall stack on the up-right corner was the solution.


One bit that I haven’t yet discussed is that lonely subwoofer that’s just upstage of center. What the heck is that?

Well, remember that down-center was the bass-player’s territory. As an additional wrinkle, no bass backline was brought in, except for a wireless rig. Such being the case, we needed to ensure that adequate low-end was produced for the folks on stage. Sonically, it would have been better to push the subwoofer downstage a bit (to reduce the time-arrival difference between the low-frequency information and everything else), but it seemed more important overall that it just not be in the way. So, I set the box flush with the drum riser, dialed the internal crossover for about 90 – 100 Hz, pulled the high-pass output to the down-center wedge, and the bassist ended up with a triamped monitor rig that could make some rumble without being run hard.

As far as I could tell, the overall setup was a success. Now, if only the woodwinds monitor hadn’t become unplugged at an unhelpful time…


Single-Ended Measurement

I really prefer it over minutes on-end of loud pink-noise.

Please Remember:

The opinions expressed are mine only. These opinions do not necessarily reflect anybody else’s opinions. I do not own, operate, manage, or represent any band, venue, or company that I talk about, unless explicitly noted.

single-ended-measurementWant to use this image for something else? Great! Click it for the link to a high-res or resolution-independent version.

Today, I helped teach a live-sound class at Broadview Entertainment Arts University. We put a stage together, ran power, and set both Front Of House (FOH) and monitor-world loudspeakers. To cap-off the day, I decided to show the students a bit about measuring and tuning the boxes that we had just finished squaring away.

The software we used was Room EQ Wizard.

The more I use “REW,” the more I like the way it works. Its particular mode of operation isn’t exactly industry-standard, but I do have a tendency to ignore the trends when they aren’t really helpful or interesting to me. Rather than continually blasting pink-noise (statistically uncorrelated audio signals with equal energy per octave from 20 Hz to 20 kHz) into a room for several minutes while you tweak your EQ, Room EQ Wizard plays a predetermined sine-sweep. It then shows you a graph, you make your tweaks based on the graph, you re-measure, and iterate as many times as needed.

I prefer this workflow for more than one reason.

Single Ended Measurements Are Harder To Screw Up

The industry-standard method for measuring and tuning loudspeakers is that of the dual-FFT. If you’ve used or heard of SysTune or SMAART, among others, those are dual-FFT systems. You run an essentially arbitrary signal through your rig, with that signal not necessarily being “known” ahead of time. That signal has to be captured at two points:

1) Before it enters the signal chain you actually want to test.

2) After it exits the signal chain in question.

And, of course, you have to compensate for any propagation delay between those two points. Otherwise, your measurement will get contaminated with statistical “noise,” and become harder to read in a useful way – especially if phase matters to you. Averaging does help with this, to be fair, and I do average my “REW” curves to make them easier to parse. Anybody who has taken and examined a measurement trace in a real room knows that unsmoothed results look pretty terrifying.

In any event, dual-FFT measurements tend to be more difficult to set up and run effectively. On top of how easy it is to screw up ANY measurement, whether by measuring the wrong thing, forgetting an upstream EQ, or putting the mic in a terrible spot, you have the added hassles of getting your two measurement points routed and delay-compensated.

Over the years, dual-FFT packages have gotten much better at guiding users through the process, internally looping back the reference signal, and automatically picking compensation delay times. Even so, automating a complicated process doesn’t make the process less complicated. It just shields you from the complexity for as long as the automation can help you. (I’m not bagging on SMAART and SysTune here. They’re good bits of software that plenty of folks use successfully. I’m just pointing some things out.)

Single Ended, “Sweep” Measurements Can Be Quieter (And Less Annoying)

Another issue with measurements involving broadband signals is that they have greater susceptibility to in-room noise. As a whole, the noise may be quite loud. However, any given frequency can’t be running very “hot,” as the entire signal has to make it cleanly through the signal path. As such, noise in the room easily contaminates the test at the frequencies contained within that noise, unless you run the test signal loudly enough. With a single-ended, sine-sweep measurement, the instant that the measurement tone is at a certain frequency, the entire system output is dedicated to that frequency alone. As such, if you have in-room noise of 50 dB SPL at 1 kHz, running your measurement signal at 70 dB SPL should completely blow past the noise – while remaining comfortable to hear. With broadband noise, the measurement signal in the same situation might have to be 90 dB SPL.

Please note that single-ended measurements of broadband signals DO exist, and they have similar problems with noise as compared to broadband-noise, dual-FFT solutions.

The other nice thing about “sweep” measurements is that everybody gets a break from the noise. For 10 seconds or so, a rising tone sounds through the system, and then it stops. This is a stark contrast to minutes of “KSSSSSHHHHHH” that otherwise have to be endured.

Quality, Single Ended Measurement Software Can Be Cheaper

A person could conceivably design and build single-ended measurement software, and then sell it for a large amount of money. A person could also create dual-FFT software and give it away for free (Visual Analyzer is a good example).

However, on average, it seems that when it comes time to bring “easy to use” and “affordable” together, single-ended is where you’ll have to look. I really like Visual Analyzer, but you really, really have to know what you’re doing to use it effectively. SMAART and SysTune are user-friendly while also being incredibly powerful, but cost $700 – $1000 to acquire.

Room EQ Wizard is friendly (at least to me), and free. It’s hard to beat free when it’s also good.


I want to be careful to say (again) that I’m not trying to get people away from the highly-developed and widely accepted toolsets available in dual-FFT measurement packages. What I’m trying to say is that “dual-FFT with broadband noise in pseudo-realtime” isn’t the only way to measure and tune a sound system. There are other options that are easier to get into, and you can always step up later.