Category Archives: Gear for Sound and Lighting

Reviews and opinions regarding audio and lighting equipment.

The Great, Quantitative, Live-Mic Shootout

A tool to help figure out what (inexpensive) mic to buy.

Please Remember:

The opinions expressed are mine only. These opinions do not necessarily reflect anybody else’s opinions. I do not own, operate, manage, or represent any band, venue, or company that I talk about, unless explicitly noted.

Want to use this image for something else? Great! Click it for the link to a high-res or resolution-independent version.

See that link up there in the header?

It takes you to The Great, Quantitative, Live-Mic Shootout, just like this link does. (Courtesy of the Department of Redundancy Department.)

And that’s a big deal, because I’ve been thinking and dreaming about doing that very research project for the past four years. Yup! The Small Venue Survivalist is four years old now. Thanks to my Patreon supporters, past and present, for helping to make this idea a reality.

I invite you to go over and take a look.


The Grand Experiment

A plan for an objective comparison of the SM58 to various other “live sound” microphones.

Please Remember:

The opinions expressed are mine only. These opinions do not necessarily reflect anybody else’s opinions. I do not own, operate, manage, or represent any band, venue, or company that I talk about, unless explicitly noted.

Want to use this image for something else? Great! Click it for the link to a high-res or resolution-independent version.

Purpose And Explanation

Ever since The Small Venue Survivalist became a reality, I have wanted to do a big experiment. I’ve been itching to round up a bunch of microphones that can be purchased for either below, or slightly above the price point of the SM58, and then to objectively compare them to an SM58. (The Shure SM58 continues to be an industry standard microphone that is recognized and accepted everywhere as a sound-reinforcement tool.)

The key word above is “objectively.” Finding subjective microphone comparisons isn’t too hard. Sweetwater just put together (in 2017) a massive studio-mic shootout, and it was subjective. That is, the measurement data is audio files that you must listen to. This isn’t a bad thing, and it makes sense for studio mics – what matters most is how the mic sounds to you. Listening tests are everywhere, and they have their place.

In live audio, though, the mic’s sound is only one factor amongst many important variables. Further, these variables can be quantified. Resistance to mechanically-induced noise can be expressed as a decibel number. So can resistance to wind noise. So can feedback rejection. Knowing how different transducers stack up to one another is critical for making good purchasing decisions, and yet this kind of quantitative information just doesn’t seem to be available.

So, it seems that some attempt at compiling such measurements might be helpful.

Planned Experimental Procedure

Measure Proximity Effect

1) Generate a 100Hz tone through a loudspeaker at a repeatable SPL.

2) Place the microphone such that it is pointed directly at the center of the driver producing the tone. The front of the grill should be 6 inches from the loudspeaker baffle.

3) Establish an input level from the microphone, and note the value.

4) Without changing the orientation of the microphone relative to the driver, move the microphone to a point where the front of the grill is 1 inch from the loudspeaker baffle.

5) Note the difference in the input level, relative to the level obtained in step 3.

Assumptions: Microphones with greater resistance to proximity effect will exhibit a smaller level differential. Greater proximity effect resistance is considered desirable.

Establish “Equivalent Gain” For Further Testing

1) Place a monitor loudspeaker on the floor, and position the microphone on a tripod stand. The stand leg nearest the monitor should be at a repeatable distance, at least 1 foot from the monitor enclosure.

2) Set the height of the microphone stand to a repeatable position that would be appropriate for an average-height performer.

3) Changing the height of the microphone as little as possible, point the microphone directly at the center of the monitor.

4) Generate pink-noise through the monitor at a repeatable SPL.

5) Using a meter capable of RMS averaging, establish a -40 dBFS RMS input level.

Measure Mechanical Noise Susceptibility

1) Set the microphone such that it is parallel to the floor.

2) Directly above the point where the microphone grill meets the body, hold a solid, semi-rigid object (like an eraser, or small rubber ball) at a repeatable distance at least 1 inch over the mic.

3) Allow the object to fall and strike the microphone.

4) Note the peak input level created by the strike.

Assumptions: Microphones with greater resistance to mechanically induced noise will exhibit a lower input level. Greater resistance to mechanically induced noise is considered desirable.

Measure Wind Noise Susceptibility

1) Position the microphone on the stand such that it is parallel to the floor.

2) Place a small fan (or other source of airflow which has repeatable windspeed and air displacement volume) 6 inches from the mic’s grill.

3) Activate the fan for 10 seconds. Note the peak input level created.

Assumptions: Microphones with greater resistance to wind noise will exhibit a lower input level. Greater resistance to wind noise is considered desirable.

Measure Feedback Resistance

1) Set the microphone in a working position. For cardioid mics, the rear of the microphone should be pointed directly at the monitor. For supercardioid and hypercardioid mics, the the microphone should be parallel with the floor.

2a) SM58 ONLY: Set a send level to the monitor that is just below noticeable ringing/ feedback.

2b) Use the send level determined in 2a to create loop-gain for the microphone.

3) Set a delay of 1000ms to the monitor.

4) Begin a recording of the mic’s output.

5) Generate a 500ms burst of pink-noise through the monitor. Allow the delayed feedback loop to sound several times.

6) Stop the recording, and make note of the peak level of the first repeat of the loop.

Assumptions: Microphones with greater feedback resistance will exhibit a lower input level on the first repeat. Greater feedback resistance is considered desirable.

Measure Cupping Resistance

1) Mute the send from the microphone to the monitor.

2) Obtain a frequency magnitude measurement of the microphone in the working position, using the monitor as the test audio source.

3) Place a hand around as much of the mic’s windscreen as is possible.

4) Re-run the frequency magnitude measurement.

5) On the “cupped” measurement, note the difference between the highest response peak, and that frequency’s level on the normal measurement.

Assumptions: Microphones with greater cupping resistance will exhibit a smaller level differential between the highest peak of the cupped response and that frequency’s magnitude on the normal trace. Greater cupping resistance is considered desirable.


Measuring A Cupped Mic

What you might think would happen isn’t what happens.

Please Remember:

The opinions expressed are mine only. These opinions do not necessarily reflect anybody else’s opinions. I do not own, operate, manage, or represent any band, venue, or company that I talk about, unless explicitly noted.

Want to use this image for something else? Great! Click it for the link to a high-res or resolution-independent version.

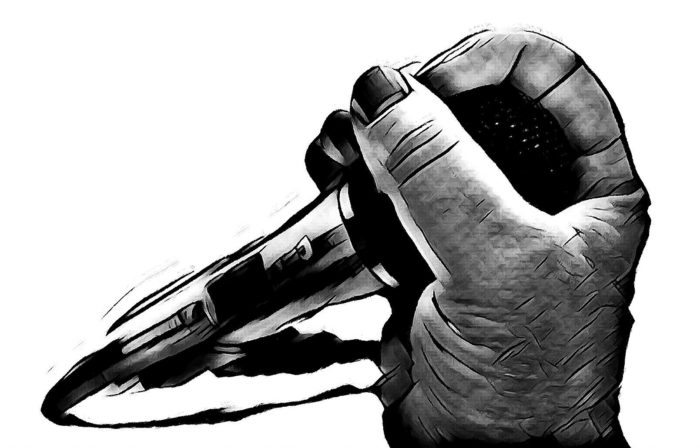
The most popular article on this site to date is the one where I talk about why cupping a vocal mic is generally a “bad things category” sort of experience. In that piece, I explain some general issues with wrapping one’s hand around a microphone grill, but there’s something I didn’t do:

I didn’t measure anything.

That reality finally dawned on me, so I decided to do a quck-n-dirty experiment on how a microphone’s transfer function changes when cupping comes into play. Different mics will do different things, so any measurement is only valid for one mic in one situation. However, even if the results can’t truly be generalized, they are illuminating.

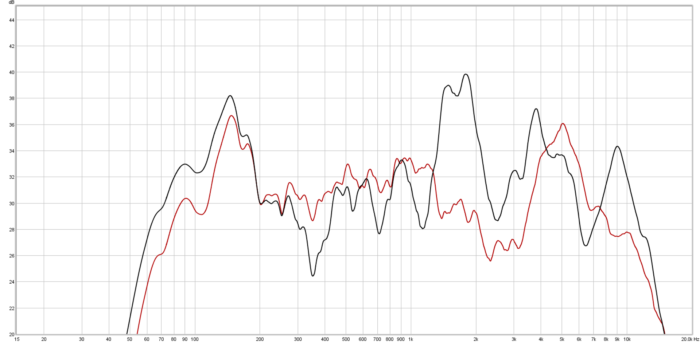
In the following picture, the red trace is a mic pointing away from a speaker, as you would want to happen in monitor-world. The black trace is the mic in the same position, except with my hand covering a large portion of the windscreen mesh.

You would think that covering a large part of the mic’s business-end would kill off a lot of midrange and high-frequency information, but the measurement says otherwise. The high-mid and HF information is actually rather hotter, with large peaks at 1800 Hz, 3900 Hz, and 9000 Hz. The low frequency response below 200 Hz is also given a small kick in the pants. Overall, the microphone transfer function is “wild,” with more pronounced differences between peaks and dips.

The upshot? The transducer’s feedback characteristics get harder to manage, and the sonic characteristics of the unit begin to favor the most annoying parts of the audible spectrum.

Like I said, this experiment is only valid for one mic (a Sennheiser e822s that I had handy). At the same time, my experience is that other mics have “cupping behavior” which is not entirely dissimilar.


Thoughts On Earplugs

They’re a good idea, and you don’t have to spend much to get good ones.

Please Remember:

The opinions expressed are mine only. These opinions do not necessarily reflect anybody else’s opinions. I do not own, operate, manage, or represent any band, venue, or company that I talk about, unless explicitly noted.

Want to use this image for something else? Great! Click it for the link to a high-res or resolution-independent version.
The Video

The Summary

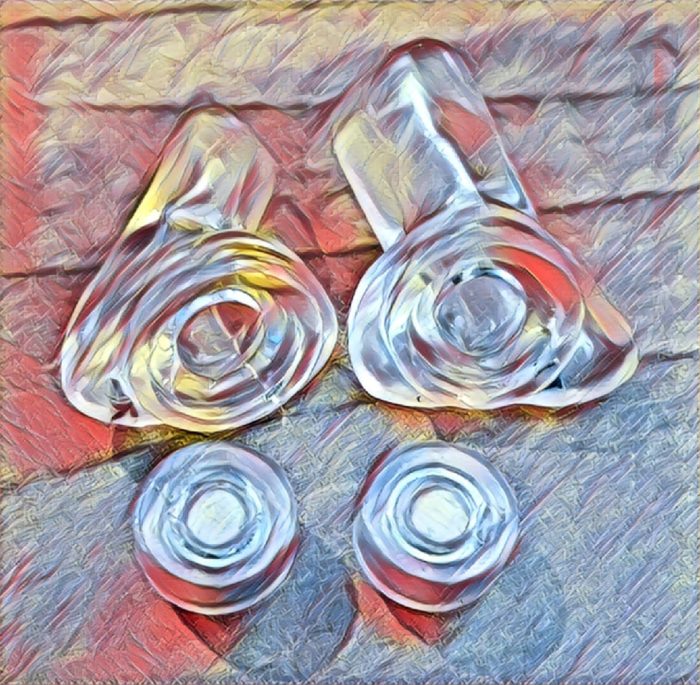
You only get one pair of ears, so protect them with plugs. Don’t let anyone tell you not to do so. “Flat response” plugs can be both generic or custom fitted, with custom molds having a large advantage in overall comfort.


You Don’t Just Need A Bigger Amp

Headroom is a holistic thing. If you run out of it in one place, getting more of it somewhere else isn’t enough.

Please Remember:

The opinions expressed are mine only. These opinions do not necessarily reflect anybody else’s opinions. I do not own, operate, manage, or represent any band, venue, or company that I talk about, unless explicitly noted.

Want to use this image for something else? Great! Click it for the link to a high-res or resolution-independent version.
The Video

The Script

Let’s say that an audio human has a mixing console that’s feeding a loudspeaker system. (That makes sense, right? Most of us do that a lot.) This loudspeaker system is nifty because it’s magic. It never clips. The only limit on output is how much voltage the console can deliver.

The weird bit is that the console can’t really swing much voltage at its outputs. It clips at a peak of 1 volt. Another weird thing is that the console doesn’t have any inboard mic pres. Those are separate. (I know this is really strange, but I’m trying to make a point.)

Our aforementioned audio human just happens to have a mic pre that also reaches its maximum output at a 1 volt peak. They connect a signal source to the preamp, crank the pre until it’s just barely under clipping, set a fader at 0 dB, and…it’s not loud enough.

So, what do they do?

If you said, “They need a console with more output capability,” you’re exactly right.

It wouldn’t make any sense to buy a mic pre with more output, right? If the console output clips at 1 volt, what good does it do to have a mic pre that will deliver 12 volts into the console? You can drive the signal to the mix outputs a lot harder, but all that gets you is more distortion.

Obtaining and connecting an upstream device with more output is kinda absurd, frankly. It’s not a solution at all. The console output is the limiting factor.

But here’s the thing.

People take this actually non-sensical approach with amps and speakers all the time. Some of the confusion is understandable. Amplifier and speaker power ratings aren’t necessarily intuitive, for one, and passive speakers don’t have level meters as a rule. There’s also all the complexity involved with trying to describe the limits of a multi-device speaker enclosure with a single number.

I get that there’s nuance involved here.

But here’s the thing. Speakers, like everything else, have a maximum undistorted output point. It’s a peak level – a point beyond which there is no more “instantaneous” sound pressure to be had. If you have, say, a loudspeaker that can handle a peak input of 1000 watts, and an amplifier that can put a 1000 watt peak input through that box…you’re there. Your system is maximized. Any more available amplifier power is wasted on both driver distortion AND the chance that you might wreck your speaker.

But people see those nasty little clip lights on their amps, and think: “Gosh, I need to buy a more powerful amplifier!” They get obsessed with headroom, but in this compartmentalized way that only involves the amp.

Actually, unless the amp’s peak (NOT CONTINUOUS – PEAK)…unless the amp’s peak output is half (or less) of the speaker’s maximum peak rating, you do NOT need a larger amp. Getting a more powerful amplifier only gets you more headroom in the amplifier, when what you actually want is more headroom throughout the entire system output section.

What you need is a speaker that gets louder for the same amount of input. Or a bigger amplifier AND a speaker that can handle the additional power. Or just “more PA” in general – although that’s a whole other can of worms in itself.


Why Are Faders Labeled Like That?

Gain multipliers are hard to read.

Please Remember:

The opinions expressed are mine only. These opinions do not necessarily reflect anybody else’s opinions. I do not own, operate, manage, or represent any band, venue, or company that I talk about, unless explicitly noted.

Want to use this image for something else? Great! Click it for the link to a high-res or resolution-independent version.
I’ve done a lot of typing on this site, and I’m worried that it’s getting stale – so, how about some video?


Drivers Don’t Have To Die With A Bang

Sane powering shields you from accidents.

Please Remember:

The opinions expressed are mine only. These opinions do not necessarily reflect anybody else’s opinions. I do not own, operate, manage, or represent any band, venue, or company that I talk about, unless explicitly noted.

Want to use this image for something else? Great! Click it for the link to a high-res or resolution-independent version.
I once lived in abject terror of pops, clicks, and bangs. I was once frightened by the thought of a musician unplugging their instrument from a “hot” input before I found the mute button. This was a result of my early experience in audio, where well-meaning (but incorrect) people had assured me that such noises were devastating to loudspeakers. A good solid “thump” from powering up a console when the amps were already on, and some poor driver would either:

A) Take another step towards doom, or…

B) Blow up like that one space station that could be confused with a small moon.

Well, that’s just a load of horsefeathers, but like all audio myths, a kernel of truth can be found. The kernel of truth is that loudspeakers CAN be destroyed by a large spike of input. There’s a reason that drivers and loudspeaker enclosures have peak ratings. Those are “Do Not Exceed” lines that you are smart to avoid crossing. Here’s the deal, though – if you’re using a sane powering strategy with passive boxes, or are using any truly decent powered speaker, worry is essentially unnecessary.

An amplifier simply can not “swing” more voltage than is available from the supply. If the peak voltage available from the amp results in power dissipation equal to or less than what the loudspeaker can handle, a brief transient won’t cook your gear. The instantaneous maximum power will be in the safe range, and the whole signal won’t last long enough for the continuous power to become a factor. An active box that’s well designed will either be powered in such a way, or it may be overpowered and then limited back into a safe range.

So, when a system is set up correctly, the odd mishap isn’t necessarily dangerous. It’s just displeasing to hear.

I believe that the persistence of this myth is due to folks who get talked into “squeezing maximum performance” out of their loudspeakers. They’re told that they have to use very large amplifiers to drive the boxes they have, and so that’s what they do. They hook up amps that can handily deliver power far beyond the “Do Not Exceed” line specified by peak ratings. If they take no other safety precautions, they ARE playing with fire. One good, solid accident, and that may be it for a driver. (If I might be so bold, I would recommend that those folks instead use my speaker powering strategy instead of “spend lots more, maybe get a touch louder, and hope you’re lucky.”)

The worrier doesn’t have to be you. Keep things reasonable, and you’ll be very unlikely to lose money because somebody yanked a cable.


How To Buy A Microphone For Live Performance

A guest-post for Schwilly Family Musicians

Please Remember:

The opinions expressed are mine only. These opinions do not necessarily reflect anybody else’s opinions. I do not own, operate, manage, or represent any band, venue, or company that I talk about, unless explicitly noted.

vintage_microphone-wallpaper-1280x800

From the article: “At the same time, though, a LOT of mics that are great for recording are a giant ball of trouble for live audio. Sure, they sound perfect when you’re in a vocal booth with headphones on, but that’s at least one whole universe removed from the brutal world of concert sound. They’re too fragile, too finicky, too heavy, their pickup patterns are too wide, and you can’t get close enough to them to leverage your vocal power.”


The whole thing is available for free, so go ahead and take a gander.


How Much Light For Your Dollar?

Measurements and observations regarding a handful of relatively inexpensive LED PARs.

Please Remember:

The opinions expressed are mine only. These opinions do not necessarily reflect anybody else’s opinions. I do not own, operate, manage, or represent any band, venue, or company that I talk about, unless explicitly noted.

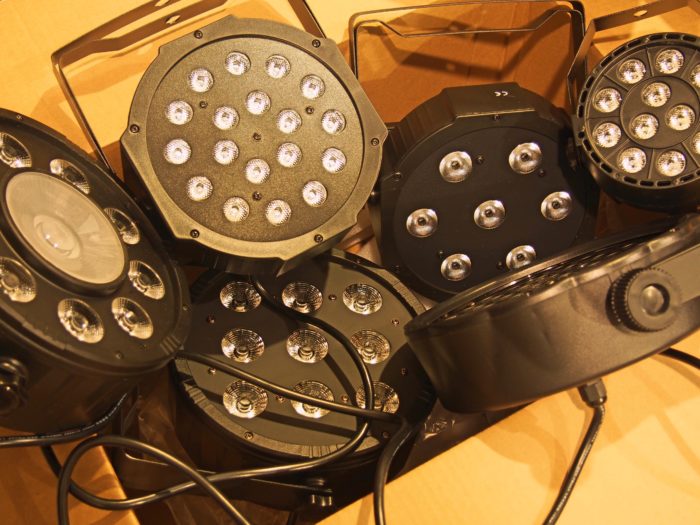
box_of_lightsWant to use this image for something else? Great! Click it for the link to a high-res or resolution-independent version.
I’m in the process of getting ready for a pretty special show. The album “Clarity” by Sons Of Nothing is turning 10, and a number of us are trying to put together one smasher of a party.

Of course, that means video.

And our master of all things videographic is concerned about having enough light. We can’t have anybody in the band who’s permanently stuck in “shadow.” You only get one chance to shoot a 10th anniversary concert, and we want to get it right.

As such, I’m looking at how to beef up my available lighting instruments. It’s been a long while since I’ve truly gone shopping for that old mainstay of small-venue lighting, the LED wash PAR, but I do take a look around every so often. There’s a lot to see, and most of it isn’t very well documented. Lighting manufacturers love to tell you how many diodes are in a luminaire, and they also like to tell you how much power the thing consumes, but there appears to be something of an allergy to coughing up output numbers.

Lux, that is. Lumens per square meter. The actual effectiveness of a light at…you know…LIGHTING things.

So, I thought to myself, “Self, wouldn’t it be interesting to buy some inexpensive lights and make an attempt at some objective measurement?”

I agreed with myself. I especially agreed because Android 4.4 devices can run a cool little Google App called “Science Journal.” The software translates the output from a phone’s ambient light sensor into units of lux. For free (plus the cost of the phone, of course). Neat!

I got onto Amazon, found myself a lighting brand (GBGS) that had numerous fixtures available for fulfillment by Amazon, and spent a few dollars. The reason for choosing fulfillment from Amazon basically comes down to this: I wanted to avoid dealing with an unknown in terms of shipping time. Small vendors can sometimes take a while to pack and ship an order. Amazon, on the other hand, is fast.

The Experiment

Step 1: Find a hallway that can be made as dark as possible – ideally, dark enough that a light meter registers 0 lux.

Step 2: At one end, put the light meter on a stand. (A mic stand with a friction clip is actually pretty good at holding a smartphone, by the way.)

Step 3: At the other end, situate a lighting stand with the “fixture under test” clamped firmly to that stand.

Step 4: Measure the distance from the lighting stand to the light meter position. (In my case, the distance was 19 feet.)

Step 5: Darken the hallway.

Step 6: Set the fixture under test to maximum output using a DMX controller.

Step 7: Allow the fixture to operate at full power for roughly 10 minutes, in case light output is reduced as the fixture’s heat increases.

Step 8: Ensure the fixture under test is aimed directly at the light meter.

Step 9: Note the value indicated by the meter.

Important Notes

A relatively long distance between the light and the meter is recommended. This is so that any positioning variance introduced by placing and replacing either the lights or the meter has a reduced effect. At close range, a small variance in distance can skew a measurement noticeably. At longer distances, that same variance value has almost no effect. A four-inch length difference at 19 feet is about a 2% error, whereas that same length differential at 3 feet is an 11% error.

It’s important to note that the hallway used for the measurement had white walls. This may have pushed the readings higher, as – similarly to audio – energy that would otherwise be lost to absorption is re-emitted and potentially measurable.

It was somewhat difficult to get a “steady” measurement using the phone as a meter. As such, I have estimated lux readings that are slightly lower than the peak numbers I observed.

These fixtures may or may not be suitable for your application. These tests cannot meaningfully speak to durability, reliability, acceptability in a given setting, and so on.

The calculation for 1 meter lux was as follows:

19′ = 5.7912 m

5.7912 = 2^2.53 (2.53 doublings of distance from 1m)

Assumed inverse square law for intensity; For each doubling of distance, intensity quadruples.

Multiply 19′ lux by 4^2.53 (33.53)

Calculated 1 meter lux values are just that – calculated. LED PAR lights are not a point-source of light, and so do not behave like one. It requires a certain distance from the fixture for all the emitters to combine and appear as though they are a single source of light.

The Data

The data display requires Javascript to work. I’m sorry about that – I personally dislike it when sites can’t display content without Javascript. However, for the moment I’m backed into a corner by the way that WordPress works with PHP, so Javascript it is.


Ascending sort by:


Loud, Low, Little

You may pick two, maximum.

Please Remember:

The opinions expressed are mine only. These opinions do not necessarily reflect anybody else’s opinions. I do not own, operate, manage, or represent any band, venue, or company that I talk about, unless explicitly noted.

speakerwallWant to use this image for something else? Great! Click it for the link to a high-res or resolution-independent version.
Most of you have probably heard the old chestnut, “Good, fast, cheap. You may pick two of the three.” The saying is an “iron law” of project management.

There’s a very similar law when it comes to loudspeakers:

A loudspeaker might be inherently efficient (Loud), it might reproduce useful low-frequency information (Low), and it might be compact in size (Little). You can’t get more than two of those things to happen at once.

By way of example, let’s take a gander at the high-frequency horn section in your typical, full-range, live-sound box. In all likelihood, it produces quite a bit of SPL with not very much power – lots of affordable, high-frequency compression drivers won’t handle more than 50 watts of continuous input. Heck, some can barely manage 20! The driver is quite small, especially when compared to a 12″ or 15″ cone.

Loud and little is 100% within that driver’s wheelhouse, but it won’t go low. If it did, there wouldn’t be a low-frequency driver in the cabinet. To prevent that itty-bitty compression driver from being wrecked, a high-pass crossover filter is needed. The corner frequency of that filter might be up at 2.5 kHz or so. There’s nobody on Earth who would confuse the high-midrange/ high-frequency transition zone for “lows.”

The above is fairly intuitive for most, but it can be a bit easier to get bamboozled when you see a big driver. An 18″ driver must be able to make really low-frequency material at high volume, right? Well…maybe. The box that driver is sitting in is a HUGE part of the equation; A large-diameter diaphragm isn’t enough. The smaller the box gets, the more power you have to dump into the driver to get the really deep material to play “loud.” Past a certain point, things get ridiculous in one way or another, which includes the unbridled hilarity of cooking the voice coil or destroying the suspension.

A compact subwoofer is highly unlikely to do a whole lot for you below about 50 Hz. Forty Hz might be doable at “half power” if the manufacturer is using a bandpass design for the box. (A bandpass design is great in a small frequency range, and terrible everywhere else – which is perfectly fine for a subwoofer.)

You have to decide on what you actually need, versus what you think you need.

For rock-band reinforcement, really deep bass actually isn’t a top requirement. Mostly, what we need is high output, though not so high that we run the whole audience out of the room. I haven’t really cared about anything below 50 Hz for a long time, especially because large SPL at low frequency is what annoys the “neighbors” the most easily. “Varsity-Level” EDM, on the other hand, can be HIGHLY dependent on very, very low frequency information (35 Hz or even lower) that has to be at levels exceeding 110 dB SPL C, slow-average. Doing that in a reasonable way demands bigger boxes, or several truckloads of smaller boxes.

So, when you’re out shopping for low-frequency loudspeakers, be wary of anything that claims to be effective for concert sound below 50 Hz, while also fitting easily into the trunk of a compact car. If a single box is going to play low AND loud without a staggering amount of amplifier power, it just can’t be little.