Tag Archives: Gear

The Unterminated Line

If nothing’s connected and there’s still a lot of noise, you might want to call the repair shop.

Please Remember:

The opinions expressed are mine only. These opinions do not necessarily reflect anybody else’s opinions. I do not own, operate, manage, or represent any band, venue, or company that I talk about, unless explicitly noted.

Want to use this image for something else? Great! Click it for the link to a high-res or resolution-independent version.

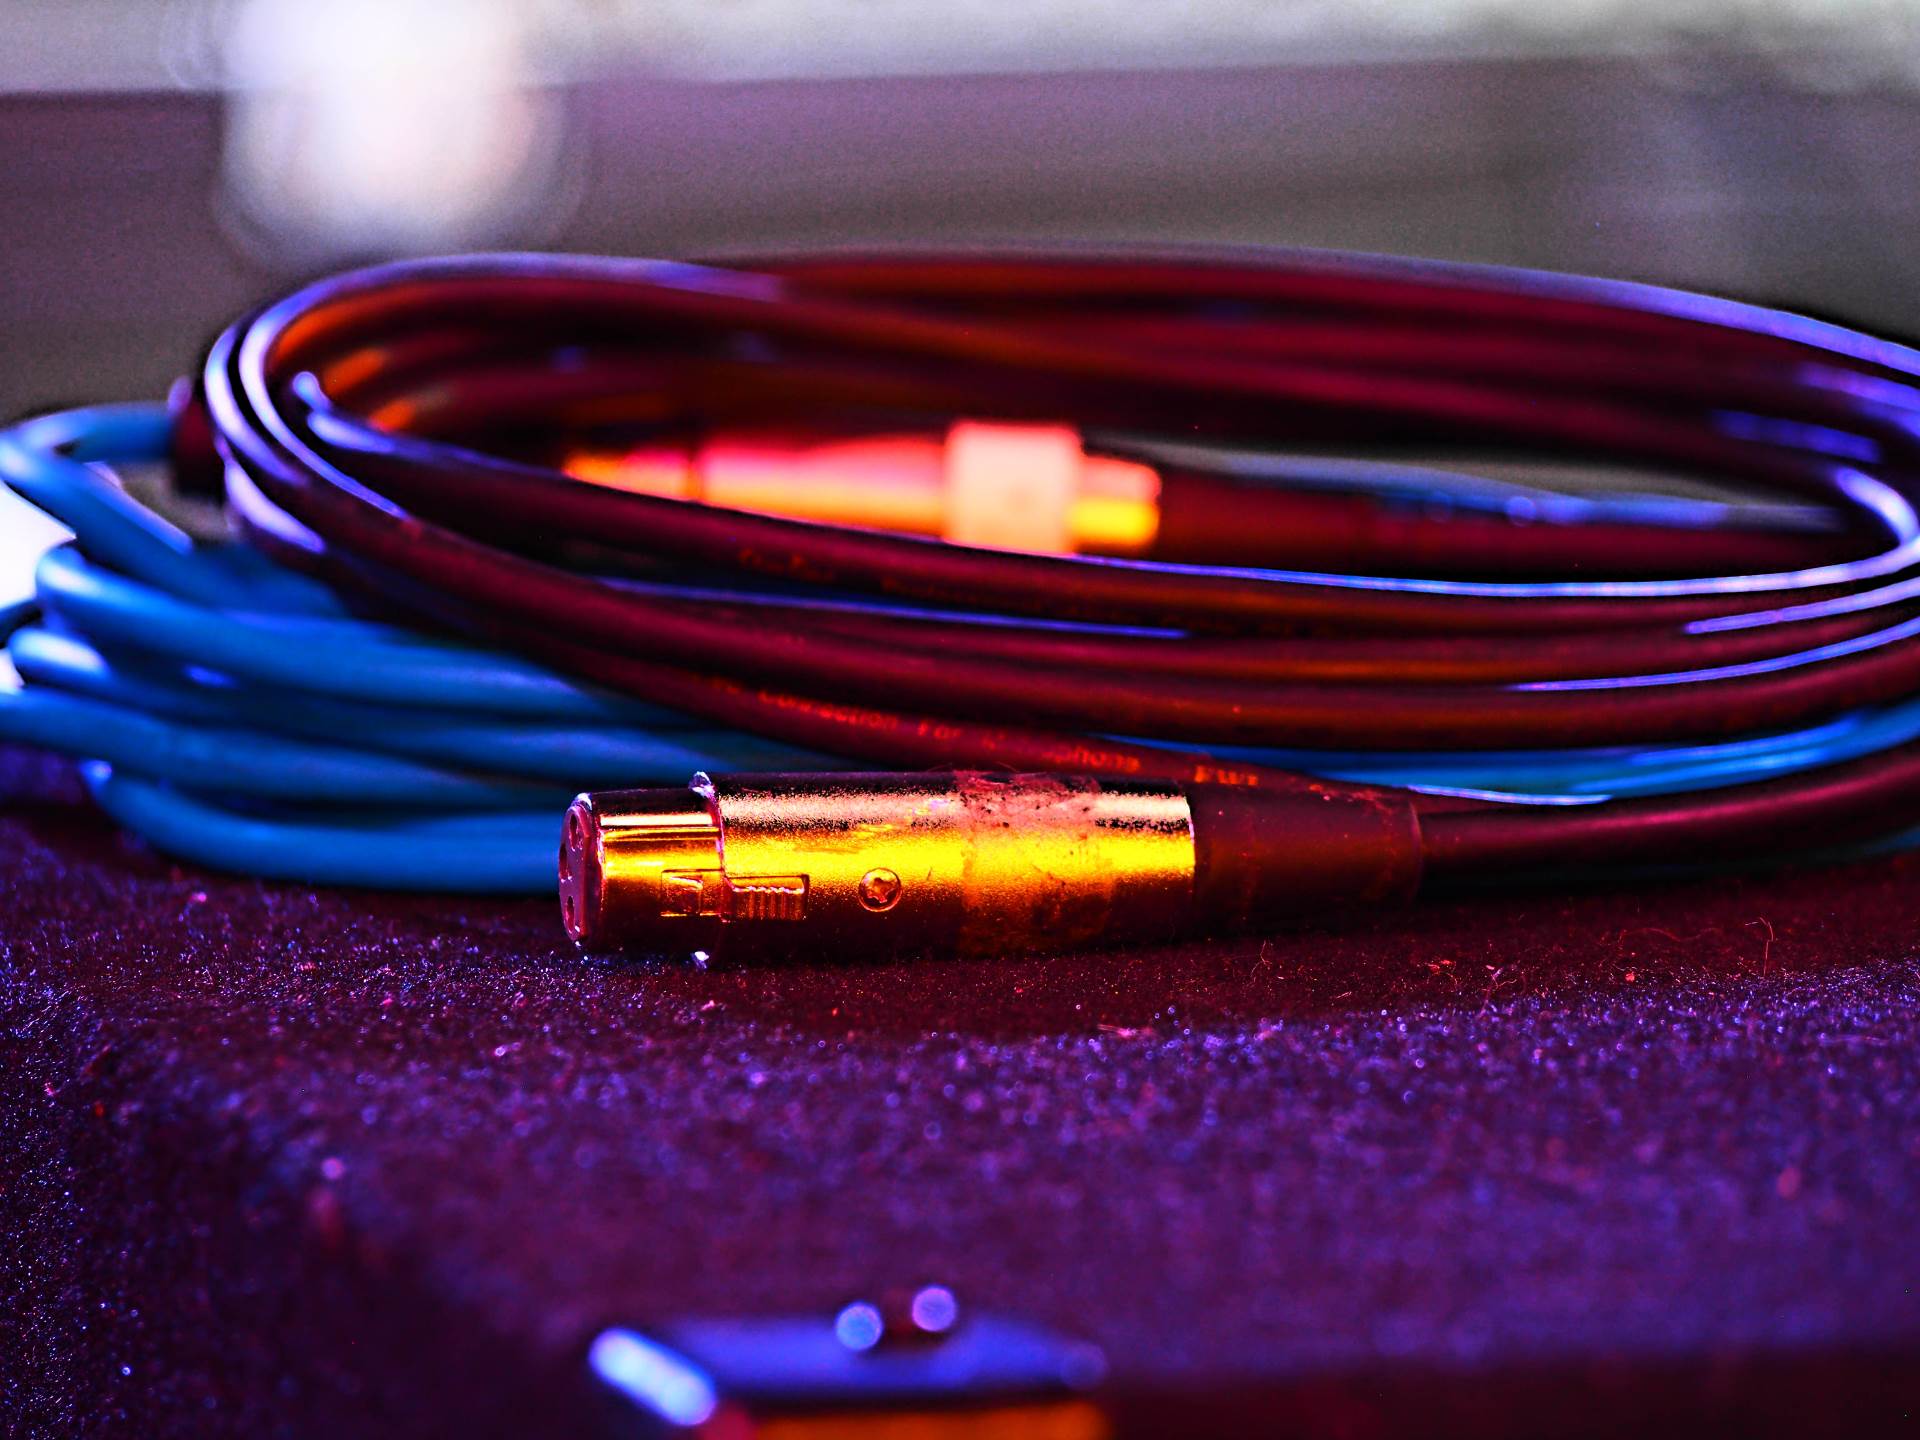
“I thought we fixed the noise on the drum-brain inputs?” I mused aloud, as one of the channels in question hummed like hymenoptera in flight. I had come in to help with another rehearsal for the band called SALT, and I was perplexed. We had previously chased down a bit of noise that was due to a ground loop; Getting everything connected to a common earthing conductor seemed to have helped.

Yet here we were, channel two stubbornly buzzing away.

Another change to the power distribution scheme didn’t help.

Then, I disconnected the cables from the drum-brain. Suddenly – the noise continued, unchanged. Curious. I pulled the connections at the mixer side. Abruptly, nothing happened. Or rather, the noise continued to happen. Oh, dear.


When chasing unwanted noise, disconnecting things is one of your most powerful tools. As you move along a signal chain, you can break the connection at successive places. When you open the circuit and the noise stops, you know that the supplier of your spurious signal is upstream of the break.

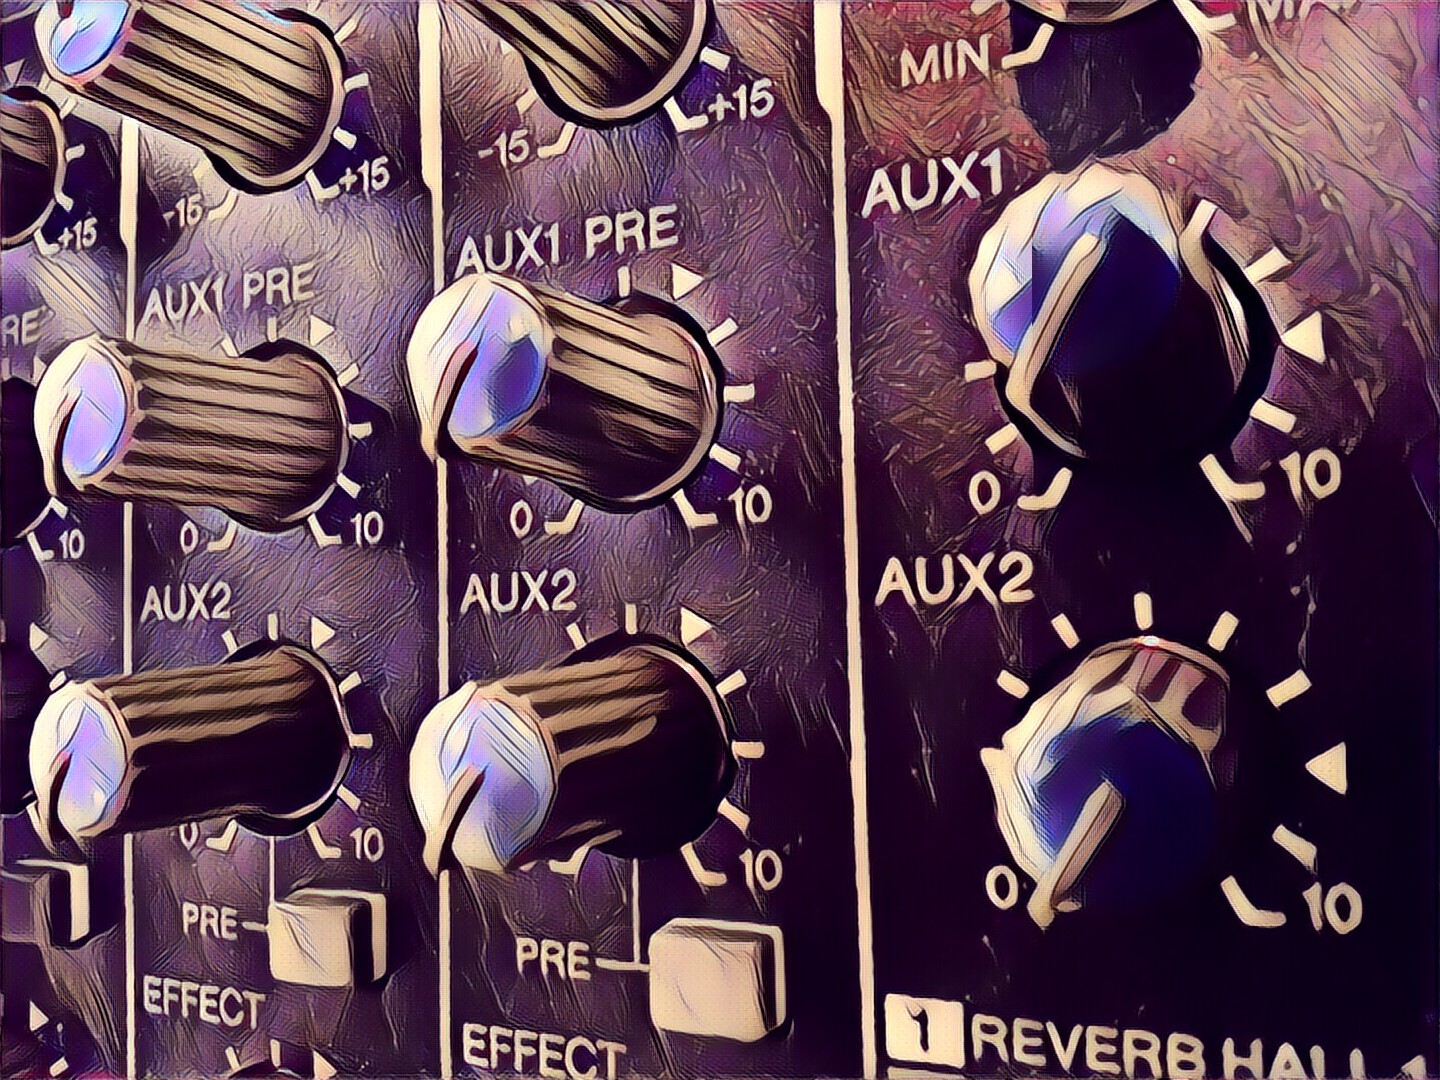
Disconnecting the cable to the mixer input should have resulted in relative silence. An unterminated line, that is, an input that is NOT connected to upstream electronics, should be very quiet in this day and age. If something unexplained is driving a console input hard enough to show up on an input meter, yanking out the patch should yield a big drop in the visible and audible level. When that didn’t happen, logic dictated an uncomfortable reality:

1) The problem was still audible, and sounded the same.

3) The input meter was unchanged, continuing to show electrical activity.

4) Muting the input stopped the noise.

5) The problem was, therefore, post the signal cable and pre the channel mute.

In a digital console, this strongly indicates that something to do with the analog input has suffered some sort of failure. Maybe the jack’s internals weren’t quite up to spec. Maybe a solder joint was just good enough to make it through Quality Control, but then let go after some time passed.

In any case, we didn’t have a problem we could fix directly. Luckily, we had some spare channels at the other end of the input count, so we moved the drum-brain connections there. The result was a pair of inputs that were free of the annoying hum, which was nice.

But if you looked at the meter for channel two, there it still was: A surprisingly large amount of input on an unterminated line.


The Grand Experiment

A plan for an objective comparison of the SM58 to various other “live sound” microphones.

Please Remember:

The opinions expressed are mine only. These opinions do not necessarily reflect anybody else’s opinions. I do not own, operate, manage, or represent any band, venue, or company that I talk about, unless explicitly noted.

Want to use this image for something else? Great! Click it for the link to a high-res or resolution-independent version.

Purpose And Explanation

Ever since The Small Venue Survivalist became a reality, I have wanted to do a big experiment. I’ve been itching to round up a bunch of microphones that can be purchased for either below, or slightly above the price point of the SM58, and then to objectively compare them to an SM58. (The Shure SM58 continues to be an industry standard microphone that is recognized and accepted everywhere as a sound-reinforcement tool.)

The key word above is “objectively.” Finding subjective microphone comparisons isn’t too hard. Sweetwater just put together (in 2017) a massive studio-mic shootout, and it was subjective. That is, the measurement data is audio files that you must listen to. This isn’t a bad thing, and it makes sense for studio mics – what matters most is how the mic sounds to you. Listening tests are everywhere, and they have their place.

In live audio, though, the mic’s sound is only one factor amongst many important variables. Further, these variables can be quantified. Resistance to mechanically-induced noise can be expressed as a decibel number. So can resistance to wind noise. So can feedback rejection. Knowing how different transducers stack up to one another is critical for making good purchasing decisions, and yet this kind of quantitative information just doesn’t seem to be available.

So, it seems that some attempt at compiling such measurements might be helpful.

Planned Experimental Procedure

Measure Proximity Effect

1) Generate a 100Hz tone through a loudspeaker at a repeatable SPL.

2) Place the microphone such that it is pointed directly at the center of the driver producing the tone. The front of the grill should be 6 inches from the loudspeaker baffle.

3) Establish an input level from the microphone, and note the value.

4) Without changing the orientation of the microphone relative to the driver, move the microphone to a point where the front of the grill is 1 inch from the loudspeaker baffle.

5) Note the difference in the input level, relative to the level obtained in step 3.

Assumptions: Microphones with greater resistance to proximity effect will exhibit a smaller level differential. Greater proximity effect resistance is considered desirable.

Establish “Equivalent Gain” For Further Testing

1) Place a monitor loudspeaker on the floor, and position the microphone on a tripod stand. The stand leg nearest the monitor should be at a repeatable distance, at least 1 foot from the monitor enclosure.

2) Set the height of the microphone stand to a repeatable position that would be appropriate for an average-height performer.

3) Changing the height of the microphone as little as possible, point the microphone directly at the center of the monitor.

4) Generate pink-noise through the monitor at a repeatable SPL.

5) Using a meter capable of RMS averaging, establish a -40 dBFS RMS input level.

Measure Mechanical Noise Susceptibility

1) Set the microphone such that it is parallel to the floor.

2) Directly above the point where the microphone grill meets the body, hold a solid, semi-rigid object (like an eraser, or small rubber ball) at a repeatable distance at least 1 inch over the mic.

3) Allow the object to fall and strike the microphone.

4) Note the peak input level created by the strike.

Assumptions: Microphones with greater resistance to mechanically induced noise will exhibit a lower input level. Greater resistance to mechanically induced noise is considered desirable.

Measure Wind Noise Susceptibility

1) Position the microphone on the stand such that it is parallel to the floor.

2) Place a small fan (or other source of airflow which has repeatable windspeed and air displacement volume) 6 inches from the mic’s grill.

3) Activate the fan for 10 seconds. Note the peak input level created.

Assumptions: Microphones with greater resistance to wind noise will exhibit a lower input level. Greater resistance to wind noise is considered desirable.

Measure Feedback Resistance

1) Set the microphone in a working position. For cardioid mics, the rear of the microphone should be pointed directly at the monitor. For supercardioid and hypercardioid mics, the the microphone should be parallel with the floor.

2a) SM58 ONLY: Set a send level to the monitor that is just below noticeable ringing/ feedback.

2b) Use the send level determined in 2a to create loop-gain for the microphone.

3) Set a delay of 1000ms to the monitor.

4) Begin a recording of the mic’s output.

5) Generate a 500ms burst of pink-noise through the monitor. Allow the delayed feedback loop to sound several times.

6) Stop the recording, and make note of the peak level of the first repeat of the loop.

Assumptions: Microphones with greater feedback resistance will exhibit a lower input level on the first repeat. Greater feedback resistance is considered desirable.

Measure Cupping Resistance

1) Mute the send from the microphone to the monitor.

2) Obtain a frequency magnitude measurement of the microphone in the working position, using the monitor as the test audio source.

3) Place a hand around as much of the mic’s windscreen as is possible.

4) Re-run the frequency magnitude measurement.

5) On the “cupped” measurement, note the difference between the highest response peak, and that frequency’s level on the normal measurement.

Assumptions: Microphones with greater cupping resistance will exhibit a smaller level differential between the highest peak of the cupped response and that frequency’s magnitude on the normal trace. Greater cupping resistance is considered desirable.


Actually, Your Equipment Is Probably Fine

Working as a team is more important than most anything.

Please Remember:

The opinions expressed are mine only. These opinions do not necessarily reflect anybody else’s opinions. I do not own, operate, manage, or represent any band, venue, or company that I talk about, unless explicitly noted.

Want to use this image for something else? Great! Click it for the link to a high-res or resolution-independent version.

This is from another article that I wrote for Schwilly Family Musicians: “What they had failed to do was to play as a team, and that made their perfectly adequate gear SEEM like a problem area.”

Read the whole thing for free, here.


Thoughts On Earplugs

They’re a good idea, and you don’t have to spend much to get good ones.

Please Remember:

The opinions expressed are mine only. These opinions do not necessarily reflect anybody else’s opinions. I do not own, operate, manage, or represent any band, venue, or company that I talk about, unless explicitly noted.

Want to use this image for something else? Great! Click it for the link to a high-res or resolution-independent version.

The Video

The Summary

You only get one pair of ears, so protect them with plugs. Don’t let anyone tell you not to do so. “Flat response” plugs can be both generic or custom fitted, with custom molds having a large advantage in overall comfort.


More Features VS Groundwork

In this case, groundwork won: There wasn’t a compelling reason to lose it.

Please Remember:

The opinions expressed are mine only. These opinions do not necessarily reflect anybody else’s opinions. I do not own, operate, manage, or represent any band, venue, or company that I talk about, unless explicitly noted.

Want to use this image for something else? Great! Click it for the link to a high-res or resolution-independent version.

The Video

The Summary

If you have significant prep that’s already done for one mixing system, you might want to avoid losing that effort – even if it would be to put a more powerful/ flexible mix rig into play.


Monitor World – Is “More” Better?

Often, the answer is “nope.”

Please Remember:

The opinions expressed are mine only. These opinions do not necessarily reflect anybody else’s opinions. I do not own, operate, manage, or represent any band, venue, or company that I talk about, unless explicitly noted.

Want to use this image for something else? Great! Click it for the link to a high-res or resolution-independent version.

Monitor world is a PA system, just like FOH is a PA system. The only difference is that monitor world handles a few very small audiences, and FOH usually deals with one comparatively large audience. All the helpful AND problematic physics considerations are the same.

This being the case, the stage is yet another place where simply piling up more and more boxes (all doing the same thing) to get “more” can be counterproductive. A vocalist wants more vocal, but their monitor is already doing everything it can, so you add another box. Does it look impressive? Yes! Is it louder? Yes! Is it better?

Yea- er…well…wait a second…

What you very well might end up with is a different set of issues. If the singer isn’t precisely situated between the wedges, the wedge outputs arrive at different times. This means that all kinds of destructive phase weirdness might be happening, and that can lead to intelligibility issues. The vocal range is very easy to louse up with time-arrival differences, and a sensation of “garble” can lead to a player wanting even MORE monitor level in compensation. In that instance, you haven’t actually gotten anywhere; Monitor world is louder, but it’s not any easier to hear in the information-processing sense. You also have greater effective loop-gain with that extra volume rocketing around, which destabilizes your system.

Plus, the low-frequency information still does combine well, which can lead to a troublesome buildup of mud. This goes double for everybody who’s off-axis (and that’s probably just about everybody who isn’t the intended audience of those wedges). That makes them want their own mixes to be hotter, which compounds all your problems even more.

And, of course, there’s even more bleed into FOH.

The brutal reality is that, for any single sound that a given player needs to hear, that signal will always sound better coming from a single box that “can get loud enough.” More wedges (all producing the same output) can only combine less and less coherently as you add more of them.

“But, Danny,” you protest, “you’ve done dual wedges for people. You’ve even rolled out some really excessive deployments, like the one in the article picture. Who are you to tell folks not to do that kind of thing?”

Fair point! In response:

1) It’s because I’ve tried some strange monitor solutions that I can say they weren’t necessarily improvements over simpler approaches.

2) Sometimes you do things that look cool, accepting that you’ll have to deal with some sonic downsides as a result.

3) Just because you’ve piled up a bunch of wedges, it doesn’t require you to put the exact same thing through each enclosure. Somebody might have two boxes in front of them, but one might be for vocals only and the other for instruments only.

With some bands, especially those who are naturally well balanced and don’t need a ton of monitor gain, the extra fun-factor and volume bump can trade off favorably with the coherence foibles. As the rest of this article indicates, yes, I am in the camp that says that a single box will always “measure better.” However, there’s more to life than just “measuring better.” If you have some room to compromise, you can be a little weird without hurting anything too badly.

Audio is an exercise in compromise. If you know what the compromise factors are, you can make an informed judgement. If you know that throwing a bunch of boxes at a problem might cause you other problems, then you’ve got more knowledge available to help you make the right decision for a fix.


You Don’t Just Need A Bigger Amp

Headroom is a holistic thing. If you run out of it in one place, getting more of it somewhere else isn’t enough.

Please Remember:

The opinions expressed are mine only. These opinions do not necessarily reflect anybody else’s opinions. I do not own, operate, manage, or represent any band, venue, or company that I talk about, unless explicitly noted.

Want to use this image for something else? Great! Click it for the link to a high-res or resolution-independent version.

The Video

The Script

Let’s say that an audio human has a mixing console that’s feeding a loudspeaker system. (That makes sense, right? Most of us do that a lot.) This loudspeaker system is nifty because it’s magic. It never clips. The only limit on output is how much voltage the console can deliver.

The weird bit is that the console can’t really swing much voltage at its outputs. It clips at a peak of 1 volt. Another weird thing is that the console doesn’t have any inboard mic pres. Those are separate. (I know this is really strange, but I’m trying to make a point.)

Our aforementioned audio human just happens to have a mic pre that also reaches its maximum output at a 1 volt peak. They connect a signal source to the preamp, crank the pre until it’s just barely under clipping, set a fader at 0 dB, and…it’s not loud enough.

So, what do they do?

If you said, “They need a console with more output capability,” you’re exactly right.

It wouldn’t make any sense to buy a mic pre with more output, right? If the console output clips at 1 volt, what good does it do to have a mic pre that will deliver 12 volts into the console? You can drive the signal to the mix outputs a lot harder, but all that gets you is more distortion.

Obtaining and connecting an upstream device with more output is kinda absurd, frankly. It’s not a solution at all. The console output is the limiting factor.

But here’s the thing.

People take this actually non-sensical approach with amps and speakers all the time. Some of the confusion is understandable. Amplifier and speaker power ratings aren’t necessarily intuitive, for one, and passive speakers don’t have level meters as a rule. There’s also all the complexity involved with trying to describe the limits of a multi-device speaker enclosure with a single number.

I get that there’s nuance involved here.

But here’s the thing. Speakers, like everything else, have a maximum undistorted output point. It’s a peak level – a point beyond which there is no more “instantaneous” sound pressure to be had. If you have, say, a loudspeaker that can handle a peak input of 1000 watts, and an amplifier that can put a 1000 watt peak input through that box…you’re there. Your system is maximized. Any more available amplifier power is wasted on both driver distortion AND the chance that you might wreck your speaker.

But people see those nasty little clip lights on their amps, and think: “Gosh, I need to buy a more powerful amplifier!” They get obsessed with headroom, but in this compartmentalized way that only involves the amp.

Actually, unless the amp’s peak (NOT CONTINUOUS – PEAK)…unless the amp’s peak output is half (or less) of the speaker’s maximum peak rating, you do NOT need a larger amp. Getting a more powerful amplifier only gets you more headroom in the amplifier, when what you actually want is more headroom throughout the entire system output section.

What you need is a speaker that gets louder for the same amount of input. Or a bigger amplifier AND a speaker that can handle the additional power. Or just “more PA” in general – although that’s a whole other can of worms in itself.


Why Are Faders Labeled Like That?

Gain multipliers are hard to read.

Please Remember:

The opinions expressed are mine only. These opinions do not necessarily reflect anybody else’s opinions. I do not own, operate, manage, or represent any band, venue, or company that I talk about, unless explicitly noted.

Want to use this image for something else? Great! Click it for the link to a high-res or resolution-independent version.

I’ve done a lot of typing on this site, and I’m worried that it’s getting stale – so, how about some video?


Baskets, Bees, and Flies

Quality generally beats quantity.

Please Remember:

The opinions expressed are mine only. These opinions do not necessarily reflect anybody else’s opinions. I do not own, operate, manage, or represent any band, venue, or company that I talk about, unless explicitly noted.

Want to use this image for something else? Great! Click it for the link to a high-res or resolution-independent version.

Sometimes, more IS more. It doesn’t matter how nice your mic cables are if you don’t have enough of them. If the show absolutely requires 24 channels, and you have a console with 16 really amazing channels…well, you’re still short by eight.

Yet, there are still plenty of instances where “a handful of bees is better than a basket of flies” (as Moroccans might say).

For instance, some folks are really hung up on the idea that a “main” PA speaker should be built around a 15″-diameter low-frequency driver. The idea is that bigger is better, but that’s not always so. Given a choice, I’ll take a good box built around a 12″ cone over a mediocre offering constructed around a 15. A well-designed 12 can be kinder to the vocals, because the cone driver is better at “playing” higher and covering the range that a small horn-driver can’t quite reach down into. Sure, the 12 probably won’t go as low, but if you want to be “loud” below 100 Hz you’re going to want subwoofers anyway. (For the record, I would never turn my nose up at a perfectly decent box that used a 15 or two.)

Also talking about speakers, there are people who believe a PA with more boxes is superior to a rig with fewer. The problem is that you have to take deployment into account. If you already have the necessary horizontal and vertical coverage happening, more boxes just act to cause more interference problems. The system looks cool because it’s bigger, and it gets louder because there are more boxes, but it doesn’t actually sound better. It might even sound terrible with all that comb-filtering going on. Coverage is sort of like what The Mad Hatter said to Alice: “When you get to the end, stop.”

This applies to bands too, especially when it comes to vocalists. One really brilliant singer with one mic is almost always light-years better than a whole group of vocalists of questionable quality. Beyond the basic aesthetics, not-so-hot singers tend to require a lot more gain to be heard (because they usually haven’t developed much vocal power), and that can easily lead to a system being run on the knife-edge of feedback all night.

…and speaking of people, how about crew-members? Any day of the week, and twice on Sunday, I’ll gladly take one knowledgeable, pleasant, and punctual helper over 15 punters who are late, surly, and have no idea what’s going on.

Tossing more and more junk at a problem rarely fixes the problem. You might eventually smother your issue or manage to distract from it, but the bugbear is still sitting beneath the pile. Applying a sufficient fix, on the other hand, works very reliably. There are times when you need “more.” There’s no getting around that. However, it’s important to avoid using “more” as a substitute for having what will actually do the job effectively.


The Effervescent Joy Of Meeting A Knowledgeable Outsider

Some of the best folks to find are those who know the craft, but aren’t invested in your workflow.

Please Remember:

The opinions expressed are mine only. These opinions do not necessarily reflect anybody else’s opinions. I do not own, operate, manage, or represent any band, venue, or company that I talk about, unless explicitly noted.

Want to use this image for something else? Great! Click it for the link to a high-res or resolution-independent version.

Last week, I got to spend a few days with students from Broadview Entertainment Arts University. The Live Sound class needs some honest-to-goodness shows to work on, so Bruce (their actual professor) and myself worked out a bit of a mechanism: I put a couple of gigs together every quarter, BEAU provides the room, I bring the PA, and we spend three days getting our collective hands dirty with building the thing.

Last week was the first round. As usual, I spent too much time talking and we didn’t get as far as maybe we should have. I also made some hilarious blunders, because everything involved in putting on a live gig is a perishable skill, and I sometimes have sizable gaps between productions. (For several minutes, I couldn’t find the blasted aux-in remap selector for my X32, even though I was on the “Input” routing page and staring right at it. I also absent-mindedly walked off the drum riser while I was mid-sentence. You can’t make this stuff up, folks.)

Anyway.

We had a really solid group of students all around. One of the most solid students was Patrick. Patrick is a guy who’s coming at this whole live-sound thing with a background in telecom. Telecom, like audio for entertainment, is the sort of business where you have to manage and troubleshoot every possible species of signal-transfer problem imaginable. Telecom skills are also becoming increasingly relevant to audio because of our increased reliance on high-speed network infrastructure. When all your audio, control, and clock signaling gets jammed onto a Cat6, it’s important to have some sort of clue as to what’s going on. (I have just enough clues to make things work. Other people have many more clues.)

As the story ended up going, we had a problem with my digi-snake. We got everything plugged together, and…oh dear. The consoles were only seeing one stage box, instead of both cascaded together. I walked over to the deck and started puzzling through things. Did the cascade connection get partially yanked? No. Did the boxes simply need a reset? No. Had I crunched the cascade cable at some point? No. I was on the brink of declaring that we’d just have to muddle through with one box when Patrick got involved.

Had I tried running a signal directly to the second box? Well, actually I hadn’t, because I was used to thinking of the two boxes as a unit.

Click.

Oh, look! The second box illuminated its green light of digital-link happiness.

Had I tried plugging directly into the secondary connection on the first box? Well, actually I hadn’t.

Click.

No happy-light was to be found.

I considered all that very nifty, but still being invested in my way of doing things, I failed to immediately see the obvious. Patrick enlightened me.

“The B-jack on the top box is the problem. Just connect them in reverse order, and you’ll have both. You can always change them around in the rack later.”

Of course, he was exactly right, and he had saved the day. (I was really glad were working on the problem the night before the show, instead of with 30 minutes to spare.)

The point here is that Patrick’s skillset, while not directly related to what we were doing, was fully transferable. He didn’t know the exact system we were working on, but he had plenty of experience at troubleshooting data-interconnects in general. He also had a distinct advantage over me. He was looking at the problem with a set of totally fresh eyes. Not being locked into a particular set of assumptions about how the system was supposed to work as a whole, he could conceptualize the individual pieces as being modular rather than as a single, static, integrated solution. I was thinking inside the flightcase, while Patrick was thinking outside the flightcase about everything inside that same flightcase. There’s a difference.

The whole situation was the triumph of the knowledgeable outsider. A person with the skills to make your plan work, but who isn’t yet invested in your specific plan may be just what you need when the whole mess starts to act up. They might be able to take a piece of the whole, reconfigure it, and slot it back in while you’re still getting your mind turned around. It’s really quite impressive.