Tag Archives: Troubleshooting

An Adventure In A Peavey

Sometimes, a broken thing is less broken than you might think.

Please Remember:

The opinions expressed are mine only. These opinions do not necessarily reflect anybody else’s opinions. I do not own, operate, manage, or represent any band, venue, or company that I talk about, unless explicitly noted.

PeaveyWant to use this image for something else? Great! Click it for the link to a high-res or resolution-independent version.

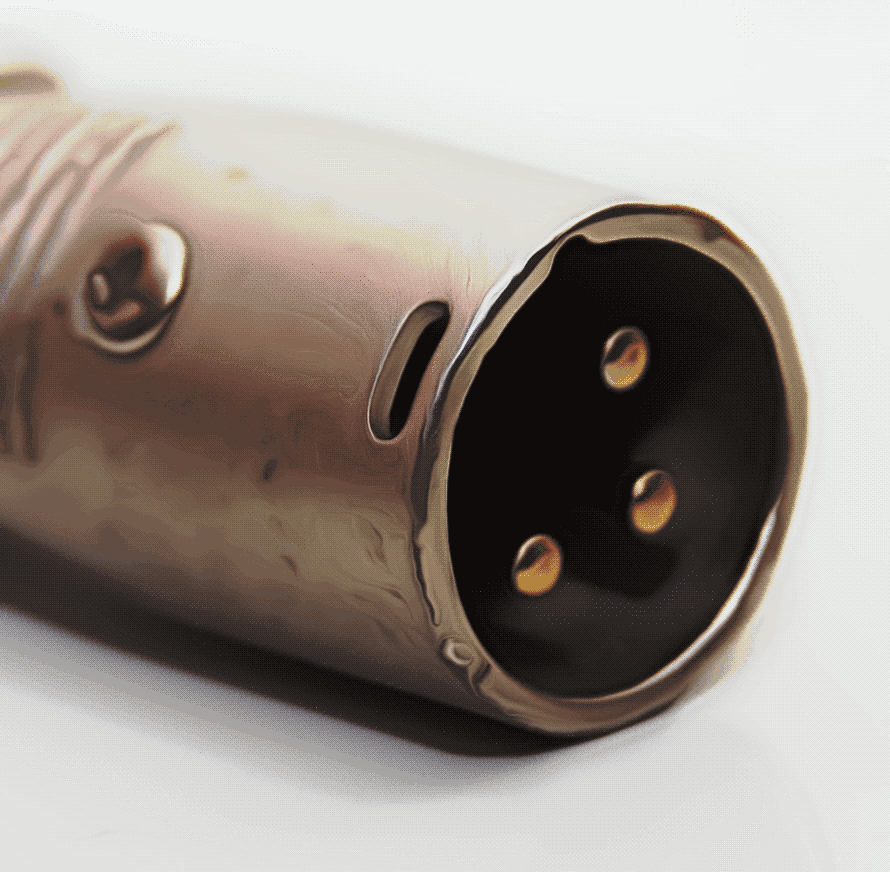
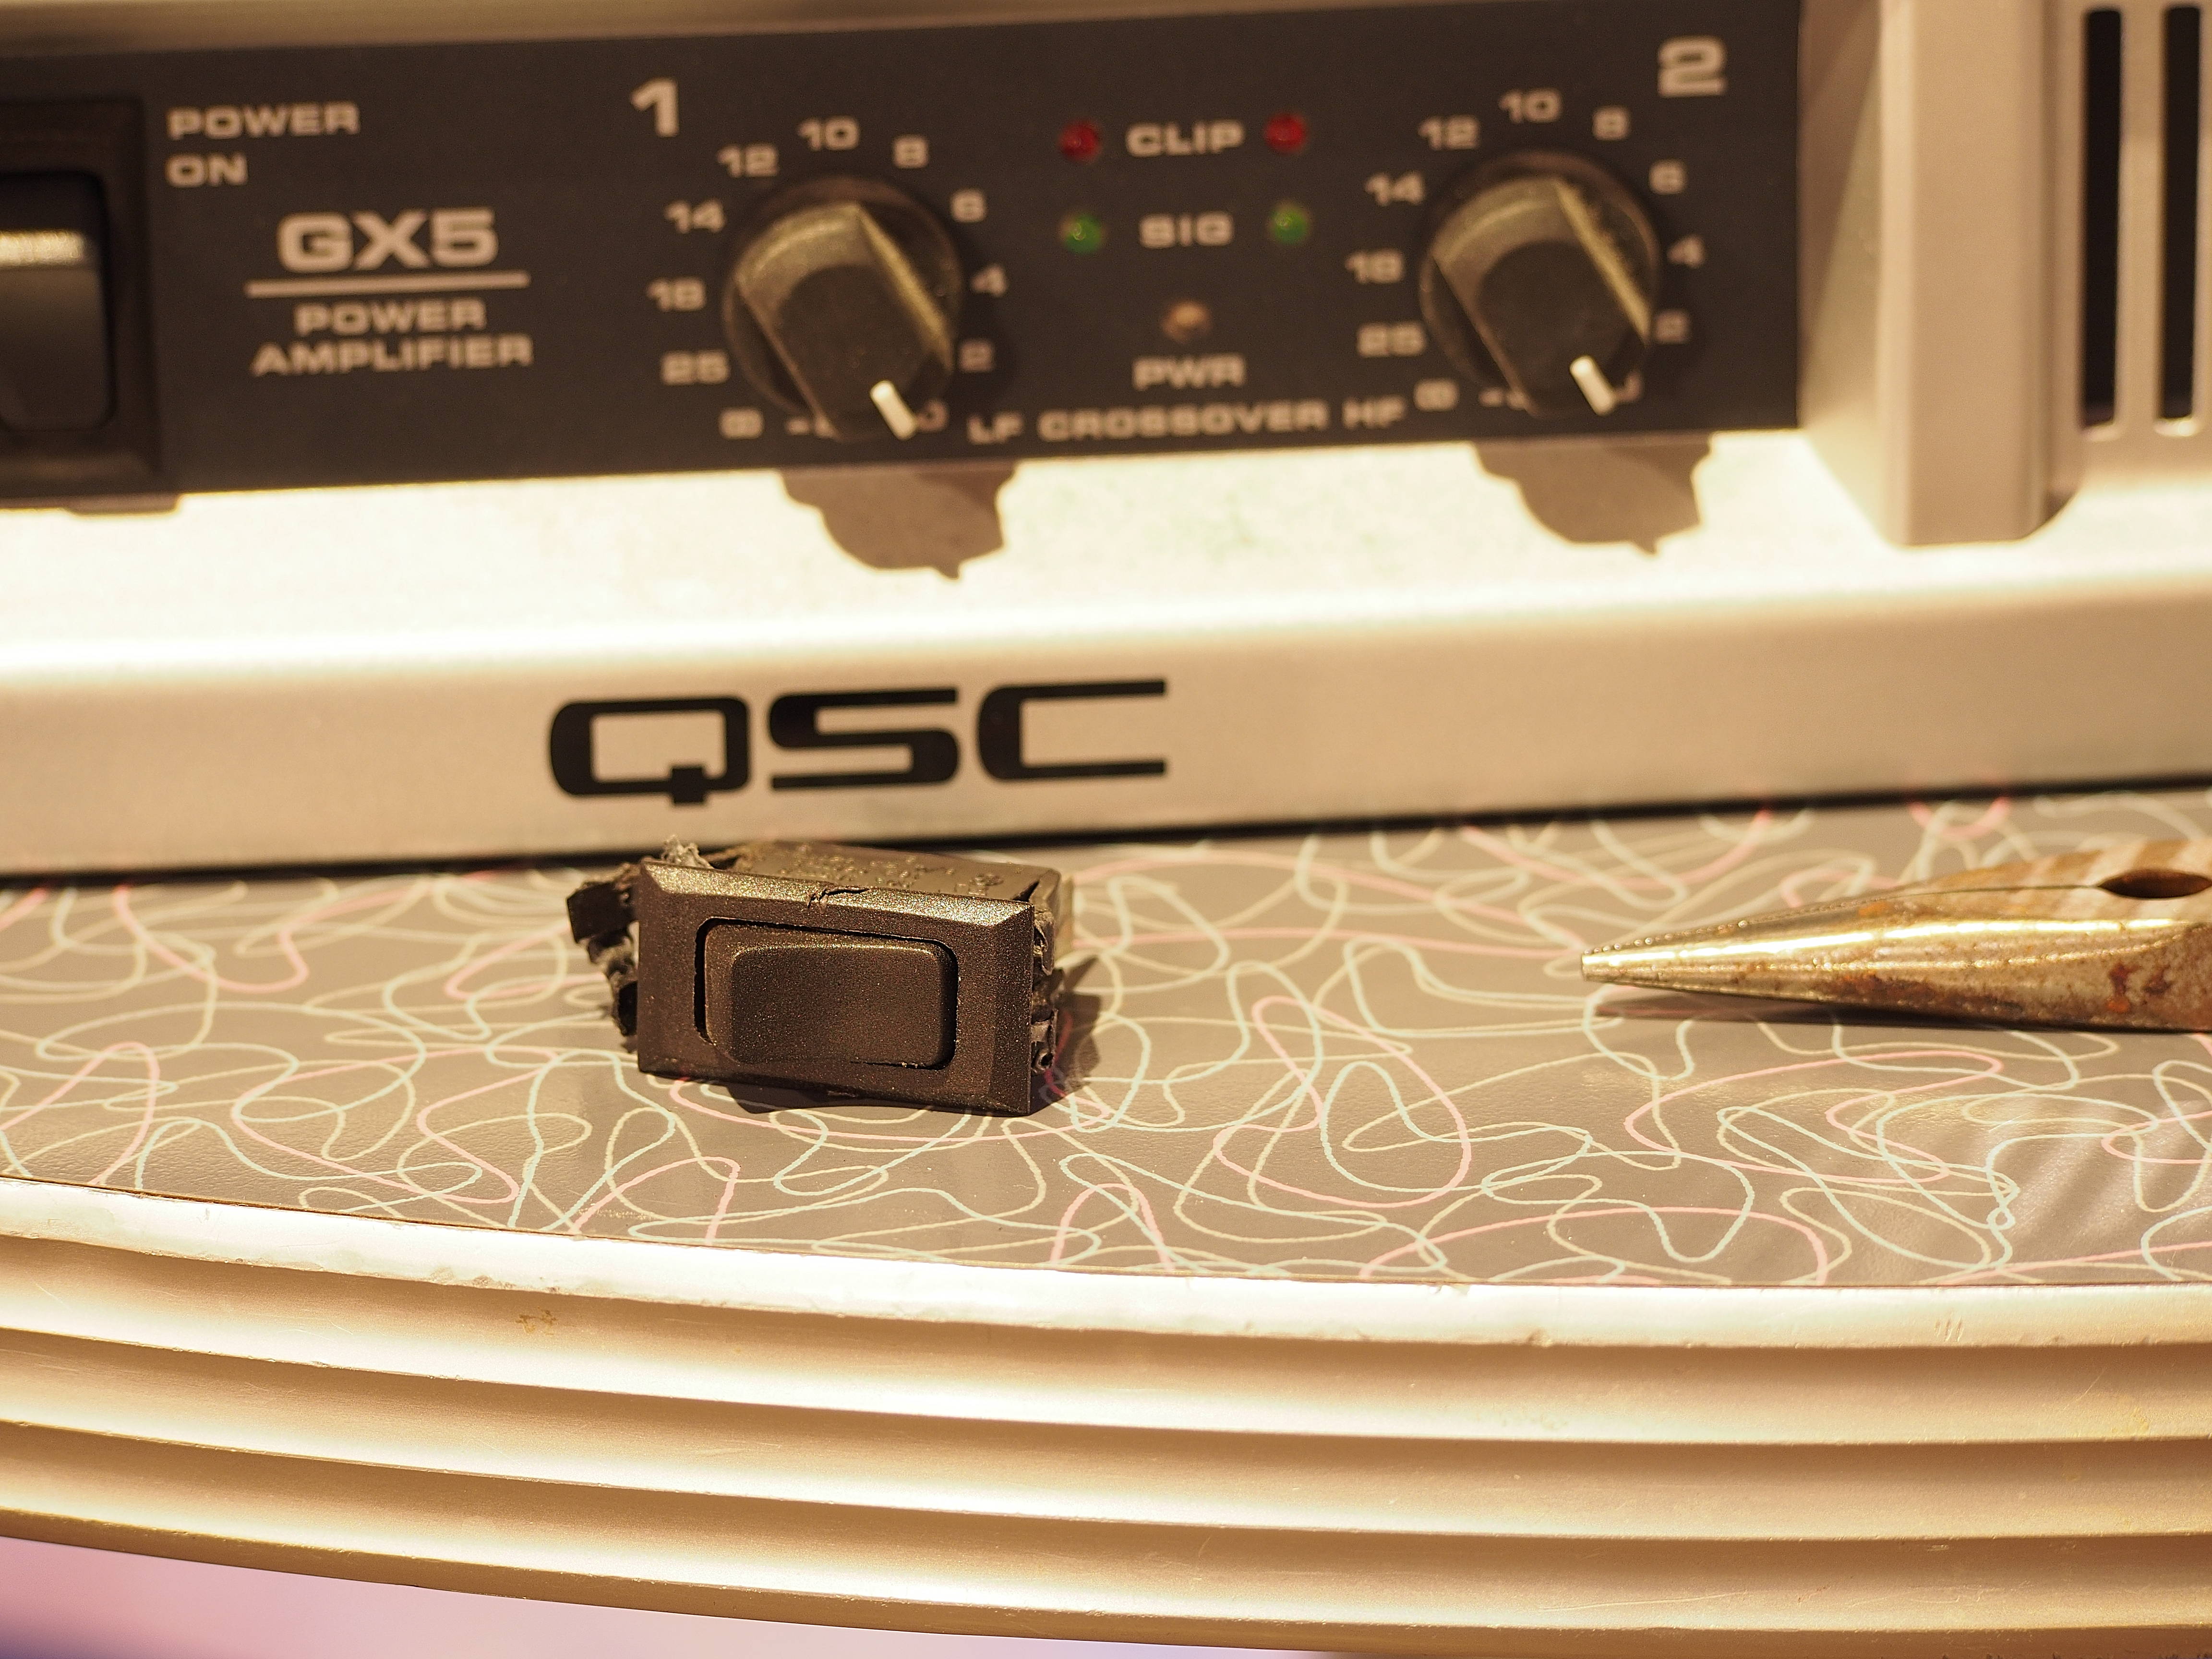
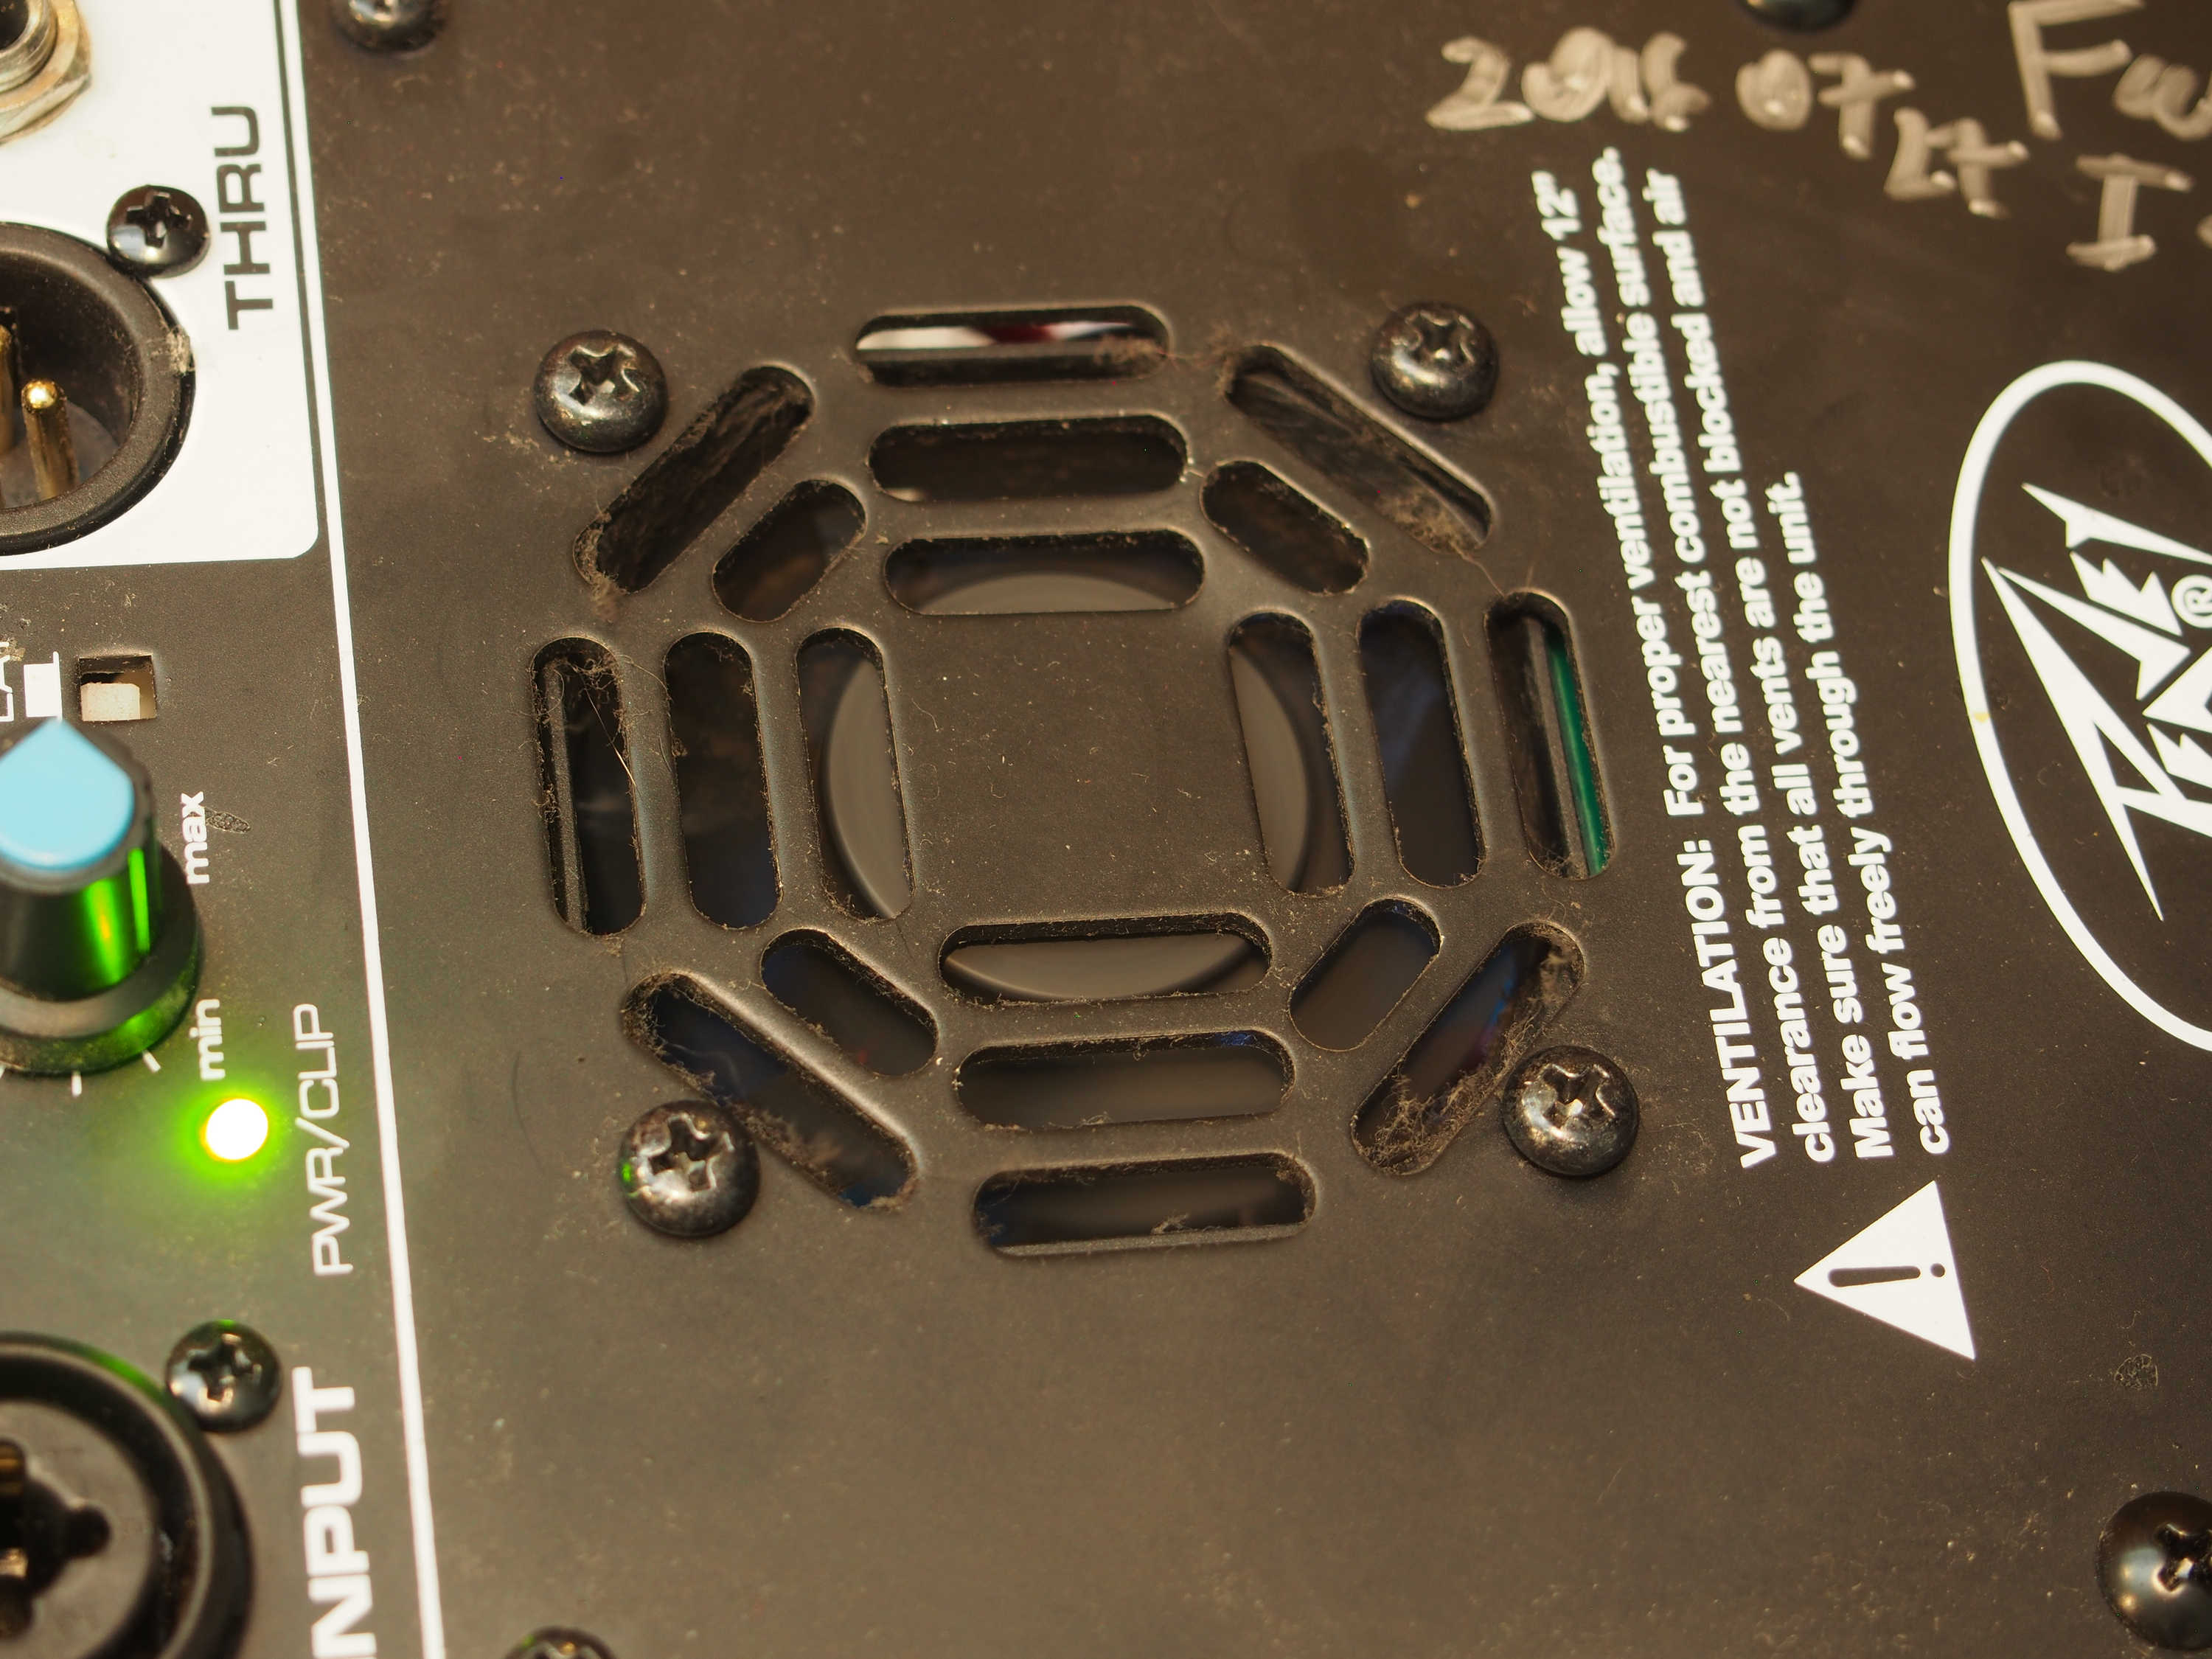
Remember that road gig I was talking about a few weeks ago? Well, during our setup for the first day, I noticed something. One of my monitors had a cooling fan that wasn’t being much of a fan. It was just sitting there, not moving any air molecules.

This was disconcerting to me, but there wasn’t much I could do about it. We ran the show with some signal going through it, and it apparently did not “thermal,” so – good on ya, PVxP!

Of course, even with the box having behaved itself, I couldn’t just leave it be. I wanted to know what was wrong, and if it could be fixed. So, I gathered up a few tools and went on a little adventure.


Gunky Fan

This monitor had spent its previous life at Fats Grill. During that life, the fan had ingested a fair amount of “old Salt Lake City basement gunk,” which is a particular kind of evil dust that’s nearly impossible to clean up, and adept at invading everything. I imagine that every city has its own version of this stuff. At the outset, I was pretty sure that the poor fan had gotten all bound up with this goop, and might have burned itself out.

But, to be sure, I would have to get the back panel off the speaker and do some rooting around.

IMPORTANT: Poking, prodding, digging, tweaking, yanking, or otherwise messing with the internals of gear that runs on “wall” power can injure or kill you. I am NOT responsible if you attempt activities like this and end up surprised, hurt, or dead.

Internal Connection

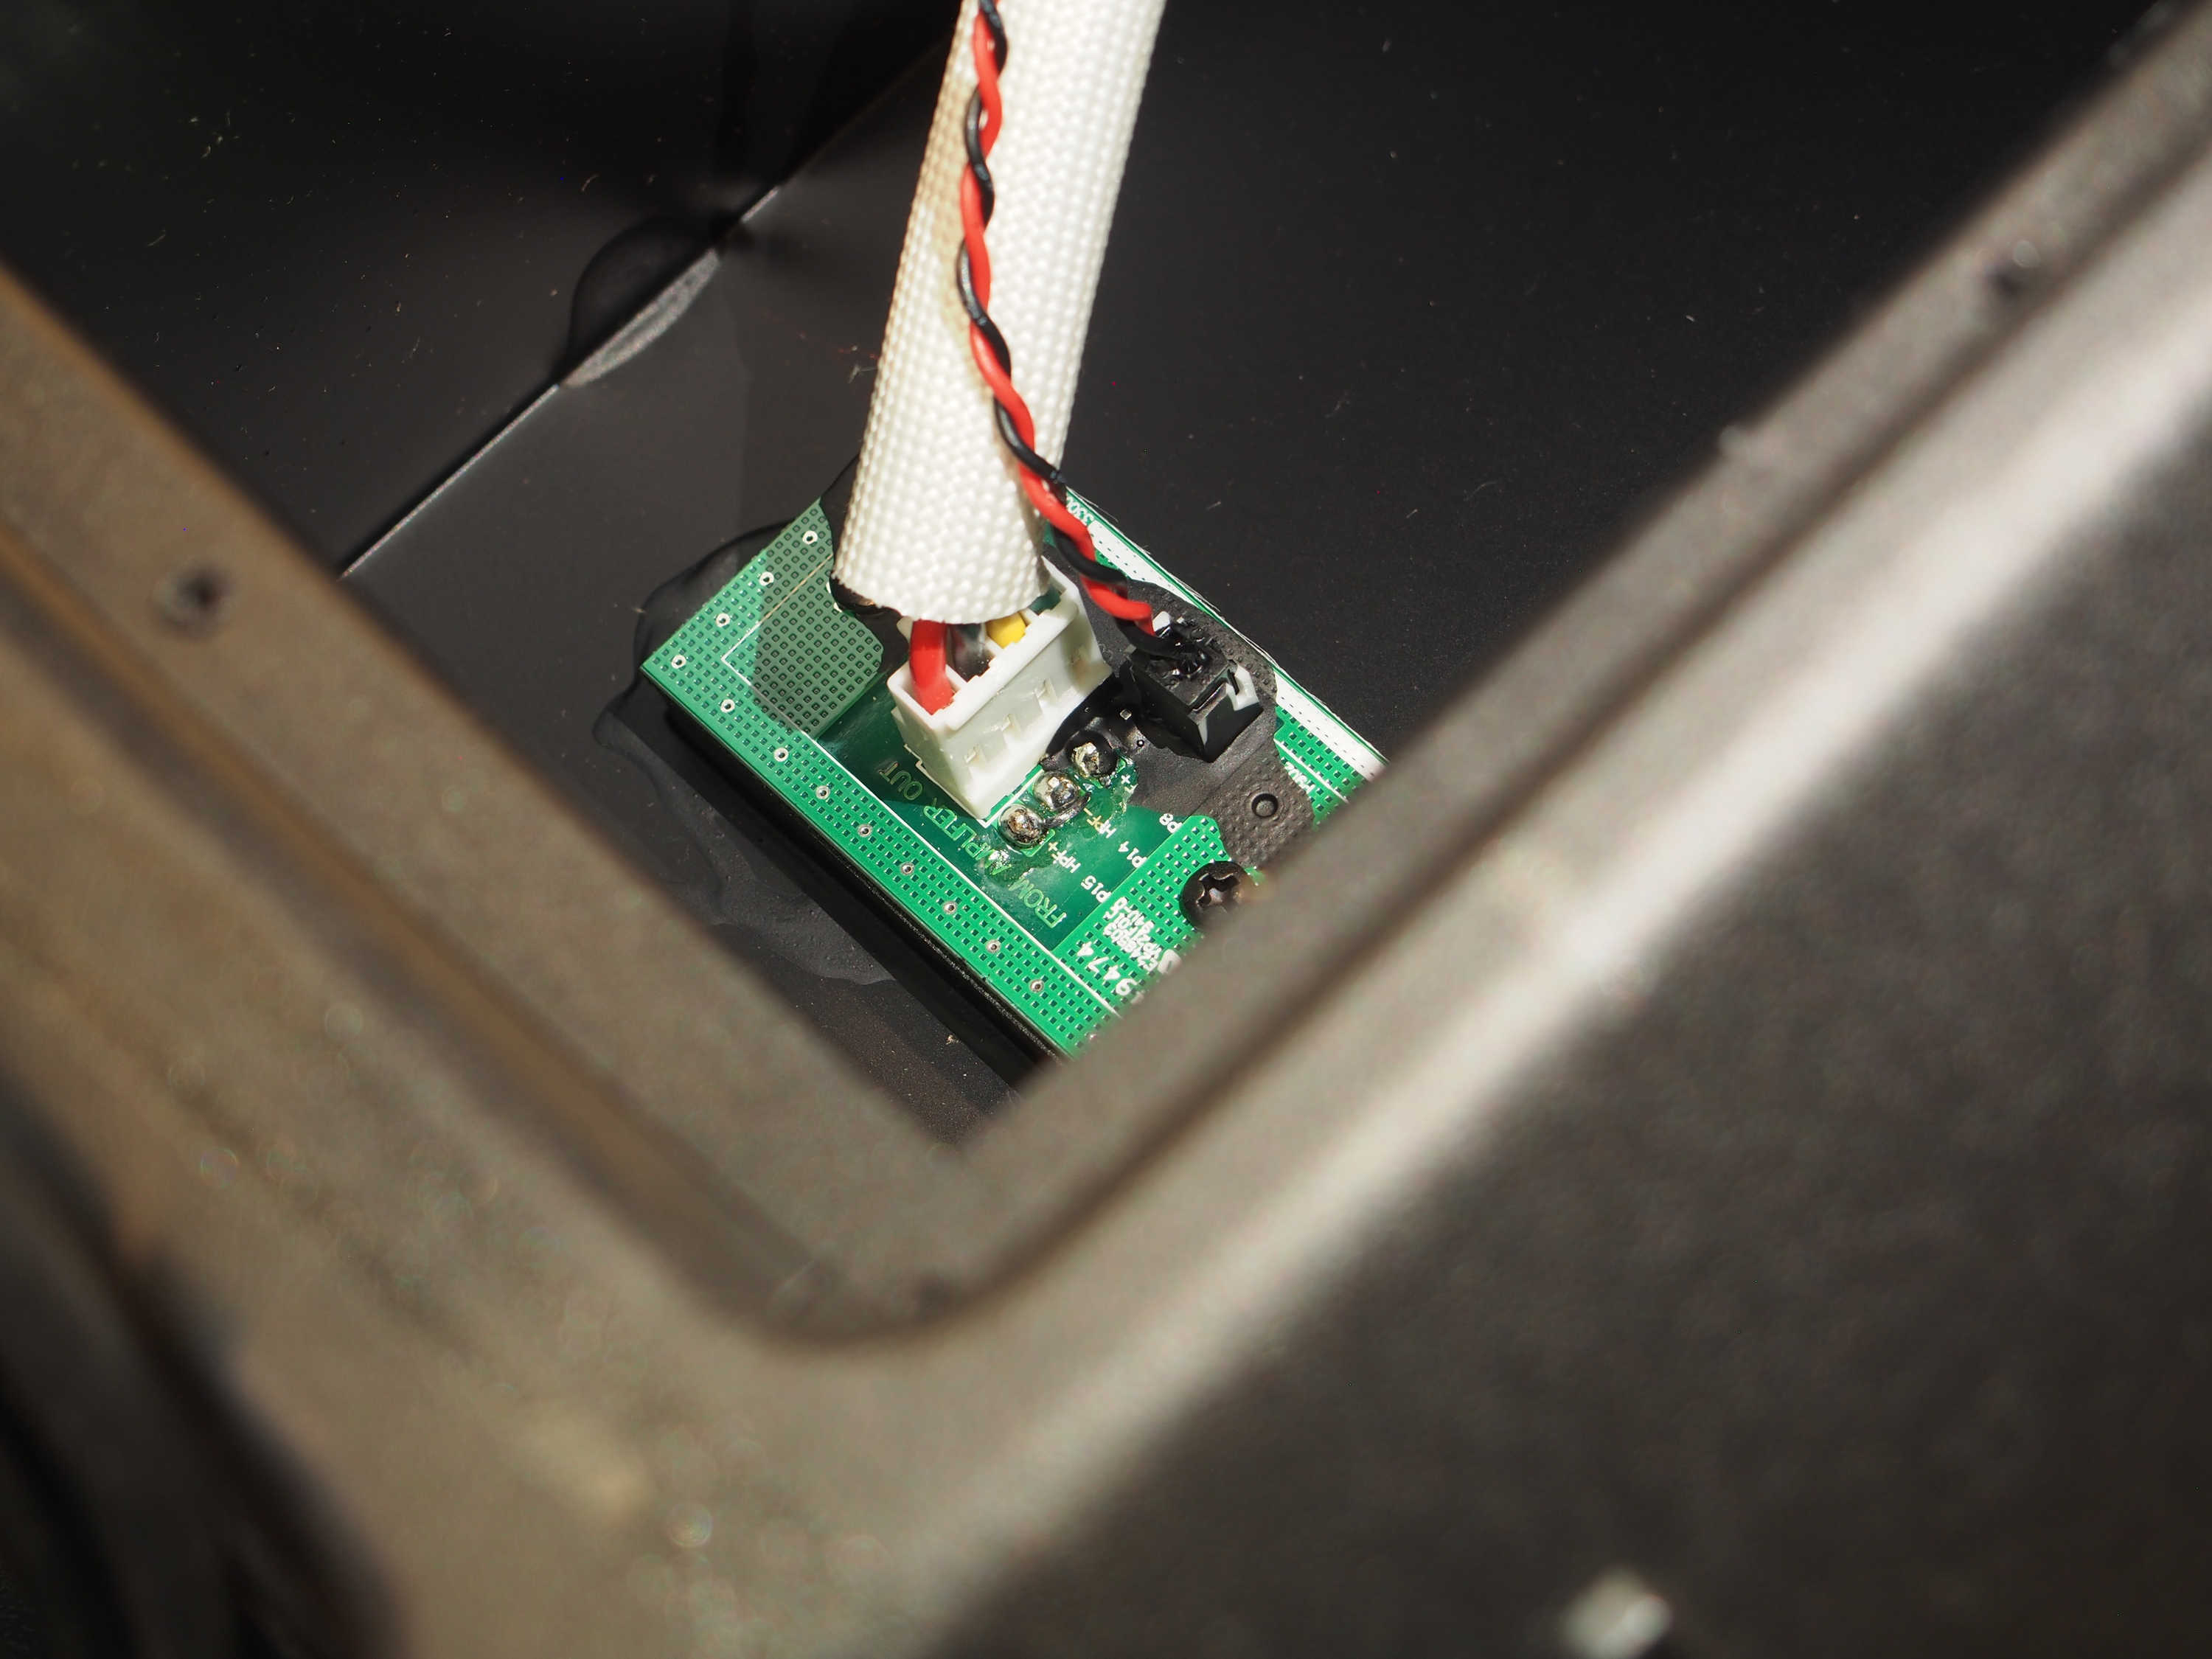
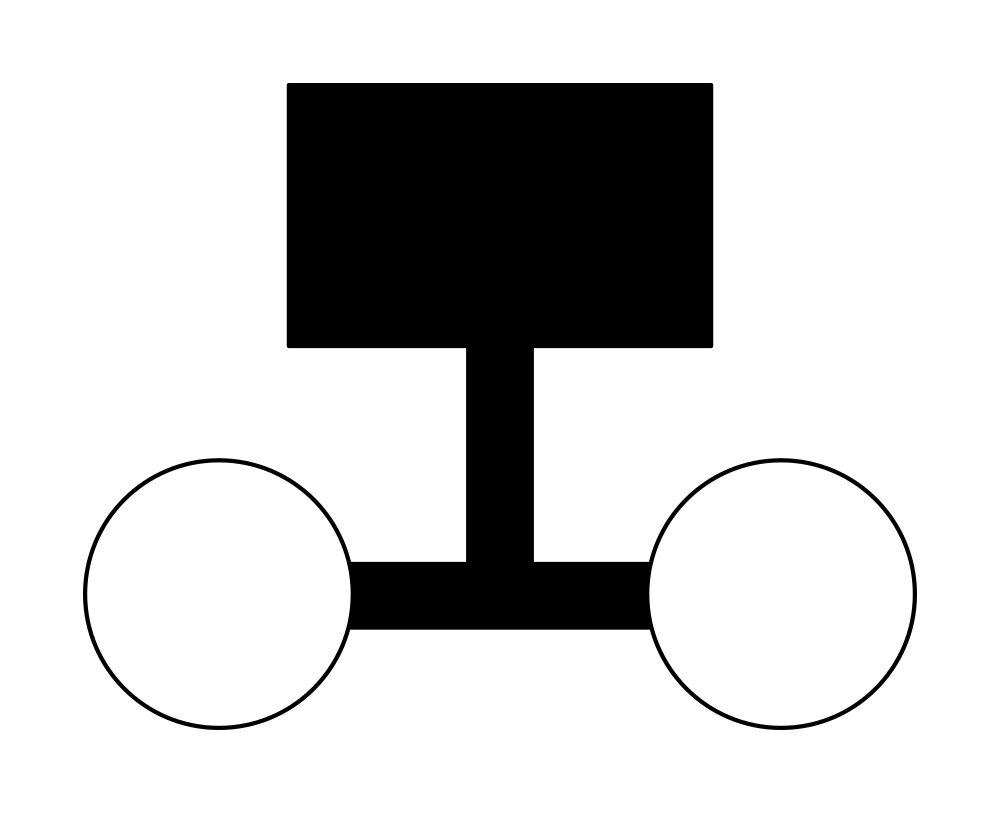
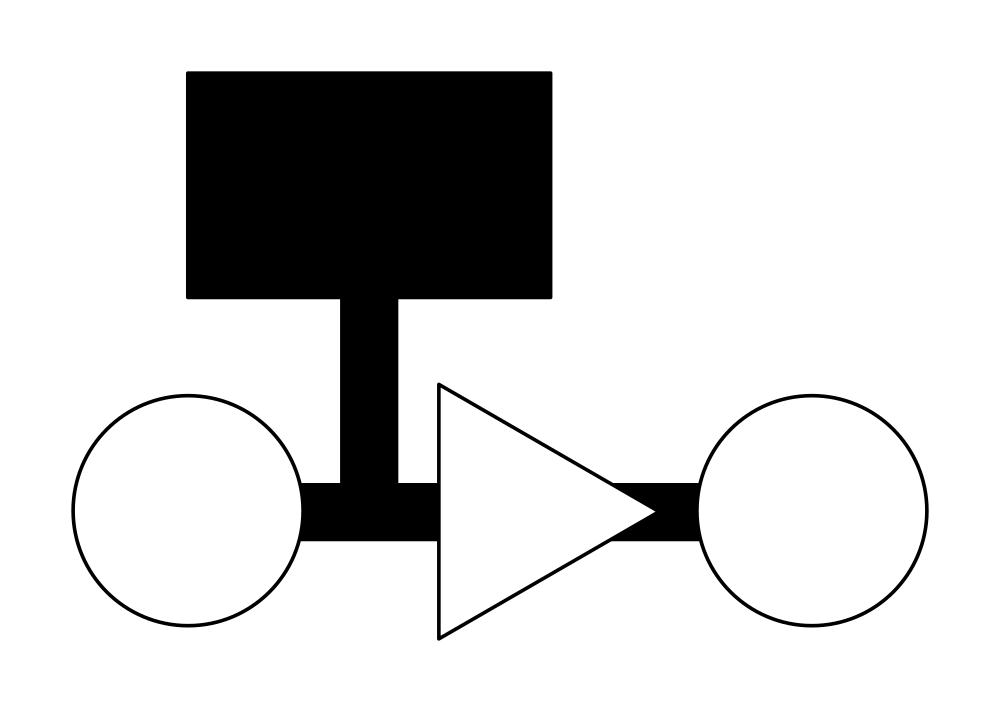
The amplifier module connects to the rest of the speaker through this little bit of fun. The four-conductor part seems to be what mates with the drivers (the clues being labeling like HPF + and HPF -). As far as I can tell, the little two-wire connector is to do nothing more than light up the LED in the front of the box.

Internal Connection Closeup

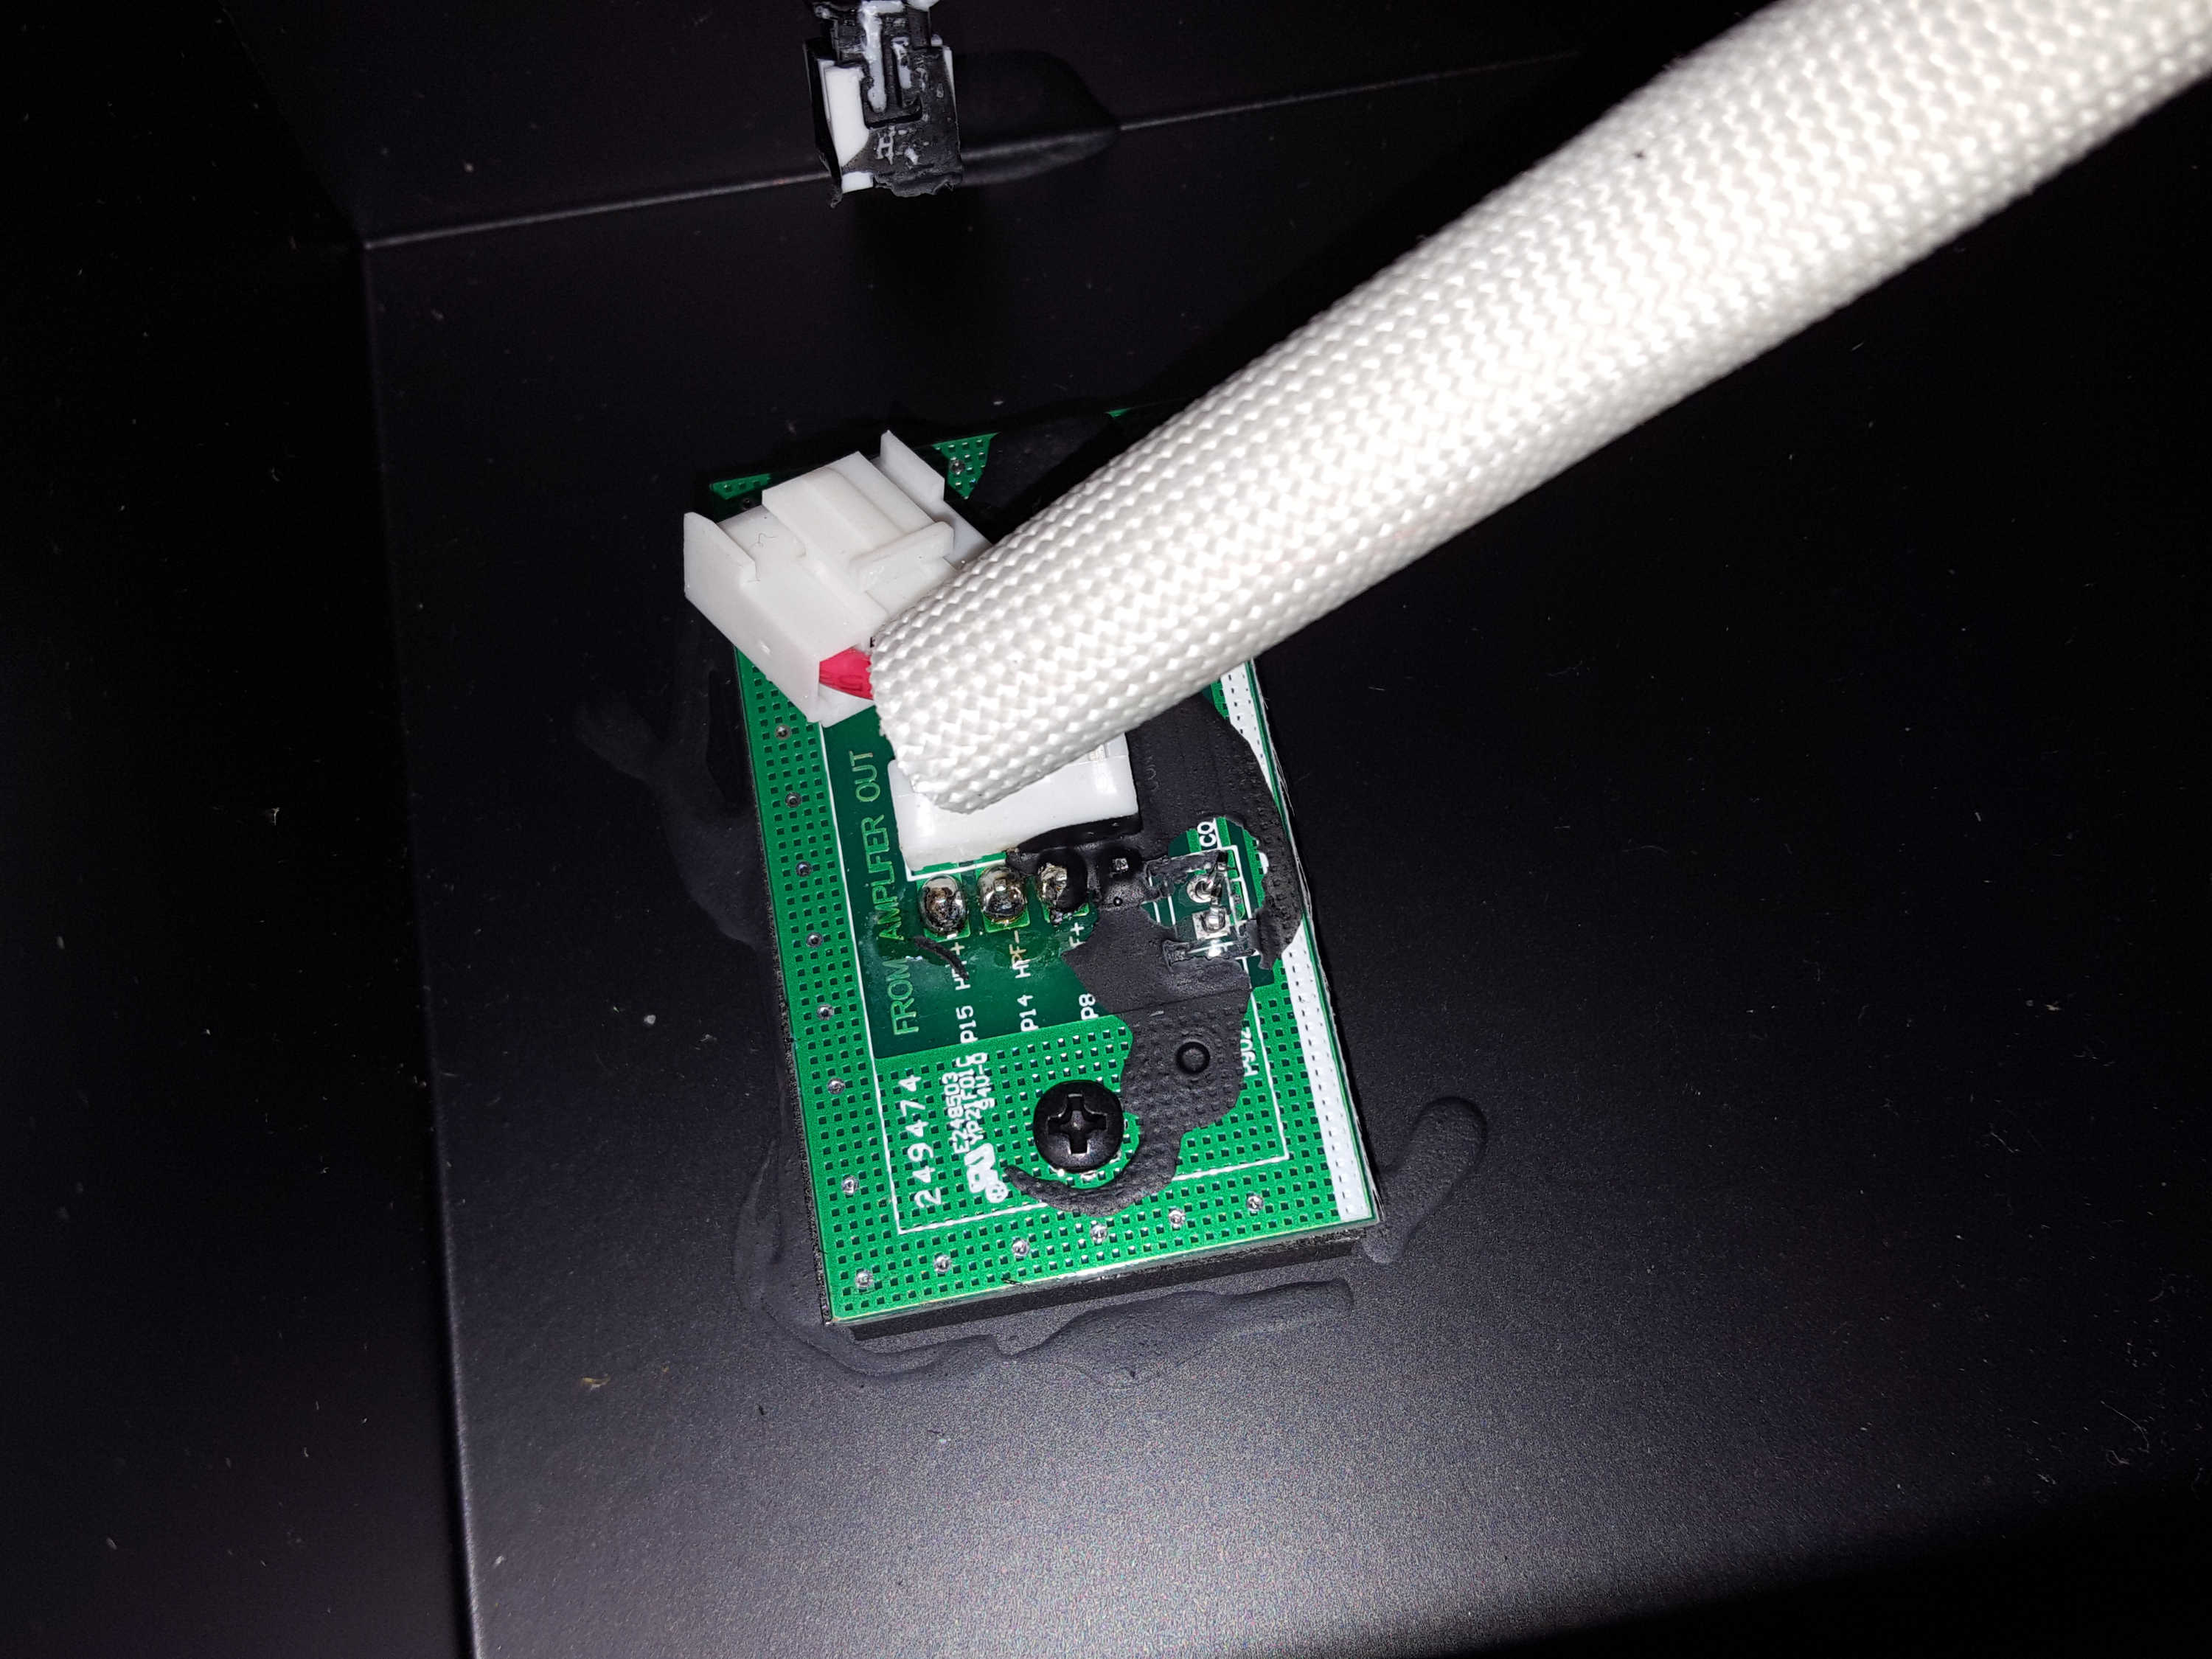
Peavey just couldn’t resist gluing that LED connection shut. Getting it out meant pulling the entire contact assembly off the circuit-board pins. Geeze…

Connection Tub

An interesting design choice with these Peavey PVxP speakers is the “big tub of nothing” that the amplifier module screws into. All that’s in there is the little tiny PCB that acts as the bridge between the backplate electronics and the rest of the loudspeaker. I can guess that it makes sense from a modularity standpoint, as all the negative space seems to be able to accommodate either an active electronics unit or a passive crossover setup with no fuss.

Woofer And Wire

Nobody in here but us drivers!

And some wire, and an LED, of course.

Fan Connector

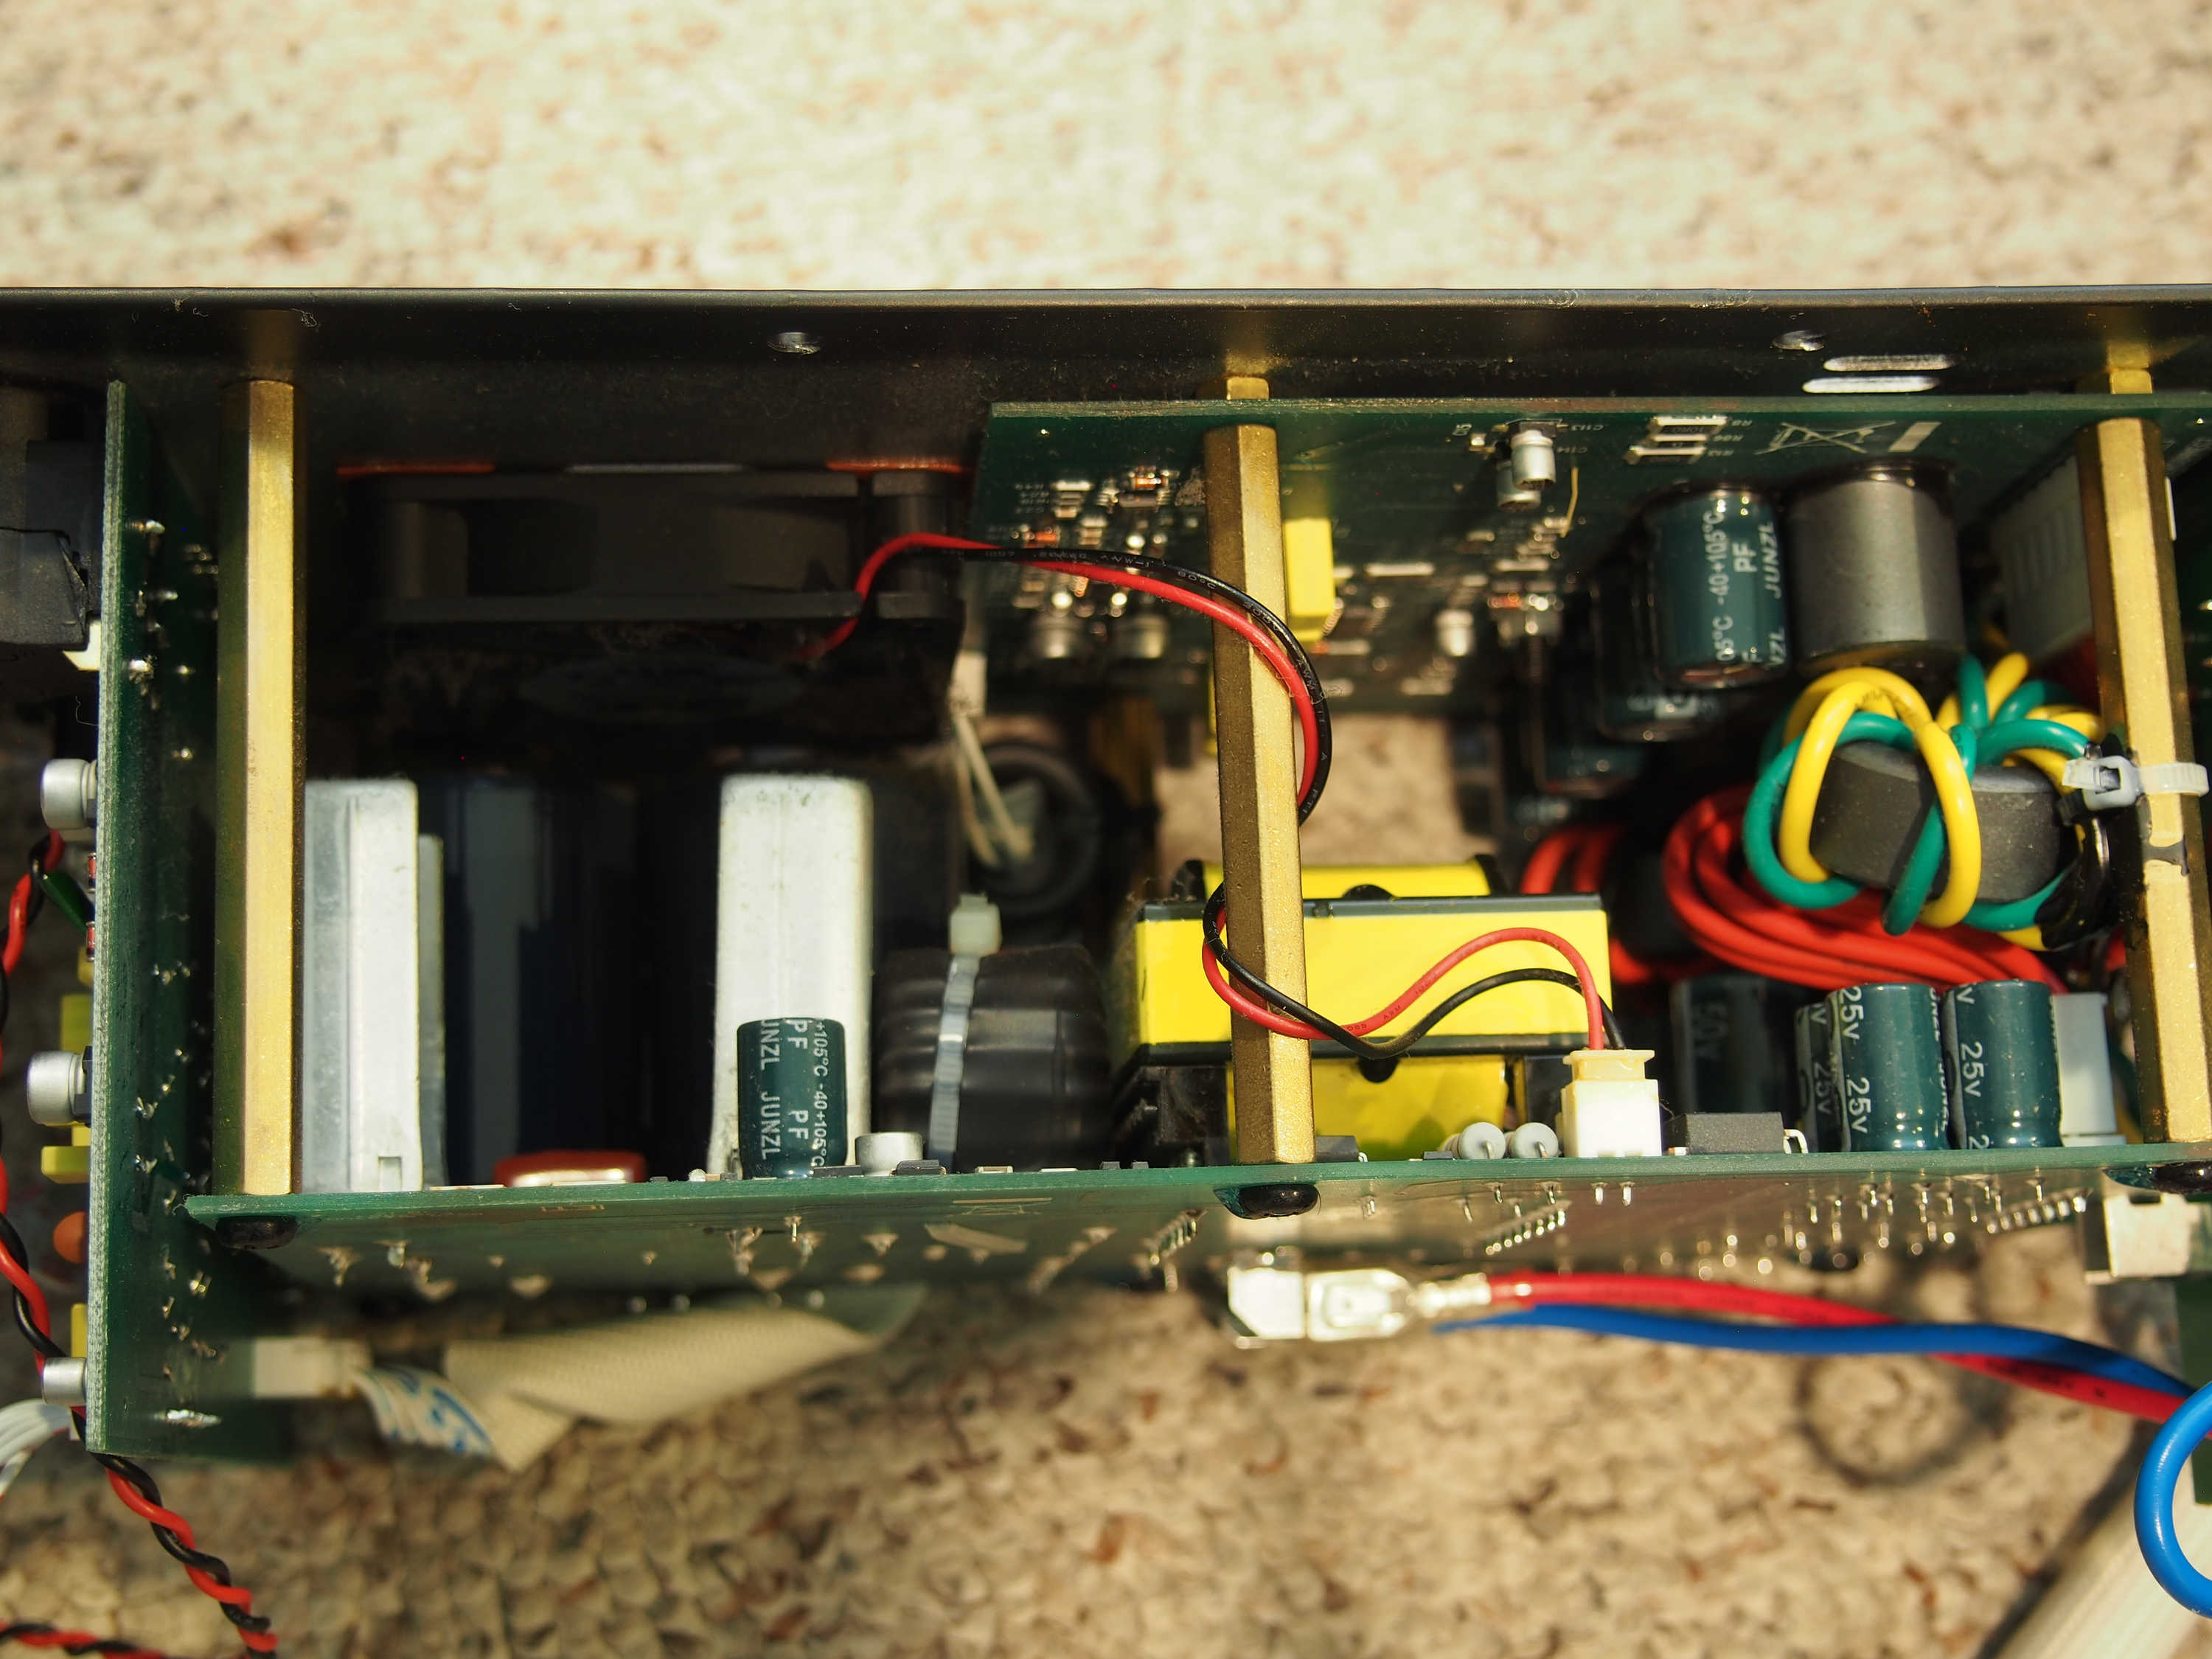
After extricating the amplifier module fully from the enclosure, I was able to get a look at where the fan got power. My first step in troubleshooting was to get the fan off the main chassis, in the hopes that I could figure out why it was no longer inclined to spin.

Spinning Fan

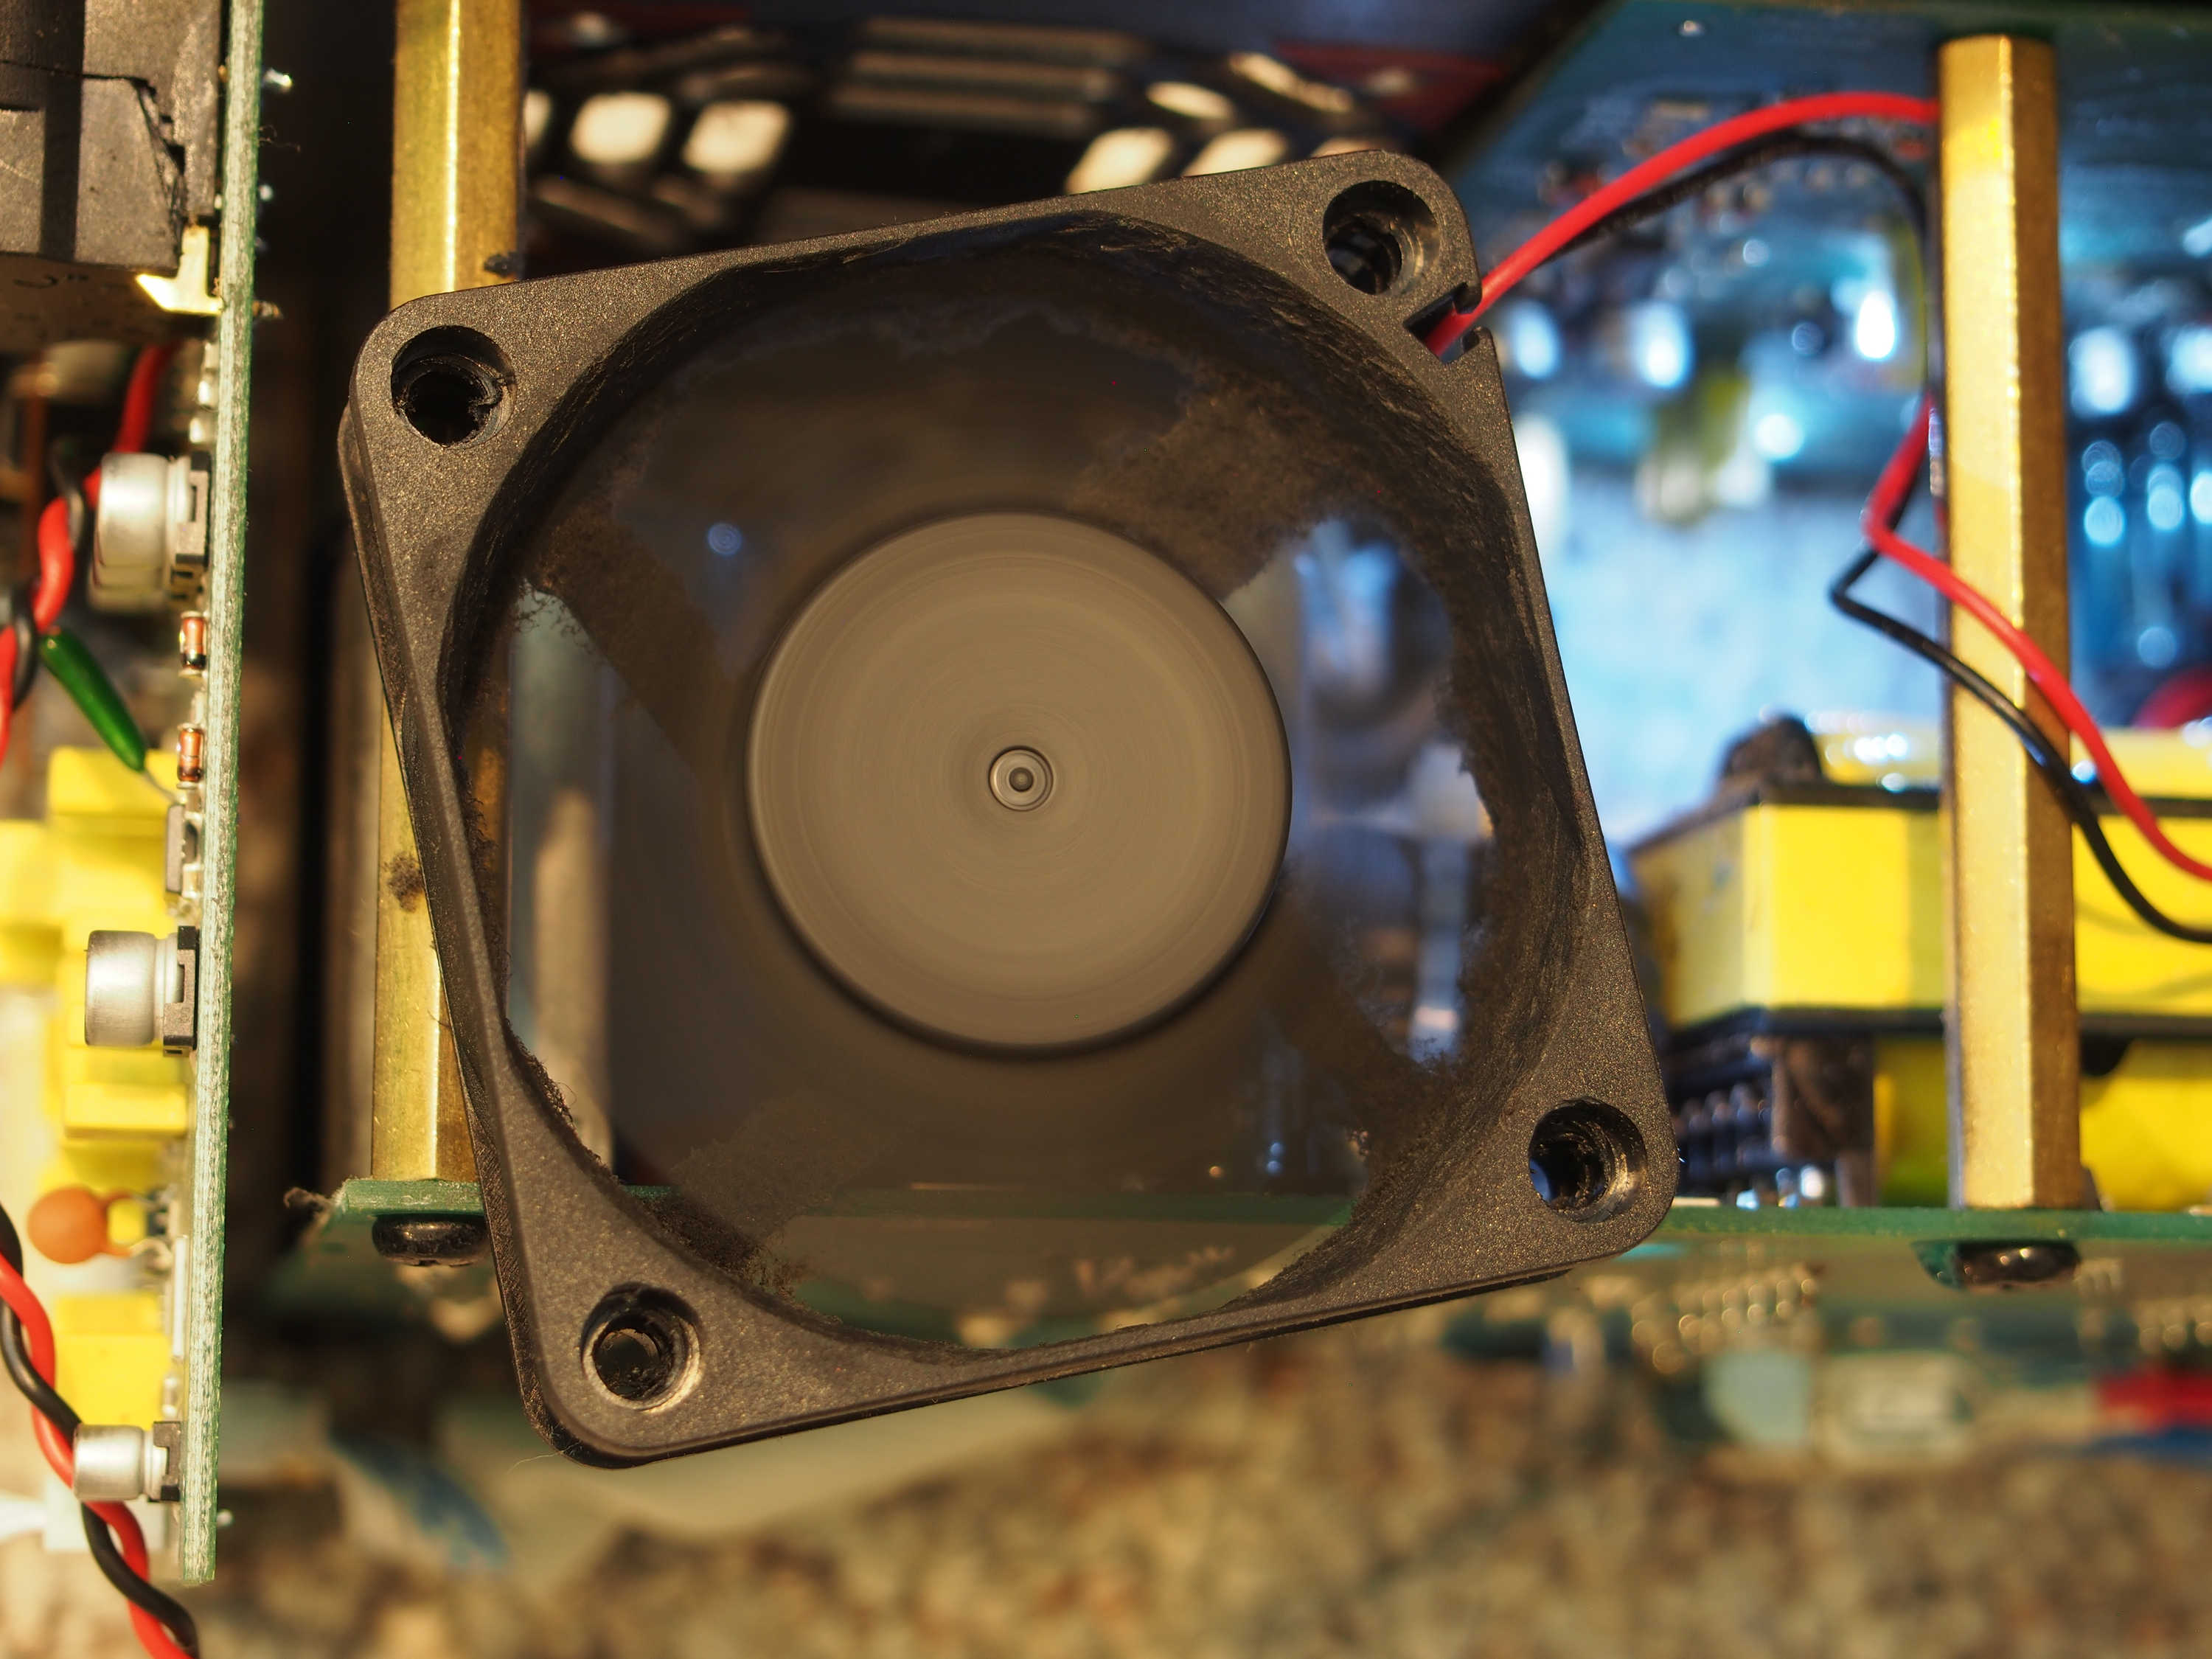
Much to my surprise, applying power to the amp module caused the fan to run like nothing was wrong at all. The hub was turning as smooth as glass, with no noise of rubbing or anything else being amiss. Well, that was surprising – but in a nice way. I had envisioned having to find a replacement fan, and maybe do some wire splicing to get back to full operation. It didn’t seem that I would have to do any of that now.

33 Volts

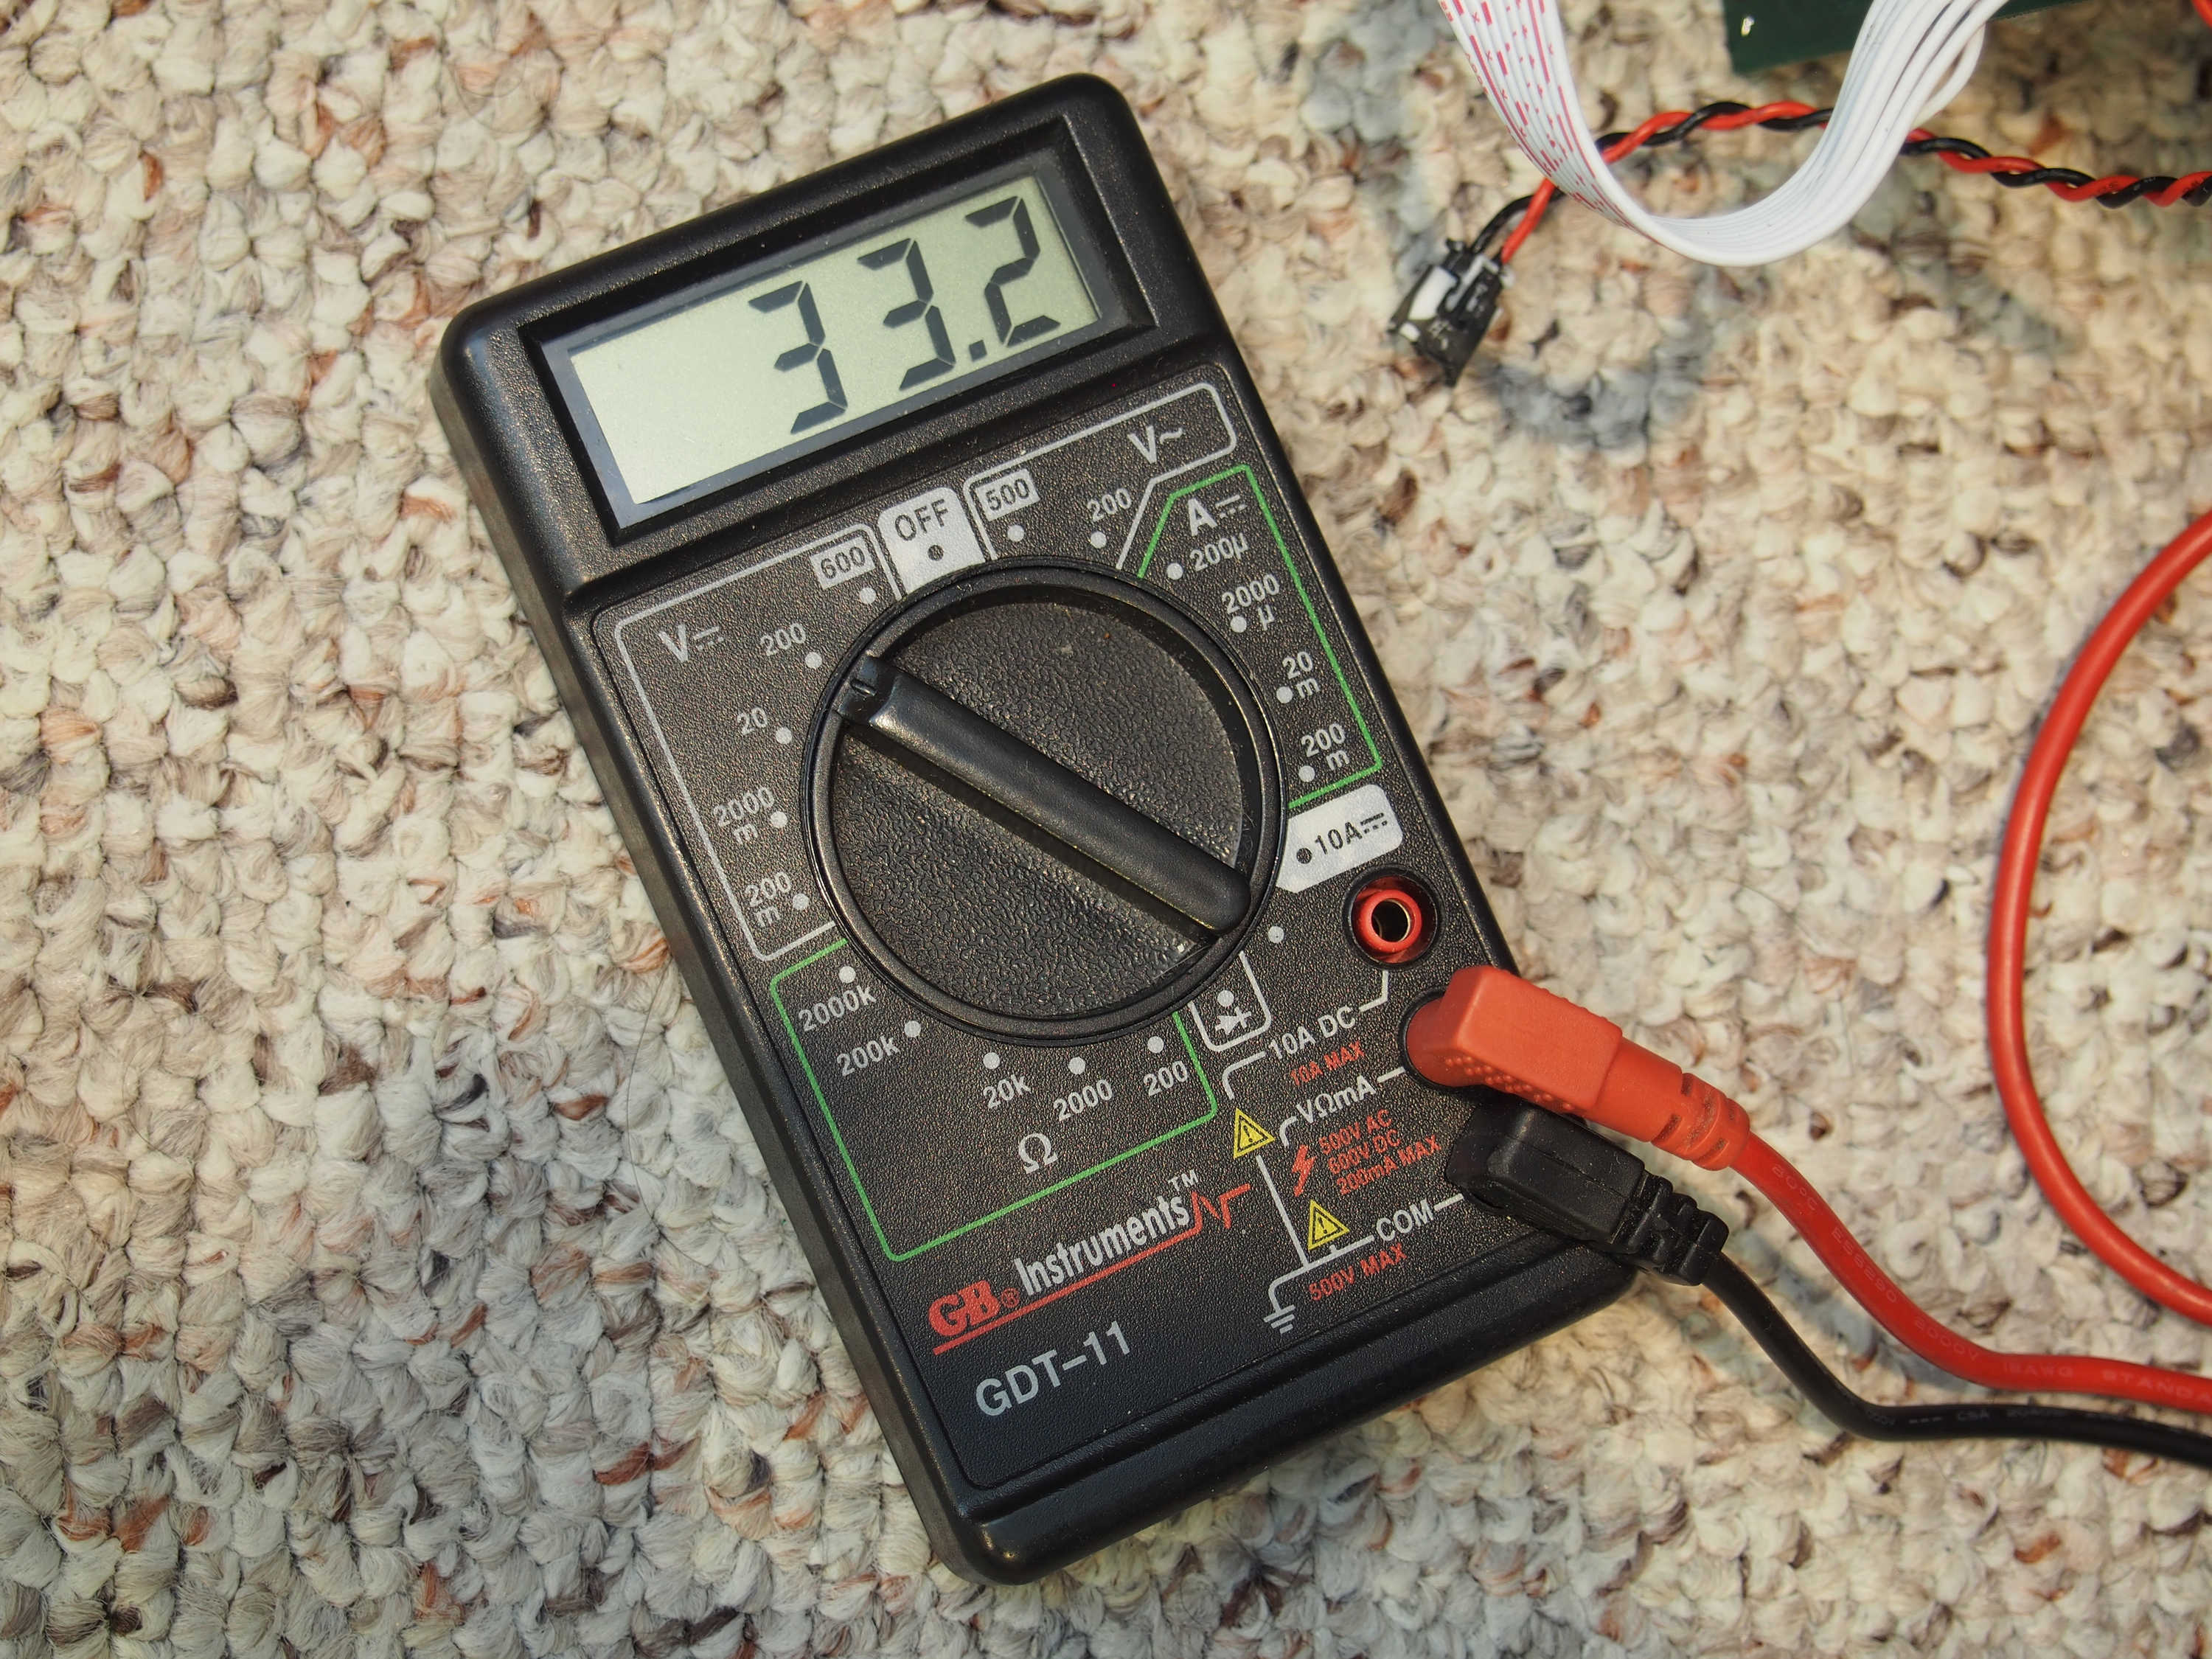
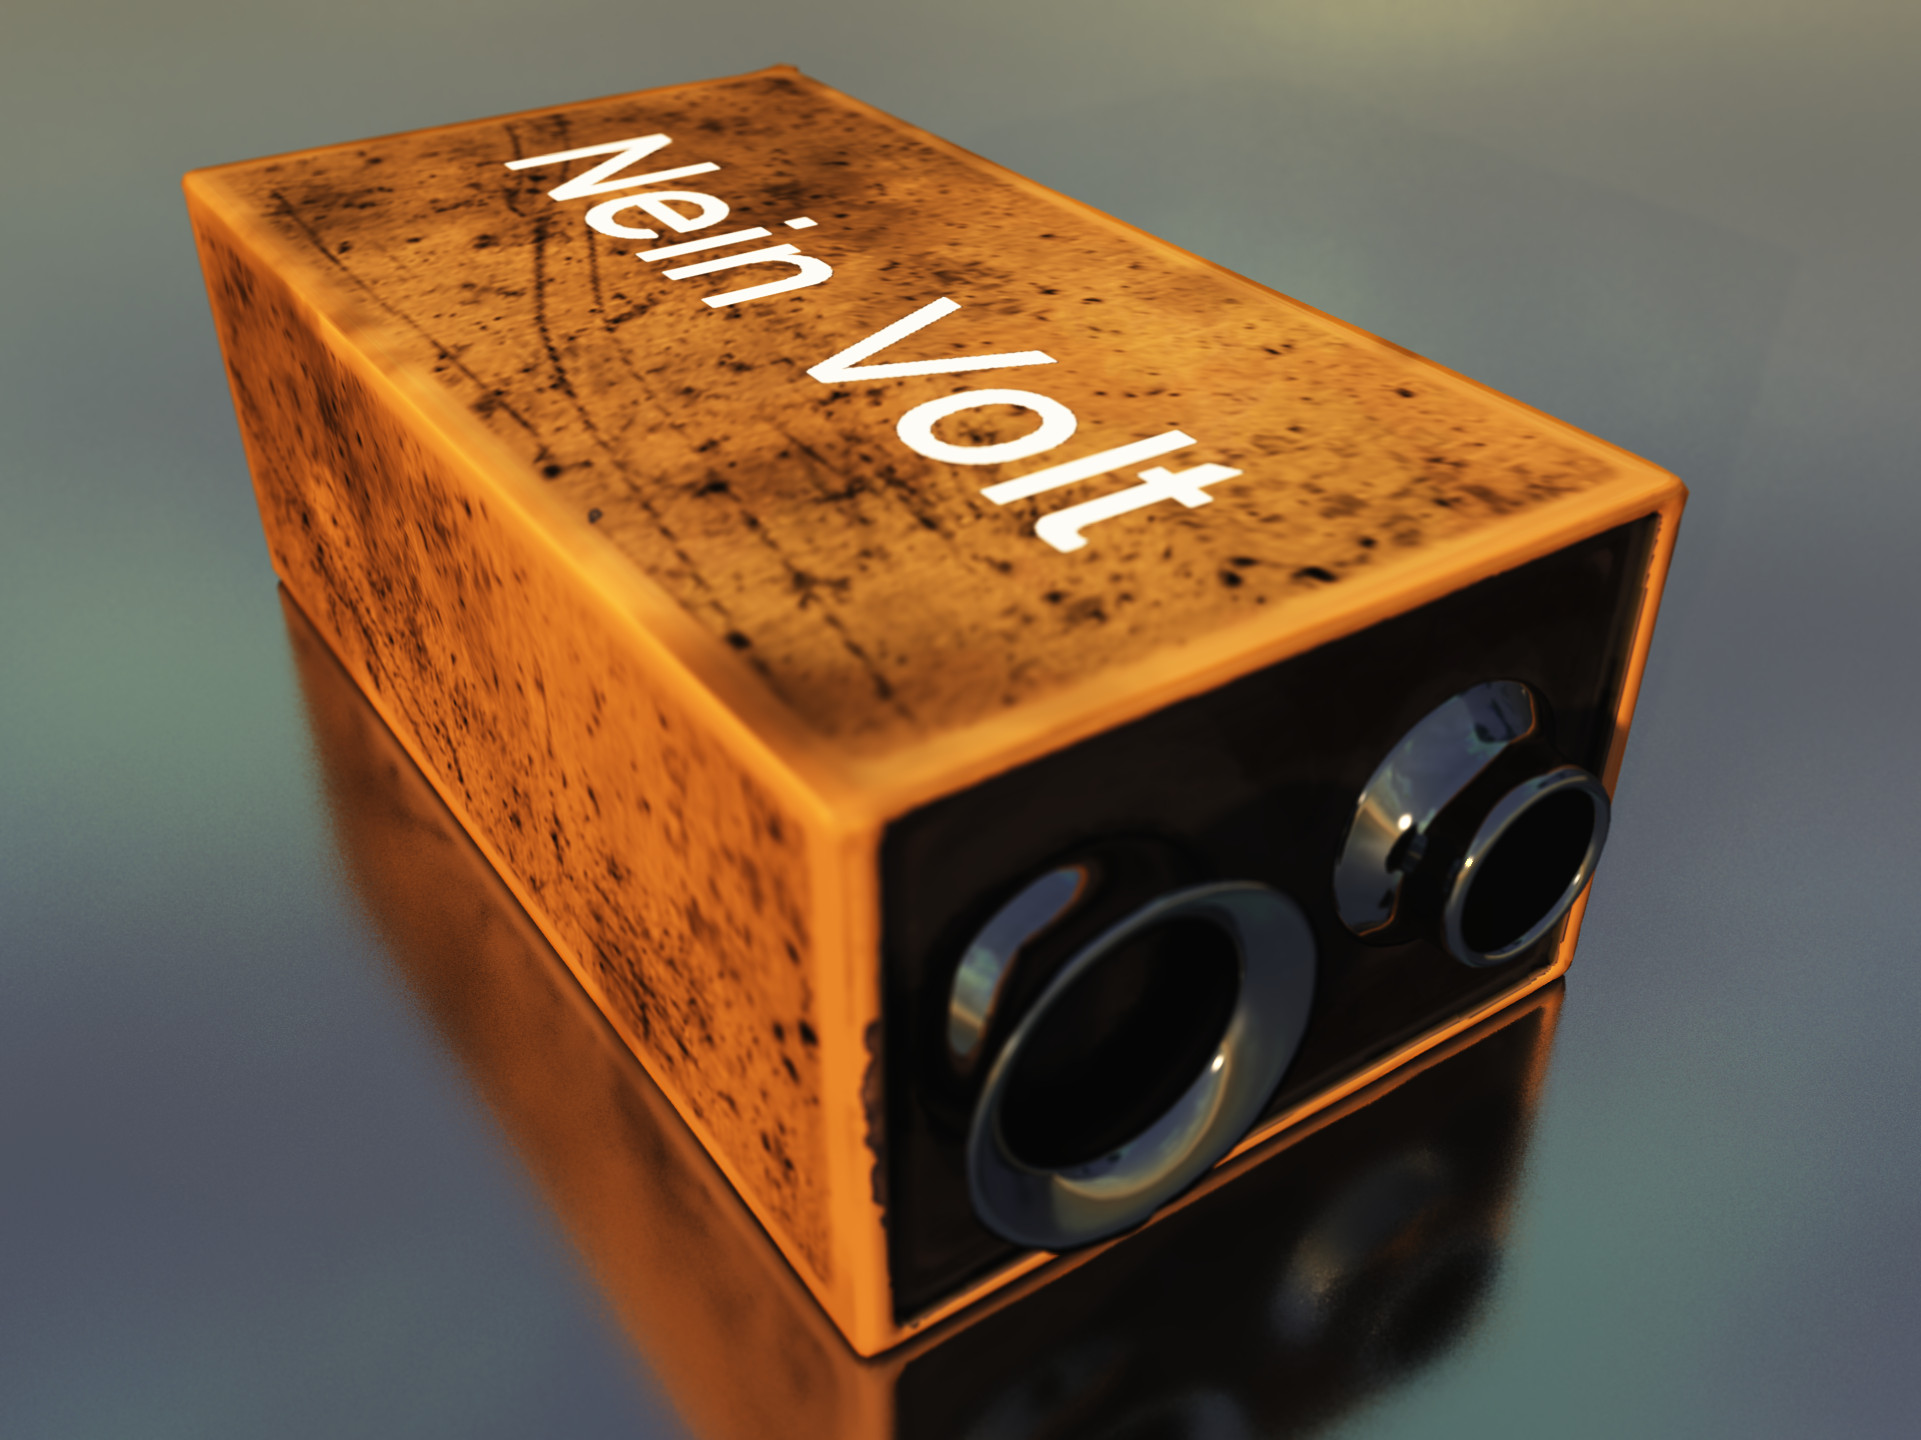
Since I had gone to the trouble of getting the major assemblies apart, I did want to satisfy my curiosity as to how much voltage was used to drive the fan. (If the fan would have refused to turn at all, my next step would have been to determine if it was getting any power.) Using my meter to take a reading across the pins got me about 33 VDC. Apparently, Peavey runs the fan a bit “hot,” because…

24V Fan

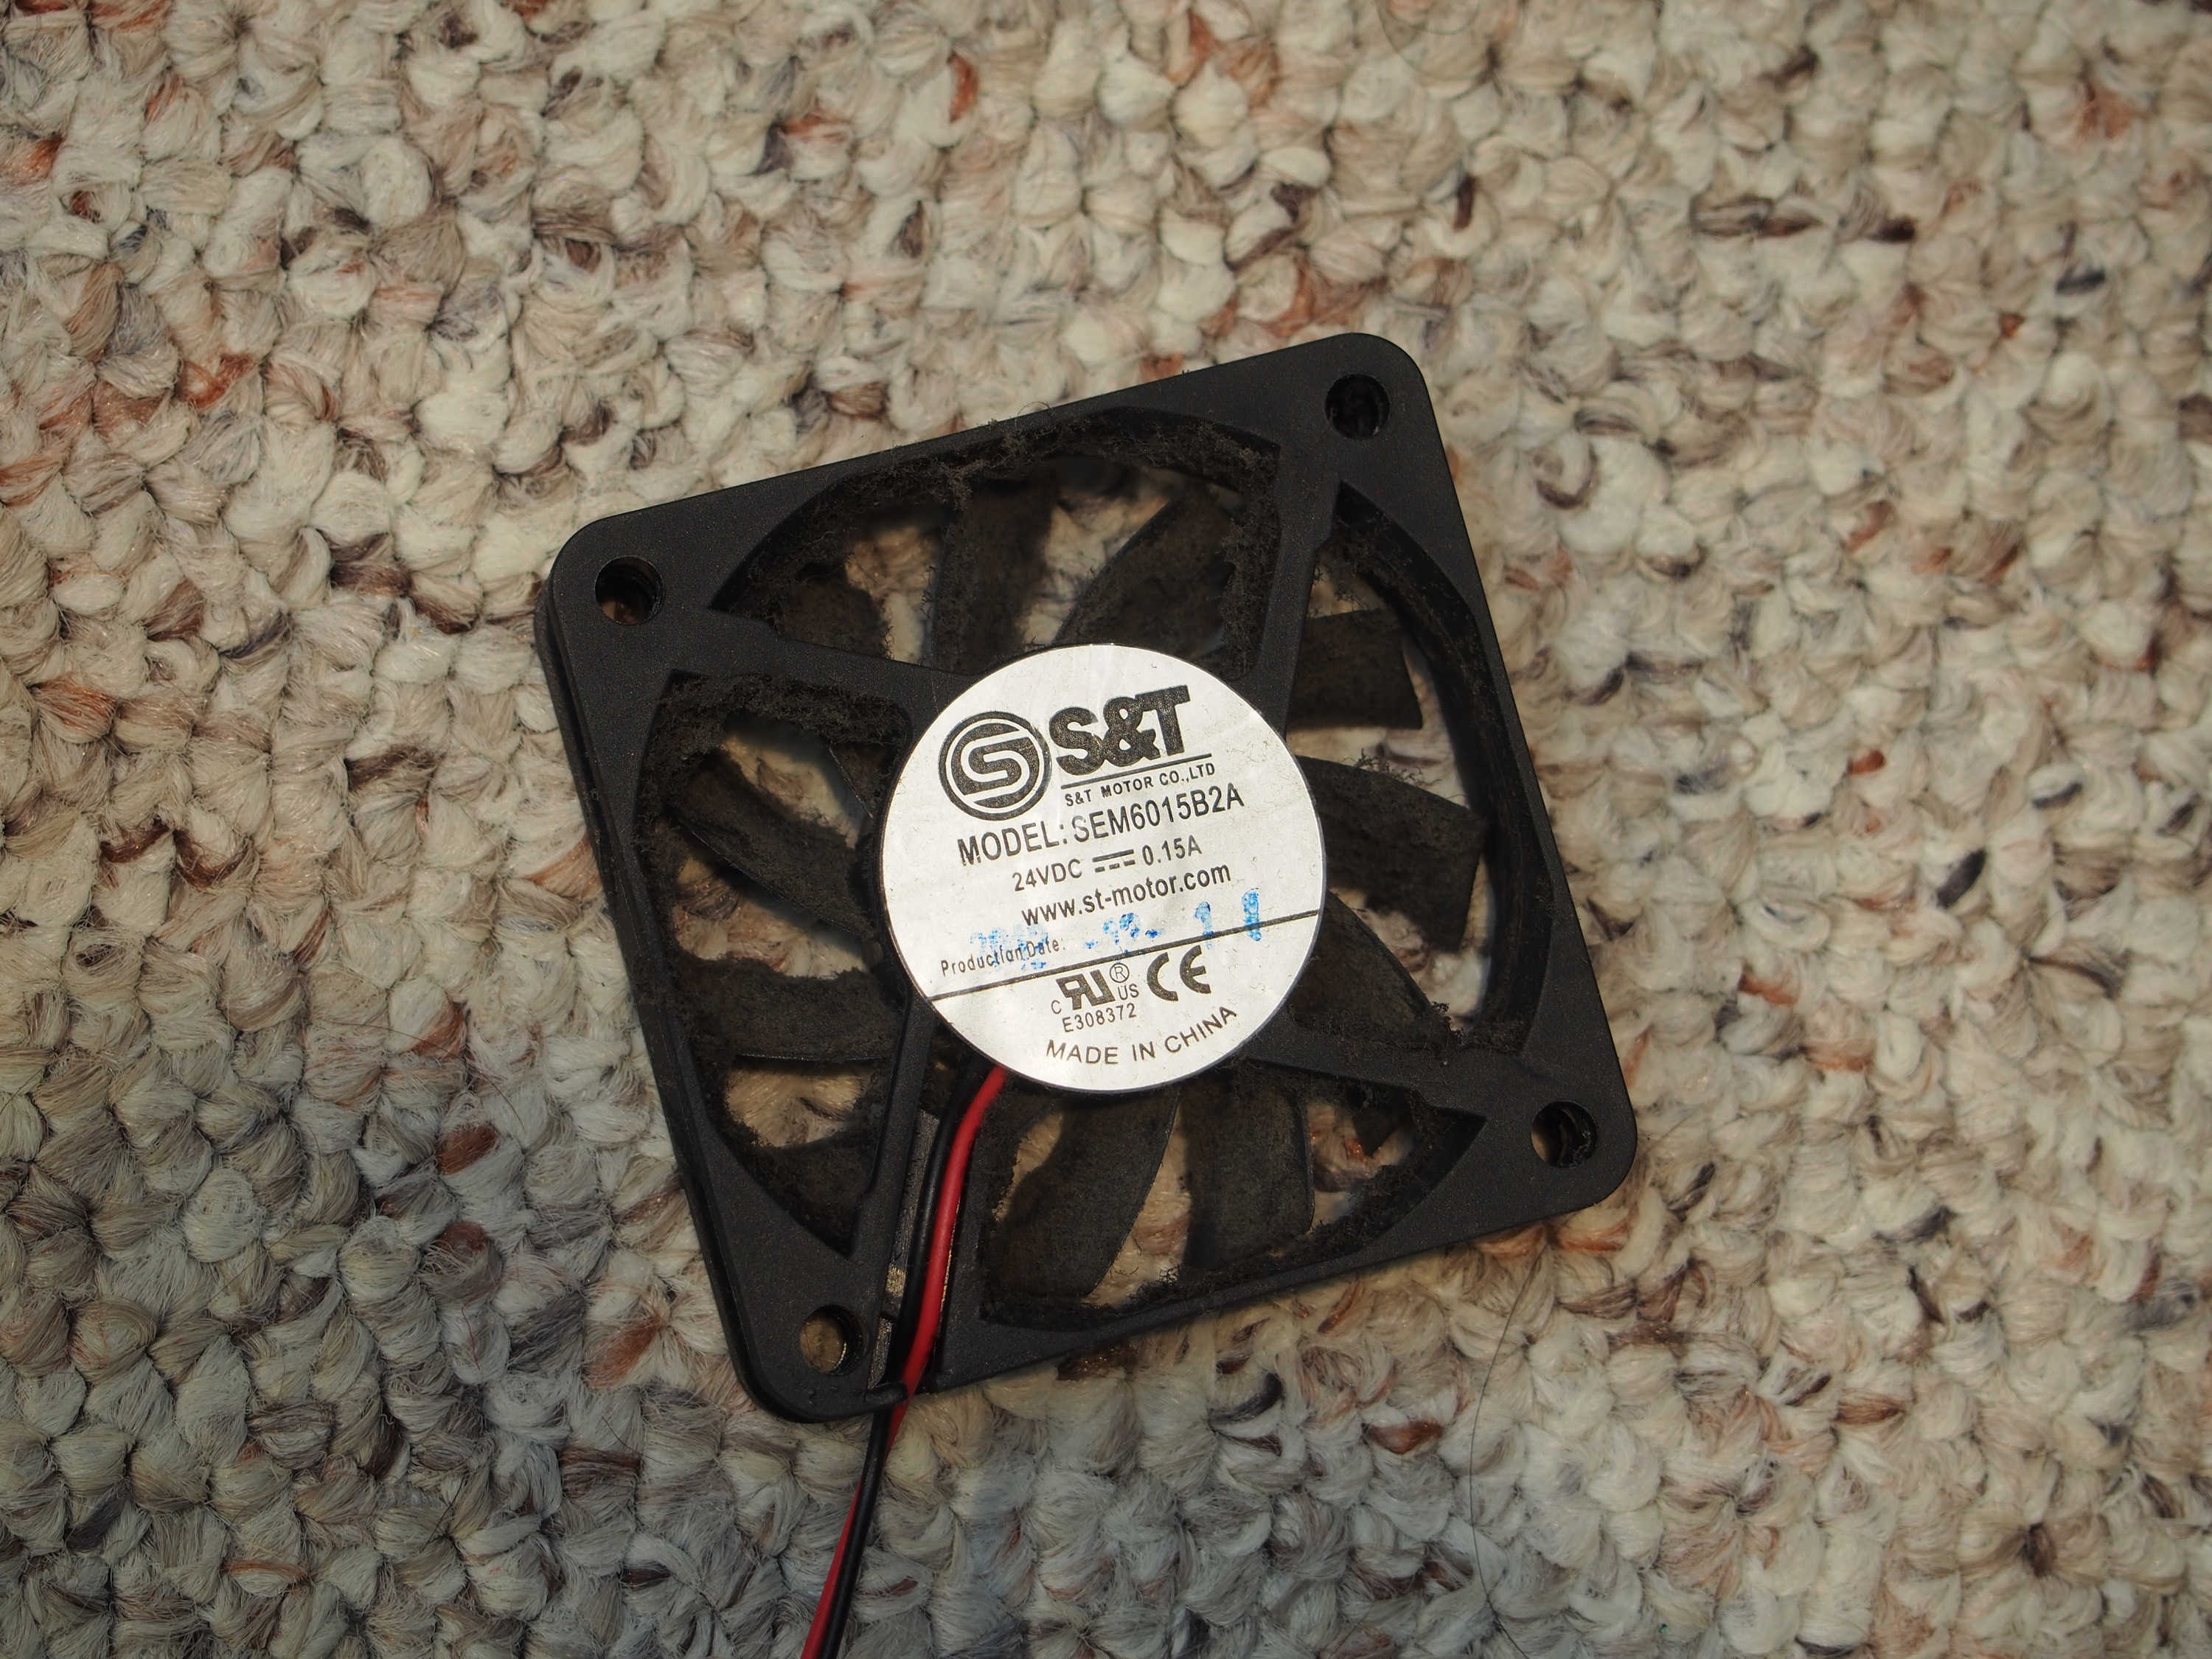
…the actual fan is a 24 VDC model. (Then again, the power supply tap could be a little “off.”)

Internal LEDs

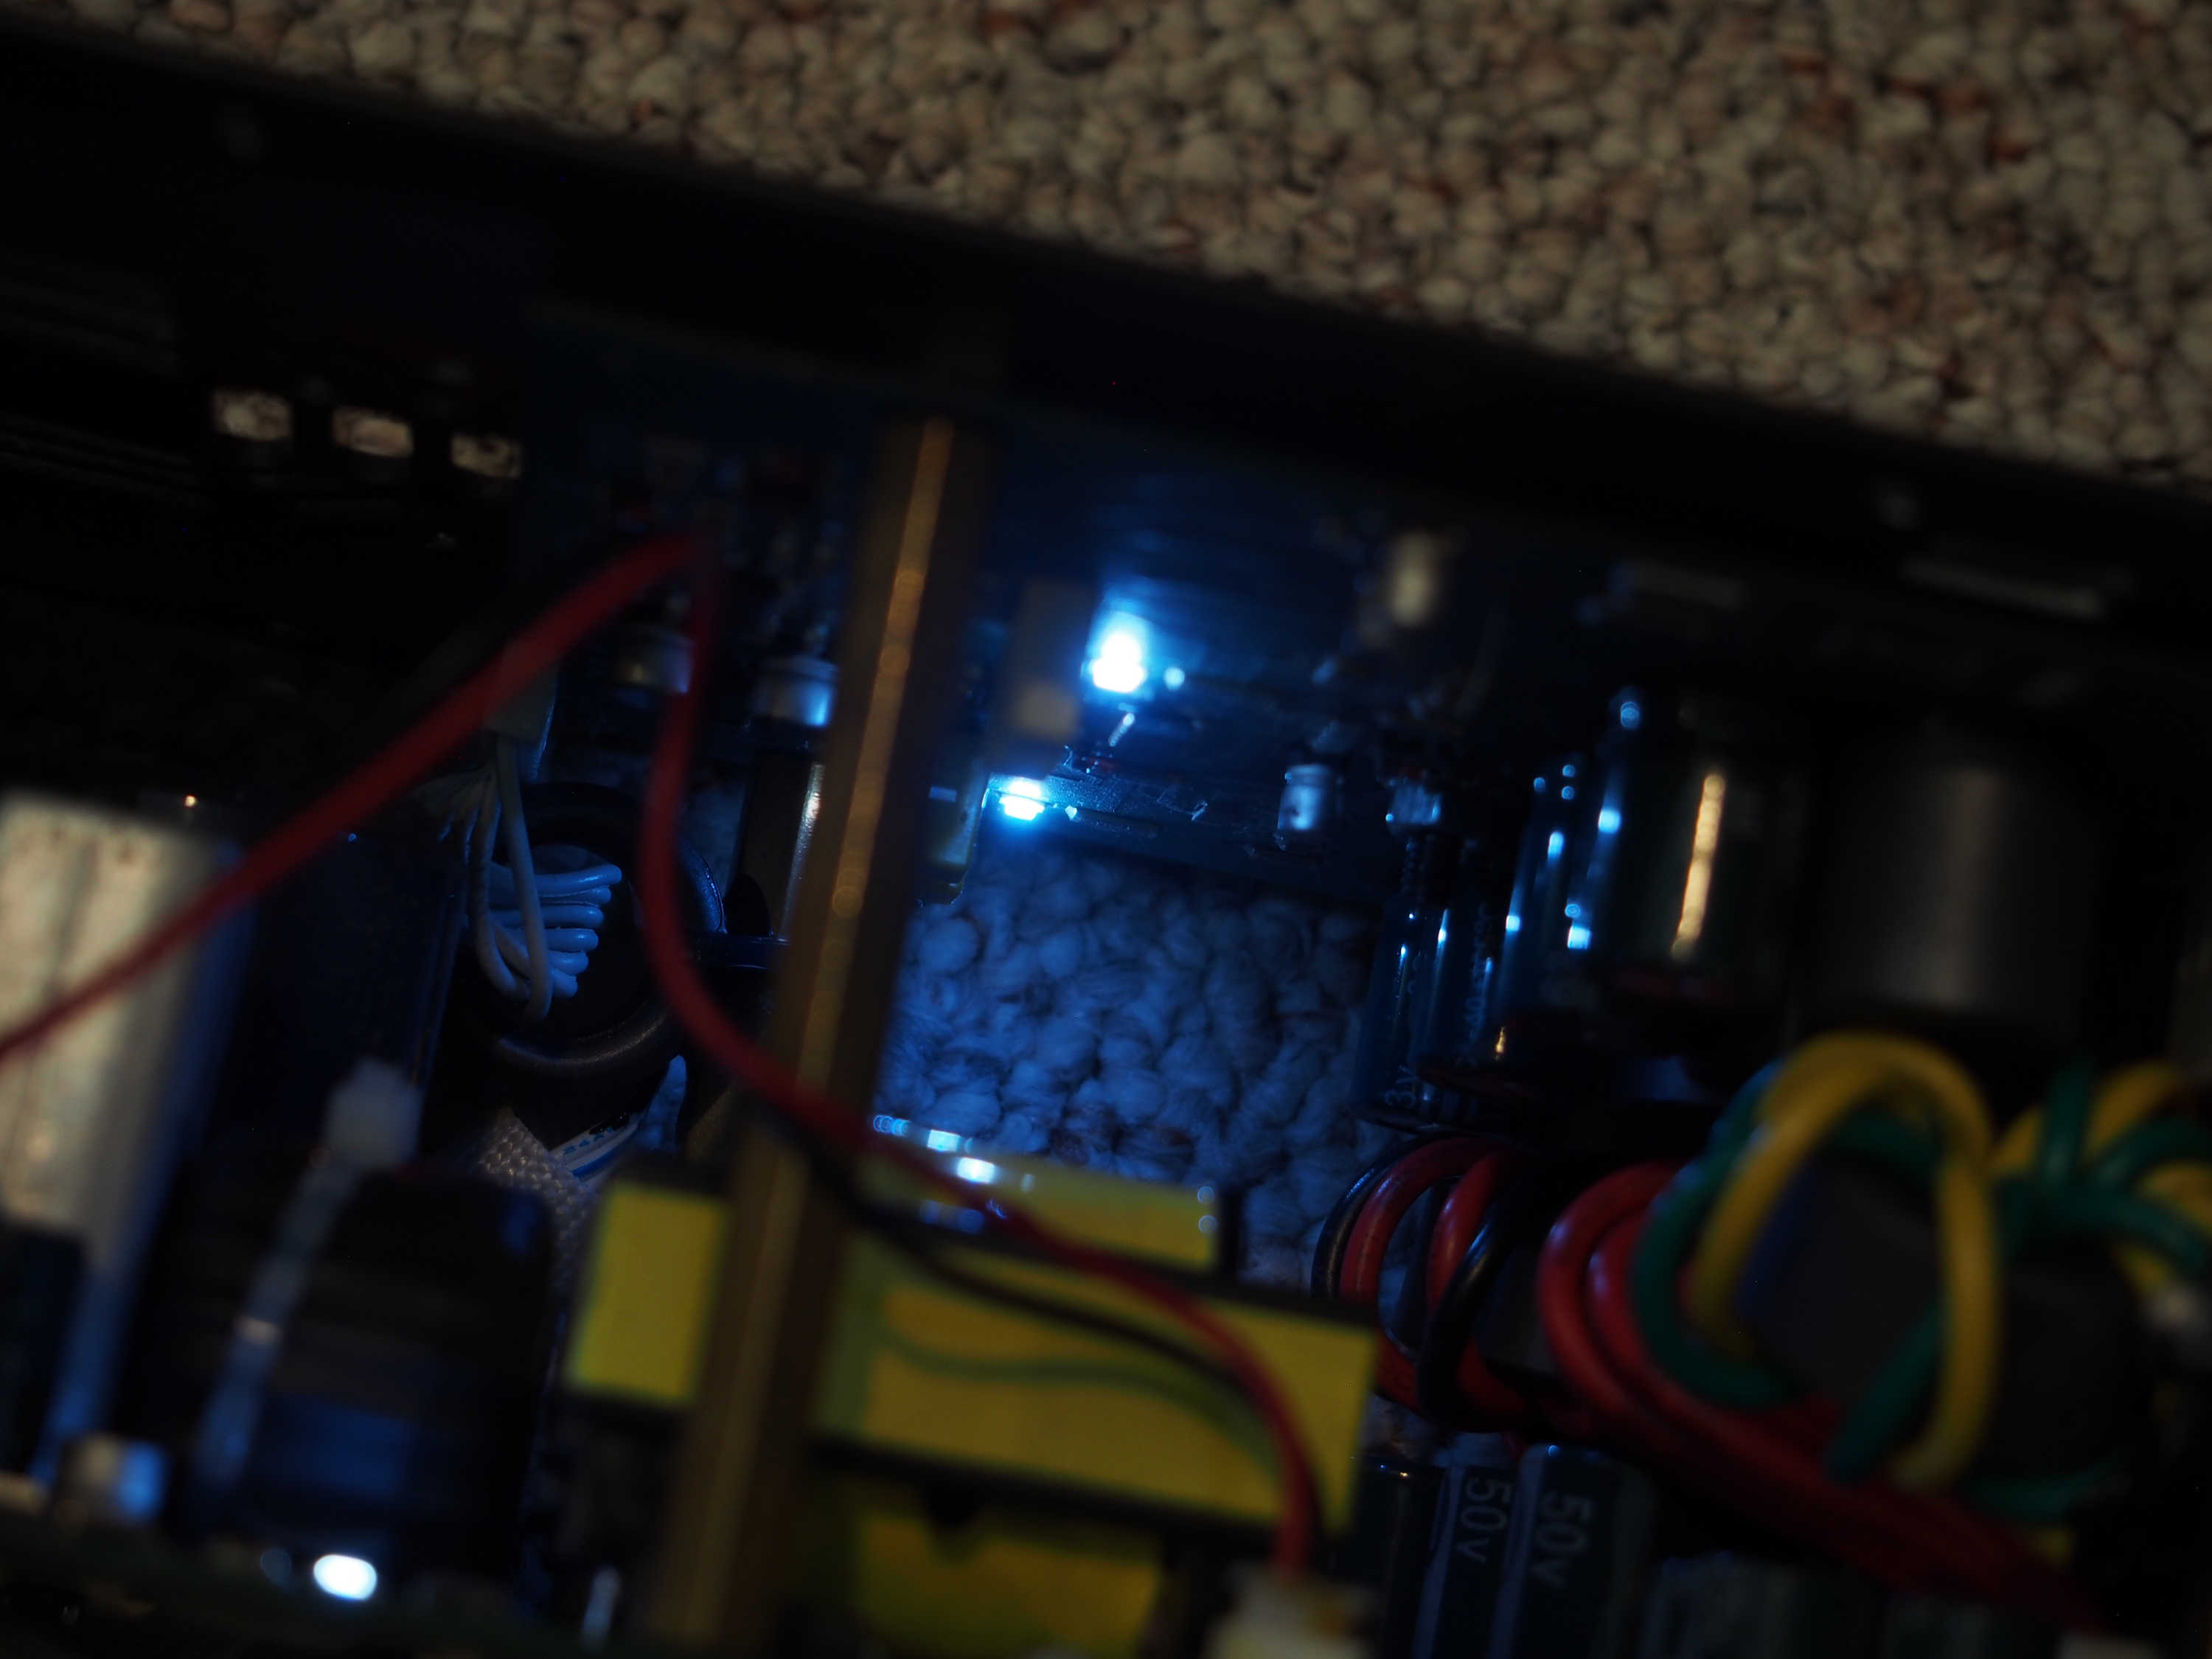
Side note: When you shut down the amplifier module, these LEDs stay lit for a while. I imagine that could be code for, “The big capacitors on this thing still have PLENTY of charge in ’em, pal, so don’t touch anything right now!”

Reassembled

I screwed the fan back onto the amp housing, and THAT’S where things got interesting. I applied power, and…nothing. The fan was at a dead stop again. I wondered if there was something about the fan’s orientation that was giving it trouble. I got out my screwdriver, and started loosening the fan from the mounting holes. Suddenly, with a bit of a grating scrape, the fan sprung to life again! I ran a couple of the screws back in a turn, and the blades ground to a halt.

The problem the whole time was that the chassis had been pressed too tightly against the fan hub. As I said before, the apparent behavior of PVxP fans is to pull air into the enclosure. In the case of these fans, that means that their integrated “cage” faces in, instead of out. As such, the outer plate can pretty easily be brought into contact with the unprotected side of the fan hub, and that can stop things pretty efficiently.

I backed a couple of screws out just a touch, and what do you know – I had a working fan again.

With the amplifier re-mounted to the box, I ran some music through the enclosure. Everything seemed fine, and that made me a happy audio-human.


The Majestic Grandeur Of Tranquility

Not everyone will appreciate it, but staying calm during a show is a really good idea.

Please Remember:

The opinions expressed are mine only. These opinions do not necessarily reflect anybody else’s opinions. I do not own, operate, manage, or represent any band, venue, or company that I talk about, unless explicitly noted.

tranquilityWant to use this image for something else? Great! Click it for the link to a high-res or resolution-independent version.

I didn’t really come up with the title of this article. Washington Irving did. I’m pretty sure Washington Irving knew basically nothing about production for rock shows, but he knew about life – and rock shows follow the rules of life.

One of the rules of life is that panic can kill you. It especially kills you in pressure situations involving technical processes. The reason why is pretty simple: Panic shuts off your rational mind, and a technical process REQUIRES your rational mind. When the…stuff…hits the fan, and you’re driving an audio rig, frantic thrashing will not save you. It will, instead, dig you an even deeper pit.

Calmness, on the other hand, allows you to think. The suppression of a fight-or-flight response means that your mental process is freed of having to swim upstream against a barrage of terrified impulses. You get more solutions with less work, because you’re able to linearly piece together why you’ve just been bitten in your ample, fleshy rear. Maintaining a tranquil, logical flow of problem solving not only means that you’re likely to get the problem fixed, it also means that you’ve got a fighting chance at finding your root cause. If you find and fix your problem’s root cause, your problem will stay solved. If all you do is mask the failure in a fit of “band-aid sticking,” you’re going to get bitten again – and soon, probably.

Another thing to keep in mind is that your emotional state is infectious in multiple ways. The most obvious connection is the simple transfer of mindset. If you’re seen as being in charge of the show – the person flying the plane, as it were – then you’re also unconsciously perceived as having authority over how to interpret the situation. If you, the authority are losing your crap, then the signal is being sent that the loss of one’s crap is the appropriate response to the problem. Deep down, we humans have “herd mammal” software installed. It’s a side-effect of how we’re constructed. Under enough stress, our tendency is to run that software, which obeys the overall direction of the group.

And the group obeys the leader. So, lead well.

The more indirect way that emotional state transfers is through your actions which affect others. The musicians on deck are not, of course, oblivious to what you’re doing with the console and system processing. If you’re banging away without much direction, eventually you will do something that seriously gums up a musician’s performance. This is especially true if you’re wildly tweaking every monitor channel in sight. One second, things are a little weird due to a minor problem. Then, you panic and start futzing around with every send and mute you can reach, and things get even weirder. Maybe even unusable. You don’t want that.

The majestic grandeur of tranquility, on the other hand, embodies itself in making precise, deliberate changes that mess with the performance as little as possible. It is engaging in the scientific process, running experiments and noting the results at very high speed. Being deliberate DOES slow down individual actions, but the total solution arrives more quickly. You end up taking the direct route, instead of a million side trips.

It’s Not Easy, And Not Everybody Gets It

If this sounds like a tough discipline, that’s because it is. Even being aware of its importance, I still don’t always do it successfully. (And I’ve had LOTS of practice.)

Also, some folks confuse serenity with inattentiveness.

I once worked a show where a member of the audience was a far more “high-powered” audio human than myself. This person worked on big shows, with big teams, in big spaces. This person knew their stuff, without a doubt.

The problem, though, was that the show was hitting some snags. The band had been thrown together to do the gig, and while the effort was admirable, the results were a little ragged. The group was a little too loud for themselves, and monitor world was being thrown together on the fly. It was a battle to keep it all from flying off the handle, and the show was definitely trying to run away. I was trying to take my own advice, and combat the problems surgically. As much as the game of “feedback whack-a-mole” wasn’t all that aesthetically pleasing, I was steadily working towards getting things sorted out.

Unfortunately, to this other audio-human, I didn’t look like I was doing enough. Their preferred method was to sledgehammer a problem until it went away, and I was NOT sledgehammering. Therefore, I was “doing it wrong.”

We ended up doing some pretty wild things to the performers in the name of getting things under control. In my opinion, the result was that the show appeared to be MORE out of control, until our EQ and monitor send carpet-bombing campaign had smashed everything in sight.

The problem was “fixed,” but we had done a lot of damage in the process, all in the name of “looking busy.”

To this day, I think staying calm would have been better for that show. I think staying calm and working things out methodically is best for all shows. My considered advice is (to take a page from Dumbledore) that everyone should, please, not panic.


We Are Water Flowing Downhill

If you’re stuck, try to go around.

Please Remember:

The opinions expressed are mine only. These opinions do not necessarily reflect anybody else’s opinions. I do not own, operate, manage, or represent any band, venue, or company that I talk about, unless explicitly noted.

waterflowingdownhillWant to use this image for something else? Great! Click it for the link to a high-res or resolution-independent version.

One of the most lethal threats to successfully pulling off a show is getting stuck.

Or, rather, agreeing to remain stuck when you don’t have to be.

We’ve all seen it happen. You’re setting up and dialing in, and something won’t cooperate. The entire flow of show-prep suddenly diverts towards making that thing cooperate. Minutes pass as more and more resources are devoted to solving the problem. An hour goes by, and you’re still stuck, and you look up, AND IT’S 15 MINUTES TO DOORS, HOLY CRAP!

I’ve been there. I’ve been there (and been guilty of perpetrating it) when a snag has brought an entire production – even a decently planned one – to a grinding halt for far too long. So what do you do?

One thing you can do is learn the lesson of water flowing downhill.

Zen And The Critical Path

Consider the stream flowing down a rocky bed. The current has a destination which it must reach, yet there is impedance to the flow of the liquid. The rocks are obstacles. Snags. The water cannot flow through them.

Yet the water is untroubled. It merely flows around the rocks, acknowledging the stones by slowing – yet not stopping. The water continues down the critical path, and thus overcomes the rocks without overpowering them. The current strives against the impedance without effort.

The water does not confuse an obstacle in the path with the ending of the path.


Too often in troubleshooting, we make the assumption that we can not move onto solving the rest of a problem until we have solved each piece of the conundrum in some arbitrary order. However, this is rarely the case. Many shows are inherently “parallel” in nature. The lead vocal has a route to the PA, and the kick drum has a route to the PA. Those routes are very likely independent of one another until they are summed into an output path. If the kick drum’s independent route fails, but the lead vocal can still make it, you have a workable show. It may not be the exact show you were hoping for, but you still have a show.

The critical path is getting whatever MUST go through the audio rig to go through it. Everything else is a bonus. The vast majority of small-venue shows can come to a workable conclusion with nothing but the lead vocal working. Like I said, that may not be the best possible show – but it will still be recognizable as a show. If you hit an obstruction that you can’t quickly clear, take a moment and think: “If this can’t be made to work, is it truly the end of the show?”

If you answer in the negative, you are snagged on something that is NOT on the critical path. Flow around it. You can always come back to it later, but for now, you need to focus on arriving at the minimum viable product. In many cases, people only get stuck on a technical problem because they “assent” to being stuck. They decide to stop and bang away at the issue when there is no physical reason that other (actually more critical) issues could not be addressed first. The longer they consent to remaining obstructed, the more that the effort required to handle the rest of the show is concentrated into a shorter span of time. At some point, a threshold of panic is reached. This is a bad scene.

Do not confuse an obstacle in the path with the ending of the path. We are water flowing downhill.


Maybe The Only Way Out Is “Thru”

Out may be “thru,” but “thru” usually isn’t out.

Please Remember:

The opinions expressed are mine only. These opinions do not necessarily reflect anybody else’s opinions. I do not own, operate, manage, or represent any band, venue, or company that I talk about, unless explicitly noted.

xlrshellWant to use this image for something else? Great! Click it for the link to a high-res or resolution-independent version.

The labeling of jacks and connections is an inexact science.

Really.

For instance, there are audio devices with “in” and “out” jacks where you can connect a source to either point and be just fine. It might be confusing, though, to have two areas labeled “input” (or even “parallel input’), so one jack gets picked to be “in,” with the other as its opposite.

At some point, you just get used to this kind of thing. You trundle along happily, connecting things together without a care in the world.

…and then, somebody asks you a question, and you have to think about what you’re doing. Just why is that jack labeled as it is? You’re taking signal from that connector and sending it somewhere else, so that’s “out,” right? Why is it labeled “through” or “thru,” then?

The best way I can put it to you is this: Usually, when a manufacturer takes the trouble to label something as “thru,” what appears on that connector is the input signal, having gone through the minimum necessary electronics to make the connection practical and easy to use. A label that reads “out” may be a signal that passed through a lot of electronics, or it may be a “thru” that’s simply been called something that’s easier to understand.

“Thru,” From Simple To Complicated

thru-wire

That up there is a simplified depiction of the simplest possible “thru.” It’s two connection points, with nothing but some sort of conductive connection between them. Also on that connection is some sort of internal arrangement of electronics. In this kind of thru, you might see male and female jacks on the different points (if the connections are XLR), but the reality is that both connectors can work for incoming or outgoing signals. Put electricity on either jack, and the simple conductors between those jacks ensure that the signal is present on the other connection point.

This kind of thru is very common on passive loudspeakers and a good many DI boxes. You might see a connector that says “in,” and one that says “out,” but they’re really a parallel setup that feeds both an internal pathway and the “jumper” to the other connector. Because the electrical arrangement is truly parallel, the upstream device driving the signal lines sees the impedance of each connected unit simultaneously. This leads to a total impedance DROP as more units are connected; More electrical pathways are available, which means lower opposition to current overall.

thru-buffer

So, what’s this, then?

This is a buffered thru. In this case, the two jacks are NOT interchangeable. One connector is meant to receive a signal that gets passed on to internal electronics. That connector is linked to a jack with outgoing signal, but in between them is a gain stage (such as an op-amp). The gain stage probably is not meant to perform meaningful voltage amplification on the input. If two volts RMS show up at the input, two volts RMS should be present at the output. The idea is to use that gain stage as an impedance buffer. The op-amp presents a very high input impedance to the upstream signal source, which makes the line easy to drive. That is, the buffer amp makes the input impedance of the next device “invisible” to the upstream signal provider. A very long chain of devices is made possible by this setup, because significant signal loss due to dropping impedance is prevented.

(Then again, the noise floor does go up as each gain stage feeds another. There’s no free lunch.)

In this case, you no longer have a parallel connection between devices. You instead have a serial connection from buffer amp to buffer amp.

thru-logic

The most sophisticated kind of thru (that I know of) is a connection that has intervening logic. There can be several gradations of complexity on that front, and a “thru” with logic isn’t something that you tend to see in audio-signal applications. It’s more for connection networks that involve data, like MIDI, DMX, and computing. The logic may be very simple, like the basic inversion of the output of an opto-isolator. It can also be more complex, like receiving an input signal and then making a whole new copy of that signal to transmit down the chain.

A connection this complex might not really seem like a “thru,” but the point remains that what’s available at the send connection is meant to be, as much as possible, the original signal that was present at the receive connection…or a new signal that behaves identically to the original.

Moving Out

So, if all of the above is “thru,” what is “out?”

In my experience the point of an “out” is to deliver a signal which is intended to have been noticeably transformed in some way by internal processing. For instance, with a mixing console, an input signal has probably gone through (at the very least) an EQ section and a summing amplifier. It’s entirely possible to route the signal in such a way that an input is basically transferred straight through, but that’s not really what the signal path is for.

With connection jacks, the label doesn’t always tell you exactly what’s going on. There might be a whole lot happening, or there might be almost nothing at all between the input and output side. You have to look at your owner’s manual – or pop open an access cover – to find out.


Deterministic Troubleshooting

Audio systems can be counted on to be deterministic in every practical way, but you can’t always count on them to be the same system.

Please Remember:

The opinions expressed are mine only. These opinions do not necessarily reflect anybody else’s opinions. I do not own, operate, manage, or represent any band, venue, or company that I talk about, unless explicitly noted.

Want to use this image for something else? Great! Click it for the link to a high-res or resolution-independent version.

In my experience, audio systems are deterministic creatures at the practical level.

That is to say, giving the system an input results in getting an output which has always been transformed in the same way. Introduce an input into a perfectly linear system which runs through a +6 dB gainstage, and you can count on getting your input, +6 dB, at the output. Give your input to a system with a nonlinear transfer function and a +6 dB gainstage, and you can be confident that the other end of the system will spit out your input signal, plus the filtering of the transfer function, and +6 dB of level.

I am, of course, excluding noise.

Electronic self-noise, if you’re being really picky, displays “random” behavior. The overall level and frequency content is statistically predictable, but the exact output at any given instant can’t be precisely foreseen. If you include the noise in your description of the output, then yes, you can argue that a sound system is non-deterministic.

But, let’s be real. At a mental level, whether we’re listening to a system or describing its behavior, we subtract the noise. There’s also the whole matter of best practices dictating that systems should be run in such a way that the noise is insignificant when compared to the signals, which makes that mental subtraction trivial.

Anyway – as far as I can tell, audio systems are deterministic in every way that really matters.

This, and a somewhat surprising component of it, can inform our concepts of troubleshooting.

Apparent Non-Determinism Makes Life Difficult

Notice that I said, “apparent.”

See, I was originally going to write this article by saying that a sound rig displaying non-deterministic behavior is one of the toughest things to troubleshoot. However, in thinking about things more fully, I’ve come to the conclusion that audio setups aren’t really capable of being non-deterministic. They can SEEM to become non-deterministic, but they aren’t actually. What truly happens is that you expected one particular system, but actually have something else.

Let’s say that you set up a FOH PA system. Everything is working nicely. You give it an input, and you get the output you expect from the loudspeakers. Groovy.

Then, when you’re not looking, somebody accidentally pulls the connection that links the console with all the downstream bits. Unaware of this, you return to FOH control and give the system an input. The output is silence. It’s not the output you expected, but the system hasn’t entered a non-deterministic state. Rather, what you have is a different system: A system that ends at the console. A mixing console that can’t pass its signals to an output transducer has an acoustical gain of 0. (Not 0 dB! A gain of 0. The signal is multiplied by 0. Any signal multiplied by 0 is 0.) The system, in truth, is both entirely deterministic and highly predictable. Any input to it results in no acoustical output.

So, no, the rig isn’t non-deterministic – it’s just not the system you expected to be in place. There is a reason that the setup is not behaving as expected, and that reason (a disconnected cable, in this case) can be isolated and corrected.

I recognize that this is small comfort to those of you, including me, who have been faced with intermittent problems. Intermittent failures are the hardest to fix, and the most nail-biting to endure, because you’re up against something that APPEARS to be non-deterministic. The output from a given input becomes unpredictable. You might be just fine for hours, and then things go very wrong, and then you’re fine for a few minutes, and then something else happens, and your blood-pressure goes through the roof.

Basically, you’re trying to debug multiple systems without knowing which system you’re currently debugging. (Good luck with that.) This is why I have been known to breathe a sigh of relief when a rig “breaks,” and has the decency to then STAY broken. When that happens, I only have to troubleshoot one system; A deterministic system which either has no output, or some output which is obviously and predictably not what I want.

If you’re faced with an audio setup that appears to be doing things at random, what you really have is – very likely – more than one system. Those systems are trading places at unpredictable times. Every one of those systems is deterministic, so what you have to do is stop all systems but one from manifesting themselves. If you can directly get that one system to be the setup that gives you the desired output, that’s great. If you can’t, though, that’s really okay. Even if the output isn’t what you ultimately want, causing your assemblage of gear to settle into one stable state will give you the leverage necessary to figure out what’s wrong and fix it. If the system seems to be non-deterministic, do what you have to do to make it appear to be as deterministic as it actually is. You’ll be back in control, and control is what you need in order to get things working again.


Buzzkill

Ridding yourself of hum and buzz is like all other troubleshooting: You have to isolate the problem to fix it.

Please Remember:

The opinions expressed are mine only. These opinions do not necessarily reflect anybody else’s opinions. I do not own, operate, manage, or represent any band, venue, or company that I talk about, unless explicitly noted.

buzzkillWant to use this image for something else? Great! Click it for the link to a high-res or resolution-independent version.

Not all hums and buzzes are equally bad. Honeybees hum and buzz, but they’re super-helpful creatures that are generally interested in being left alone and making honey. Wasps, like the one pictured above, are aggressive jerks.

Of course, this site isn’t about insects. It’s about audio, where hum and buzz mean problems. Unwanted noise. Blech.

I recently got an email from a friend who wanted to know how to de-buzzify (I just made that word up) a powered mixer. When you mercilessly distill what I told him, you come up with a basic truth that covers all of troubleshooting:

The probability of an effective fix for a problem is directly proportional to your ability to isolate the problem.

Solitude

The importance of finding the exact location of a fault is something that I don’t believe I can overemphasize. It’s the key to all the problem-solving I’ve ever had to do. It doesn’t matter if the problem is related to audio signal flow, car trouble, or computer programming; if you can actually nail down the location of the problem, you’ve got a real shot at an effective (and elegant) fix.

The reverse is also true. The less able you are to pinpoint your conundrum’s place of residence, the more likely you are to end up doing surgery with a sledgehammer. If you can’t zero-in on a root cause, you end up “fixing” a certain amount of things that aren’t actually being troublesome. The good news is that you can usually take an iterative approach. All problems begin with “this system isn’t working as I expected,” which is a completely non-specific view – but they don’t have to end there. The key is to progressively determine whether each interrelated part of the system is contributing to the issue or not. There are lots of ways to do this, but all the possible methods are essentially an expression of one question:

“Is the output of this part of the system what I expect it to be?”

So…here’s a way to apply this to buzz and hum problems.

Desperately Seeking Silence

Talking in depth about the exact electrical whys and wherefores surrounding strange and unwanted noises is a little bit beyond my experience. At a general level, though, the terminology of “ground loop” provides a major clue. Voltage that should be taking a direct path to ground is instead taking a “looping” or “circuitous” path. A common cause of this is equipment receiving mains (“wall”) power from two different circuits, where each path to mains ground has a significantly different impedance. There is now a voltage potential between the two pieces of gear.

Bzzzzzzzz….

You can also have a situation where two device’s audio grounds are interconnected such that there is a potential between the two devices.

Hmmmmmmzzzzzzzz…

Anyway.

The first thing to do is to decide what piece of equipment you’re testing against. Maybe it’s a mixing console. Maybe it’s an amplifier. Whatever it is, you are asking the question from before:

“Is the output of this part of the system what I expect it to be?”

Or, more specifically…

“I expect this device’s output to be quiet, unless an audio signal is present. Is that the case?”

To answer that question, you need isolation.


WARNING: At NO point should you do anything to disconnect the mains-power/ safety grounds from your equipment. It’s there to prevent you from dying if the equipment chassis should become energized. In fact, as a start, try to verify that the mains-power sockets you are using actually DO provide a connection to “earth.” If they don’t, stop using them until they’re fixed. You may even find that your noise problem goes away.


To get isolation, start by disconnecting as much as you possibly can from the DUT (the Device Under Test). Of course, you’ve got to have some kind of way to monitor the output, so that might mean that you can’t disconnect everything. As much as possible, try to ensure that all mains-power grounds offer the same impedance – if it must stay connected, and it requires mains power, get all the power to connect to the same socket. A multi-outlet power tap can come in handy for this.

Is the output what you expect?

If yes, then something which was connected to your DUT’s input has a good chance of being the problem. At this point, if possible, treat each potential culprit as a secondary DUT in turn. If feasible, connect each suspect directly to your monitoring solution. If the ground loop manifests itself, and the suspect device requires mains power, try getting power from the same tap that the primary DUT is on. If the loop goes away, you’ve established that the two devices in play were likely having an “unequal impedance to ground” problem. If the loop stays in effect, you can jump back up to the beginning of this process and try again, but with the gear you had just plugged in as the new, primary DUT. You can keep doing this, “moving up the stack” of things to test until you finally isolate the piece of gear that’s being evil. (IMPORTANT: Any piece of the chain could be your problem source. This includes cables. You may need to pack a lunch if you have a lot of potential loop-causers to go through.)

If you can’t get the buzz to manifest when adding things back one at a time, then you might have a multi-device interaction. If possible, work through every possible combination of input connections until you get your noise to happen.

But what if the output on the original DUT was NOT what you expected, even with everything pulled off the output side?

At that point, you know that an input device isn’t the source of your trouble with this particular DUT. This is good – your problem is becoming isolated to a smaller and smaller pool of possibilities.

Try to find an alternate way to connect to your monitoring solution, like a different cable. If the problem goes away, that locates the cable as the menace. If you’re switching the connection, and the noise remains with no audio path, then the monitoring system has the problem and you need to restart with a new DUT. (If you’ve got a mixer connected to an amp and a speaker, and a ground loop stays audible when the mixer-to-amp connection is broken, then the amp is your noise source.)

If you’ve tried all that and you still have the buzz, it’s time to try a different circuit. Get as far away from the original mains-power socket as you can, and reproduce the minimal setup. If the ground-loop goes away, then you may have a site-wiring issue that’s local to the original socket(s). If the problem doesn’t go away, it’s time to take a field-trip to another building. It’s possible to have a site-wide electrical problem.

If the loop still won’t resolve, it’s very likely that your DUT has an internal fault that needs attention. Whether that means repair or replace is an exercise left to the reader.

Hopefully, you don’t get to that point – but you won’t figure out if you ARE at that point unless you can isolate your problem.


Charged With Battery

Mysterious distortion just might be caused by a dying battery.

Please Remember:

The opinions expressed are mine only. These opinions do not necessarily reflect anybody else’s opinions. I do not own, operate, manage, or represent any band, venue, or company that I talk about, unless explicitly noted.

neinvoltWant to use this image for something else? Great! Click it for the link to a high-res or resolution-independent version.

If you know a little German (and who doesn’t, what with all the WWII movies out these days) you might get the pun in the picture up there. If you’re mystified, well, let’s just say that Google is your friend.

Anyway.

Picture this: You’re the sound craftsperson for a themed, “acoustic-music” gig hosted by JT Draper. The middle act features a player who wields an upright bass. Part of his kit is a piezo-plus-mic pickup system that uses a specialized, battery-powered preamp. You get started with line-check and things seem okay. The bass seems “twangy” through the PA, but you don’t have a lot of time to think about it. The first song gets played, and you feel like there isn’t enough of that upright. You get on the gas with the appropriate channel, but it doesn’t seem to be helping much.

You solo the channel.

The bass is heavily distorted.

So, you run up to the stage after the song, and have a quick conference with the player. The prime suspect is the battery, but changing it out requires a screwdriver and a few minutes. In the end, the very fastest thing to do is to grab an unused instrument mic, point it at the bass, and dive back in.

But why would the prime suspect be the battery?

Jump Off The Swing

To be clear, you can get the sound of distortion from a bad connection. A partial short can really make some interesting (also, evil and vicious) noises. Get voltage not quite going where it’s supposed to, and electronics can become rather unhappy.

If a bad connection seems unlikely, however, the “classic” precipitating factor for harmonic distortion becomes the culprit: Something is being asked to “swing” more voltage than its design allows. When this occurs, the overloaded device produces spurious tones that are multiples of the frequencies present in the input signal – harmonics, in other words. As the device is driven harder and harder, its peak voltage remains fixed, but the RMS voltage rises. The distortion components become more and more prevalent in the output signal, raising its average level.

For example, here’s an analysis view of an undistorted 100 Hz tone.

undistorted

Now, I’ll simulate what happens when an attempt is made to drive that signal to a voltage that a device can’t actually swing at its outputs.

milddistortion

You can begin to see how the waveform is flattening out and gaining more “area under the curve.” Harmonics are also clearly visible in the FFT display.

Dial things up a bit more, and…

heavierdistortion

The average level of the signal continues to climb, while the peak is stuck at its maximum. Harmonics all the way up to the end of the audible range are clearly visible on the analyzer.

What does a dying battery have to do with this? Well…

Insufficient Supply For The Demand

If you’ve got yourself an active electronic circuit, i.e., a circuit that requires a steady “supply” voltage and not just the input signal in order to operate, there’s a very important limitation in play: Without some sort of additional component or device, you can NOT swing more voltage at the outputs than is available from the supply. If you find a way to safely boost the supply, that’s fine – but the boosted supply is now simply the supply.

If the supply voltage drops, then the amount of voltage you can cleanly swing will also drop. (Makes sense, right?)

So, if you’re rolling along happily, producing an output voltage that’s just below the maximum, what happens if the supply suddenly decreases? Well, if the available voltage is below what you’re trying to produce, you’re going to get distortion. How much distortion you get is dependent upon how much your supply has been reduced. For audio gear that gets connected to “mains” power, we (usually) don’t have to worry very much about the supply changing dramatically and unexpectedly. Batteries are a different story.

As a battery gets used, its voltage drops. At a certain point, that voltage drop can result in a supply that’s too low to accurately pass a signal with the desired amount of gain applied. Combine this with the tendency (as far as I’m aware) for batteries to discharge smoothly for a long while…then suddenly have their voltage “drop off a cliff,” and you’ve got a recipe for distortion that rears up rather quickly.

So, if a battery-powered device is suddenly producing a lot of distortion, a prime suspect is the death of that power cell. You DO need to eliminate the possibility of a connection problem, and you also need to be careful to check your gain structure. Some instrument preamps’ output levels can hammer the tar out of an un-padded console mic pre. If you’ve “controlled” for those two issues, though, it’s probably time to try a new battery.


The $3 Switch That Felled The $400 Amplifier

The thing that breaks is usually the mundane bit that gets handled all the time.

Please Remember:

The opinions expressed are mine only. These opinions do not necessarily reflect anybody else’s opinions. I do not own, operate, manage, or represent any band, venue, or company that I talk about, unless explicitly noted.

switchWant to use this image for something else? Great! Click it for the link to a high-res or resolution-independent version.

My formal education in audio was gotten at The Conservatory of Recording Arts and Sciences. During my time, there was only one campus (Tempe). We had an SSL 4056 G+ in studio A, which was great fun to use. I’m not really into the “analog mystique,” but I’ll be doggone if there isn’t something neat about all the knobs, buttons, and lights on a large-frame console.

All of us received a copy of the SSL instruction manual, and I still have mine. I haven’t looked at it in quite a while, but I remember it as one of the most lucid and helpful instruction books I’ve read. In it was a gem of a thought regarding troubleshooting. To paraphrase:

“If you run into trouble with your SSL console, you should first be sure that you have not pressed the wrong button. The console happily sits in the studio, day after day, without being moved, kicked, or dropped. It is unlikely that the console has actually suffered a failure.”

The technical writers at SSL may or may not have realized it (I think they probably did realize it), but what they said has generalizable implications for troubleshooting all manner of equipment failures:

While it is entirely possible for any device or component in a device to fail, the components and devices most likely to fail are those most exposed to physical wear of some kind.

This concept was very much on display when I started having problems with an amplifier at my regular gig.

Why Is It So Quiet In Here?

The amplifier in question was the QSC GX5 that runs our FOH mid-highs. I first noticed a problem when we were running a loud-ish show (not really loud, but a bit louder than average). I wasn’t getting enough clarity from the singer, so I “got on the gas” with his fader. I didn’t notice any real improvement, which mystified me. I cast about a bit, looking for a reason why pushing the fader around didn’t seem to be changing things. I happened to glance over at the amp rack, which revealed that the GX5 did NOT have power applied.

(As a side note, the basic audibility of everything in the show, even without the main part of the FOH PA, suggested that the onstage combination of band-sound and monitor wedges was in a good place.)

Anyway…

The GX5’s power switch was in the correct position, so I thought “maybe something is causing the amp to ‘thermal’ and shut down.” I tried cycling the switch.

Hooray! The power LEDs came on, and the amp slowly ramped up to full output availability. I resolved to get the dust out of the amplifier as soon as possible, which I did the next day.

And then the amp wouldn’t start up.

I tried flipping the switch again. Nope. I flipped the switch again, and gave the top half an extra-firm press.

“Click!” The amp started.

I figured that something was just getting “weird,” and that I could live with a little quirkiness. This went on for a couple of months, until a point was reached where the amp just would not get power. I yanked the unit out of the rack, unscrewed the case, and started looking around. Nothing seemed burnt or ruptured, so that was encouraging. I set the switch in the “on” position, and began wiggling wires. (Yes, I was careful to wiggle the wires in a way that would not get me killed.) Maybe there was a short somewhere. Maybe one of the wires to the switch had a break at the crimping. Maybe if I just tweaked one of those wires, it would-

“Click!” The lights on the front panel illuminated, the cooling fan whirred, and the amp was oka-

Nope.

I tried again. I got ahold of the same wire, moving it (and the “tab” contact on the switch) around a bit.

“Click!” The amp came to life. And then I got my tipoff: I heard the sound of electricity arcing inside the switch case. A thin stream of smoke also started to rise from inside the switch. Everything inside the amp was fine, but the user-accessible bit that turned the insides on was not well at all.

Switched Switches

Fast-forward a bit, and the amp was its old self again. A new switch was occupying the space where the old one used to be, and the new part was in much better shape. The old “rocker” had, over time, started to feel very soft when toggled between on and off. This change had occurred so gradually that I hadn’t noticed, but the comparison was undeniable. The new switch’s rocker button had a much firmer feeling of engagement when pressed; the old switch had simply worn down early.

This brings me back to the concept I presented earlier. Of all the parts in the amp, the one bit that was handled at every show was the moving part that allowed power to flow to everything else. Nothing else in or on the amp received more regular, physical stress – with the exception of the fan, perhaps. It was the most likely thing to go. Sure, something in the power supply could have failed. Sure, an actual amplifier component could have popped or fried. It can happen. Amplifiers can lead a tough life, full of heat and high-current.

It’s just that you’re so much more likely to have breakage occur in the parts that move. Of those moving parts, the ones most likely to die are those most subject to the stress of being “handled.” It’s very easy for a $3 switch to stop a $400 amplifier – at least temporarily. Don’t panic.


If It’s Gonna Break, I Hope That It Breaks Like It Means It

As soon as something has definitely failed, you can start routing around it.

Please Remember:

The opinions expressed are mine only. These opinions do not necessarily reflect anybody else’s opinions. I do not own, operate, manage, or represent any band, venue, or company that I talk about, unless explicitly noted.

I couldn’t write my regular article today, due to a power outage. In certain ways that seems apropos to this “consolation post.”

Catastrophic (or otherwise definitive) failure is preferable to intermittent failure.


Always Try To Fix The Thing With The Actual Problem

If it ain’t broke, fixing it won’t help much.

Please Remember:

The opinions expressed are mine only. These opinions do not necessarily reflect anybody else’s opinions. I do not own, operate, manage, or represent any band, venue, or company that I talk about, unless explicitly noted.

In regards to troubleshooting:

“Rocket surgery” can be a great thing…
As long as you’re working on the right rocket.

(Consider the implications of this carefully.)