Tag Archives: System Building

The Sublime Beauty Of Cheap, Old, Dinged-Up Gear

Some things can be used, and used hard, without worry.

Please Remember:

The opinions expressed are mine only. These opinions do not necessarily reflect anybody else’s opinions. I do not own, operate, manage, or represent any band, venue, or company that I talk about, unless explicitly noted.

Want to use this image for something else? Great! Click it for the link to a high-res or resolution-independent version.

I really do think that classy gear is a good idea in the general case. I think it sends a very important signal when a band walks into a room, and their overwhelming impression is that of equipment which is well-maintained and worth a couple of dollars. When a room is filled with boxes and bits that all look like they’re about to fail, the gigs in that room stand a good chance of being trouble-filled. In that case, musician anxiety is completely justified.

In the past, I have made updates to gear almost purely for the sake of “politics.” I don’t regret it.

At the same time, though, “new n’ shiny” equipment isn’t a guarantee of success. I’ve had new gear that developed problems very quickly, but more than that, new and spendy gear tends to make you ginger (in the timid sense). You can end up being so worried about something getting scratched up or de-spec’d that you forget the purpose of the device: It’s there to be used.

And that’s where the sublime beauty of inexpensive, well-worn equipment comes in. You’ve found a hidden gem, used it successfully in the past, will probably keep using it successfully in the future, and you can even abuse it a bit in the name of experimentation.

Case Study: Regular Kick Mics Are Boring

I’ve used spendy kick mics, and I’ve used cheap kick mics. They’ve all sounded pretty okay. The spendy ones are pre-tuned to sound more impressive, and that’s cool enough.

…but, you know, I find the whole “kick mic” thing to be kinda boring. It’s all just a bunch of iteration or imitation on making a large-diaphragm dynamic. Different mics do, of course, exhibit different flavors, but there’s a point where it all seems pretty generic. It doesn’t help that folks are so “conditioned” by that generic-ness – that is, if it doesn’t LOOK like a kick mic, it can’t be any good. (And, if it doesn’t COST like a kick mic, it can’t be any good.)

I once had a player inquire after a transducer I used on his bass drum. He seemed pretty interested in it based on how it worked during the show, and wanted to know how expensive it was. I told him, and he was totally turned OFF…by the mic NOT costing $200. He stated, “I’m only interested in expensive mics,” and in my head, I’m going, “Why? This one did a good enough job that you started asking questions about it. Doesn’t that tell you something?”

Anyway, the homogeneity of contemporary kick mic-ery is just getting dull for me. It’s like how modern car manufacturers are terrified to “color outside the lines” with any consumer model.

To get un-bored, I’ve started doing things that expose the greatness of “cheap, old, and dinged up.” In the past, I tried (and generally enjoyed) using a Behringer ECM8000 for bass drum duty. Mine was from back when they were only $40, had been used quite a bit, and had been dropped a few times. This was not a pristine, hardwood-cased, ultra-precision measurement mic that would be a real bear to replace. It was a knock-around unit that I had gotten my money out of, so if my experiment killed it I would not be enduring a tragedy.

And it really worked. Its small diameter made it easy to maneuver inside kick ports, and its long body made it easy to get a good ways inside those same kick ports. The omni pattern had its downsides, certainly. Getting the drum to the point of being “stupid loud” in FOH or the drumfill wasn’t going to happen, but that’s pretty rare for me. At an academic level, I’m sure the tiny diaphragm had no trouble reacting quickly to transients, although it’s not like I noticed anything dramatic. Mostly, the mic “sounded like a drum to me” without having to be exactly like every other bass-drum mic you’re likely to find. The point was to see if it could work, and it definitely did.

My current “thing” bears a certain similarity, only on the other end of the condenser spectrum. I have an old, very beat-up MXL 990 LDC, which I got when they were $20 cheaper. I thought to myself, “I wonder what happens if I get a bar-towel and toss this in a kick drum?” What I found out is that it works very nicely. The mic does seem to lightly distort, but the distortion is sorta nifty. I’m also freed from being required to use a stand. The 990 might die from this someday, but it’s held up well so far. Plus, again, it was cheap, already well used, and definitely not in pristine condition. I don’t have to worry about it.

Inoculation Against Worry Makes You Nicer

Obviously, an unworried relationship with your gear is good for you, but it’s also good in a political sense. Consternation over having a precious and unblemished item potentially damaged can make you jumpy and unpleasant to be around. There are folks who are so touchy about their rigs that you wonder how they can get any work done.

Of course, an overall attitude of “this stuff is meant to be used” is needed. Live-audio is a rough and tumble affair, and some things that you’ve invested in just aren’t going to make it out alive. Knowing this about everything, from the really expensive bits to the $20 mic that’s surprisingly brilliant, helps you to maintain perspective and calmness.

The thing with affordable equipment (that you’ve managed to hold on to and really use) is that it feeds this attitude. You don’t have to panic about it being scuffed up, dropped, misplaced, or finally going out with a bang. As such, you can be calm with people. You don’t have to jump down someone’s throat if they’re careless, or if there’s a genuine accident. It’s easy to see that the stuff is just stuff, and while recklessness isn’t a great idea, everything that has a beginning also has an end. If you got your money out of a piece of equipment, you can just shrug and say that it had a good life.

Have some nice gear around, especially for the purpose of public-relations, but don’t forget to keep some toys that you can “leave out in the rain.” Those can be the most fun.


Minimum Phase, Maximum Phase

Or…how you can learn to stop worrying and love your EQ.

Please Remember:

The opinions expressed are mine only. These opinions do not necessarily reflect anybody else’s opinions. I do not own, operate, manage, or represent any band, venue, or company that I talk about, unless explicitly noted.

phaseeqWant to use this image for something else? Great! Click it for the link to a high-res or resolution-independent version.

There’s a famous “Rane Note” out there which discusses the myth of “minimum phase.” You might want to read it. Even if you do read it, though, it’s possible to be confused. The confusion seems to come from a misunderstanding regarding the scope of the conversation – and also from misunderstandings regarding phase.

With phase being a more fundamental issue, it seems best to start there.

Set Phasers To Kill!

Some people hear the word “phase” and come dangerously close to an aneurysm. They panic. They have learned to equate phase exclusively with problems.

Phase issues can indeed cause problems. Yes, phase issues are one of the primary reasons why collecting a whole pile of speakers and spraying sound everywhere in a room is NOT a recipe for success with a PA system.

The thing is, though, that phase shift is a natural occurrence in all sorts of ways, and can be used as a very handy tool with audio systems. It’s like “The Force” from “Star Wars.” It is not, in itself, good or evil. It can be used well or badly, to your benefit or detriment. As stated in the opening sentence of “Myth #6” from the Rane Note I linked: “Phase shift is not a bad word.” I believe I can offer a proof: The equalization that you use with your PA system, from channel EQ on up to system-management filters, is probably NOT phase linear.

That is to say that the large majority of “affordable, user friendly” equalizers that I have encountered are “phase warping.” They are either one of two things. The first thing they can be is an analogue filter, which creates a resonant circuit using capacitors, inductors, and resistors. The second thing they can be is a digital filter which models the behavior of a resonant circuit. In both cases, phase shift is a natural part of the design. It is, in fact, required by the design. If the design had no phase shift, it wouldn’t work as a filter. Someone would have forgotten all the capacitors and inductors (or their digital equivalents). You would have no EQ at all.

This also has to do with what I mentioned about “the scope of the conversation.”

Your “common, easy to use” EQ is almost certainly an implementation of “IIR” filters. The components “resonate” or “ring,” and they do so forever until the system is de-energized. (There is, of course, a point where the ringing is so deep in the noise floor that it’s not worth bothering about.) There are such things as internally phase-linear equalizers. These equalizers use FIR filters, which do not rely on feedback for operation and can be constructed to operate without phase-shift. Because they are internally phase-linear, you CAN say that FIR based equalization is able to exhibit “less phase” than an IIR-based system. However, this statement is out of context when discussing the traditional “minimum phase” argument, which is a (pardon my crassness) pissing contest in the marketing realm of equalizers that use IIR filters. FIR implementations are outside of that context.

As an aside, I will also note that there is no such thing as a free lunch. You may have noticed that I used the words “internally phase-linear” when talking about FIR filters. I say that because FIR filters delay the signals they are working on. There is no internal phase shift because the entire bandwidth is subjected to the same delay time. However, if an FIR EQ is used, and delay compensation is neglected for unaffected signals, you will run into phase shift between the processed and unprocessed signals. The FIR-processed information will be “late.” (Whether this actually causes a real problem or not is related to your specific situation and is beyond the scope of this article.)

The Minimum Is The Maximum

Once the scope of the argument is sorted out, the second point of confusion seems – as ever – to be rooted in how products are marketed and discussed. For instance, it’s basically in-bounds for someone to say that the channel EQ on a console they use (or build) is “more musical” and “less phasey” than the channel EQ from some other mixer. People do have preferred workflows and equalizer flavors. You may also perceive that setting a channel EQ on console A to a +6 dB boost at 1 kHz sounds “less weird” than doing the same thing on console B.

But here’s the thing. I’m willing to bet that both of those consoles have channel EQs with factory-set bandwidths, and that console A’s bandwidth is wider. Here’s a simulation:

differentphase

Console A is on the left, and console B is on the right. Console B uses a more selective filter, which is produced by a more abrupt phase transition. The magnitude responses (output vs. frequency) of the two filters are NOT the same, even though the center frequency selections and gain settings are the same.

I’m comfortable making my bet because of my current understanding of how IIR equalization works, as evidenced above. Everything I’ve read or experienced leads me to believe a simple, but powerful theory of operation: With an IIR EQ, a particular magnitude response REQUIRES a specific phase response. There is no getting around it. A “musical” filter with a wide bandwidth will seem “less phasey” because its phase transition is, necessarily, gentle when compared with a narrower filter. There is no magic. The manufacturer of console A has not found a way to create a filter with the same magnitude response as what you get with console B, yet also with a milder phase transition. It’s not physically possible for them to do so.

The requirement of a specific phase response to create a specific magnitude response means that the minimum phase to create a certain filter is also the maximum phase. Any other phase means that you have a different filter. You may like the different filter better, and that’s completely acceptable, but it’s not the same filter. If we changed our consoles to have a “Q” control for their equalizers, and you managed to dial up the same magnitude response on both desks, the phase response between the two would become indistinguishable.

The reason to choose any particular EQ is that it gets you where you need to go, does so easily, and does so reliably. If the fundamental operational implementation is the same, then the phase-shift involved is a non-issue. If the EQ does what you need it to, you can be assured that no more or less phase-shift than is required has been introduced.


Why Do We Use Big Drivers For Low-Frequency Material?

It’s easy to say that we have to move more air, but there’s more to it.

Please Remember:

The opinions expressed are mine only. These opinions do not necessarily reflect anybody else’s opinions. I do not own, operate, manage, or represent any band, venue, or company that I talk about, unless explicitly noted.

driverWant to use this image for something else? Great! Click it for the link to a high-res or resolution-independent version.

There’s a certain intuitiveness to the idea that a subwoofer driver (especially one that radiates directly, as opposed to being horn-loaded) is big. Or rather, that the subwoofer driver has a large diaphragm relative to a high-frequency driver. If you want a low-frequency noise, and you want it loud, it just makes sense that you need something big for making it. Bears, for instance, have lower voices than doormice.

For the average person in entertainment, I don’t really find satisfaction with the standard explanation for why we use big drivers to produce LF information. We say things like, “Ya gotta move more air, dude!” and then move on. Sure we have to move more air, but WHY? It doesn’t help that the topic seems to be avoided by many sites that talk about sound. My guess is that it probably has something to do with the physics being more hairy than a lot of audio humans are ready for. It’s the kind of material that you’d expect to find in acoustical engineering classes, as opposed to a live-sound engineering course. (Acoustical engineering is “classical” engineering, whereas being a sound engineer for entertainment emphasizes equipment operation.)

As such, even folks like me end up “feeling around in the dark” in regards to the question. We know that there’s more to it all, but how it works is tough to piece together.

This article is all about me trying to piece it together. A big “thank you” is due to Jerry McNutt, an honest-to-goodness Product Design Manager at Eminence Loudspeakers. Two years ago(!), he was kind enough to answer some of my questions about this topic, and I’ve been chewing on those answers sporadically since then.

Anyway…

Please be aware that this is a “best attempt.” My conclusions may not be exactly correct, but I don’t have an easy way to really verify them. Treat this all as food for thought seasoned with at least one grain of metaphorical salt.

Sound Intensity vs. Frequency

Intensity is a measure of power over area, or watts applied per square meter at the observation point. Most of us don’t think of sound level in terms of intensity as defined by physics. We’re used to dB SPL. Conversions are definitely possible, but that’s not the point here. The point is that intensity does relate to frequency, and greater intensity means that something is perceived as being louder.

If you want to actually calculate intensity of sound with real units, there’s a fair bit of math involved in figuring out how to do so. The end result of all that figuring still looks a bit intimidating to those of us used to moving no more than three terms around. According to the physics.info site:

I = 2π^2ρƒ^2v∆x^2max

But…if all that’s desired is to make comparisons regarding how intensity varies with frequency, everything that isn’t “ƒ” can be set to a value of 1:

I (abstract comparison) = ƒ^2

If we start with good ol’ 1 kHz as a reference point, the abstract comparison intensity is 1000^2, or 1,000,000. If we go down an octave, the frequency is 500 Hz. Five-hundred squared is 250,000.

In other words, if everything else but frequency is held constant, then going down an octave means the sound intensity drops by a factor of four.

To really drive this home, let’s consider the frequencies of 60 Hz and 6000 Hz. We would generally expect the low side to be produced by a big ol’ subwoofer, and the high side to be in compression-driver territory.

I (abstract comparison) = ƒ^2 = 6000^2 = 36,000,000

I (abstract comparison) = ƒ^2 = 60^2 = 3,600

36,000,000 / 3,600 = 10,000

In terms of power, a factor of 10,000:1 is jaw-dropping. Pushing an itty-bitty compression driver with one watt is common. Pushing one with 10,000 watts, well…

Two vs. Four

From the above, I think you can get an idea of the importance of “moving more air” to keep everything manageable. We have to do something to counteract the intensity drop from lower frequency. It’s actually a multi-factor problem, of course, because real-life tends to be that way. We can move more air by making a driver undergo longer excursion (forward/ back movement), but there’s only so much that’s doable. Closely related to that is more drive power. That’s good, but again, there’s only so much that’s reasonable. If we’re going to shove more air molecules around, we need to also have more diaphragm area.

One of the best tidbits I got from my conversation with Mr. McNutt was in regards to the advantage of using a squared term instead of a linear term. Doubling a driver’s excursion (the linear term) certainly gets you something, but doubling the driver radius (the squared term) gets you much more.

For the sake of argument, let’s simplify a loudspeaker driver’s diaphragm into being a piston that pushes hydraulic fluid around. We’ll conveniently use a driver that starts with 1 mm of excursion, because it will make the math easier. My guess is that most compression drivers can handle rather less excursion than that, but this is just an example. The radius will be 25.4 mm (that’s like a 2″ diameter compression driver, if you want to visualize it).

Displacement Volume = Area * Excursion

Displacement Volume = (pi*25.4mm^2) * 1mm = 2027 mm^3

If we double the linear term to 2 mm of excursion, the displacement doubles to 4054 mm^3. Nice, but if we double the squared term and leave the excursion alone:

Displacement Volume = (pi*50.8mm^2) * 1mm = 8107 mm^3

That’s a fourfold increase in the amount of fluid the piston moved. When it comes to loudspeakers, making a small driver have a very long excursion is impractical, but making a driver with a larger surface area is commonplace. So, if we consider an 18″ diameter subwoofer (228.6 mm radius) that can handle an excursion of 8 mm:

Displacement Volume = (pi*228.6mm^2) * 8mm = 1313386 mm^3

That’s 648 times more displacement, gotten mostly by making the driver bigger.

I can’t say exactly how all this works out with real drivers, real air, and the real equation for intensity. However, even with rough approximations it seems pretty clear that it’s much easier to move a lot more air if you have a big diaphragm available. The squared term is very important in getting the necessary results.


Why I Think Steam Machines Are Cool

My audio-human mind races when thinking of high-performance, compact, affordable machines.

Please Remember:

The opinions expressed are mine only. These opinions do not necessarily reflect anybody else’s opinions. I do not own, operate, manage, or represent any band, venue, or company that I talk about, unless explicitly noted.

steamWant to use this image for something else? Great! Click it for the link to a high-res or resolution-independent version.

“Wait,” you’re thinking, “I thought this site was about live shows. Steam Machines are gaming devices.”

You’re right about that. What you have to remember (or just become aware of), is that I have a strange sort of DIY streak. It’s why I assembled my own live-audio console from “off the shelf” products. I really, really, REALLY like the idea of doing powerful things with concert sound via unorthodox means. An unorthodox idea that keeps bubbling up in my head is that of a hyper-customizable, hyper-expandable audio mix rig. It could be pretty much any size a user wanted, using pretty much whatever audio hardware a user wanted, and grow as needed. Also, it wouldn’t be too expensive. (About $900 per 16X16 channel “block.”)

When I look at the basic idea of the Valve Steam Machine, I see a device that has the potential to be a core part of the implementation.

But let’s be careful: I’m not saying that Steam Machines can do what I want right now. I’m not saying that there aren’t major pitfalls, or even dealbreakers to be encountered. I fully expect that there are enormous problems to solve. Just the question of how each machine’s audio processing could be conveniently user-controlled is definitely non-trivial. I’m just saying that a possibility is there.

Why is that possibility there?

The Box Is Prebuilt

The thing with prebuilt devices is that it’s easier for them to be small. A manufacturer building a large number of units can get custom parts that support a compact form factor, put it all together, and then ship it to you.

Of course, when it comes to PCs, you can certainly assemble a small-box rig by hand. However, when we’re talking about using multiple machines, the appeal of hand-building multiple boxes drops rapidly. So, it’s a pretty nice idea that a compact but high(er) performance computing device can be gotten for little effort.

The System Is Meant For Gaming

Gaming might seem like mere frivolity, but these days, it’s a high-performance activity. We normally think of that high-performance as being located primarily in the graphics subsystem – and for good reason. However, I also think a game-capable system could be great for audio. I have this notion because games are so reliant on audio behaving well.

Take a game like a modern shooter. A lot of stuff is going on: Enemy AI, calculation of where bullets should go, tracking of who’s shooting at who, collision detection, input management, the knowing of where all the players are and where they’re going, and so on. Along with that, the sound has to work correctly. When anybody pulls a trigger, a sound with appropriate gain and filtering has to play. That sound also has to play at exactly the right time. It’s not enough for it to just happen arbitrarily after the “calling” event occurs. Well-timed sounds have to play for almost anything that happens. A player walks around, or a projectile strikes an object, or a vehicle moves, or a player contacts some phsyics-enabled entity, or…

You get the idea.

My notion is that, if the hardware and OS of a Steam Machine are already geared specifically to make this kind of thing happen, then getting pro-audio to work similarly isn’t a totally alien application. It might not be directly supported, of course, but at least the basic device itself isn’t in the way.

The System Is Customizable

My understanding of Steam Machines is that they’re meant to be pretty open and “user hackable.” This excites me because of the potential for re-purposing. Maybe an off-the-shelf Steam Machine doesn’t play nicely with pro-audio hardware? Okay…maybe there’s a way to take the box’s good foundation and rebuild the upper layers. In theory, a whole other OS could be runnable on one of these computers, and a troublesome piece of hardware might be replaceable (or just plain removable).


I acknowledge that all of this is off in the “weird and theoretical” range. My wider goal in pointing it out is to say that, sometimes, you can grab a thing that was intended for a different application and put it to work on an interesting task. The most necessary component seems to be imagination.


The Best Upgrades

If you’re going to upgrade something, try to upgrade at the ends of your signal chain.

Please Remember:

The opinions expressed are mine only. These opinions do not necessarily reflect anybody else’s opinions. I do not own, operate, manage, or represent any band, venue, or company that I talk about, unless explicitly noted.

chainendsWant to use this image for something else? Great! Click it for the link to a high-res or resolution-independent version.

This business is so “magical gear” oriented that it hurts people. I don’t know how many bankruptcies, strained relationships, failed businesses, and heartburn prescriptions have resulted from gear acquisition, but my bet is that the number is somewhere between “a lot” and “a gazillion.” Audio humans spend a ton of money, and what’s worse, there’s a tendency to spend it on the wrong things. The search for better sound is a journey that’s often undertaken through a path that leads into the deep underbrush of mythology, and that’s a recipe for getting lost.

One perennial (and expensive) mistake is pursuing upgrades to the wrong parts of the signal path. Folks get incredibly wound up about the sound quality of things like consoles, poweramps, preamps, and even cables. They thrash around, trying to figure out why things don’t sound “just so,” and run huge bills as they do. In the process, they miss opportunities to upgrade the bits that would really matter.

If we’re talking about the part of the signal chain that involves electricity, the bits that matter are at the ends.

Transduction Is Hard

Let’s start with what I’m not saying: I’m not saying that the middle of the signal chain is trivial. It isn’t. A lot of work has been done to get us to where we are now in terms of distortion and SNR. Very smart people have worked for decades to design and miniaturize the components and subassemblies that make pro-audio go. What I am saying, though, is that signal routing, combining, and gain adjustment ARE trivial when compared to signal transduction.

For instance, let’s take the INA217, an instrumentation amplifier that can be used to build microphone preamps. At around 68 dB of gain, (the base 10 logarithm of 2500, multiplied by 20), the unit maintains a bandwidth beyond the audible range. Nifty, eh?

You can buy one for less than $7. Buy in quantity, and the per-unit cost is less than half that.

Or, take a mix bus from a console. The heart of a mix bus is either electrical or mathematical summing. Addition, I mean. The basic process is incredibly simple, and though the circuits do have some important particulars, they are not difficult for an electrical engineer to design. (And, that’s assuming that they actually get designed anymore. I strongly suspect that most folks are grabbing an existing design from a library and extending it to meet a certain specification.) Insofar as I can determine, there is no secret sauce to a summing bus. There are better components that you can specify, and due diligence is required to prevent external noise from corrupting the signals you actually want to use, but there’s no “magical addition process” that some folks have and some don’t.

“Doing stuff” to electricity that’s already electricity is pretty darn simple.

Life gets far more complicated when you’re trying to change sound into electricity or back again. The vagaries of directional microphone tuning, for instance, are strange enough that they don’t even make it into patent applications. They’re kept locked away as trade secrets. Microphone diaphragms aren’t really something you can build with ingredients found in your kitchen (good luck with working on materials that are only microns thick). Just about any decision you make will probably affect the whole-device transfer function in a way that’s easy to hear. On the output side, the tradeoffs associated with making a loudspeaker driver are both numerous and enormous. Everything matters, from the diaphragm material on up. The problem compounds when you start putting those drivers in boxes and attaching them to horns. Big drivers move lots of air, but don’t start or stop as fast as small units. The box might be resonating in a strange way. Just how bad do things get when the loudspeaker is run below the box tuning? Again, a small design change is likely to have audible results.

Manufacturers continue to iterate on transducer designs in ways that appear “fundamental” to the layman, whereas iteration on other products is more about incremental improvements and feature additions.

What this all amounts to is that a transduction improvement is far more likely to be of obvious and significant benefit than an upgrade in the “pure electricity” path.

Beyond The Chain

Upgrading the ends of the signal chain is a concept that works even beyond the electro-acoustical sense.

Let’s say I have the greatest microphone ever made. The entire thing is built from pure “unobtainium.” It is perfectly linear from 1 Hz to 30 kHz, and has infinitely fast transient response. It’s not even physically possible for this microphone to exist, it’s so good. I put that microphone in front of a singer with an annoying overtone in their voice. Does that singer sound good?

No. The microphone perfectly captures that ugly harmonic. If I had a choice, I would prefer an upgrade to the ultimate end of the signal chain: The signal source. I’ll take an amazing singer into an okay mic at any time, but a great mic in front of a bad singer doesn’t help very much.

Let’s also say that I have the greatest loudspeaker ever constructed. Its transfer function is perfectly flat, with flawless phase response. This mythical device is then placed in an aircraft hangar built of metal. The acoustical environment’s insane reflections and smeared transients result in a sound that’s almost completely unintelligible, and even a bit painful.

A “basically okay” loudspeaker in a great room would be much better.

If you’re going to undertake some sort of sonic improvement, you want to do all you can to upgrade things that are as close to the endpoints as possible. If you’re not getting the sound you want, look at source quality, room acoustics, mic capability, and loudspeaker fidelity first.


Zen And The Art Of Dialing Things In

Good instruments through neutral signal paths require very little “dialing in,” if any.

Please Remember:

The opinions expressed are mine only. These opinions do not necessarily reflect anybody else’s opinions. I do not own, operate, manage, or represent any band, venue, or company that I talk about, unless explicitly noted.

zenWant to use this image for something else? Great! Click it for the link to a high-res or resolution-independent version.

Not long ago, Lazlo and The Dukes paid me a visit at my regular gig. They were coming off a spectacularly difficult show, and were pleased-as-punch to be in a room with manageable acoustics, a reasonably nice audio rig, and a guy to drive it all. We got settled-in via a piecemeal sort of approach. At one point, we got Steve on deck and ran his dobro through the system. He and I were both pretty happy within the span of about 30 seconds.

Later, Steve gushed about how I “just got it all ‘dialed up’ so fast.” Grateful for the compliment, and also wanting to be accurate about what occurred, I ensured Steve that he was playing a good instrument. I really hadn’t dialed anything in. I pushed up the faders and sends, and by golly, there was a nice-sounding dobro on the end of it all. I did a little experimenting with the channel EQ for FOH, wondering what would happen with a prominent midrange bump, but that was pretty optional.

In terms of “pop-culture Zen,” Steve had gotten dialed in without actually being dialed in.

How?

Step 1: The Instrument Must Be Shaped Like Itself

The finest vocal mics I’ve ever had have been the ones in front of terrific singers. The very best signal chains I’ve ever had for drums have been the ones receiving signals derived from drums that sound killer. I’ve hurriedly hung cheap transducers in front of amazing guitar rigs, and those rigs have always come through nicely.

Whatever the “source” is, it must sound correct in and of itself. If the source uses a pickup system, that system must produce an output which sounds the way the instrument should sound.

That seems reasonable, right? The first rule of Tautology Club is the first rule of Tautology Club.

Especially with modern consoles that have tons of processing available, we can do a lot to patch problems – but that’s all we’re doing. Patching. Covering holes in things that weren’t meant to have holes. Gluing bits down and hoping it all stays together for the duration of the show. Does that sound like a shaky, uncomfortable proposition? It does because it is.

But, if the instrument is making the right noise in the room, by itself, with no extra help, then it can never NOT make the right noise in the room. We can do all kinds of things to overpower and wreck that noise by way of a PA system, but the instrument itself will always be right. In contrast, an instrument which sounds wrong may potentially be beaten into shape with the rest of the rig…but the source still doesn’t sound right. It’s completely dependent on the PA, and if the PA fails to do the job, then you’re just stuck.

An instrument which just plain “sounds good” will require very little (if any) dialing-in, so long as…

Step 2: The Rig Is Shaped Like Everything

Another way to put this is that the instrument must be filled with itself, yet the FOH PA and monitor rig must be emptied of themselves. In technical terms, the transfer function of the PA system’s total acoustical output should ideally be flat “from DC to dog-whistles.”

Let’s say you want to paint a picture. You know that the picture will be very specific, but you don’t know what that picture will be in advance. What color of canvas should you obtain? White, of course. The entire visible spectrum should be reflected by the canvas, with as little emphasis or de-emphasis on any frequency range. This is also the optimal case for a general-purpose audio system. It should impose as little of its own character as is reasonably possible upon the signals passing through.

At a practical level, this means taking the time to tune FOH and monitor world such that they are both “neutral.” Unhyped, that is. Exhibiting as flat a magnitude response as possible. To the extent that this is actually doable, this means that an instrument which is shaped like itself – sonically, I mean – retains that shape when passed through the system. This also means that if there IS a desire to adjust the tonality of the source, the effort necessary to obtain that adjustment is minimized. It is much easier to, say, add midrange to a signal when the basic path for that signal passes the midrange at unity gain. If the midrange is all scooped out (to make the rig sound “crisp, powerful, and aggressive”), then that scoop will have to first be neutralized before anything else can happen. It’s very possible to run out of EQ flexibility before you get your desired result.

Especially when talking about monitor world, this is why I’m a huge advocate for the rig to not sound “good” or “impressive” as much as it sounds “neutral.” If the actual sound of the band in the room is appropriate for the song arrangements, then an uncolored monitor rig will assist in getting everybody what they need without a whole lot of fuss. A monitor rig that’s had a lot of cool-sounding “boom” and “snap” added will, by nature, prioritize sources that emphasize those frequency ranges (and this at the expense of other sources). This can take a good acoustical arrangement and make it poor, or aggravate the heck out of an already not-so-good band configuration. It also tends to lead to feedback problems, because the critical midrange gets lost. Broadband gain is added to compensate, which combines with the effectively positive gain on the low and high-ends, and it all can end with screeching or rumbling as the loop spins out of control.

The ironic thing here is that the “netural” systems end up sounding much more impressive later on, when the show is a success. The rigs that sound impressive with walkup music, on the other hand, sometimes aren’t so nice for the actual show.

So – an audio-human with a rig that is acoustically shaped like nothing is in command of a system that is actually shaped like everything. Under the right circumstances, this means that a signal through the rig will be dialed in without any specific dialing-in being required.


Always Multiply Your Time-Estimate By Four

There is no such thing as a simple project.

Please Remember:

The opinions expressed are mine only. These opinions do not necessarily reflect anybody else’s opinions. I do not own, operate, manage, or represent any band, venue, or company that I talk about, unless explicitly noted.

sdcWant to use this image for something else? Great! Click it for the link to a high-res or resolution-independent version.

Just a quick aside.

My Dad says that “everything costs more and takes longer than you think.” He’s right.

Case in point: Prep for last Friday’s show, where a simple “I’ll swap this snake because the fan-end is getting weird, it’ll take about 15-20 minutes,” turned into an hour-long slog through the production equivalent of quicksand and monkey guano.

I spent at last half of the time with my body bent over the console I/O rack, a screwdriver in hand, trying to break off a couple of stuck XLR jack latches…and repeating, as though it were a mantra, “Are you EFFING KIDDING ME?”


Compact Can Be Accommodated

When the PA is big and heavy, other things can be small and light.

Please Remember:

The opinions expressed are mine only. These opinions do not necessarily reflect anybody else’s opinions. I do not own, operate, manage, or represent any band, venue, or company that I talk about, unless explicitly noted.

toolargeWant to use this image for something else? Great! Click it for the link to a high-res or resolution-independent version.

Related: A mouse can fit in a mouse-sized room, a dog-sized room, and an elephant sized room. An elephant can only fit in an elephant-sized room.

Meditate upon this carefully.

There’s also this bit about elephants and garden hoses.


Practical Gain Staging For Live Sound

Find a way to run your faders where they’re truly useful to you, and don’t clip anything in the process.

Please Remember:

The opinions expressed are mine only. These opinions do not necessarily reflect anybody else’s opinions. I do not own, operate, manage, or represent any band, venue, or company that I talk about, unless explicitly noted.

preampWant to use this image for something else? Great! Click it for the link to a high-res or resolution-independent version.

This article started its life as a request from David Cavan Fraser (‏@dcfmusic on Twitter), who said he wanted to hear about practical gain staging for small venues.

“No problem!” I think – and then suddenly realize that I haven’t given a lot of systematic thought to how I gain stage. It’s not that I haven’t thought about it, and it’s not that it isn’t important. (It is important. Very.) It’s just that I don’t give it a lot of conscious thought anymore. I’ve arrived at a system that seems to work, and when it stops working, I just implement a fix without spending a lot of mental energy.

So, what I’m trying to do here is deconstruct my own thought process. Buckle up, folks!

Distillation

Gain structure is often talked about as a system of rules. There are lots of little parameters, whys, and wherefores, and the whole thing can get unwieldy. Also, rigid. Maybe both.

In my mind, you can bypass a lot of the “cruft” by boiling good gain structure down to three concepts and one accompanying bit of sound-rig physics:

1) The system’s front-end controls must be operable in a practical way that facilitates the running of the show.

2) No part of the system that is intended for linear operation should be pushed into nonlinear operation.

3) The system should not be producing more noise than is acceptable for the application.

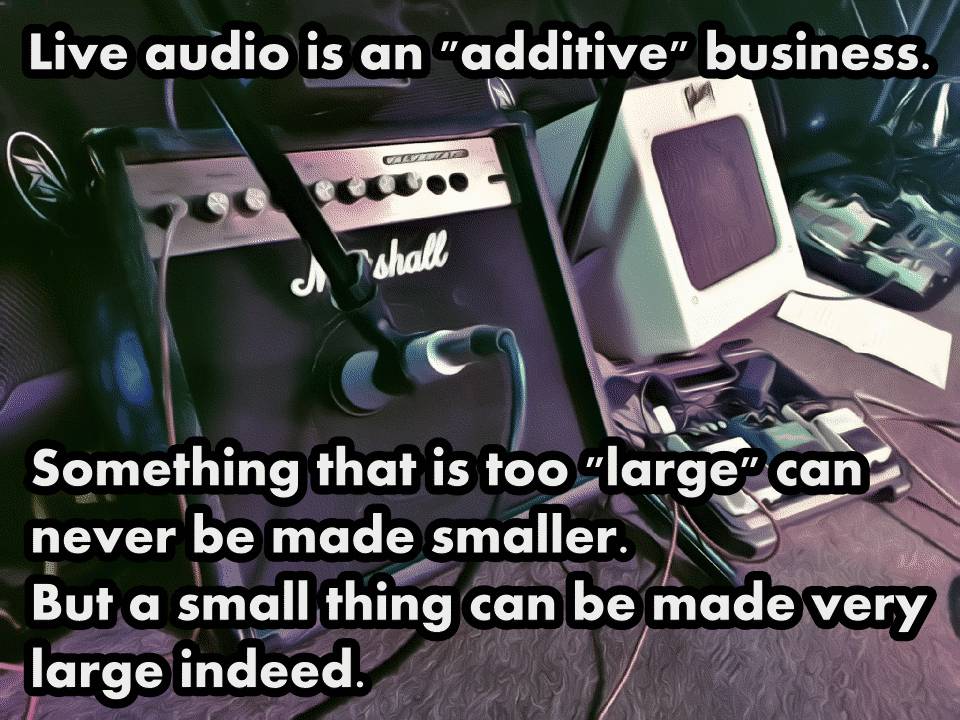
If you distort a gain stage, you effectively distort all following gain stages. That is, the sound of the clipping will be passed down the chain, even if no further clipping actually occurs. For this reason, avoid compensating for gain reduction at a point before the gain reduction goes into effect. Instead, compensate for gain reduction at a point AFTER the gain reduction has been applied. If your overall output level is insufficient, compensate for the problem as close to the system’s output side as is practicable.

With all that in your mind, it’s my view that you can handle just about any gain-structure problem that comes your way. Because these are concepts and NOT a procedure, most edge cases are handled automatically: If your usual routine results in one of the three needs not being met, you just make the changes necessary to get things back into alignment. Those changes are situationally dependent, and up to you.

Of course, some specifics would probably be nice, right?

The Preamp

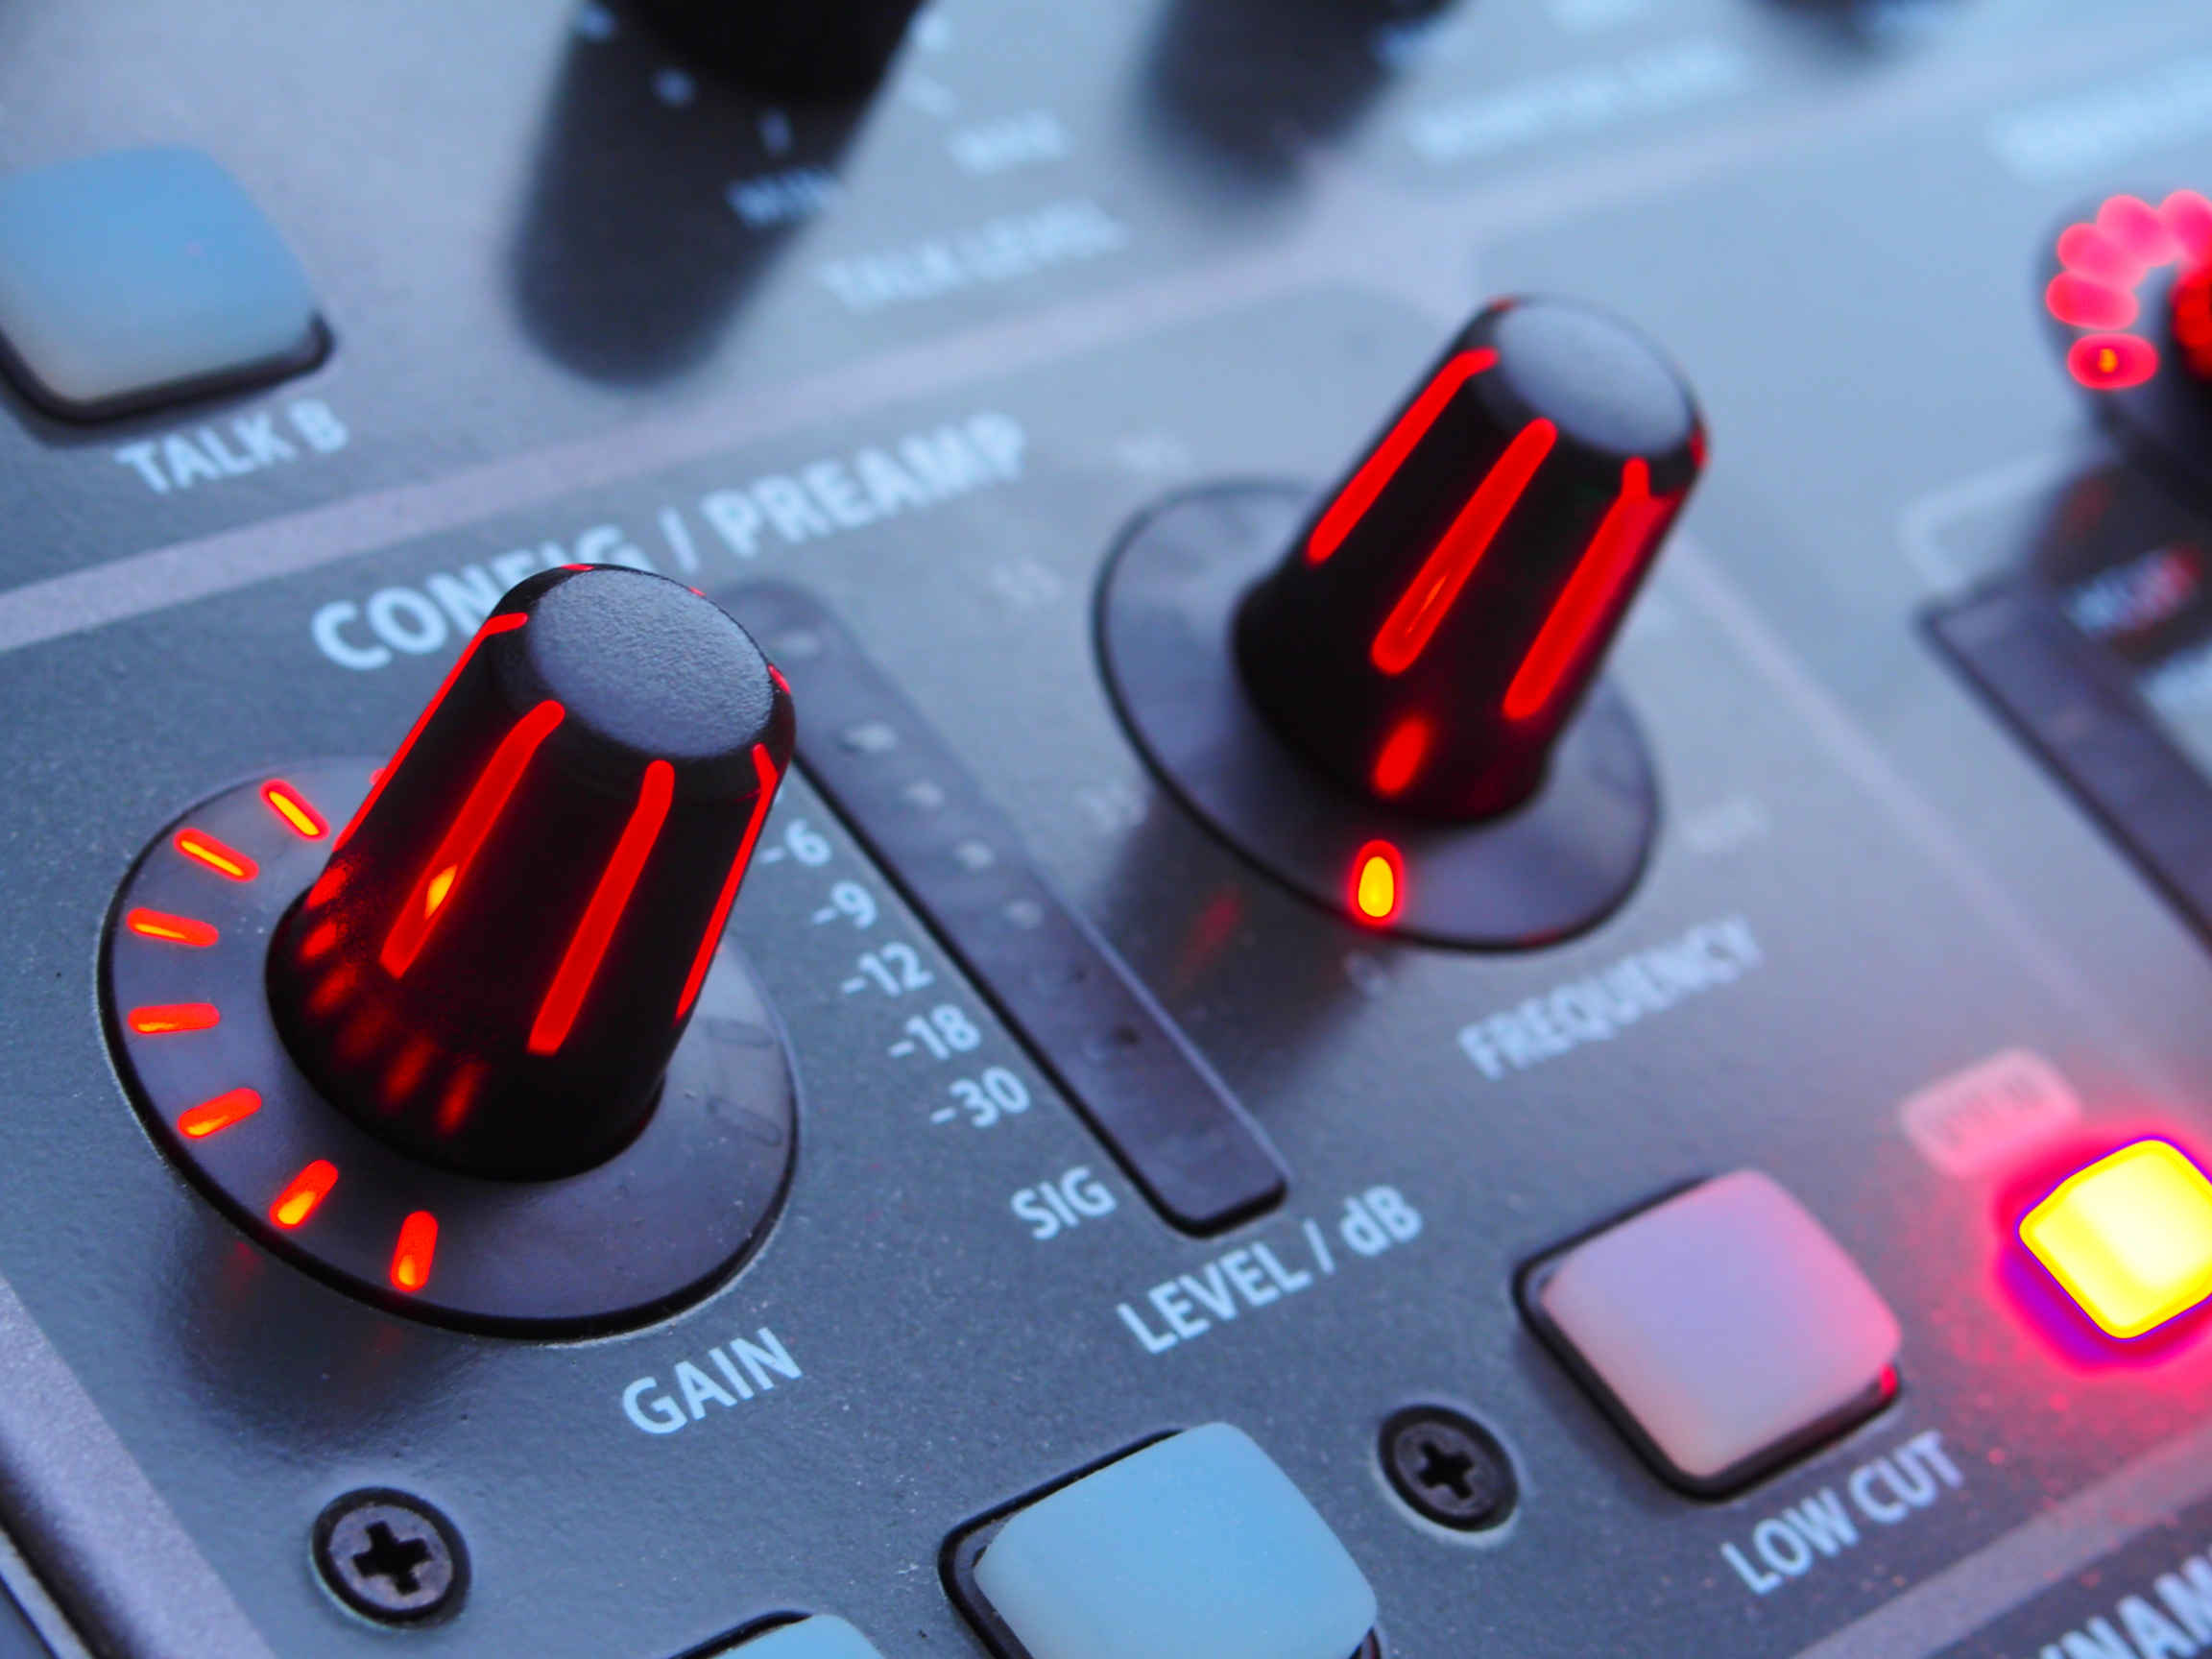
First of all, I generally recommend forgetting about the idea of finding the “sweet spot” on a head amp/ mic pre/ whatever you want to call it. A preamp’s sweet spot is the point where its circuitry is becoming nonlinear with respect to the input. Some preamps just might impart that perfect hint of distortion that adds even-numbered harmonics to a signal, those harmonics being distributed such that the lows and low mids are emphasized “just so.”

They might.

If they’re the right mic pre and you get them set properly. Otherwise, the result will probably not be very nice.

If you really want to go off in pursuit of finding a preamp’s “magical gain setting of happiness,” and you have the time to do so, then go ahead. However, it seems to me that this nifty area of not-too-much-or-too-little nonlinearity is pretty small in comparison with the range where a preamp’s output is:

A) Linear with respect to the input, and

B) Allows the rest of the system’s controls to be run in a useful way.

As an audio-human who is generally WITHOUT the time necessary to chase down the preamp sweet spot on even one channel, and who is almost completely uninterested in running a mic pre in a range with significant nonlinearity anyway, I advise most people to just “get a decent input level and move on.” It’s much easier.

So – what’s a decent level, then?

Well, your numbers may vary. In my case, a preamp output signal that’s about 15 – 20 decibels below clipping is plenty. Because of the way the rest of the system is set up, preamp output at that level lets me run my faders and aux send pots in a convenient part of their travel, use everything else in its linear range, and gets me a long way above the electronic noise floor. (In other words, I satisfy all the conditions that I listed above).

Again, your specific number may vary, though I do certainly recommend setting up your system such that the area around 20 dB below clip is a workable preamp output level. This is a holistic sort of exercise, because everything depends on everything else. Let me explain.

Channel Faders And Knobs

Faders and aux-send knobs (ALSO faders, just rotary instead of linear) have one job: To allow you to conveniently set levels being sent to other destinations. Their ability to do this is directly tied to where your preamp output is, and it’s also tied to every other downstream gain stage. We’ll get to that in more detail – just be aware of it now.

If you’re running an honest-to-goodness pro-audio rig, the various incarnations of volume controls will be logarithmic in nature. That is, near the bottom of their travel, a small movement results in a large gain change. Near their maximum travel, that same amount of control movement results in a much smaller gain change. If the preamp output or console output gain is too high, you’ll find yourself pulling your faders and send knobs back so far that you can’t make “fine” adjustments very easily. If the upstream or downstream levels are too low, your controls may reach the end of their travel before you actually get enough acoustical output.

For the basic question of control usability, I find that a fader or knob that can run somewhere between its own -10 dB and 0 dB points is easily usable. In most cases, this gives me between 10 and 22 decibels of space to “get on the gas” if necessary, and the fader being relatively near its “unity” point means that a small movement doesn’t result in a wild change in level.

Beyond the basic question, though, lie the issues of repeatability and representation of proportion. Which gain stages do those things for you is a matter of personal preference and situational applicability.

Repeatability is the ease of placing multiple, comparable controls at the same setting, or placing one control at the same setting multiple times. There are certain cases where, for example, I want my vocal faders to reflect the basic, correct blend when they’re all at 0 dB. In that case, I will “mix with the preamps” to get an initial proportionality. The preamp gain-knob travels will be different from one another, reflecting the proportionality amongst channels, but the channel faders will be all the same. They won’t represent the proportion, but they are very easy to return to the baseline position. (This is also very handy when a mic is being shared amongst various applications. Getting it back to the right level for the main application is a snap.)

In lots of other situations, however, I tend to prefer a “same preamp gain, different fader position” approach. This is very handy for grab-n-go shows, because you know that channels with the same control positions applied are at the same gain. (Not the same output! The same gain.) This helps in terms of knowing where you are in regards to system instability and feedback. If the input gain on all comparable channels is the same, and things start to get “weird” at a certain point in fader travel on one channel, then things will probably get similarly troublesome for similar channels run with their faders at that level. In this case, the faders show the proportionality of total gain applied, and the preamps are in the more easily repeatable state.

The correct choice of which method to adopt is situationally dependent, as I said. I’ve already mentioned that I do both, although I use “repeatable preamp gain with proportional faders” much more often.

The way this relates to gain staging is that, with the approach where the preamps are repeated, you can end up with significantly “hotter” or “cooler” preamp output then you might otherwise have. If this results in clipping or level-control travel that’s tough to use, you have to rethink your strategy. However, especially for human voices, I have found that a certain overall setup will be right about 90% of the time. Those are pretty good odds.

For monitor world, I am becoming more and more enamored of proportionality on the send knobs with a global fader for trim. The first thing I do is to get things set so that, between a send knob at 0 dB and the global fader at “wherever,” the level is right for the main person needing that thing in the monitors. When that person is happy, I pretty much know for certain that the signal in question is audible through an on-deck wedge. If somebody else needs that channel in the monitors, I can quickly set their sends to 0 dB, which should result in basically the same per-wedge acoustical output as the first person is getting. From there, it’s easy to make fine adjustments as necessary. When done correctly, this results in on-the-fly monitor workflow which is very fast. (Please note that this is a pretty advanced application, requiring a separate or quasi-separate monitor world. I still thought I’d share it, though.)

Output Masters

When it comes to master outputs, I am a big fan of setting up the system’s holistic gain structure so that they can always be initially set at 0 dB, with the option to pull back if necessary. For me, repeatability is the main issue for master levels. I so rarely run into a situation where a mix even has a snowball’s chance of being “too quiet” that I simply don’t worry about the option of adding level at the console output.

This may not be the case for you, however. Where this can become a problem is when a console’s output master can go no higher than “unity gain” (0 dB). In this situation, it’s probably wise to rework the gain structure downstream from the console such that the mix master can be run at, say, -10 dB. Then you’ll have some ability to get louder as the situation dictates. Remember, the reason that I recommend focusing on the downstream (post) console gain structure for this is because “distortion flows downhill.” If you make up for a 10 dB master fader drop on the upstream side, you run a relatively substantial risk of clipping something in the process. The sound of that clipping (ickkkkk…) is passed downstream, all the way to the loudspeakers. By making up the gain on the downstream side, you have a much greater chance of keeping everything in its linear range. A bit more noise is greatly preferable to “crunch.”

No matter how things shake out in terms of control settings, I generally recommend running your console outputs with at least 10 dB of headroom to spare – 20 dB, if you can manage it. (Uncompressed peaks can be great big things.) Those numbers should be scaled appropriately if you’ve pulled the master output down for some reason. For instance, if the master has been pulled back 10 dB, you should ideally have 20 – 30 dB of headroom. If that’s not the case, you’re probably mixing too hot, and you should find a way to add output at a point that’s downstream of the console. You might not be clipping the console output, but you just might be cooking the snot out of the summing bus.

Sidenote: You’ve got to know what your metering is actually reading…

Post Console Processing

When it comes to things like equalizers and crossovers, I find that the repeatability issue takes great precedence. For this reason, I greatly prefer to run my “system drive” processing at unity gain. Please note, however, that an exception exists when you’ve pulled a console output master back so that you can get louder later. In that case, you will need to make up the lost gain somewhere.

As with everything else, you want to keep some headroom in your drive processing. Whatever the unit immediately preceding the amplifiers and loudspeakers is, it should be able to drive the amps into limit or clip without having to be clipped itself. At least 10 dB of headroom is desirable, if you can get it.

The Final Stage

The end of your gain chain is the amplifier. Whether that amplifier is fully exposed to you as an independent unit, or tucked away inside a loudspeaker enclosure with a whole bunch of invisible processing in front of it, the gain on and through the amp is the last piece of the puzzle.

For pro-audio power amps that exist as separate units, it’s very likely that unity input gain and maximum input gain are the same thing. You either pass the input signal straight through to the rest of the amp’s electronics, or you lug it down to some degree. For simplicity, repeatability, and protection against driving the upstream side into distortion, I recommend running amplifiers with their input attenuators wide open. Of course, you should NOT do this if it results in an undue amount of noise, or if it forces you to operate your console in an inconvenient way.

Most amplifiers these days have some sort of clip limiting which reduces (though it may not eliminate) audible distortion from a unit running at full tilt. It’s a very good practice to set up your rig such that the amps can be driven to maximum while everything else stays well within the range of linear operation: If the only system limiter you have is in the amplifier, that should be the only limiter you hit…and you should endeavor to engage that limiter as little as is possible. Not at all, if that’s realistic.

For powered speakers, the basic idea is the same. The upstream side should be able to drive the unit to full throttle without being at full throttle itself. The difference is that a powered speaker may have an input stage which allows for greater than unity gain to be applied to the downstream electronics.

If you do all this, and everything sounds good, but you still don’t have enough output, then there’s only one thing left to do. It’s the ultimate, “as far downstream as possible” makeup gain upgrade. You need to get your hands on more – or just plain louder – PA.


If you’re not completely burned out at this point, you can always go and read my article about the holistic nature of headroom


Pickups Are Helpful Kit – For Audio-Humans

I am of the opinion that a couple of removable pickup options are very helpful things for a tech to own.

Please Remember:

The opinions expressed are mine only. These opinions do not necessarily reflect anybody else’s opinions. I do not own, operate, manage, or represent any band, venue, or company that I talk about, unless explicitly noted.

pickupsWant to use this image for something else? Great! Click it for the link to a high-res or resolution-independent version.

I’m not trying to zing anybody, or speak disrespectfully about (or toward) any musician, but… I swear that there’s an unwritten rule regarding players of acoustic guitars. This unwritten rule apparently states that acoustic guitars without pickups MUST be sold to players who use a delicate technique.

When I encounter an acoustic player who has no kind of pickup for their guitar at all, the chances are alarmingly high that the player will have a “jazzy” style (quiet), or be playing achingly tender love songs, fingerstyle (really danged quiet). Further, this situation will occur in a bar or other casual setting where the audience WILL NOT SHUT UP. So, you point a mic at that big, resonating reflector of an instrument, do your best to get enough level for both the house and the deck, field the inevitable “Can’t you turn it up?” questions, and brace for the feedback problems which are almost sure to pounce.

The whole situation is basically crap for everyone.

So, if you’re an audio-human, I urge you: Buy a few more things for your workbox/ goody kit/ whatever you call it. You know, that collection of adapters, hand tools, cables, and mics that you carry around to help you out in a pinch. (You do have one, right?)

What To Buy

The few more things you should buy are a “no tools” soundhole pickup, a contact pickup, and an active DI box for each. The whole grouping can cost you less than $175, and its worth in unsuckifying your life is enormous. The peace of mind you get in knowing that your gain-before-feedback can be considerably more manageable is, itself alone, enough to justify the expenditure. Having these items handy is about as close as I think any of us can get to having a magic rabbit that can be pulled from a hat.

So, what’s it all for? Well…

1) The soundhole pickup is for acoustic guitars with metallic strings. You want one that has the semi-spongy “inserts” on the sides, so that it can fit a range of soundhole sizes. You also want one with humbucking coils. I personally have a couple of single coil models, and while I’m fine with them, their susceptibility to electronic interference is rather higher than I’d prefer.

2) Someday, you will encounter a guitar player who uses nylon strings. On that day, you will learn to love your contact pickup. As far as I can tell, a contact pickup is nothing more exotic than a piezo element in an attractive housing. The pickup should have some tacky putty pre-applied to the housing, so that you can stick the thing directly to an instrument. If not, poster putty is cheap and essentially the same thing. Finding a really good placement for the pickup can take some doing, but sticking it behind the bridge and being ready to wield a parametric EQ is a good guess if you don’t have time on your side. Also, this pickup ISN’T JUST FOR GUITARS! It can work on a lot of otherwise troublesome instruments. I have been very relieved to have a contact pickup on hand for the odd cello that comes through. I also want to try using one on a musical saw, the next time I have a chance.

3) The active DI is the missing link that ensures your pickups will play nicely with the console. I like passive pickups because there are no batteries to have die at an inconvenient time, but the drawback – especially with piezo-based contact mics – is that the pickup output impedance is higher than the mountains of Nepal. If the pickup were a water pump, it would be capable of very healthy pressure…but that pressure would be coming through a pipe with a diameter comparable to a novelty soda-straw. Acceptable voltage transfer and circuit damping requires a very healthy amount of impedance at the direct box’s input side, and that’s what an active unit gives you. Be aware that “expensive” doesn’t necessarily mean “active.” It’s entirely possible to spend $200 on a passive unit and not have sufficiently high input impedance. Look first at what the unit is, and then look at the price.

Put all this together, and you’ll have a very handy survival kit for players without pickups of their own. Yes, you DO need to ask before using the pickups. Especially in the case of the contact unit, it’s rather impolite to just tack it onto an instrument without getting permission. If you’re denied permission, then you’re stuck with using a mic and toughing out the set – but if you’ve got these extra bits on hand, having to tough it out won’t be your fault.