Tag Archives: Loudspeakers

The Lessons Of El Ridiculoso

Loudspeaker experiments are very educational.

Please Remember:

The opinions expressed are mine only. These opinions do not necessarily reflect anybody else’s opinions. I do not own, operate, manage, or represent any band, venue, or company that I talk about, unless explicitly noted.

Want to use this image for something else? Great! Click it for the link to a high-res or resolution-independent version.

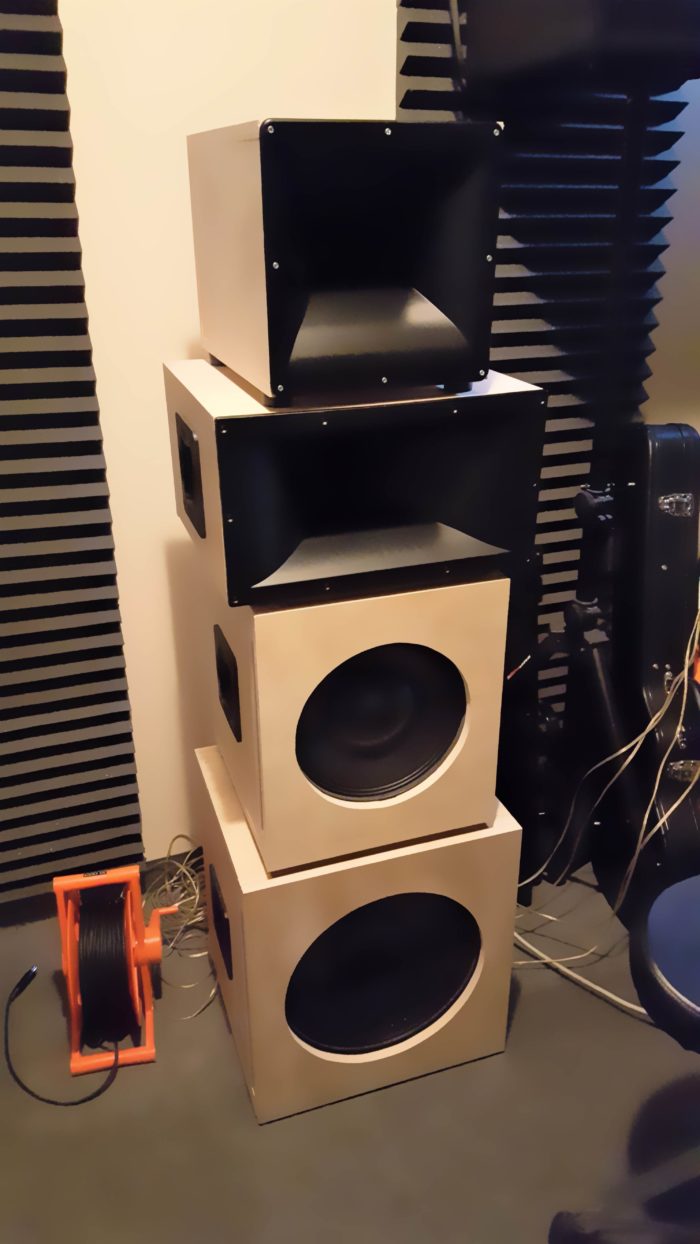
El Ridiculoso is an idea that’s been bumping around in my head – conceptualized in various morphologies – for years. With the help of the extravagantly cool Mario Caliguiri, who does custom woodworking out here in the high desert, the idea is now incarnated.

Inwoodnated.

Inwoodnated is a real word, because I made it up. All words are made up.

Anyway…

El Ridiculoso is a quad-amped monstrosity meant to go “pretty loud” (but not insanely loud) with 2300 watts of peak input creating about 131 dB of peak, 1 meter SPL. It is very definitely NOT meant to play down low. The conveniently-sized, sealed box for the 15″ driver starts rolling off somewhere around 75 Hz, and really, El Ridiculoso is supposed to be used with subwoofers carrying everything up to 100 Hz anyway. (Sealed boxes are easier to build, and generally pretty forgiving. You can “fudge” the internal volume a bit and still have the whole driver-and-box system work pretty well.)

A few days ago, I got to hook amplifiers up to the boxes and hear them make noise. I found the experience to be rather educational in a few areas.

If You Tune It By Ear You Will Probably Get It Wrong

I set up an X32 mixing console to act as a four-way crossover: You downmix two channels to the main bus, and then send the main bus to matrices 1-4. (The matrices have crossover filters available to them if you have the right firmware upgrade in place.) Because I wouldn’t be working with subwoofers for the test run, I started off by putting the 15’s high-pass at 75 Hz, with the low-pass at 400 Hz. The 12 handled 400 – 1600, the big horn did 1600 – 6400, and the smaller horn took everything above that.

And, of course, I started out by playing music and pushing the different bandpass levels around.

I ended up with an overall sound that was reasonably pleasing, but somewhat tubby (or resonant) at certain bass frequencies. I wondered if the 15’s box was booming for some reason – maybe it was acting like a drum?

In any case, I decided it was time to do some measuring for a real, honest-to-goodness magnitude line-up of the boxes. As I started running sweeps and making adjustments, one thing became VERY clear: Tuning the system by ear had sent me way off course. In some cases, 10+ dB off course. (!)

A Basic Bandpass Magnitude Alignment Fixes A Lot

When you’ve missed the mark as far as I had, information that should blend nicely with other information…doesn’t. You get things like overpowering bass notes, because the crucial midrange just isn’t there to balance it all out. I was actually pretty stunned at just how much better the stack sounded with all the boxes in basically the right place, volume-wise. The music I was playing suddenly started to have the tonal characteristics I’d grown used to from listening at home.

This was without any corrective EQ, which is what I worked on next.

Going through and getting a fine-detail equalization solution certainly changed things, but the difference was not nearly as pronounced as what had happened before. This surprised me as well. I had expected that applying the “make-em-really-flat” solution would result in a massive change in clarity, but really, we were most of the way there already.

Large Horns Make Large Noise

I discovered rather quickly that sitting with my head right up against the 2″ driver-exit horn was unpleasant. The amount of noise that thing can make is impressive. The matrix feed to that bandpass ended up being 12 dB down from everything else, and I still preferred being across the room. I’ve known for years – at an academic level – that 2″ exit compression drivers are used when you need to tear faces off, but this was the first time that I even got a whiff of what they’re really capable of.

Awesome But Impractical

Playing with El Ridiculoso is a great treat, but I can’t imagine getting three more built for regular gigs. For a start, they’re relatively complicated to set up, because all the bandpasses are in separate enclosures…and there are four bandpasses per speaker system. Big-boy loudspeakers might have three bandpasses, but they package them all into a single cabinet. Plus, you usually get one Speakon connector which you can use to mate all your power channels to all your drivers in one click. El Ridiculoso needs four separate connections to work.

Add to that the need for subwoofers in many cases, and now you’ve got a five-way system. Then you have to add all the amplifiers necessary, and all the crossovers/ system management, which results in a pretty hefty drive rack or two. Then you have to add all the speaker cable. You end up spending a lot of money, and a lot of weight, just to make the things work.

And, the only way to get them up in the air is scaffolding, or stacking them on a big pile of subs.

In the end, a compact, ultra-engineered box from a major manufacturer really has the advantage. El Ridiculoso sure does have a lot of “cool factor” as an exotic idea, but a good, solid, self-powered biamp unit will go just about as loud and require far less care and feeding to be day-to-day useful.

This doesn’t mean I’m sad about the experiment. I knew from the beginning that I wasn’t going to design a better mousetrap than every speaker manufacturer on the planet. What I wanted is what I got: A different implementation that I could use to get more hands-on understanding of how these things work.

Hitting The Far Seats

A few solutions to the “even coverage” problem, as it relates to distance.

Please Remember:

The opinions expressed are mine only. These opinions do not necessarily reflect anybody else’s opinions. I do not own, operate, manage, or represent any band, venue, or company that I talk about, unless explicitly noted.

Want to use this image for something else? Great! Click it for the link to a high-res or resolution-independent version.

This article, like the one before it, isn’t really “small venue” in nature. However, I think it’s good to spend time on audio concepts which small-venue folk might still run across. I’m certainly not “big-time,” but I still do the occasional show that involves more people and space. I (like you) really don’t need to get engaged with a detailed discussion regarding an enormous system that I probably won’t ever get my hands on, but the fundamentals of covering the people sitting in the back are still valuable tools.

This article is also very much a follow up to the piece linked above. Via that lens, you can view it as a discussion of what the viable options are for solving the difficulties I ran into.

So…

The way that you get “throw” to the farthest audience members is dependent upon the overall PA deployment strategy you’re using. Deployment strategies are dependent upon the gear in question being appropriate for that strategy, of course; You can’t choose to deploy a bunch of point-source boxes as a line-array and have it work out very well. (Some have tried. Some have thought it was okay. I don’t feel comfortable recommending it.)

Option 1: Single Arrival, “Point Source” Flavor

You can build a tall stack or hang an array with built-in, non-changeable angles, but both cases use the same idea: Any given audience member should really only hear one box (per side) at a time. Getting the kind of directivity necessary for that to be strictly true is quite a challenge at lower frequencies, so the ideal tends to not be reached. Nevertheless, this method remains viable.

I’ve termed this deployment flavor as “single arrival” because all sound essentially originates at the same distance from any given audience member. In other words, all the PA loudspeakers for each “side” are clustered as closely as is practical. The boxes meant to be heard up close are run at a significantly lower level than the boxes meant to cover the far-field. A person standing 50 feet from the stage might be hearing a loudspeaker making 120 dB SPL at 3 feet, whereas the patrons sitting 150 feet away would be hearing a different box – possibly stacked atop the first speaker – making 130 dB SPL at 3 feet. As such, the close-range listener is getting about 96 dB SPL, and the far-field audience member also hears a show at roughly 96 dB SPL.

This solution is relatively simple in some respects, though it requires the capability of “zone” tuning, as well as loudspeakers capable of high-output and high directivity. (You don’t want the up-close audience to get cooked by the loudspeaker that’s making a ton of noise for the long-distance people.)

Option 2: Single Arrival, Line-Array Flavor

As in the point source flavor, you have one array deployed “per side,” with each individual box as close to the other boxes as is achievable. The difference is that an honest-to-goodness line-array is meant to work by the audible combination of multiple loudspeakers. At very close distances, it may be possible to only truly hear a small part of the line, and this does help in keeping the nearby listeners from having their faces ripped off. However, the overall idea is to create a radiation pattern that resembles a section of a cylinder. (Perfect achievement of such a pattern isn’t really feasible.) This is in contrast to point-source systems, where the pattern tends towards a section of a sphere.

As is the case in many areas of life, everything comes down to surface area. A sphere’s surface area is 4*pi*radius^2, whereas the lateral surface area of a cylinder is 2*pi*radius*height. The perceived intensity of sound is the audible radiation spread across the surface area of the radiation geometry. More surface area means less intensity.

To keep the calculations manageable, I’ll have to simplify from sections of shapes to entire shapes. Even so, some comparisons can be made: At a distance of 150 feet, the sound power radiating in a spherical pattern is spread over a surface area of 282,743 square feet. For a 10-foot high cylinder, the surface area is 9424 square feet.

For the sphere, 4 watts of sound power (NOT electrical power!) means that a listener at the 150 foot radius gets a show that’s about 71 dB. For the cylinder, the listener at 100 feet should be getting about 86 dB. At the close-range distance of 50 feet, the cylindrical radiation pattern results in a sound level of 91 dB, whereas a spherical pattern gets 81 dB.

Putting aside for the moment that I’m assuming ideal and mathematically easy conditions, the line-array has a clear advantage in terms of consistency (level difference in the near and far fields) without a lot of work at tuning individual boxes. At the same time, it might not be quite as easily customizable as some point-source configurations, and a real line-source capable of rock-n-roll volume involves a good number of relatively expensive elements. Plus, a real line has to be flown, and with generous trim height as well.

Option 3: Multiple Arrival, Any Flavor

This is otherwise known as “delays.” At some convenient point away from the main PA system, a supplementary PA is set. The signal to that supplementary PA is made to be late, such that the far system aligns pleasingly with the sound from the main system. The hope is that most people will overwhelmingly hear one system over the other.

The point with this solution is to run everything more quietly and more evenly by making sure that no audience member is truly in the deep distance. If each PA only has to cover a distance of 75 feet, then an SPL of 90 dB at that distance requires 118 dB at 3 feet.

The upside to this approach is that the systems don’t have to individually be as powerful, nor do they strictly need to have high-directivity (although it’s quite helpful in keeping the two PA systems separate for the listeners behind the delays). The downside is that it requires more space and more rigging – whether actual rigging or just loudspeakers raised on poles, stacks, or platforms. Additionally, you have to deal with more signal and/ or power runs, possibly in difficult or high-traffic areas. It also requires careful tuning of the delay time to work properly, and even then, being behind or to the side of the delays causes the solution to be invalid. In such a condition where both systems are quite audible, the coherence of the reproduced audio suffers tremendously.


If I end up trying the Gallivan show again, I think I’ll go with delays. I don’t have the logistical resources to handle big, high-output point-source boxes or a real array. I can, on the other hand, find a way to boxes up on sticks with delay applied. I can’t say that I’m happy about the potential coherence issues, but everything in audio is a compromise in some way.


Entering Flatland

I encourage live-audio humans to spend lots of time listening to studio monitors.

Please Remember:

The opinions expressed are mine only. These opinions do not necessarily reflect anybody else’s opinions. I do not own, operate, manage, or represent any band, venue, or company that I talk about, unless explicitly noted.

Want to use this image for something else? Great! Click it for the link to a high-res or resolution-independent version.

Do you work in live-audio? Are you new to the field? An old hand? Somewhere in between?

I want to encourage you to do something.

I want you to get yourself a pair of basically decent studio monitors. They shouldn’t be huge, or expensive. They just have to be basically flat in terms of their magnitude response. Do NOT add a subwoofer. You don’t need LF drivers bigger than 8″ – anything advertised to play down to about 40 Hz or 50 Hz is probably fine.

I want you to run them as “flat” as possible. I want you to do as much listening with them as possible. Play your favorite music through them. Watch YouTube videos with them passing the audio. When you play computer games, let the monitors make all the noises.

I want you to get used to how they sound.

Oh, and try to tune your car stereo to sound like your studio monitors. If you can only do so coarsely, still do so.

Why?

Because I think it’s very helpful to “calibrate” yourself to un-hyped audio.

A real problem in live music is the tendency to try to make everything “super enhanced.” It’s the idea that loud, deep bass and razor-sharp HF information are the keys to good sound. There’s a problem, though. The extreme ends of the audible spectrum actually aren’t that helpful in concert audio. They are nice to have available, of course. The very best systems can reproduce all (or almost all) of the audible range at high volume, with very low distortion. The issue is over-emphasis. The sacrifice of the absolutely critical midrange – where almost all the musical information actually lives – on the altar of being impressive for 10 seconds.

I’m convinced that part of what drives a tendency to dial up “hyped” audio in a live situation is audio humans listening to similar tonalities when they’re off-duty. They build a recreational system that produces booming bass and slashing treble, yank the midrange down, and get used to that as being “right.” Then, when they’re louderizing noises for a real band in a real room, they try to get the same effect at large scale. This eats power at an incredible rate (especially the low-end), and greatly reduces the ability of the different musical parts to take their appointed place in the mix. If everything gets homogenized into a collection of crispy thuds, the chance of distinctly hearing everything drops like a bag of rocks tied to an even bigger rock that’s been thrown off a cliff made of other rocks.

But it does sound cool!

At first.

A few minutes in, especially at high volume, and the coolness gives way to fatigue.

In my mind, it’s a far better approach to try to get the midrange, or about 100 Hz to 5 kHz, really worked out as well as possible first. Then, you can start thinking about where you are with the four octaves on the top and bottom, and what’s appropriate to do there.

In my opinion, “natural” is actually much more impressive than “impressive,” especially when you don’t have massive reserves of output available. Getting a handle on what’s truly natural is much easier when that kind of sonic experience is what you’ve trained yourself to think of as normal and correct.

So get yourself some studio monitors, and make them your new reference point for what everything is supposed to sound like. I can’t guarantee that it will make you better at mixing bands, but I think there’s a real chance of it.


THD Troubleshooting

I might have discovered something, or I might not.

Please Remember:

The opinions expressed are mine only. These opinions do not necessarily reflect anybody else’s opinions. I do not own, operate, manage, or represent any band, venue, or company that I talk about, unless explicitly noted.

Want to use this image for something else? Great! Click it for the link to a high-res or resolution-independent version.

Over the last little while, I’ve done some shows where I could swear that something strange was going on. Under certain conditions, like with a loud, rich vocal that had nothing else around it, I was sure that I could hear something in FOH distort.

So, I tried soloing up the vocal channel in my phones. Clean as a whistle.

I soloed up the the main mix. That seemed okay.

Well – crap. That meant that the problem was somewhere after the console. Maybe it was the stagebox output, but that seemed unlikely. No…the most likely problem was with a loudspeaker’s drive electronics or transducers. The boxes weren’t being driven into their limiters, though. Maybe a voice coil was just a tiny bit out of true, and rubbing?

Yeesh.

Of course, the very best testing is done “In Situ.” You get exactly the same signal to go through exactly the same gear in exactly the same place. If you’re going to reproduce a problem, that’s your top-shelf bet. Unfortunately, that’s hard to do right in the middle of a show. It’s also hard to do after a show, when Priority One is “get out in a hurry so they can lock the facility behind you.”

Failing that – or, perhaps, in parallel with it – I’m becoming a stronger and stronger believer in objective testing: Experiments where we use sensory equipment other than our ears and brains. Don’t get me wrong! I think ears and brains are powerful tools. They sometimes miss things, however, and don’t natively handle observations in an analytical way. Translating something you hear onto a graph is difficult. Translating a graph into an imagined sonic event tends to be easier. (Sometimes. Maybe. I think.)

This is why I do things like measure the off-axis response of a cupped microphone.

In this case, though, a simple magnitude measurement wasn’t going to do the job. What I really needed was distortion-per-frequency. Room EQ Wizard will do that, so I fired up my software, plugged in my Turbos (one at a time), and ran some trials. I did a set of measurements at a lower volume, which I discarded in favor of traces captured at a higher SPL. If something was going to go wrong, I wanted to give it a fighting chance of going wrong.

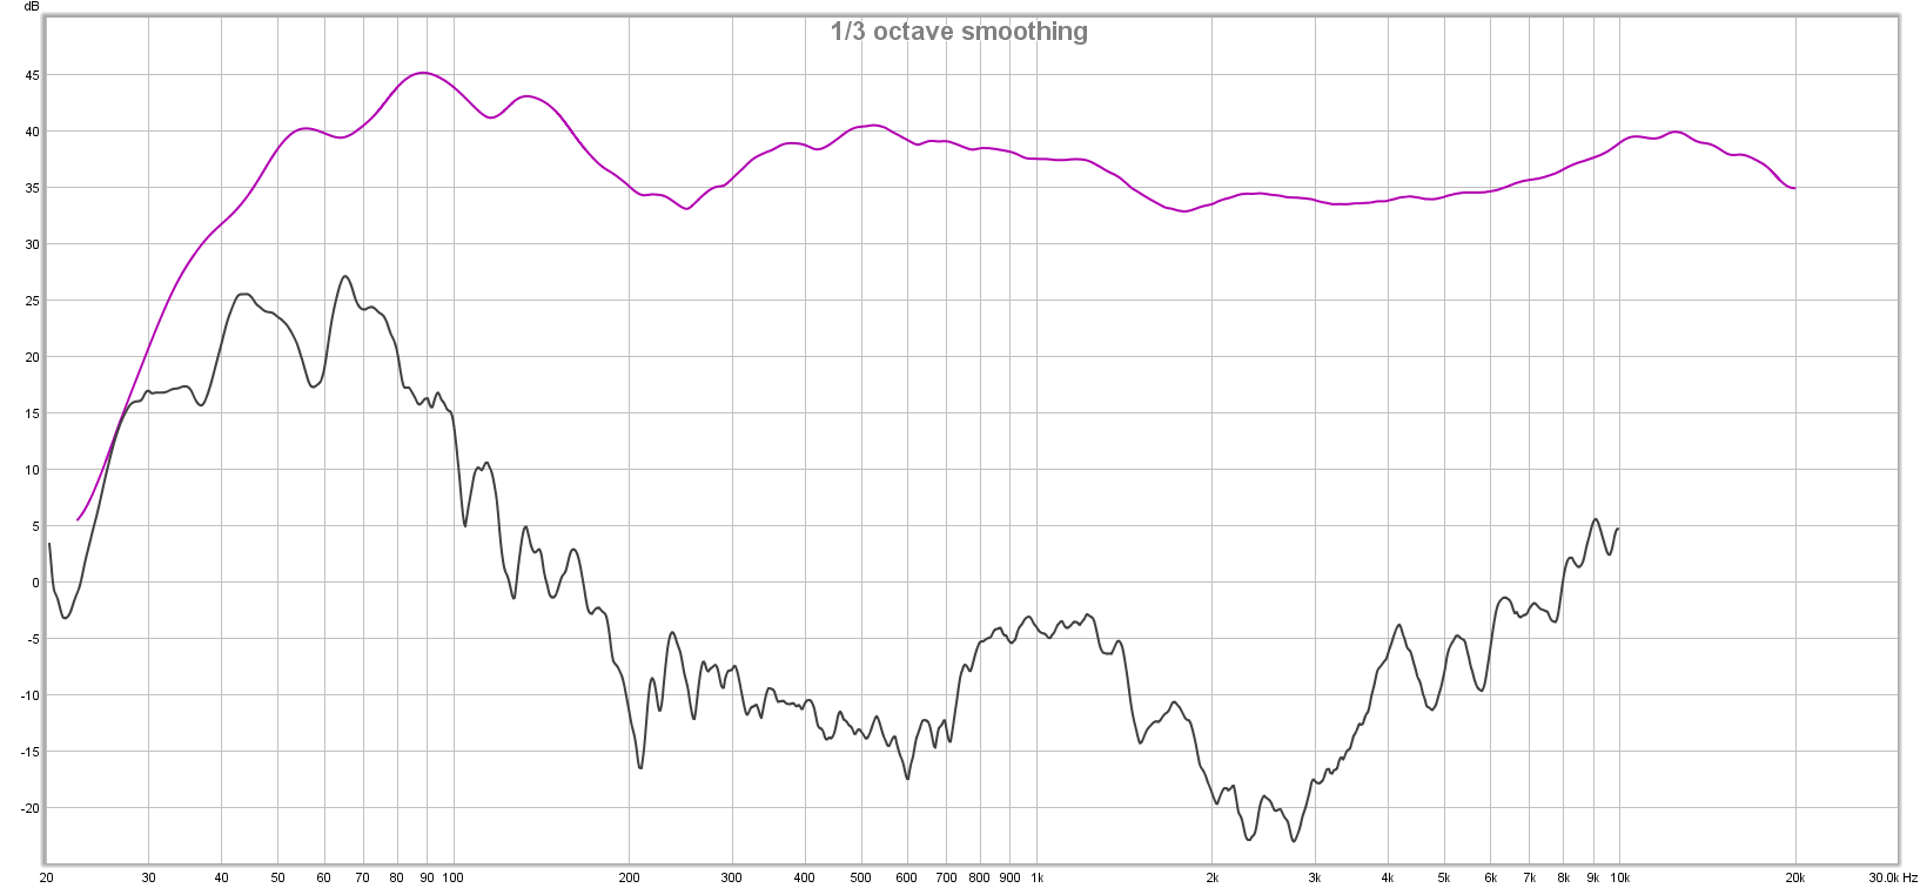
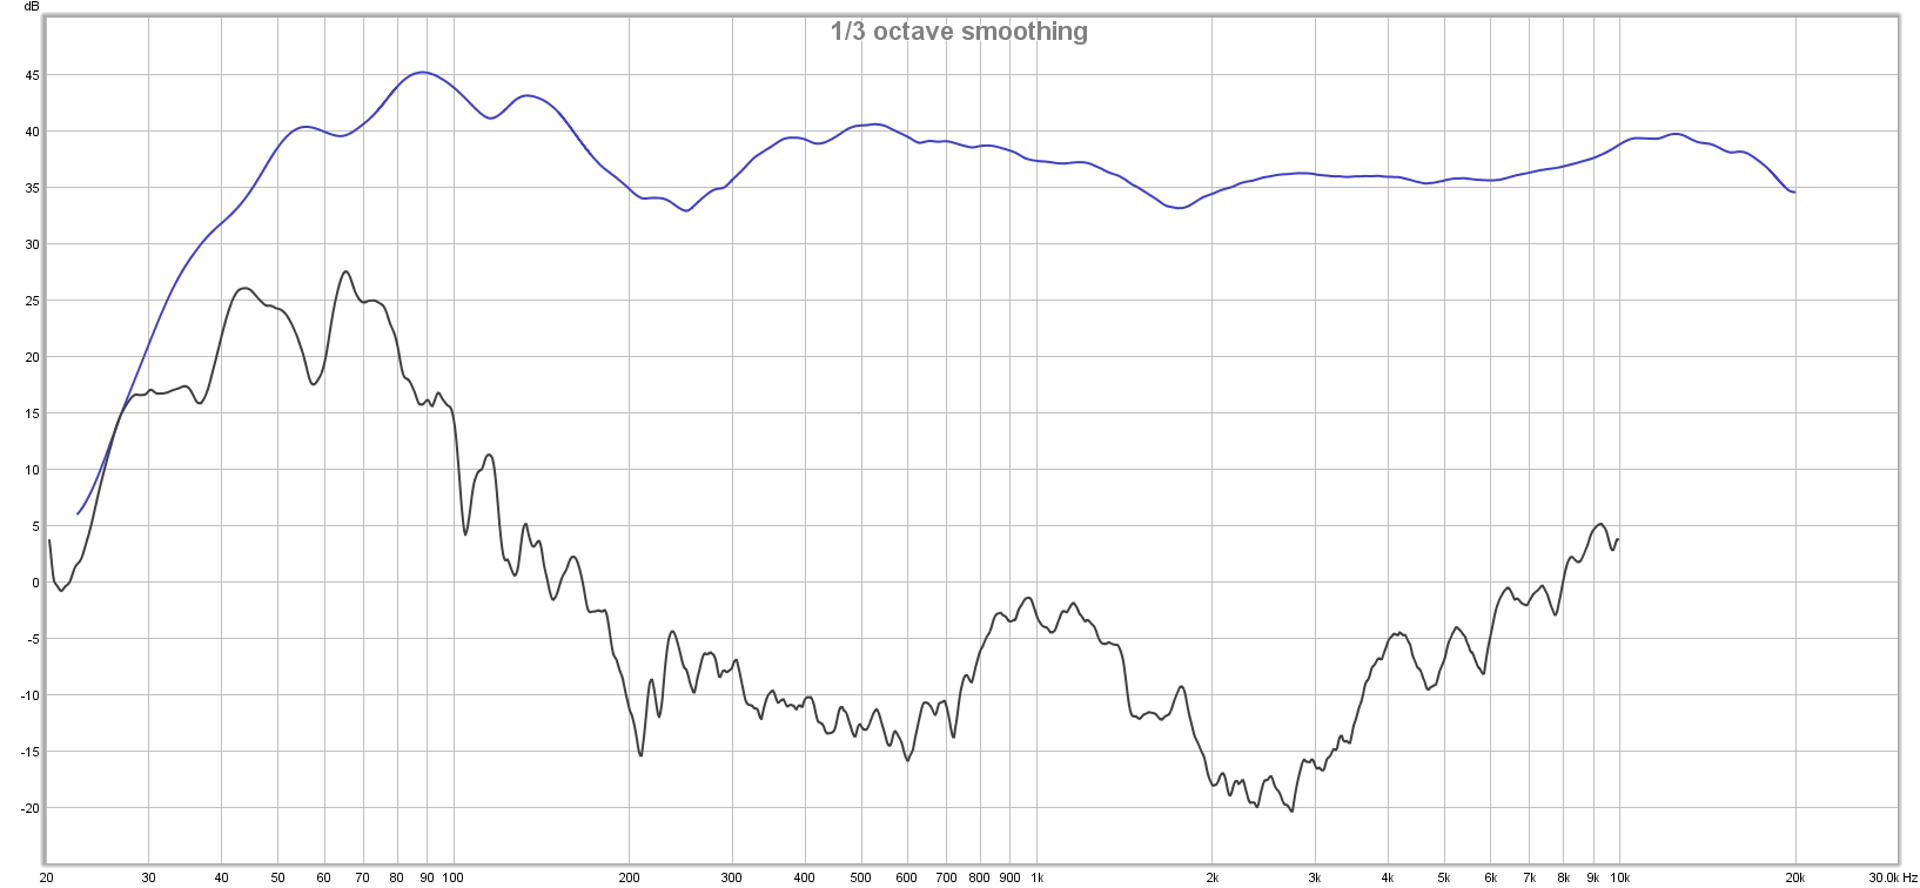
Here’s what I got out of the software, which plotted the magnitude curve and the THD curve for each loudspeaker unit:

I expected to see at least one box exhibit a bit of misbehavior which would dramatically affect the graph, but that’s not what I got. What I can say is that the first measurement’s overall distortion curve is different, lacking the THD “dip” at 200 Hz that the other boxes exhibit, significantly more distortion in the “ultra-deep” LF range, and with the “hump” shifted downwards. (The three more similar boxes center that bump in distortion at 1.2 kHz. The odd one out seems to put the center at about 800 Hz.)

So, maybe the box that’s a little different is my culprit. That’s my strong suspicion, anyway.

Or maybe it’s just fine.

Hmmmmm…


Case Study: Creating A Virtual Guitar Rig In An Emergency

Distortion + filtering = something that can pass as a guitar amplifier in an emergency.

Please Remember:

The opinions expressed are mine only. These opinions do not necessarily reflect anybody else’s opinions. I do not own, operate, manage, or represent any band, venue, or company that I talk about, unless explicitly noted.

Want to use this image for something else? Great! Click it for the link to a high-res or resolution-independent version.

The Video

The Script

Imagine the scene: You’re setting up a band that has exactly one player with an electric guitar. They get to the gig, and suddenly discover a problem: The power supply for their setup has been left at home. Nobody has a spare, because it’s a specialized power supply – and nobody else plays an electric guitar anyway. The musician in question has no way to get a guitar sound without their rig.

At all.

As in, what they have that you can work with is a guitar and a cable. That’s it.

So, what do you do?

Well, in the worst-case scenario, you just find a direct box, run the guitar completely dry, and limp through it all as best you can.

But that’s not your only option. If you’re willing to get a little creative, you can do better than just having everybody grit their teeth and suffer. To get creative, you need to be able to take their guitar rig apart and put it back together again.

Metaphorically, I mean. You can put the screwdriver away.

What I’m getting at is this question: If you break the guitar rig into signal-processing blocks, what does each block do?

When it comes right down to it, a super-simple guitar amp amounts to three things: Some amount of distortion (including no distortion at all), tone controls, and an output filter stack.
The first two parts might make sense, but what’s that third bit?

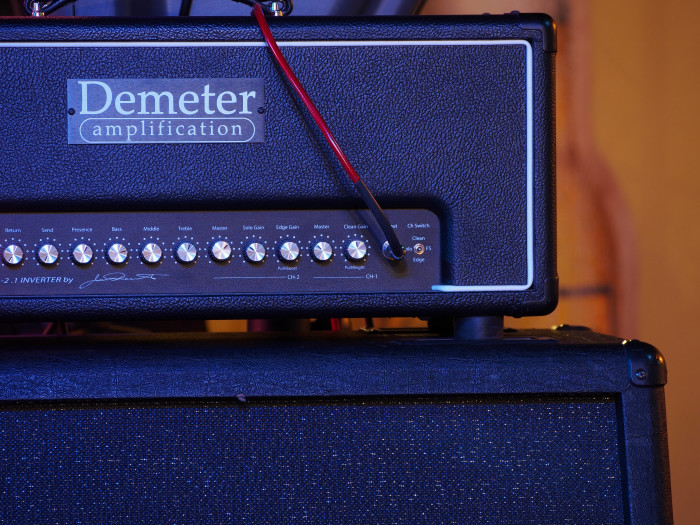
The output filtering is either an actual loudspeaker, or something that simulates a loudspeaker for a direct feed. If you remove a speaker’s conversion of electricity to sound pressure waves, what’s left over is essentially a non-adjustable equalizer. Take a look at this frequency-response plot for a 12″ guitar speaker by Eminence: It’s basically a 100 Hz to 5 kHz bandpass filter with some extra bumps and dips.

It’s a fair point to note that different guitar amps and amp sims may have these different blocks happening in different orders. Some might forget about the tone-control block entirely. Some might have additional processing available.

Now then.

The first thing to do is to find an active DI, if you can. Active DI boxes have very high input impedances, which (in short) means that just about any guitar pickup will drive that input without a problem.

Next, if you’re as lucky as I am, you have at your disposal a digital console with a guitar-amp simulation effect. The simulator puts all the processing I talked about into a handy package that gets inserted into a channel.

What if you’re not so lucky, though?

The first component is distortion. If you can’t get distortion that’s basically agreeable, you should skip it entirely. If you must generate your own clipping, your best bet is to find some analog device that you can drive hard. Overloading a digital device almost always sounds terrible, unless that digital device is meant to simulate some other type of circuit.
For instance, if you can dig up an analog mini-mixer, you can drive the snot out of both the input and output sides to get a good bit of crunch. (You can also use far less gain on either or both ends, if you prefer.)

Of course, the result of that sounds pretty terrible. The distortion products are unfiltered, so there’s a huge amount of information up in the high reaches of the audible spectrum. To fix that, let’s put some guitar-speaker-esque filtering across the whole business. A high and low-pass filter, plus a parametric boost in the high mids will help us recreate what a 12″ driver might do.
Now that we’ve done that, we can add another parametric filter to act as our tone control.

And there we go! It may not be the greatest guitar sound ever created, but this is an emergency and it’s better than nothing.

There is one more wrinkle, though, and that’s monitoring. Under normal circumstances, our personal monitoring network gets its signals just after each channel’s head amp. Usually that’s great, because nothing I do with a channel that’s post the mic pre ends up directly affecting the monitors. In this case, however, it was important for me to switch the “monitor pick point” on the guitar channel to a spot that was post all my channel processing – but still pre-fader.

In your case, this may not be a problem at all.

But what if it is, and you don’t have very much flexibility in picking where your monitor sends come from?

If you’re in a real bind, you could switch the monitor send on the guitar channel to be post-fader. Set the fader at a point you can live with, and then assign the channel output to an otherwise unused subgroup. Put the subgroup through the main mix, and use the subgroup fader as your main-mix level control for the guitar. You’ll still be able to tweak the level of the guitar in the mix, but the monitor mixes won’t be directly affected if you do.


Monitor World – Is “More” Better?

Often, the answer is “nope.”

Please Remember:

The opinions expressed are mine only. These opinions do not necessarily reflect anybody else’s opinions. I do not own, operate, manage, or represent any band, venue, or company that I talk about, unless explicitly noted.

Want to use this image for something else? Great! Click it for the link to a high-res or resolution-independent version.

Monitor world is a PA system, just like FOH is a PA system. The only difference is that monitor world handles a few very small audiences, and FOH usually deals with one comparatively large audience. All the helpful AND problematic physics considerations are the same.

This being the case, the stage is yet another place where simply piling up more and more boxes (all doing the same thing) to get “more” can be counterproductive. A vocalist wants more vocal, but their monitor is already doing everything it can, so you add another box. Does it look impressive? Yes! Is it louder? Yes! Is it better?

Yea- er…well…wait a second…

What you very well might end up with is a different set of issues. If the singer isn’t precisely situated between the wedges, the wedge outputs arrive at different times. This means that all kinds of destructive phase weirdness might be happening, and that can lead to intelligibility issues. The vocal range is very easy to louse up with time-arrival differences, and a sensation of “garble” can lead to a player wanting even MORE monitor level in compensation. In that instance, you haven’t actually gotten anywhere; Monitor world is louder, but it’s not any easier to hear in the information-processing sense. You also have greater effective loop-gain with that extra volume rocketing around, which destabilizes your system.

Plus, the low-frequency information still does combine well, which can lead to a troublesome buildup of mud. This goes double for everybody who’s off-axis (and that’s probably just about everybody who isn’t the intended audience of those wedges). That makes them want their own mixes to be hotter, which compounds all your problems even more.

And, of course, there’s even more bleed into FOH.

The brutal reality is that, for any single sound that a given player needs to hear, that signal will always sound better coming from a single box that “can get loud enough.” More wedges (all producing the same output) can only combine less and less coherently as you add more of them.

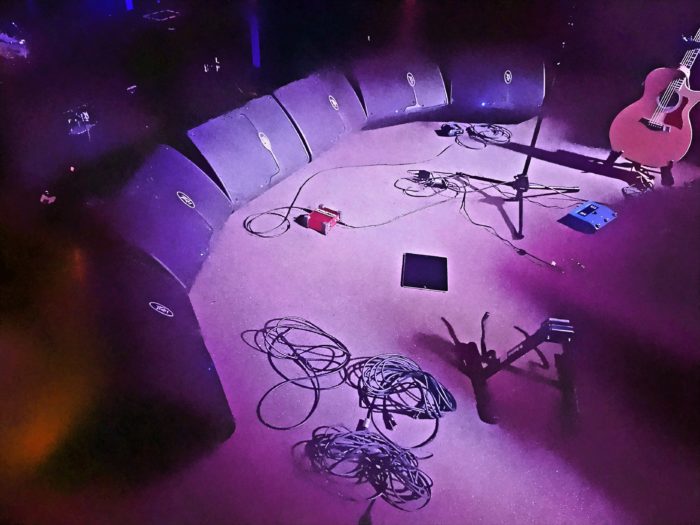
“But, Danny,” you protest, “you’ve done dual wedges for people. You’ve even rolled out some really excessive deployments, like the one in the article picture. Who are you to tell folks not to do that kind of thing?”

Fair point! In response:

1) It’s because I’ve tried some strange monitor solutions that I can say they weren’t necessarily improvements over simpler approaches.

2) Sometimes you do things that look cool, accepting that you’ll have to deal with some sonic downsides as a result.

3) Just because you’ve piled up a bunch of wedges, it doesn’t require you to put the exact same thing through each enclosure. Somebody might have two boxes in front of them, but one might be for vocals only and the other for instruments only.

With some bands, especially those who are naturally well balanced and don’t need a ton of monitor gain, the extra fun-factor and volume bump can trade off favorably with the coherence foibles. As the rest of this article indicates, yes, I am in the camp that says that a single box will always “measure better.” However, there’s more to life than just “measuring better.” If you have some room to compromise, you can be a little weird without hurting anything too badly.

Audio is an exercise in compromise. If you know what the compromise factors are, you can make an informed judgement. If you know that throwing a bunch of boxes at a problem might cause you other problems, then you’ve got more knowledge available to help you make the right decision for a fix.


You Don’t Just Need A Bigger Amp

Headroom is a holistic thing. If you run out of it in one place, getting more of it somewhere else isn’t enough.

Please Remember:

The opinions expressed are mine only. These opinions do not necessarily reflect anybody else’s opinions. I do not own, operate, manage, or represent any band, venue, or company that I talk about, unless explicitly noted.

Want to use this image for something else? Great! Click it for the link to a high-res or resolution-independent version.

The Video

The Script

Let’s say that an audio human has a mixing console that’s feeding a loudspeaker system. (That makes sense, right? Most of us do that a lot.) This loudspeaker system is nifty because it’s magic. It never clips. The only limit on output is how much voltage the console can deliver.

The weird bit is that the console can’t really swing much voltage at its outputs. It clips at a peak of 1 volt. Another weird thing is that the console doesn’t have any inboard mic pres. Those are separate. (I know this is really strange, but I’m trying to make a point.)

Our aforementioned audio human just happens to have a mic pre that also reaches its maximum output at a 1 volt peak. They connect a signal source to the preamp, crank the pre until it’s just barely under clipping, set a fader at 0 dB, and…it’s not loud enough.

So, what do they do?

If you said, “They need a console with more output capability,” you’re exactly right.

It wouldn’t make any sense to buy a mic pre with more output, right? If the console output clips at 1 volt, what good does it do to have a mic pre that will deliver 12 volts into the console? You can drive the signal to the mix outputs a lot harder, but all that gets you is more distortion.

Obtaining and connecting an upstream device with more output is kinda absurd, frankly. It’s not a solution at all. The console output is the limiting factor.

But here’s the thing.

People take this actually non-sensical approach with amps and speakers all the time. Some of the confusion is understandable. Amplifier and speaker power ratings aren’t necessarily intuitive, for one, and passive speakers don’t have level meters as a rule. There’s also all the complexity involved with trying to describe the limits of a multi-device speaker enclosure with a single number.

I get that there’s nuance involved here.

But here’s the thing. Speakers, like everything else, have a maximum undistorted output point. It’s a peak level – a point beyond which there is no more “instantaneous” sound pressure to be had. If you have, say, a loudspeaker that can handle a peak input of 1000 watts, and an amplifier that can put a 1000 watt peak input through that box…you’re there. Your system is maximized. Any more available amplifier power is wasted on both driver distortion AND the chance that you might wreck your speaker.

But people see those nasty little clip lights on their amps, and think: “Gosh, I need to buy a more powerful amplifier!” They get obsessed with headroom, but in this compartmentalized way that only involves the amp.

Actually, unless the amp’s peak (NOT CONTINUOUS – PEAK)…unless the amp’s peak output is half (or less) of the speaker’s maximum peak rating, you do NOT need a larger amp. Getting a more powerful amplifier only gets you more headroom in the amplifier, when what you actually want is more headroom throughout the entire system output section.

What you need is a speaker that gets louder for the same amount of input. Or a bigger amplifier AND a speaker that can handle the additional power. Or just “more PA” in general – although that’s a whole other can of worms in itself.


Drivers Don’t Have To Die With A Bang

Sane powering shields you from accidents.

Please Remember:

The opinions expressed are mine only. These opinions do not necessarily reflect anybody else’s opinions. I do not own, operate, manage, or represent any band, venue, or company that I talk about, unless explicitly noted.

Want to use this image for something else? Great! Click it for the link to a high-res or resolution-independent version.

I once lived in abject terror of pops, clicks, and bangs. I was once frightened by the thought of a musician unplugging their instrument from a “hot” input before I found the mute button. This was a result of my early experience in audio, where well-meaning (but incorrect) people had assured me that such noises were devastating to loudspeakers. A good solid “thump” from powering up a console when the amps were already on, and some poor driver would either:

A) Take another step towards doom, or…

B) Blow up like that one space station that could be confused with a small moon.

Well, that’s just a load of horsefeathers, but like all audio myths, a kernel of truth can be found. The kernel of truth is that loudspeakers CAN be destroyed by a large spike of input. There’s a reason that drivers and loudspeaker enclosures have peak ratings. Those are “Do Not Exceed” lines that you are smart to avoid crossing. Here’s the deal, though – if you’re using a sane powering strategy with passive boxes, or are using any truly decent powered speaker, worry is essentially unnecessary.

An amplifier simply can not “swing” more voltage than is available from the supply. If the peak voltage available from the amp results in power dissipation equal to or less than what the loudspeaker can handle, a brief transient won’t cook your gear. The instantaneous maximum power will be in the safe range, and the whole signal won’t last long enough for the continuous power to become a factor. An active box that’s well designed will either be powered in such a way, or it may be overpowered and then limited back into a safe range.

So, when a system is set up correctly, the odd mishap isn’t necessarily dangerous. It’s just displeasing to hear.

I believe that the persistence of this myth is due to folks who get talked into “squeezing maximum performance” out of their loudspeakers. They’re told that they have to use very large amplifiers to drive the boxes they have, and so that’s what they do. They hook up amps that can handily deliver power far beyond the “Do Not Exceed” line specified by peak ratings. If they take no other safety precautions, they ARE playing with fire. One good, solid accident, and that may be it for a driver. (If I might be so bold, I would recommend that those folks instead use my speaker powering strategy instead of “spend lots more, maybe get a touch louder, and hope you’re lucky.”)

The worrier doesn’t have to be you. Keep things reasonable, and you’ll be very unlikely to lose money because somebody yanked a cable.


A Monitor Layout For A Rock Show

Sometimes you’re thinking about audio, and sometimes not.

Please Remember:

The opinions expressed are mine only. These opinions do not necessarily reflect anybody else’s opinions. I do not own, operate, manage, or represent any band, venue, or company that I talk about, unless explicitly noted.

monitorsWant to use this image for something else? Great! Click it for the link to a high-res or resolution-independent version.

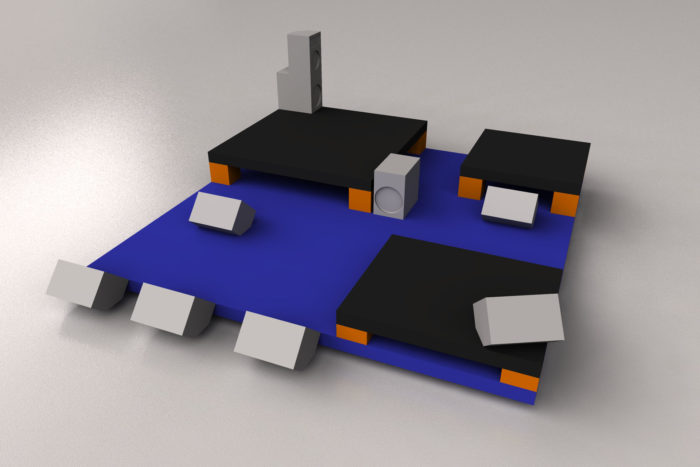
The picture attached to this article is an important reference point for the text. What you’re looking at is a scale drawing of the stage and monitor rig for the Sons Of Nothing: Clarity 10th Anniversary show.

So…why did it all end up like that?

The first thing that drives monitor placement is the stage layout – or, more precisely, where the actual players are going to be. In general, what we want to do with wedges comes down to one, simple rule: We want the loudspeaker output to hit whoever is supposed to be listening to it, while hitting as little of anything else as possible.

Of course, that rule gets bent (or simply taken outside and used for target practice with heavy artillery and wiffle bats) for various reasons, but it’s the starting point.

Down front, the plan was to have up to three people in play at any given moment. A guitarist downstage right, a solo vocal or solo guitar downstage right center, and a bassist parked down center. The down left riser was a dedicated space for a separate “keys and guitar” world. Center right was to be the land of woodwinds.

Upstage was split because of a need to run video. Sons Of Nothing uses projection as a key part of the concert, and in this case, front-projection was the order of the day. That meant that we needed a clear shot for the projector to fire “through” the band and onto the back wall. To get that open space, we put the drum riser off to the stage right side, and the backup-vocal riser went the opposite way.


Now, with the rule that I stated above, the natural inclination would be to always get a loudspeaker delivering a foldback mix as close to the players as could be physically managed. That’s not a bad rule of thumb. In fact, that’s a huge advantage of in-ears; You get to put the monitors so close to the player that they are partially inside their head, and only deliver usable output to that musician.

But an important realization is that live-sound is not actually about the best sound, as divorced from everything else. Rather, what we’re trying to do is create the best show, which is a holistic exercise.

Hence, the three downstage wedges were set on the floor, rather than up on the deck. The difference in distance was negligible, but a couple of very nice advantages were gained. Advantage 1 was that the loudspeakers no longer had as much physical contact with the riser, so they didn’t transfer as much vibration to the stage. Advantage 2 was that rather more of the main riser was available for actual people and the things they need to have to play well – like guitar-effect pedal boards.

A natural tendency is to set a player’s wedge such that it’s centered in front of them. In most circumstances, this is a reasonable idea. With a mono mix, most people like getting the output into both ears equally. There’s a problem, though, when keyboards enter into the equation. Physically, they’re pretty big and solid, and thus are very good at blocking the oh-so-critical “intelligibility frequencies” from a loudspeaker. Plus, keyboards can’t hear. It’s waste of output to fire a wedge into the bottom of a keys setup.

That’s why the keys wedge is off to the side. That placement allowed the sound from the drivers to have a clearer path to an actual human ear. A big help with making that placement work was the use of supercardioid-pattern microphones. Their pickup null points are at an angle to the rear of the mic (rather than straight back) and they have a tighter pattern in general. That helps significantly in being able to get enough output from a box that’s coming in from a diagonal. (With supercardioids and a monitor directly in front of the player, having the mic parallel with the floor helps to get that wedge firing into the least sensitive areas of the pattern.)

I would have liked to have put the keys wedge on the floor, but I was worried that the necessary distance for a good angle would be too much of a tradeoff.


Talking about the upstage folks, it might seem a bit weird that the backup-vocal wedge was set so that the riser partially blocked its output. There is an explanation though. First, I was concerned about chewing up real-estate on that platform, because there wasn’t much to go around. Second, some blockage from the riser was actually helpful. Plenty of sound that needed to get to the vocalists’ ears could still get there, with “splash” from the back wall mostly heading up into the acoustically treated ceiling. If the wedge had been up on the riser with the singers, there would have been a lot more spatter in general, and a lot of those reflections might have headed directly for the vocal mic in keyboard land.

The drumfill was an exercise in compromise. From a purely audio-centric perspective, it would probably have been best to to put things on the stage-left side of the drummer, with the full-range wedge off the sub and pointed upwards. The backup vocalists wouldn’t get blasted with the drummer’s monitor mix, and excess spill would go up into the ceiling. Unfortunately, logistics got in the way of this. Most of the square-footage on the drum riser was needed for…you know…drums, and so the “idealized” drumfill setup was too greedy for space. It also would have made it very hard, or maybe even impossible for the percussionist to enter from stage left as was planned. Stacking the drumfill on the left would have blocked the video.

So, a tall stack on the up-right corner was the solution.


One bit that I haven’t yet discussed is that lonely subwoofer that’s just upstage of center. What the heck is that?

Well, remember that down-center was the bass-player’s territory. As an additional wrinkle, no bass backline was brought in, except for a wireless rig. Such being the case, we needed to ensure that adequate low-end was produced for the folks on stage. Sonically, it would have been better to push the subwoofer downstage a bit (to reduce the time-arrival difference between the low-frequency information and everything else), but it seemed more important overall that it just not be in the way. So, I set the box flush with the drum riser, dialed the internal crossover for about 90 – 100 Hz, pulled the high-pass output to the down-center wedge, and the bassist ended up with a triamped monitor rig that could make some rumble without being run hard.

As far as I could tell, the overall setup was a success. Now, if only the woodwinds monitor hadn’t become unplugged at an unhelpful time…


Loud, Low, Little

You may pick two, maximum.

Please Remember:

The opinions expressed are mine only. These opinions do not necessarily reflect anybody else’s opinions. I do not own, operate, manage, or represent any band, venue, or company that I talk about, unless explicitly noted.

speakerwallWant to use this image for something else? Great! Click it for the link to a high-res or resolution-independent version.

Most of you have probably heard the old chestnut, “Good, fast, cheap. You may pick two of the three.” The saying is an “iron law” of project management.

There’s a very similar law when it comes to loudspeakers:

A loudspeaker might be inherently efficient (Loud), it might reproduce useful low-frequency information (Low), and it might be compact in size (Little). You can’t get more than two of those things to happen at once.

By way of example, let’s take a gander at the high-frequency horn section in your typical, full-range, live-sound box. In all likelihood, it produces quite a bit of SPL with not very much power – lots of affordable, high-frequency compression drivers won’t handle more than 50 watts of continuous input. Heck, some can barely manage 20! The driver is quite small, especially when compared to a 12″ or 15″ cone.

Loud and little is 100% within that driver’s wheelhouse, but it won’t go low. If it did, there wouldn’t be a low-frequency driver in the cabinet. To prevent that itty-bitty compression driver from being wrecked, a high-pass crossover filter is needed. The corner frequency of that filter might be up at 2.5 kHz or so. There’s nobody on Earth who would confuse the high-midrange/ high-frequency transition zone for “lows.”

The above is fairly intuitive for most, but it can be a bit easier to get bamboozled when you see a big driver. An 18″ driver must be able to make really low-frequency material at high volume, right? Well…maybe. The box that driver is sitting in is a HUGE part of the equation; A large-diameter diaphragm isn’t enough. The smaller the box gets, the more power you have to dump into the driver to get the really deep material to play “loud.” Past a certain point, things get ridiculous in one way or another, which includes the unbridled hilarity of cooking the voice coil or destroying the suspension.

A compact subwoofer is highly unlikely to do a whole lot for you below about 50 Hz. Forty Hz might be doable at “half power” if the manufacturer is using a bandpass design for the box. (A bandpass design is great in a small frequency range, and terrible everywhere else – which is perfectly fine for a subwoofer.)

You have to decide on what you actually need, versus what you think you need.

For rock-band reinforcement, really deep bass actually isn’t a top requirement. Mostly, what we need is high output, though not so high that we run the whole audience out of the room. I haven’t really cared about anything below 50 Hz for a long time, especially because large SPL at low frequency is what annoys the “neighbors” the most easily. “Varsity-Level” EDM, on the other hand, can be HIGHLY dependent on very, very low frequency information (35 Hz or even lower) that has to be at levels exceeding 110 dB SPL C, slow-average. Doing that in a reasonable way demands bigger boxes, or several truckloads of smaller boxes.

So, when you’re out shopping for low-frequency loudspeakers, be wary of anything that claims to be effective for concert sound below 50 Hz, while also fitting easily into the trunk of a compact car. If a single box is going to play low AND loud without a staggering amount of amplifier power, it just can’t be little.