Tag Archives: Loudspeakers

Projector Hangers

Just throwing a bunch of sound into a room is NOT pro-audio.

Please Remember:

The opinions expressed are mine only. These opinions do not necessarily reflect anybody else’s opinions. I do not own, operate, manage, or represent any band, venue, or company that I talk about, unless explicitly noted.

projectorhangersWant to use this image for something else? Great! Click it for the link to a high-res or resolution-independent version. Also, did you know that Pixabay has lots of high-res pictures you can use, free, for just about anything?

Since pre-school, I have known that calling people names is not a very nice thing. It’s not something that Winnie The Pooh would do, except by mistake, and if he did make that mistake, the end of the episode would have all the residents of the Hundred-Acre Wood coming together to learn a very special lesson. Eeyore would say something unintentionally funny. Christopher Robin would say “Silly old bear.”

But I sometimes do invent derogatory names for people and organizations. I especially invent those names when people or organizations manage to get things wrong in a very complete and glaring way – particularly when it comes to live audio.

(In the name of fairness, let me present that audio-humans are sometimes called “Squeaks.” It’s a reference to some of the unpleasant sounds we’ve been known to make, which includes feedback. I believe I have earned the label on more than one occasion.)

Anyway.

Events over the last couple of weeks have led me to concoct the epithet, “Projector Hanger.” A Projector Hanger may also be called a “D!@# Projector Hanger,” or a “G!@ D!@# Projector Hanger,” or even a “F!@#$%^ PROJECTOR HANGER,” depending upon just how much of a metaphorical mess they’ve left for folks like me to clean up.

Metaphorically.

A Projector Hanger is an A/V integrator who has no business installing a public-address audio system (because they have no clue about what makes such a system actually work well), yet installs such a system anyway. They attach this fundamentally screwed-up monstrosity to the bit of the install they actually do understand: A reasonably bright projector, maybe with HD capability, which is pointed at a screen and supplied with various inputs at some convenient location. This final bit of behavior actually provides a gateway to identifying – and hopefully avoiding – Projector Hangers.

Point-N-Shoot

Projector Hangers are adept at directly firing some sort of light emitter at a reflective target, such as a proper screen or brightly-painted wall. They seem to assume that this is the way to go for everything, and so they have an alarming tendency to fire sound emitters (loudspeakers) directly at reflective targets. Reflective targets like…hardwood floors. This creates an acoustical crapstorm of multiple, secondary arrivals, ensuring that everybody in the room is sitting as deeply in a reverberant field as may be practicable. Intelligibility drops like a rock as transients from words spoken into a microphone smear, bounce, ricochet, and rattle to the maximum extent possible. Gain before feedback throws up its hands and takes a sick day as overhead loudspeakers fire into the sides of microphones, and also as those microphones pick up even more re-entrant noise from the vortex of acoustical reflections.

(A primary indicator of a Projector Hanger is that the audio side of the system LOOKS nice, being unobtrusive and able to blend in with the decor, but the actual audio from the audio side SOUNDS awful.)

More Is Better, Right?

The Projector Hanger is a lover of large images. Wide throw. Multiple screens. Make sure everyone can see it! They apply this same mentality to audio, seemingly thinking that the key to everyone hearing well is for everyone to just hear something. Anything!

To accomplish this, the Projector Hanger installs a lot of speakers, with the intent that sound should be sprayed everywhere. So, even before the sound from all those loudspeakers smacks into the floor, a nightmare of multiple arrivals and destructive interference has been summoned. Also, the Projector Hanger can be counted on to compound this problem by deploying loudspeakers in spaced pairs. (The ability to reproduce stereo sound from a playback device is paramount, even if the critical application for the system is to reinforce the signal from a single microphone.) These spaced pairs further aggravate the multiple arrival and interference problems, and also feed the gaping maw of the acoustical issues: Why just hit the floor with a bunch of sound when you can also hit the walls!

Math Is Hard

Another indicator that a Projector Hanger has been on the loose is when equal numbers no longer correspond. For example:

The Projector Hanger, wishing to be helpful, installs an easy-access XLR jack for a microphone line. The jack is labeled “Mic 1,” and the label even looks like it was silkscreened directly onto the jackplate. It all looks so PRETTY.

They then permanently wire the output of that jack to a set of terminal blocks on a super-classy input mixer and amplifier. The control knobs on the device were clearly labeled at the factory, so that a person could easily find the gain controls for various channels. It would make sense, then, that the jackplate labeled “Mic 1” would be wired to “Input 1” on the mixer-amplifier unit. Of course, that’s not what happens. In an astounding bit of mental gymnastics, perhaps influenced by the literary horrorscapes of HP Lovecraft, the Projector Hanger decides that “1” is actually equal to “2.” That’s where the jack is wired. Input 1 is actually used for the installed wireless system – but no labeling is put in place to clear this up.

One day, an audio-human ties into the system through “Mic 1.” All the knobs on the mixer-amplifier are down, meaning that no signal passes through the system. The audio-human rolls the volume up on “Input 1,” but no noise is heard. The audio-human naturally thinks that there’s a cabling problem, and proceeds to waste a huge chunk of time looking for the bad connection. Eventually, the sound craftsperson gives up and deploys their fallback option – only to later discover that the whole mess was caused by a moronic, undocumented connection scheme.

I can see the argument in my head right now.

Projector Hanger: “Why didn’t you try more knobs?”

Sound Person: “Why can’t YOU COUNT?”

The Backup Is Better Than The Primary

The interface (or, perhaps more appropriately, catastrophic collision) between a pro-audio tech and a Projector Hanger is highly instructive in other ways. I mentioned above that a series of problems might force an audio human to take an alternate route. This alternate route might have been, say, patching into a single, inexpensive, powered loudspeaker sitting on a tripod stand.

Now then.

Before this particular debacle, the sound person had been trying valiantly to spray-paint the acoustical turd that the Projector Hanger had created. To this end, a very large number of parametric EQ filters had been used. By “large number,” what I mean is, “all that were available.” The EQ transfer function applied to try to make the system usable was (quite frankly) insane, and was implemented across two processors. One was patched across the total output of the audio human’s mixer, and the other was inserted on a wireless headset.

When the fallback solution was implemented, the tech bypassed all the EQ. All that crazy finagling could not be counted on to be helpful in the situation, so it was better to start from scratch. This was unfortunate, but the operator was poised and ready to fight any problems in realtime. Some faders for wired mics were pushed up on the console.

The sound was, actually, very good. With nothing beyond basic channel EQ, the single, ugly, cheap loudspeaker on a stick was handily beating the CRAP out of the multi-unit, nice-looking, expensive install. The headset mic also had plenty of usable gain, although the audio human did use a few inserted filters to clean up a bit of mud and harshness. When an emergency-implemented “I don’t know what else to do, so let’s just get through it” solution works better than the thing that was all planned out…

…you might just have had a run in with a Projector Hanger.


Building A Small System

A guide to building a simple live-sound rig, from input to output.

Please Remember:

The opinions expressed are mine only. These opinions do not necessarily reflect anybody else’s opinions. I do not own, operate, manage, or represent any band, venue, or company that I talk about, unless explicitly noted.

systembuildingWant to use this image for something else? Great! Click it for the link to a high-res or resolution-independent version.

Every once in a while, I get a request for information on how to create or add-on to a system for live audio. I like to personalize this information, because rigs for show and event production are best built for specific applications. However, there is a point where insisting that everything be approached in a customized way becomes inefficient – a lot of the same ground gets covered repeatedly.

So…

If you’re wondering what I think is required for a “small, basic, but still worthwhile” audio rig, read on. I’ll be including lots of links to vendor pages where you can buy various products.

(We’re going to go in order of signal flow, by the way.)

Input Transducers and Interfaces

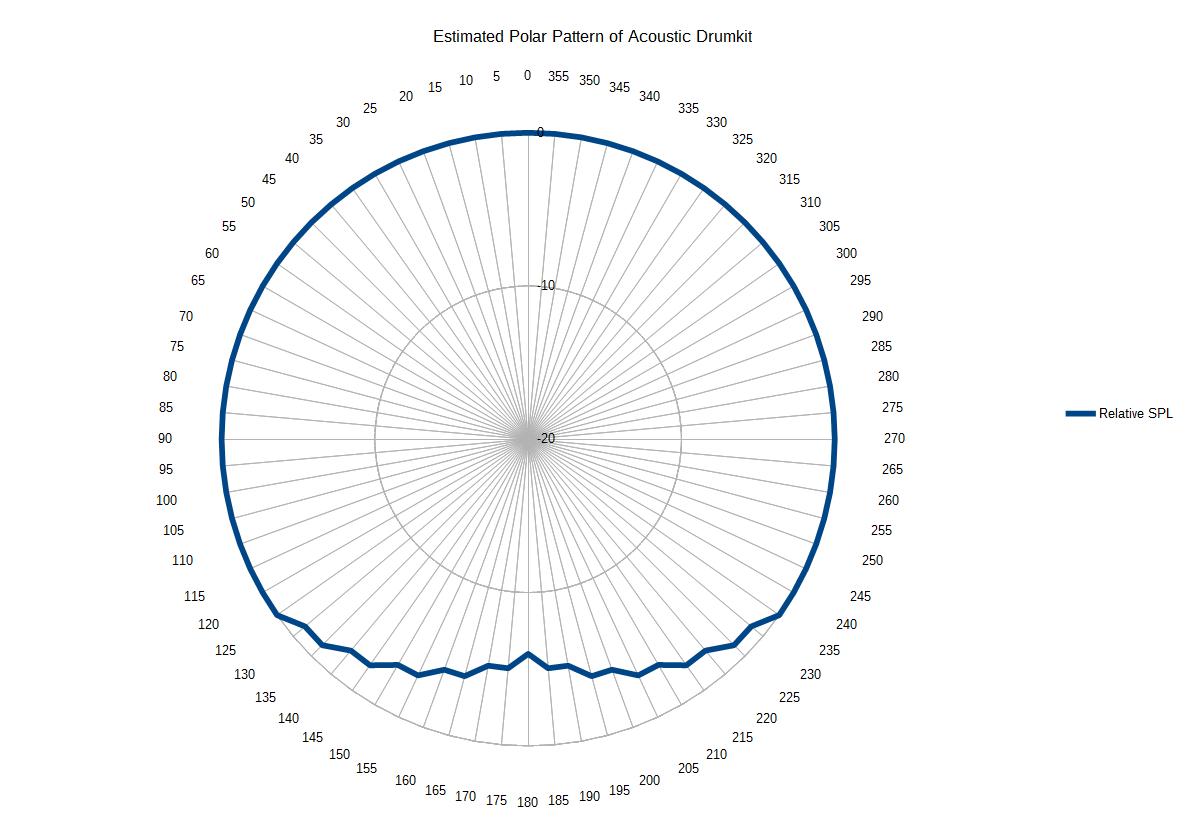
For the smallest possible rig, take a distributed approach: With anything other than vocals, have the musician supply their own, personalized sound. Further, seek to avoid the whole issue of putting the output of that sound through the PA. Let a guitar amp make the guitar sound, let the drums just make their own noise in the room, and so on.

Having the ability to put more in the PA increases your potential control over the sound of the show, but outside factors can prevent that potential control from becoming actual control. Also, more inputs means more complexity, and thus more difficulty in system operation. There’s no hard and fast rule of what to be ready to reinforce, but I generally encourage folks – especially folks new to this whole thing – to ease themselves into the maelstrom that is live audio.
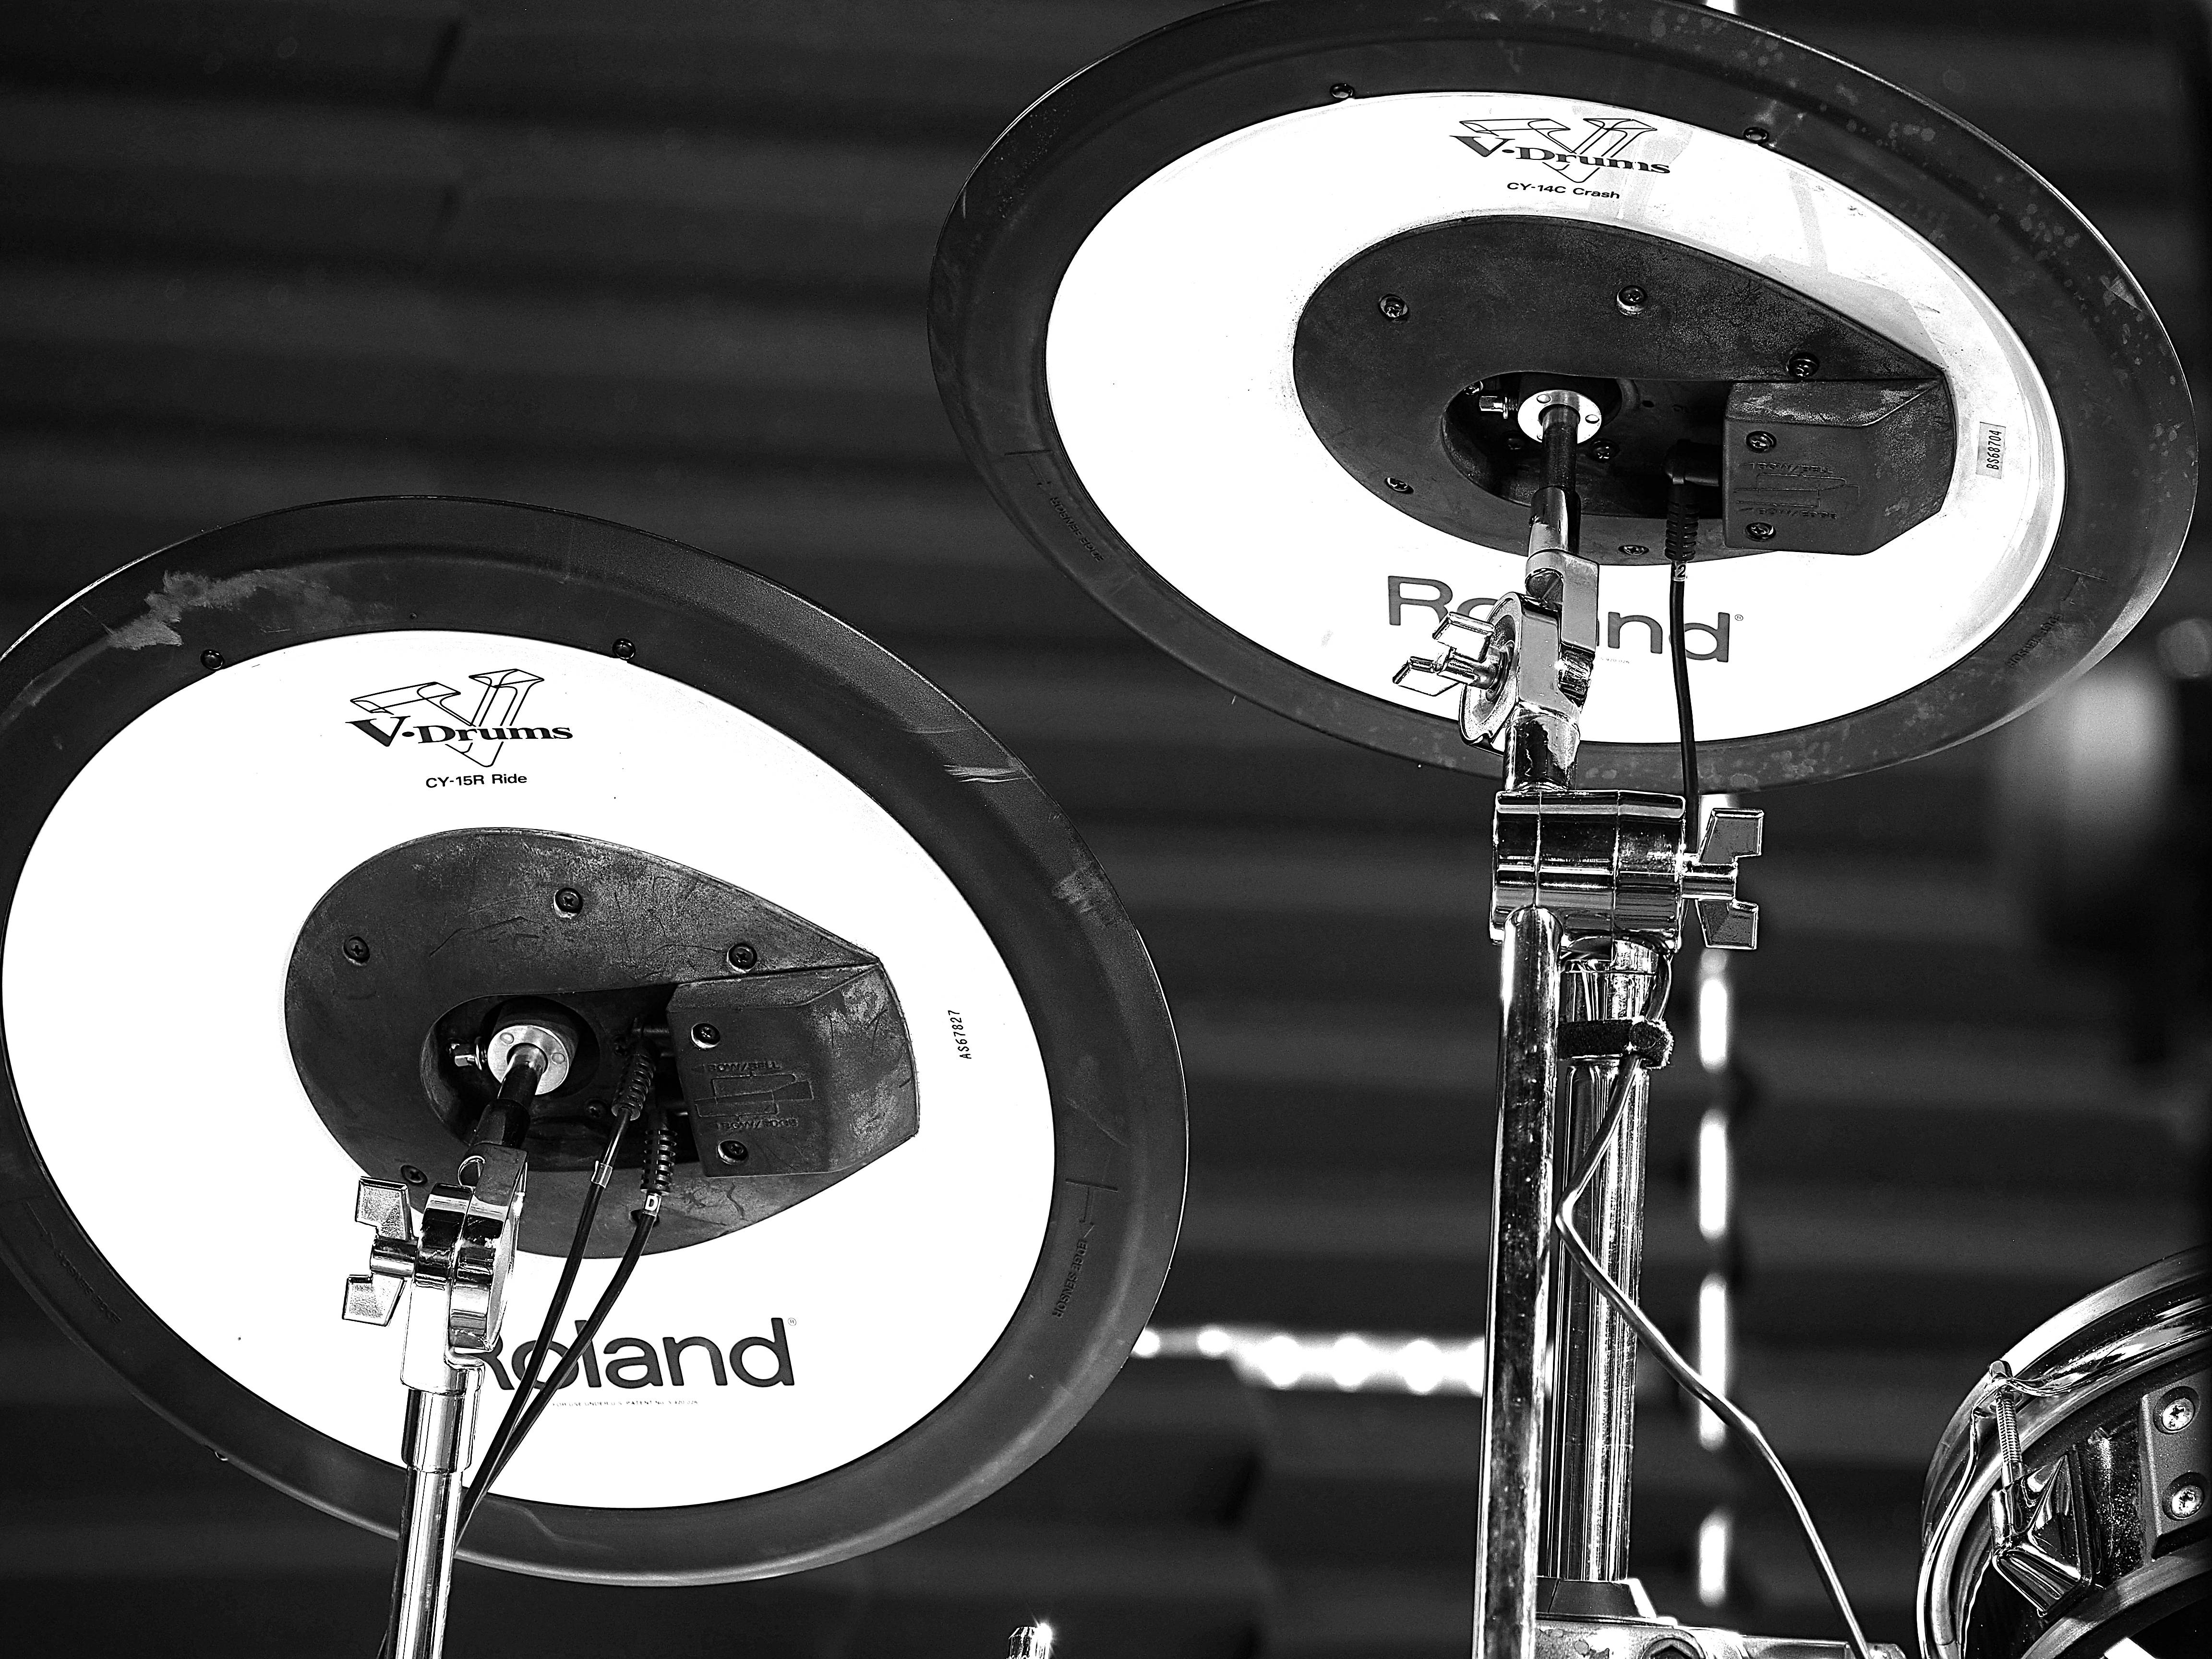
Wired Microphones

A decent mic will basically sound like the thing it’s being pointed at. For this reason, don’t agonize about getting specialized mics for everything right off the bat. A good “vocal” mic will be fine for many, many instrument applications. I recommend buying mics with tighter patterns (super or hypercardioid), as they can make the handling of high-gain situations much easier. Tight-pattern mics do require that the musicians – especially the vocalists – be able to use them appropriately. This issue should be considered as something for the musicians to figure out, because no system can fix everything (and a basic rig can fix even less of everything, if you take my meaning).

My current favorite mic is the EV ND767a. You might also consider the Audix OM2. Here’s a comparison of the two at Sweetwater.

Microphone Accessories

Each mic you buy will require an appropriate stand and XLR-Female to XLR-male cable.

Budget stands (like these from OnStage Stands) are just fine… if you can put in the effort to be nice to them. Gator Frameworks also has some promising offerings.

When it comes to cable, don’t overspend and don’t oversave. For a 20+ foot mic cable, paying more than $1.00 per foot is a huge premium for no benefit that I’ve been able to clearly observe. There are perfectly decent cables that can be had for as low as $0.40 per foot when purchased in a bundle. Going much below that, though, is likely to lead to problems.

I’ve been quite happy with cables I’ve gotten from Audiopile and Orange County Speaker. I’ve gotten some REALLY inexpensive cables from Unique Squared that were okay for a good while, but started having problems after a number of uses.

Wireless Mics

One word: Don’t.

Wireless is a pain in the donkey, with the FCC selling off all kinds of UHF spectrum to cellphone and computing companies, and the frequencies used for digital wireless becoming ever more crowded and hostile. Functionally, wireless transmission of audio is far more “fragile” than signal running on a cable, with all kinds of weird things that can happen outside your control.

But no matter what I say, you’re going to buy at least one wireless mic anyway, so…

Buy a digital system that operates in the 2.4 Ghz band if you want a chance at retaining your sanity in the short term. Specifically, look at the XD-V55 systems by Line 6. They’re very reasonably priced, have nice features like remote monitoring of mute status and battery level, and are the best wireless experience I’ve personally had to date.

You can, of course, go up from there.

Wireless Mic Accessories

Handheld wireless mics benefit greatly from having a stand available for every transmitter. Further, each receiver will need a cable to interface with the rest of the system.

Direct Boxes

A direct box is what I class as an “interface,” because it doesn’t convert acoustical events into electrical signals. A DI makes signals that are already electrical play nicely with pro-audio equipment when they might not otherwise. An aspect of this is also isolation, in that the DI creates what you might call an indirect connection between a console and a device. This can be very handy if the sending device (a guitar, keyboard, sampler, whatever) can’t tolerate phantom power, and the console has phantom applied to the signal line in question.

Direct boxes come in two main flavors, passive and active. Active DI boxes require external power of some kind, be that power from the wall, batteries, or phantom from the console. If you’re going to buy DI boxes, buy ACTIVE models. An active DI will work with almost anything, whereas some instrument pickups pair quite badly with passive boxes. You might as well buy units that work everywhere, and thus simplify your life. Expensive models from BSS, Radial, and Countryman are certainly nice, but there’s great value to be had in units from ART and Behringer, especially the “multiple modules in one box” offerings.

DI Box Accessories

Just like a microphone, each DI box will require an XLR-Female to XLR-Male cable. Remember that multi-module DI boxes require a cable for each individual module.

You don’t have to actually mount a rackable DI system, but you might want to. Sweetwater and Audiopile both sell quality rack cases in a huge variety of configurations.

Snakes/ Multicore Connections

Depending upon how you implement the mix and signal processing part of the rig, you may or may not require multicore cabling. If you want to send and receive a bunch of audio signals at a remote location, a snake really is a must. If you merely want to control the processing of signals from a remote location, you might be able to use your console in the same way you would use a traditional snakehead or stagebox.

If you do use a multicore, I suggest getting one that’s a little “overkill” in terms of the number of lines it contains. If a line fails, you’ll have a spare to patch to. “Headless or “fan-to-fan” snakes are a bit cheaper, but less convenient than multicores that terminate one end at a box. (You will always have to hunt for the specific line you want to connect to. It’s like a law of nature, or something.)

Audiopile would be my first choice for buying a snake I was really serious about. I have had good results with Seismic Audio fantail-to-fantail snakes, but my experience with their stagebox offerings has been mixed.

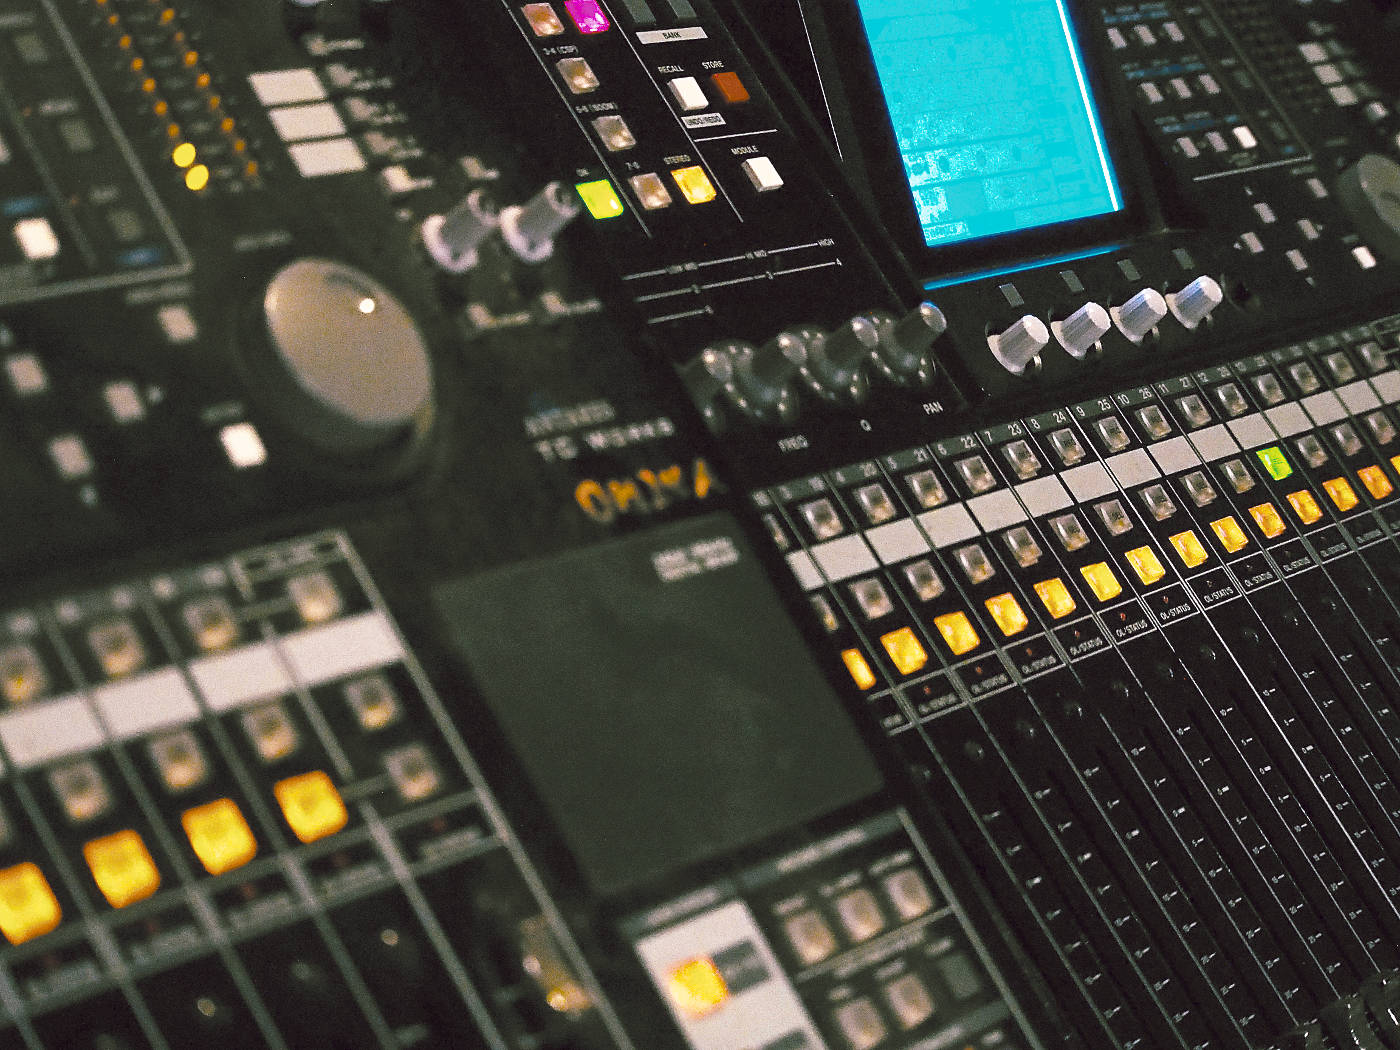
Mixing Consoles and Output Processing

This is where things get REALLY interesting.

Essentially, you have three major choices:

1) Use a relatively simple console where output processing is handled externally, and place all that at a “remote” location.

2) Use a more sophisticated console that encapsulates the output processing, and place the console at a “remote” location.

3) Use a more sophisticated console that encapsulates the output processing, leave the console close to the stage, and control the console from a remote location.

Option one takes up more space and requires more complicated physical patching, but the interface can be easier to understand at an intuitive level. Option two is compact and easy to physically patch, but the whole thing can be less intuitive for an inexperienced operator. Option three is like option two, with the added issue that control can depend entirely on an external device and network connection. If those fail, you may be in big trouble.

In every case, a console with some room to grow in terms of both inputs and outputs is a good idea. Don’t go overboard, though. You’ll end up spending a lot of money to no functional end. Especially if you’re new to all this, keep your monitor sends down to a maximum of four.

Option 1

The Console

Whatever you do, buy a console where the EQ has sweepable mids on the EQ and pre-fader auxiliary sends for each unique monitor mix you want to handle. A Soundcraft EPM8 is probably the minimum you should look for. I’ve been quite pleased with Yamaha’s mid-basic offerings, which have been revamped since I’ve bought one.

Simple, analog consoles “race” in a VERY tight pack, which means that there are lots of little permutations and many viable choices. Mackie, A&H, and Peavey are all worth looking at, and Behringer, while not having the shiniest reputation, has a knack for cramming lots of features into small cost. An XL2400 has what I would consider to be pretty darn flexible routing for a $650 mixer.

Console Accessories

Some consoles can be easily cased up or rackmounted, and some can’t.

You will need patch cables and/ or adapters with appropriate ends to get from your console outputs to your processing, one cable for each channel. As with other cables, high-dollar options really aren’t necessary. Stay somewhere in the $2/ foot range, and you’ll have patch connections that are long enough for some wiggle room and cheap enough that you won’t cry about ’em.

Also, get yourself a decent set of headphones for listening to the console’s solo bus. I have a pair of very-well-loved HD280s, and lots of other options exist. You want to look for closed-back, durable, “un-hyped” phones if you’re doing your own hunting.

The Processing

What you choose for output processing depends greatly on your own personal taste and comfort level. At the minimum, you should have an independent EQ for each mix. A really basic setup might be three mixes – one for the audience, and two monitor mixes for the stage. Things go up from there, of course.

Graphic equalizers, while not my personal favorite, are straightforward for most folks to operate. I generally recommend 31-band models over 15-band units, because you can focus in on a problem area without sledgehammering material that’s not making trouble. Peavey and dBX are good overall bets, but affordable graphics are similar to affordable consoles: All the players are very similar. I do like the features of the Behringer FBQ3102, but I also had one die after a year of use and a bumpy ride in the back of a truck.

If I’m going for an EQ-only solution, I can tell you that I vastly prefer a flexible parametric EQ over a graphic. In that realm, I have been extremely impressed by Behringer’s Feedback Destroyers. To be clear, my experience is that their automated feedback management is mediocre at best – but they are WICKED HANDY when you run them manually. You get a huge number of fully parametric filters at a very low price point. I’ve never had a major problem with any Feedback Destroyer I’ve owned. (Be aware that parametric EQ is more involved than graphic EQ. It’s not quite as “grab-n-go.” There are more choices that you have to make deliberately.)

If you want your processing to include dynamics, and also to let you have a graphic EQ combined with a parametric EQ, then a Behringer DEQ2496 is another killer device. Again, I haven’t found anything else exactly like it “in the wild,” although a Driverack PA2 is actually very close. DEQ2496 units do sometimes have problems with one of the internal connectors getting loose, but it’s an easy fix once you get the cover pulled off the device…and the connector freed from being glued down. (You will very definitely void your warranty if it’s still in effect, but hey, live a little.)

Processing Accessories

You may or may not be able to patch your snake returns (or other output cables) directly to your processing, so some adapters or patch cables might be necessary.

Also, you should definitely rack up any outboard processors you have for your system. It really does help to keep things neat and tidy.

Option 2

The Console

Digital consoles are a great route to take if you want to keep everything in one box. The downside, of course, is that the one box becomes a single point of failure. Then again, in any case, losing the console pretty much ends your day if you don’t have a spare.

Another factor to consider is that the processing available in digital consoles tends to be more fully featured while also being somewhat abstracted. This can make them overwhelming for new users, who simply don’t know what to make of all the options available.

If you’re going to be physically present at the console, you may as well get one that has a control-surface integrated in some way. An X32 Producer is a pretty natural choice, along with offerings from Presonus, Allen & Heath, and QSC.

Console Accessories

As was said earlier, rackmounting or casing the console might be possible. You can decide if you want to go to the expense or not.

The need to buy patch cables or adapters may still be there, depending on the configuration of your snake or other output lines.

And you’ll still want some headphones.

Option 3

The Console

You can leave the console on stage and mix remotely with the consoles detailed above, although the control surface might be a bit of a waste. Affordable digi-mixers that lack a surface are an interesting new product on the scene – just remember to factor in the cost of a remote-control laptop or tablet. Also, be aware that remote control is inherently a bit more “shaky” than being physically present at the mixer. It’s not horribly problematic, of course, but you have to have a contingency plan.

Surfaceless consoles at lower price points are available from Behringer, Soundcraft, and A&H. More expensive units also exist, of course.

Console Accessories

Surfaceless consoles are definitely rackable, and definitely should be.

Remember to buy the necessary patch cables or adapters for the outputs.

…but you can probably skip the headphones, because the consoles don’t currently stream the solo bus to a remote location (that I know of). That’s another downside of the number three option – to access the solo bus, you still have to be physically present at the console’s location.

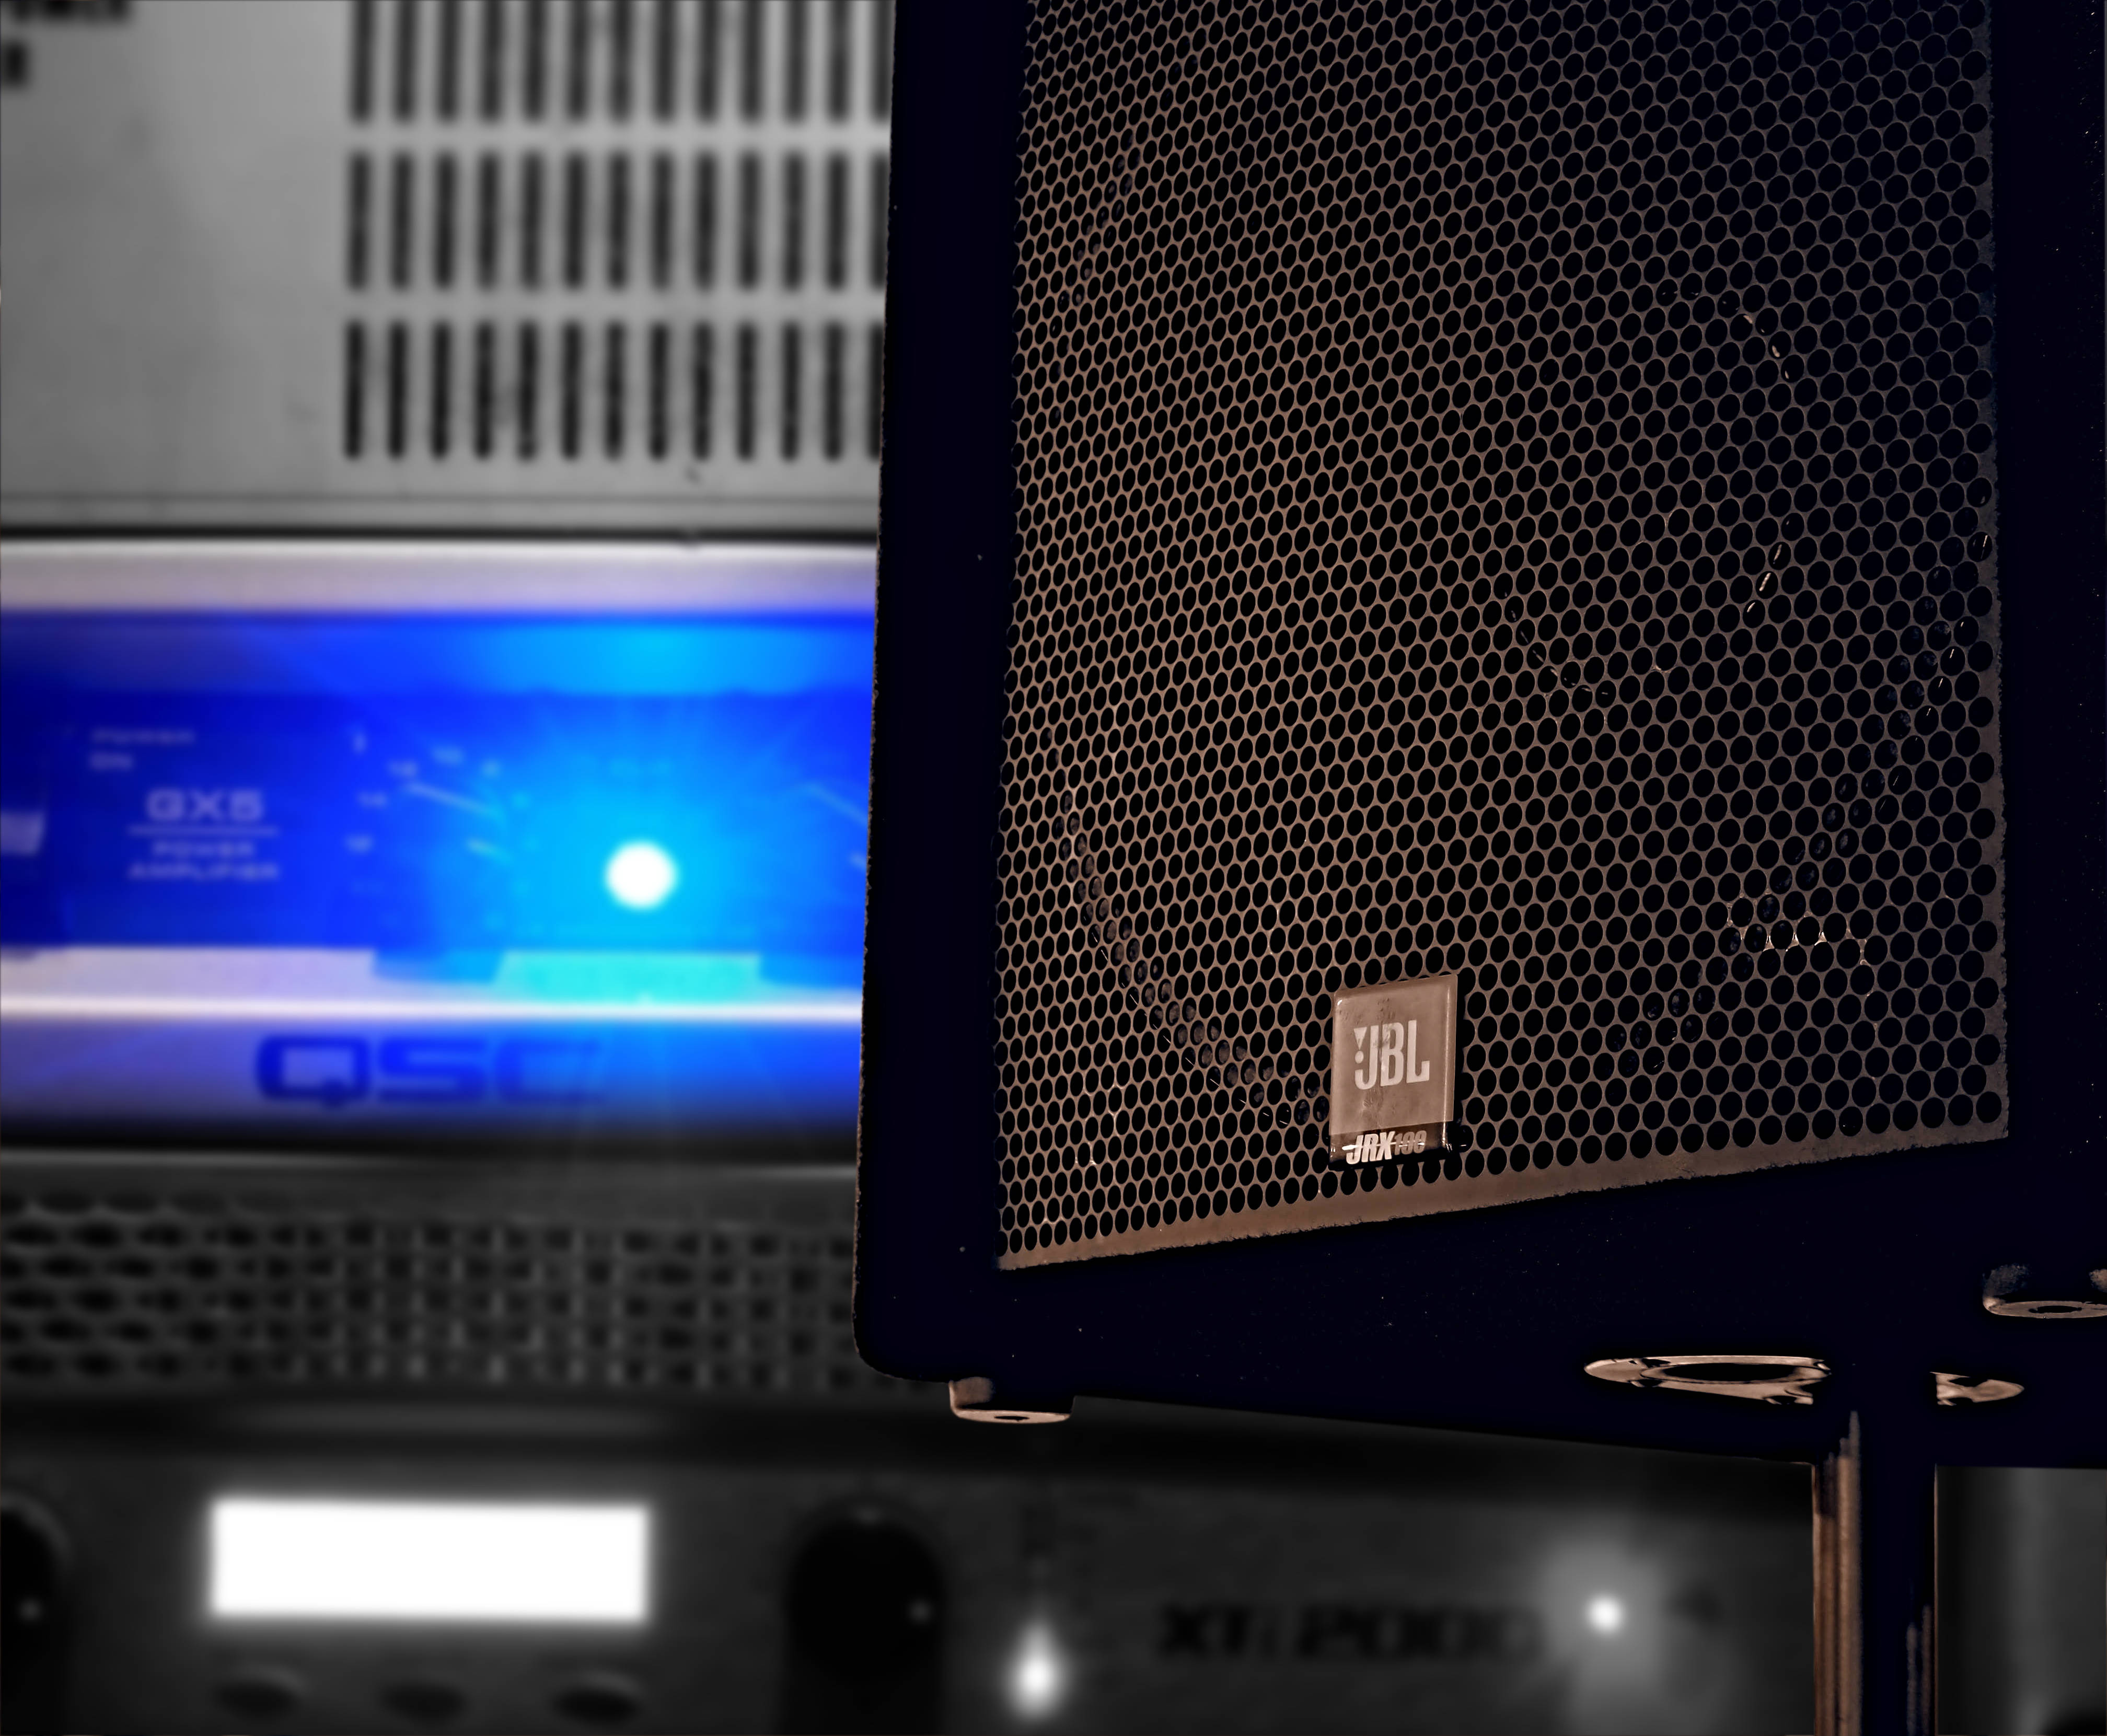
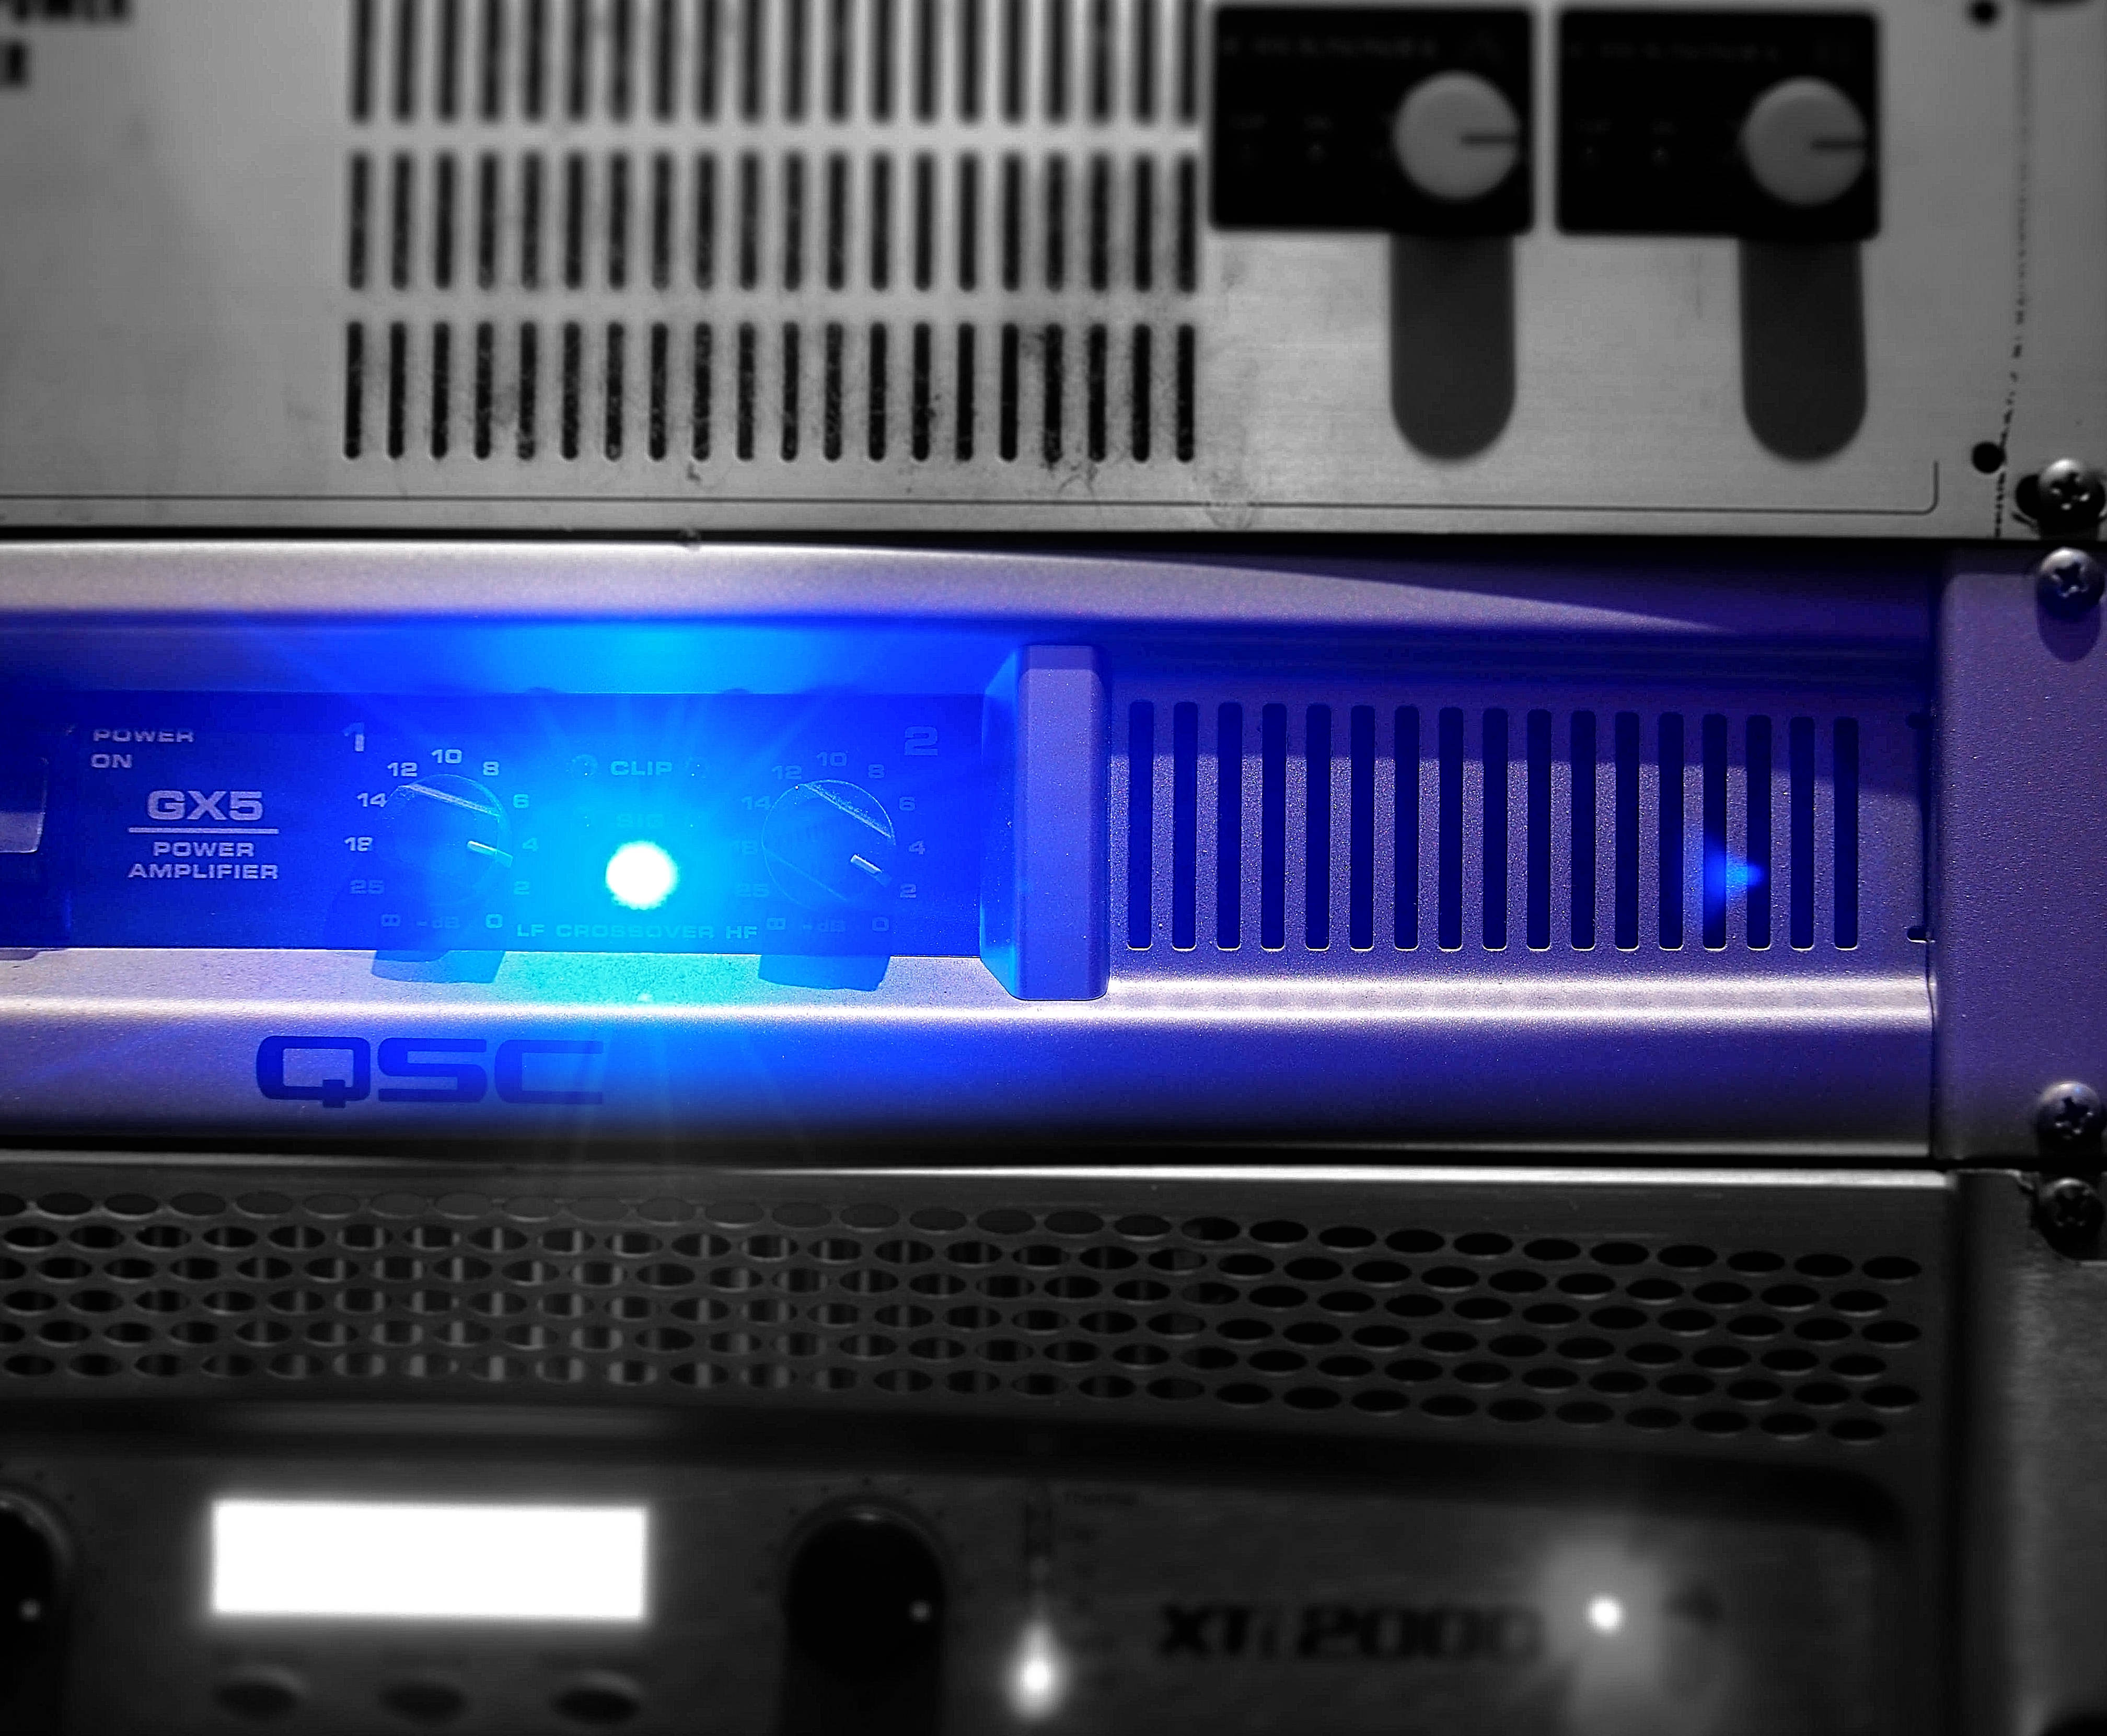
Output Transducers (Speakers, That Is)

You’ll notice that I didn’t include an option for amps and passive speakers, and there’s a reason for that: This is supposed to be a simple system, and powered speakers are really the way to go to achieve simple.

Also in the service of simple is to keep your monitor wedges and FOH speakers interchangeable. Unless it’s completely inappropriate for your application, having loudspeakers that are all of the same model means that you can expect similar behavior from each box. If a failure occurs, you can swap one box for another and not have to think about it too much.

When buying powered loudspeakers, accept nothing less than an honest-to-goodness, biamped, fully processed unit. There are plenty of powered speakers that are single amped, with no processing outside of a passive crossover that is placed between the amplifier and the drivers. You want something more – something with an active crossover, basic corrective EQ applied at the factory, and an internal limiter. A peak SPL rating of greater than 120 dB @ 1 meter is also a good thing to look for, even with all the “fudging” that marketing departments apply to output numbers.

In terms of specific recommendations, I can say that PVXP12s have done very well for me. I can do “rock and roll” monitors with them in a small space, and I’m confident that they would perform equally well as an FOH unit. There are lots of other possibilities of course, provided by JBL, Mackie, Yamaha, and Behringer (just to name a few).

Loudspeaker Add-Ons

First, make sure you have the necessary cables to get from the console or snake outputs to the loudspeakers. Because speakers tend to be deployed in a rather spread-out fashion, it’s advisable to buy a bit more cable than you think you need. A 50 footer for each loudspeaker is probably a good start.

When it comes to stands for your FOH speakers, it’s good to get something a little nicer. Stands with locking collars and/ or piston assists can be a big help. I’ve used crank stands in the past, and they’re okay, but given a chance I’d make the upgrade to a more technologically advanced support.

The Biggest Accessories Of All

In the end, none of the fancy gear will mean much without power. You don’t have to buy really fancy power-conditioning equipment, but some rackmountable power units help reduce the need to fish around for a bunch of “free range” power taps. Of course, you should still keep a few freely-positionable power taps handy, along with several extension cords that use 14-gauge conductors (or something beefier, like 12-gauge). Powered speakers spread out all over creation have an alarming tendency to need those extension cords.


While there are other sundries and gadgets you can add on, going through the above should get you a working rig. As I said, this is a basic system. It won’t do everything for everybody all the time, but it should provide you with a decent start.


Let ‘Em Get Away From It

Maximum coverage isn’t always appropriate for small venues.

Please Remember:

The opinions expressed are mine only. These opinions do not necessarily reflect anybody else’s opinions. I do not own, operate, manage, or represent any band, venue, or company that I talk about, unless explicitly noted.

arrayWant to use this image for something else? Great! Click it for the link to a high-res or resolution-independent version.

I love the idea of a high-end, concert-centric install.

It excites me to think of a music venue where the coverage is so even that every patron is getting the same mix, +/- 3 dB. Creating audio rigs where “there isn’t a bad seat in the house” is a point of pride for concert-system installers, as well it should be.

Maximum coverage isn’t always appropriate, though. It can sometimes even be harmful. The good news is that an educated guess at the truly necessary coverage for live audio isn’t all that hard. It starts with audience behavior.

What Is The Audience Trying To Do?

Another way to put that question is, “What is the audience’s purpose?” At my regular gig, the answer is that they want to hang out, listen pretty informally, and socialize. This is an “averaged” assessment, by the way: Some folks want to focus entirely on the music. Some people barely want to focus on the tunes at all. Some folks would hate to be stuck in their seat. Some folks wouldn’t care.

The point is that there’s a mix of objectives in play.

This differs from going to show at, say, The State Room or, even more so, at Red Butte Garden. My perception of those events is that people go to them – paying a bit of a premium – with the intent to focus on the music.

At my regular gig, where there’s such a diversity of audience intent, perfectly even coverage of all areas in the room is counterproductive to that diversity. It forces a singular decision on everyone in the room. It essentially requires that everybody in attendance has the goal of being primarily focused on the music as a foreground element. This is a bad thing, because denying a large section of the audience their intended enjoyment is likely to encourage them to leave.

If they leave, that hurts us, and it hurts the band. As much as possible, we should avoid doing things that encourage folks to vamoose.

So, I’m perfectly happy to NOT cover everything. The FOH PA is slightly “toed in” to focus its output primarily on the area nearest the stage. The sound intensity is allowed to drop off naturally towards the back of the room, and there’s no attempt at all to fill the coverage gap off to the stage-left side. People often seem to congregate there, and my perception is that many of them do it to take a break from being in the direct fire of the PA. They can still hear the show, but the high-frequency content is significantly rolled off (at least for whatever is actually “in” the audio rig).

If I knew that almost everybody in the room was primarily focused on the music, I would take steps to cover the room more evenly. That’s not the case, though, so there are “hot” and “cool” coverage zones.

Cost/ Choice Parametrization

Another way to view the question of how much coverage is appropriate is to try to define the value that an attendee placed on being at a show, and how much choice they have in terms of their position at the show. This is another sort of thing that has to be averaged. Not all events (or people) in a certain venue are the same, so you have to look at what’s most likely to happen.

When you state the problem in terms of those parameters, you get something like this:

coveragenecessity

If the cost of being at the show is high (in terms of money, effort spent, overall commitment required, etc.) and the choice of precisely where to take in the show is low (say, assigned seating), then it’s very important to have consistent audio coverage for everyone. If people are paying hundreds of dollars and traveling long distances to see a huge band’s farewell or reunion, and they’re stuck in one seat at a theater, there had better be good sound at that seat!

On the other hand, it’s not necessary to cover every square inch of an inexpensive, “in town” show, where folks are free to move around. If the coverage isn’t what someone wants, they can move to where it is what they want – and, if they can’t get into the exact coverage area they desire, it’s not a huge loss. For a lot of small venues, this is probably what’s encountered most often.

Now, please don’t misconstrue what I’m saying. What I’m definitely NOT saying is that we should just “punt” on some gigs.

No.

As much as possible, we should assume that the most important show of our careers is the one we’re doing now.

What I’m saying is that we need to spend our effort on things that matter. We have to have a priorities list. If people want (and also have) options available for how they experience a show, then there’s no reason for us to agonize about perfect coverage. As I said above, academically perfect PA deployment might even be bad for us. They might not even want to be in the direct throw of our boxes, so why force them to be? In the world of audio, we have finite resources and rapidly diminishing returns. We have to focus on the primary issues, and if our primary issue is something OTHER than completely homogenous sound throughout the venue, then we need to direct our efforts appropriately.


Transitionally Finicky

Sudden pattern or frequency-response transitions can make audio systems do unexpected things.

Please Remember:

The opinions expressed are mine only. These opinions do not necessarily reflect anybody else’s opinions. I do not own, operate, manage, or represent any band, venue, or company that I talk about, unless explicitly noted.

cardioidWant to use this image for something else? Great! Click it for the link to a high-res or resolution-independent version.

Most of us have probably heard the story of “that nice, sweet dog that suddenly bit Timmy.” If you are, or have been an aviation enthusiast, you’ve probably also heard the stories about aircraft that abruptly departed from controlled flight and crashed. In both cases, everything seemed to be perfectly okay, and then, BOOM! The canine or the airplane turned around and “bit” someone.

This disconcerting behavior can also happen with audio rigs. You’ve got a system that seems nice and stable, and the show’s rolling along, and everybody’s happy –

SCREECH! WHOOOOOOOOOM! SQUAAAAAAAAWWWWWWKKK!

The rig goes into feedback and “bites” you.

As with dogs and aircraft, a sound system always has a reason for doing what it does. If the rig got tipped over the edge of stability, there’s a logical, physical explanation for why. When it comes to an audio system seeming to be just fine, and then suddenly behaving in a terrifying way, I’ve come to believe that there’s a primary factor to look for: Where does some part of the system display an abrupt transition in polar or frequency response?

A Polar Expedition

If you’re not familiar with the concept of polar response, it’s actually a fairly simple concept. It’s the varying sensitivity of a microphone or loudspeaker at different angles around the device. Microphones and loudspeakers are the inverse of each other, and so what the measurement concerns is also inverted. For a microphone, the signal source’s location is variable and the observer’s location is “fixed” – that is, we observe the output of the microphone by looking at the voltage from the outputs. For a loudspeaker, the signal source’s location is fixed (the speaker’s input terminals), and the observer’s relative location is what changes.

In the case of microphones, we tend to assume that the polar pattern is the same for both horizontal and vertical angles. A sound source going off to the left of the mic at some angle is presumed to be picked up with the same sensitivity as a source that is under the mic at the same angle. For loudspeakers, life is more complicated. A great many sound-reinforcement loudspeakers are “asymmetric” regarding the horizontal and vertical planes. Standing off to the right of a loudspeaker at 45 degrees may not get you the same apparent output as standing above the loudspeaker at 45 degrees.

But anyway – let’s talk about transitions in polar response. We’ll stick to mics for this article, because the concepts translate pretty easily to loudspeakers and speaker placement.

Changing Patterns

omni

That picture is of a theoretically perfect, omnidirectional pattern. It’s exactly the same everywhere. It’s transitions are infinitely small, because there aren’t any. As such, an omni polar has very predictable characteristics. If someone suddenly grabs an omni microphone and flips it around, its tendency toward feedback isn’t going to change very much. You can’t “point” an omnidirectional microphone at the monitors, because you can’t point one away from the monitors either. An omni mic “points” everywhere all the time, to the extent that its response pattern is perfect. (Also, when I say “point it at the monitors,” I don’t mean glomming onto the mic and shoving it right up into the monitor wedge’s horn. I’m talking only about the orientation of the mic, not a change in its distance from any particular thing.)

Whether or not you can get generally usable gain-before-feedback with an omni mic is a whole other discussion, and a highly application-dependent one at that.

Now, let’s look at some directional patterns, like a cardioid and supercardioid response. In these pictures, zero degrees (directly on axis) is to the right. The numbers are “pressure units” – NOT decibels. The first picture is side-by-side for greater clarity, whereas the picture with responses overlaid is better for comparison.

sidebyside

overlaid

(Please note that, in manufacturer specs, the supercardioid “tail” is flipped around to provide a more intuitive graph.)

Directional responses are great for live-sound mics, because they give us a shot at hotter monitor levels before feedback stops the fun. There’s a tradeoff, though. Both cardioid (blue) and supercardioid (red) responses are more “finicky” than omni, because their feedback rejection is dependent upon the mic’s orientation. Point the mic in the right direction, and everything’s great. If somebody twists that mic around so that it’s pointing at a monitor, and you might have a problem. The problem can even be worsened by you being able to squeeze more gain into your signal flow: Suddenly, all that extra gain – which was counteracted by the mic’s orientation – is now applied without attenuation. Thus, feedback can build far more aggressively.

What about a comparison between cardioid and supercardioid?

The first thing to see is that I’ve scaled the graphs so that “2 pressure units” is an overall reference. We’ll call that 0 dB, and I’ll quietly do the math to transform the other values into decibels.

Cardioid

Supercardioid

0 degrees (On Axis) 0 dB 0 db
30 degrees -0.6 dB -0.8 dB
60 degrees -2.5 dB -3.5 dB
90 degrees -6.0 dB -9.5 dB
120 degrees -12.0 dB -177.1 dB
150 degrees -23.5 dB -12.2 dB
180 degrees -259.4 dB -9.5 dB

The cardioid does have a single, deep null, but overall the response transitions gently towards the front. The supercardioid, on the other hand, has a deep null that occurs in the midst of the front-to-back transition, along with a tighter pattern in general. This is great for getting better gain before feedback, but only for as long as the mic is oriented correctly. If the mic is sideways in comparison to a monitor, and then abruptly turned to face that same wedge, it’s as if you gunned the monitor feed +9.5 dB. That’s 3.5 dB more than the cardioid, and might be enough to push things over the edge.

There’s also the whole issue of when someone “cups” a mic such that it bevaves largely like an omni. The degree to which this is a problem depends on how far away from omnidirectional the mic was to start with. A highly directional mic that changes to an omni has undergone a HUGE and abrupt transition. Supercardioids (and similarly patterned transducers) tend to be less forgiving of being cupped, because they have a tighter pattern than a cardioid. The change they undergo is more pronounced, and again, they may have also been run at higher gain. As such, the problem tends to be compounded.

Feeling Peaky

In much the same way as polar patterns, smooth frequency response is more forgiving than responses with narrow peaks. For instance, here are a couple of graphs of theoretical microphone frequency responses. Which one do you think would be tougher to manage, in terms of feedback?

frequency1

frequency2

I will certainly grant you that a 10 dB transition in mic response is rarely what you want in any case, but look at the difference in the rate of change between the two graphs. One has a relatively gentle 3 dB per octave slope. The other rockets away at 10 dB per octave. The response with a large dy/dx (there’s that calculus thing again) is more likely to suddenly hit you with aggressive, unexpected feedback than the gentler slope – speaking on average, of course. Each system that mic goes through also has its own transfer function, and that transfer function may help you or hurt you when it combines with the mic’s response.

Where things get REALLY hairy is when you have even steeper peaks. They might not even top out at the same magnitude as what I’ve presented here, but that doesn’t stop them from being pernicious little creatures.

See, when fighting feedback, we prefer to use very narrow filters. Their steep transitions allow us to select and cut only a small portion of the audible spectrum, which makes those filters hard to hear. The problem, though, is when a similarly steep peak gets introduced into a device’s frequency response. That “hard to hear-ness” is still in effect, but the peak represents positive apparent gain rather than negative. With very little warning, feedback can take off like Maverick and Goose feeling the need, the need for speed. (Name the movie.)

I had a peakiness experience happen to me recently with an otherwise very nifty carbon-fiber guitar. The instrument sounded nice, seemingly having no strange resonances at all, but it would squeal at 1kHz like nobody’s business…and with no warning. It would be fine, and then go nuts. We eventually killed the problem, but it took all of us by surprise.

If you’re having weird system stability problems that are hard to pin down, start looking for devices (and acoustical phenomena, too!) that display abrupt transitions in either broadband sensitivity or their frequency curves. Their finickiness might just be the source of your issues.


Danny’s Unofficial Sound System Taxonomy

Actual “concert rigs” are capable of being really loud. They’re also really expensive.

Please Remember:

The opinions expressed are mine only. These opinions do not necessarily reflect anybody else’s opinions. I do not own, operate, manage, or represent any band, venue, or company that I talk about, unless explicitly noted.

basscabWant to use this image for something else? Great! Click it for the link to a high-res or resolution-independent version.

There’s a question in this business that’s rather like the quandary of what someone means when they say “twice as loud.” It’s the question of how a PA system “classes.”

To a certain degree, the query is unanswerable. What might be a perfectly acceptable rock-band PA for one group might not be adequate for a different band. Even so, if you ask the first group whether or not they play through a “rock-band” system, they will probably say yes. In the end, it all comes down to whether a rig satisfies people’s needs or not. The systems I work on are just fine for what I need them to do (most of the time). If you gave them to Dave Rat, however, they wouldn’t fit the bill.

Even if the question can’t be definitively put to rest, it can still be talked about. In my mind, it’s possible to classify FOH PA systems and monitor rigs by means of acoustical output.

Right away, I do have to acknowledge that acoustical output is a sloppy metric. It doesn’t tell you if a rig sounds nice, or is user-friendly, or if it’s likely to survive through the entire show. Reducing the measure of a system to one number involves a LOT of other assumptions being made, and being made “invisibly.” It’s sort of like the whole problem of simple, passive loudspeakers. The manufacturer suggests a certain, broadband wattage number to use, all while assuming that major “edge cases” will be avoided by the end user.

But one-number metrics sure do make things simple…

Anyway.

My Proposed “Rule Of Quarters”

So, as I present my personal taxonomy of audio rigs, let me also mention some of my other assumptions for a “pro” PA system:

1) I assume that a system can be tuned such that any particular half-octave range of frequencies will have an average level of no more than +/- 6 dB from an arbitrary reference point. Whether the system is actually tuned that way is a whole other matter. (My assumption might also be too lenient. I would certainly prefer for a rig’s third-octave averages to be no more than +/- 3 dB from the reference, to be perfectly frank. I’d also like a $10 million estate where I can hold concerts.)

2) I assume that the system can provide its stated output from 50 Hz to 15000 Hz. Yes, some shows require “very deep” low-frequency reproduction, but it seems that 50 Hz is low enough to cover the majority of shows being done, especially in a small-venue context. On the HF side, it seems to me that very few people can actually hear above 16 kHz, so there’s no point in putting superhuman effort into reproducing the last half-octave of theoretical audio bandwidth. Don’t get me wrong – it’s great if the rig can actually go all the way out to 20 kHz, but it’s not really a critical thing for me.

3) I assume that the system has only a 1:100 chance (or less) of developing a major problem during the show. To me, a major problem is one that is actually a PA equipment failure, is noticeable to over 50% of the audience, and requires the space of more than 5 minutes to get fixed.

If all the above is in the right place, then I personally class PA systems into four basic categories. The categories follow a “rule of quarters,” where each PA class is capable of four times the output of its predecessor. Please note that I merely said “capable.” I’m not saying that a PA system SHOULD be producing the stated output, I’m only saying that it should be ABLE to produce it.

Also, as a note about the math I’m using for these numbers, I do make it a point to use “worst case” models for things. That is, I knock 12 dB off the peak output of a loudspeaker just to start, and I also treat every doubling of distance from a box to result in a 6 dB loss of apparent SPL. I also neglect to account for the use of subwoofers, and assume that full-range boxes are doing all the work. I prefer to underestimate PA performance, because it’s better to have deployed a Full-Concert rig and wish you’d brought a Foreground Music system than to be in the opposite situation.

Spoken Word

Minimum potential SPL at audience center, continuous: 97 dB

This isn’t too tough to achieve, especially in a small space. If the audience center is 25 feet (7.62 meters) from the PA, and they can hear two boxes firing together, then each box has to produce about 112 dB at one meter. A relatively inexpensive loudspeaker (like a Peavey PVx12) with an amp rated for 400 watts continuous power should be able to do that with a little bit of room left over – but not much room, to be brutally honest.

Also, it’s important to note that 97 dB SPL, continuous, is REALLY LOUD for speech. Something like 75 – 85 dB is much more natural.

Background Music

Minimum potential SPL at audience center, continuous: 103 dB

This is rather more demanding. For a 25-foot audience centerpoint being covered by two boxes, each box has to produce about 118 dB continuous at close range. This means that you would already be in the territory of something like a JBL PRX425, powered by an amp rated for 1200 watts continuous output. (It’s a bit sobering to realize that what looks like a pretty beefy rig might only qualify as a “background” system.)

Foreground Music

Minimum potential SPL at audience center, continuous: 109 dB

Doing this at 25 feet with two boxes requires something like a Peavey QW4F…and a lot of amplifier power.

Full Concert

Minimum potential SPL at audience center, continuous: 115 dB

If you want to know why live-sound is so expensive, especially at larger scales, this is an excellent example. With $4800 worth of loudspeakers (not to mention the cost of the amps, cabling, processing, subwoofer setup, and so on), it’s actually possible to, er, actually, NOT QUITE make the necessary output. Even in a small venue.

Also, there’s the whole issue that just building a big pile of PA doesn’t always sound so great. Boxes combining incoherently cause all kinds of coverage hotspots and comb filtering. It’s up to you to figure out what you can tolerate, of course.

And, of course, just because a system can make 115 dB continuous doesn’t mean that you actually have to hit that mark.

Don’t Be Depressed

Honest-to-goodness, varsity-level audio requires a lot of gear. It requires a lot of gear because varsity-level audio means having a ton of output available, even if you don’t use it.

In the small-venue world, the chances of us truly doing varsity-level audio are pretty small, and that’s okay. That doesn’t mean we can’t have a varsity-level attitude about what we’re doing, and that doesn’t mean that our shows have to be disappointing. We just have to realize where we stack up, and take pride in our work regardless.

As an example, at my regular gig, “full-throttle” for an FOH loudspeaker is 117 dB SPL at one meter. “Crowd center” is only about 12 feet from the boxes, so their worst-case output is 106 dB continuous individually, or 109 dB continuous as a pair. According to my own classification methods, the system just barely qualifies as a “foreground music” rig.

But I rarely run it at full tilt.

In fact, I often limit the PA to 10 dB below its full output capability.

“Full Concert” capability is nice, but it’s a difficult bar to reach – and you may not actually need it.


How Much Output Should I Expect?

A calculator for figuring out how much SPL a reasonably-powered rig can develop.

Please Remember:

The opinions expressed are mine only. These opinions do not necessarily reflect anybody else’s opinions. I do not own, operate, manage, or represent any band, venue, or company that I talk about, unless explicitly noted.

howloudWant to use this image for something else? Great! Click it for the link to a high-res or resolution-independent version.

As a follow-on to my article about buying amplifiers, I thought it would be helpful to supply an extra tool. The purpose of this calculator is to give you an idea of the SPL delivered by a “sanely” powered audio rig.

A common mistake made when estimating output is to assume that the continuous power the amp is rated for will be easily applied to a loudspeaker. This leads to inflated estimations of PA performance, because, in reality, actually applying the rated continuous power of the amp is relatively difficult. It’s possible with a signal of narrow bandwidth and narrow dynamic range – like feedback, or sine-wave synth sounds, but most music doesn’t behave that way. Most of the time, the signal peaks are far above the continuous level…

…and, to be brutally honest, continuous output is what really counts.


This Calculator Requires Javascript

This calculator is an “aid” only. You should not rely upon it solely, especially if you are using it to help make decisions that have legal implications or involve large amounts of money. (I’ve checked it for glaring errors, but other bugs may remain.) The calculator assumes that you have the knowledge necessary to connect loudspeakers to amplifiers in such a way that the recommended power is applied.


Enter the sensitivity (SPL @ 1 watt @ 1 meter) of the loudspeakers you wish to use:

Enter the peak power rating of your speakers, if you want slightly higher performance at the expense of some safety. If you prefer greater safety, enter half the peak rating:

Enter the number of loudspeakers you intend to use:

Enter the distance from the loudspeakers to where you will be listening. Indicate whether the measurement is in feet or meters. (Measurements working out to be less than 1 meter will be clamped to 1 meter.)

Click the button to process the above information:

Recommended amplifier continuous power rating at loudspeaker impedance:
0 Watts

Calculated actual continuous power easily deliverable to each loudspeaker:
0 Watts

Calculated maximum continuous output for one loudspeaker at 1 meter:
0 dB SPL

Calculated maximum continuous output for one loudspeaker at the given listening position:
0 dB SPL

Calculated maximum continous output for entire system at the given listening position:
0 dB SPL

How The Calculator Works

First, if you want to examine the calculator’s code, you can get it here: Maxoutput.js

This calculator is intentionally designed to give a “lowball” estimate of your total output.

First, the calculator divides your given amplifier rating in half, operating on the assumption that an amp rated with sine-wave input will have a continuous power of roughly half its peak capability. An amp driven into distortion or limiting will have a higher continuous output capability, although the peak output will remain fixed.

The calculator then assumes that it will only be easy for you to drive the amp to a continuous output of -12 dB referenced to the peak output. Driving the amp into distortion or limiting, or driving the amp with heavily compressed material can cause the achievable continuous output to rise.

The calculator takes the above two assumptions and figures the continuous acoustic output of one loudspeaker with a continuous input of -12 dB referenced to the peak wattage available.

The next step is to figure the apparent level drop due to distance. The calculator uses the “worst case scenario” of inverse square, or 6 dB of SPL lost for every doubling of distance. This essentially presumes that the system is being run in an anechoic environment, where sound pressure waves traveling away from the listener are lost forever. This is rarely true, especially indoors, but it’s better to return a more conservative answer than an “overhyped” number.

The final bit is to sum the SPLs of all the loudspeakers specified to be in the system. This is tricky, because the exact deployment of the rig has a large effect – and the calculator can’t know what you’re going to do. The assumption is that all the loudspeakers are audible to the listener, but that half of them appear to be half as loud.


How Powerful An Amp Should I Buy?

For safety, match the continuous ratings. For performance, match the peak ratings.

Please Remember:

The opinions expressed are mine only. These opinions do not necessarily reflect anybody else’s opinions. I do not own, operate, manage, or represent any band, venue, or company that I talk about, unless explicitly noted.

gx5Want to use this image for something else? Great! Click it for the link to a high-res or resolution-independent version.

For people who buy passive speakers (loudspeakers driven by amplifiers in separate enclosures), the question of how much amp to purchase is somewhat sticky. Ask it, and you’ll get all manner of advice. Some of it good, some of it bad, and some of it downright ludicrous. You’re very likely to hear a bunch of hoo-ha about how using too small of an amp is dangerous (it isn’t), because clipping kills drivers (it doesn’t). Someone will eventually say that huge amps give you more headroom (sorry, but no). All kinds of “multipliers” will be bandied about.

You may become more confused than when you started.

In my opinion, the basic answer is pretty simple, although the explanation will take a bit of time:

First, note that even though physicists will tell you that there’s no such thing as “RMS power,” there IS such a thing as the average or continuous power derived from a certain RMS voltage input. That’s what “RMS power” on a spec sheet means.

For a reasonable balance of safety and performance, match the amp’s continuous rating with the loudspeaker’s continuous rating.

(If you cannot find a loudspeaker’s continuous rating, clearly stated, on a spec sheet, take the smallest rating you can find and divide by two. If you cannot easily find an amp’s continuous rating on a spec sheet, just choose a different amplifier.)

For slightly more performance at the cost of some safety, choose an amplifier with a continuous rating that is half the peak power handling of the loudspeaker.

Depending upon how a loudspeaker is rated, the “safety” and “performance” criteria may actually end up giving you the same answer. This is perfectly acceptable.

Now then. Here’s how I justify my advice.

Peak / √2

The first step here is to understand a bit more about some basic bath and science regarding amplifiers.

A power amplifier is really a voltage amplifier that can deliver enough current to drive a loudspeaker motor. A power amplifier has an upper limit to how much voltage it can develop, as you might expect. That maximum voltage, combined with the connected load and the amplifier’s ability to supply current, determines the amplifier’s peak power.

In normative cases, an amplifier’s peak output is an “instantaneous” event. If the amplifier is contributing no noticeable distortion to the signal, then the signal “swing” is reaching the amplifier’s maximum voltage for a very small amount of time. (Ideally, an infinitely small duration.) Again, if we assume normal operation, an amplifier spends the overwhelming majority of its life producing less than maximum output.

An amplifier’s continuous power, on the other hand, is an average over a significant amount of time. This is why engineers say things like “power is the area under the curve.” An undistorted peak with nothing before or after it has virtually no area under the curve, whereas a signal that never gets anywhere near peak output (but lasts for several seconds) can have very significant area under the curve.

For audio voltages, we use RMS averaging. One important reason for this is because audio voltages corresponding to sound-pressure events have positive and negative swing. For, say, one cycle of a sine wave, the arithmetic mean would be zero – the wave has equal positive and negative value. RMS averaging, on the other hand, squares each input value. As such, positive values remain positive, and negative values become positive (-2 squared, for instance, is 4).

In the case of an undistorted sine wave, the RMS voltage is the peak voltage divided by √2, or about 1.414.

Here’s a graph to make this all easier to visualize. This is a plot of a very small, hypothetical power amplifier passing an undistorted sine wave. The maximum output voltage is ± 2 volts. That means that the RMS voltage is 2/√2, or 1.414.

2sinx

Here’s where the rubber begins to meet the road. Let’s assume that this amplifier is mated to a loudspeaker with an impedance of 8 Ohms.

Power = Voltage Squared / Resistance

Peak Power = Peak Voltage Squared / Resistance

Continuous Power = RMS Voltage Squared / Resistance

Peak Power = 2^2 / 8 = 0.5 Watts

Continuous Power = (2 / √2)^2 / 8 = 0.25 watts

For a sine wave, the continuous power is half the peak power, or 3 dB down. This is the main justification for the above statement: “For slightly more performance at the cost of some safety, choose an amplifier with a continuous rating that is half the peak power handling of the loudspeaker.” Assuming that the amplifier was rated using sine-wave input (a reasonable assumption at the time of this writing), the peak output of the amplifier will be twice the continuous rating, and therefore match up with the peak power handling of the loudspeaker. By the same token, the “safety” recommendation means that the peak amp output will be either at or far below the peak rating of the loudspeaker – especially since many loudspeakers are claimed to handle peaks that are four times greater than the recommended continuous input.

An amplifier with peak output capabilities that exceeds the peak handling capabilities of a loudspeaker is a liability, not an asset. In live-sound, all kinds of mishaps can occur which will drive an amp all the way to its maximum output. If that maximum output is too high, you might just have an expensive repair on your hands. If the maximum amplifier output plays nicely with the loudspeaker’s capabilities, however, accidents are much less worrisome.

So, there’s the explanation in terms of peak power. What about some other angles?

A More Holistic Picture

Musical signals running through a PA are usually not pure sine waves. They can be decomposed into pure tones, certainly, but the total signal behavior is not “RMS voltage = peak / √2.” You might have an overall continuous power level that’s 10 dB, 12 dB, 15 dB, or even farther down from the peaks. Why could you still run into problems?

The short answer is that not all drivers are created equally, and EQ can make them even more unequal. Further, EQ can cause you to be rather more unkind than you might realize.

For a bit more detail, let’s make up a compromise example using pink noise that has a crest factor of slightly more than 13 decibels. If we run the signal full-range, we get statistics that look like this:

fullrangepink

Let’s say that we have a QSC GX5 plugged into an 8 Ohm loudspeaker. A GX5 is rated for 500 watts continuous into that load, so a reasonable guess at peak output is 1000 watts. To find -13 dB in terms of power:

10 log (x / 1000) = -13 dB

log (x / 1000) = -1.3 dB

10^-1.3 = 0.0501 = x / 1000

x = 50 watts

(Of course, -13 dB can also be found by dividing -10 dB, or 0.1 X power, by two.)

That power hits a passive crossover, which splits the full range signal into appropriate passbands for the various drivers. In an affordable, two-way box, the crossover might be something like 12 dB / octave at 2000 Hz. If I filter the noise accordingly, I get this for what the LF driver “sees”:

lfpink

Compared to the original peak, the LF driver is seeing about -14.5 dB continuous, or a bit more than 35 watts. Some instantaneous levels of about 800 watts come through, but the driver can probably soak those up if most of the energy is above, say, 40 Hz.

For the HF driver:

hfpink

Again, we have to compare things to the original peak of -0.89 dB, so the continuous measurement is actually 17.8 dB down from there. Also, an additional complication exists. The HF driver is probably padded down at the crossover, because a compression driver mated to a horn can have a sensitivity of 104+ dB @ 1 watt @ 1 meter, whereas the cone driver might be only 96 dB or so. In the case of an 8 dB pad, the total continuous power being experienced by the HF portion of the box could reasonably be said to be -25.8 dB from the peak power. That’s something like 2.5 watts, with peaks at 37 watts or so.

No problem, right?

But what if you bought a really powerful amp – like one that could deliver peaks of 2000 watts?

Your HF driver would still be okay, but your LF driver might not be. Sure, 70 watts continuous wouldn’t burn up the voice coil, but what would 1600 watt peaks do? Especially if the information is “down deep,” that poor cone is likely to get ripped apart. If somebody does something like dropping a mic…well…

And what if someone applies the dreaded “smiley face” EQ, and then drives the amp right up to the clip lights?

At first, things still look OK. The continuous signal is still 13 dB down from the peaks.

smileyeq

The LF driver is getting something like this:

smileylf

For the reasonably-sized amp, the LF peaks are at 0.7 dB below clipping, or 850 watts. That’s probably a little too much for the driver, but it might not die immediately – unless a huge impulse under 40 Hz comes through. With the oversized amplifier, you now have 1700 watt peaks, which are beating up your LF cone just that much faster.

In the world of the HF driver:

smileyhf

Using the appropriate amp, the HF driver isn’t getting cooked at all. In fact, the abundance of LF content actually pushes the continuous and peak power down slightly. Even the big amp isn’t an issue.

Of course, someone could decide to only crank the highs, because they want “that crispness, you know?” (This would also correspond to program material that’s heavily biased towards HF information.)

crispy

Now things get a little scary. Scale the measurement right up to clipping (0 dB, because this reading was taken “in isolation”), and the peaks are padded down to only -8 dB. That’s almost 160 watts, which is beyond the peak tolerance of the driver. The 13 watts of continuous input isn’t hurting anything, but the poor little HF unit is taking plenty of abuse.

Connect the “more headroom, dude!” amplifier, and it gets much worse. One 320 watt peak will surely be enough to end the life of the unit, and if (by some miracle) the peaks are limited but the continuous power isn’t…well, the driver might withstand 26 watts continuous, but just two more dB and you get 41 watts. The poor baby is probably roasting, if it’s an affordable unit.

Conclusions

I’m sorry if all that caused your eyes to glaze over. Here’s how it shakes out:

An amp which has a continuous rating that matches the loudspeaker’s continuous rating does a lot to protect you from abuse, accidents, and stupidity. Using an amplifier that has a peak rating equal to the speaker’s peak rating lets you get a bit more level (3 dB) while still shielding you from a lot of problems. You can still get yourself into trouble, but it takes some effort.

Running an amplifier which goes a long way past the peak rating of a speaker enclosure is just asking for something to get wrecked. Yes, you can make it all work if you’re careful and use well-set processing to keep things sane – but that’s beyond the scope of this article.

If a conservatively powered PA doesn’t get loud enough for you, you need more PA. That is, you need more boxes powered at the same per-box level, or boxes that are naturally louder, or boxes that will take more power.


Mysteriously Clean

“Clean sound” has to do with more than just volume. Where that volume goes is also important.

Please Remember:

The opinions expressed are mine only. These opinions do not necessarily reflect anybody else’s opinions. I do not own, operate, manage, or represent any band, venue, or company that I talk about, unless explicitly noted.

PA030005Want to use this image for something else? Great! Click it for the link to a high-res or resolution-independent version.

So – you might be wondering what that picture of V-drum cymbals has to do with all this. I’ll gladly tell you.

Just a couple of weeks ago, the band Sake Shot was playing at my regular gig. They were the opening act, and the drummer decided that the changeover would be facilitated by the simplicity and speed of just pulling his E-kit off the deck.

During Sake Shot’s set, Brian from The Daylates walked up to FOH (Front Of House) control. After saying hello, he made a single comment that caused me to do some thinking. What he said was: “The drums sound great. It’s so clean!”

He was absolutely correct, of course. The drums were very clear, and highly separated from the other sources on stage. If the sound of the drums had been a photograph, the image would have been razor sharp. The question was, “Why?” It wasn’t just volume. The mix was somewhat quieter than some other rock bands I’ve done, but we were definitely louder than a jazz trio playing a hotel lobby (if you get my drift). No…there were other factors in play besides how much SPL (Sound Pressure Level) was involved.

I’ll start out by putting it this way: It’s not just how much volume there is. It’s also about where that volume goes.

Let me explain.

Drums, Drums, Everywhere

If you were to take a measurement microphone and walk around an acoustic drumkit, I’m reasonably sure that the overall plot of SPL levels would look something like this:

drumkitpolar

Behind the drummer, you might lose about 6 dB (or maybe not even that much), but overall, the drums just go everywhere. Sound POURS from the kit in all directions. In other words, the drumkit is NOT directional in any real way. This has a number of consequences:

1) Sound (and LOTS of it) travels forward from the kit, into the most sensitive part of the downstage vocal mics’ polar patterns. What’s wanted in those vocal mics is, of course, vocals. Anything that isn’t vocals that makes it into the mic is “noise,” which partially washes out the desired vocal signal.

2) The same sound that just hit the vocal mics continues forward to arrive at the ears of the audience.

3) That same sound also travels through the PA, courtesy of the vocal mics. Especially in a system that uses digital processing of some kind, latency is introduced. The sonic event being reproduced by the PA arrives slightly later than the acoustical event.

4) The sound traveling in directions other than straight towards the audience is – in a small venue – extremely likely to meet some sort of boundary. Some of these boundaries may have significant acoustical absorption qualities, and some of them may have almost no absorption at all. The boundaries that mostly act as reflectors (hard walls, hard ceilings, hard floors, etc) cause the sound to re-emit into the room, and that re-emitted sound can travel into the audience’s ears. These reflections also arrive later than the direct acoustical radiation from the kit. The reflections may exist in the closely packed, smooth wash of reverberation, or they might manifest as distinct “slaps” or “flutter.”

The upshot is that you have sonic events with multiple arrivals. One particular snare hit makes several journeys to the ears of the audience members, and what would otherwise be a nice, clean “crack” becomes smeared in time to some extent. Each drum transient gets sonically blurred, which means inter and intra-drum events become harder to discern from each other. (Inter-drum events are hits on different drums, whereas intra-drum events are the beginnings and ends of sounds produced by one hit on one drum.)

In short, the reflected sound of the drumkit partially garbles the direct sound of the kit. On top of that, the drum sound is now partially garbling the vocals.

This isn’t necessarily a disaster. Bands and techs deal with it all the time, and it’s possible to get perfectly acceptable sonics with an acoustic drumkit in a small venue. The point of this article isn’t to sell electronic drums to everybody. Even so, the effects of an acoustic kit’s sound careening around a room can’t be ignored.

Directivity Matters

Now then.

What was different enough about Sake Shot’s set to make Brian say that the sound was really clean?

It really wasn’t the SPL involved. When it came right down to it, the monitor rig and PA system were creating enough level to make the V-drums sound reasonably like a regular kit. The key was where that SPL was going…directivity, in other words.

Most pro-audio loudspeakers are far more directional than a drumkit. Sure, if you walk around the back of a PA speaker, you’ll still hear something. Even so, the amount of “spill” is enormously reduced. Here’s my estimate of what the average SPL coverage of an “affordable, garden-variety” pro-audio box looks like.

papolar

This is exceptionally important in the context of my regular gig, because the upstage and stage-right walls, along with a portion of the stage ceiling, are acoustically treated. Not only do the downstage monitors fire into the parts of the vocal mic patterns that are LEAST sensitive, they also fire into a boundary which is highly absorptive. Further, the drum monitors fire into the drummer’s ears, and partially into the absorptive back wall. There’s a lot less spill that can hit the reflective boundaries in the room.

What this means is that the non-direct arrivals of the E-kit’s sounds were – relative to an acoustic kit – very low in relation to the direct arrivals from the FOH PA. Further, there was very little “wash” in the vocal mics. All this added up to a sound that was very clean and defined, because each transient from the drums had a sharply defined beginning and end. This makes it much easier for a listener to figure out where drum sounds stop, and where other things (like vocal consonants) begin. Further, the vocal mics were generally delivering a rather higher signal-to-noise ratio than they otherwise might have been, which cleaned up the vocals AND the sound of the drums.

All the different sounds from the show were doing a lot less “running into each other.”

As such, the mysteriously clean sound of the show wasn’t so mysterious after all.


Crossover Confusion

Strictly speaking, a crossover separates “full-bandwidth” audio into two or more frequency ranges, and that’s it.

Please Remember:

The opinions expressed are mine only. These opinions do not necessarily reflect anybody else’s opinions. I do not own, operate, manage, or represent any band, venue, or company that I talk about, unless explicitly noted.

Want to use this image for something else? Great! Click it for the link to a high-res or resolution-independent version.

Every so often, I’ll get a question which indicates that we (the industry) is doing a poor job at explaining the tools we use. The question can take the form of “Is it okay to do this thing if this other thing isn’t a part of the system?” Other such questions may take the form of “Is there one right way to hook this up? Where does it go in the signal chain?”

What questions like these reveal is that there’s gear we talk about as being important – indispensable, even – yet we fail to discuss the fundamental aspects of what that gear does. The equipment in question becomes a kind of magical box or physical spellcasting component, that, if used improperly or neglected, could cause Very Bad Things to happen.

You know, like the “Klaatu, barata, nikto” incantation in “Army of Darkness.” Ash doesn’t know what it does (heck, NOBODY probably knows what it does), but getting it wrong causes Very Bad Things to occur.

“Did you say the words?”

“I said ’em…yeah.”

“Exactly?”

“Look, I might not have said every single little syllable…”

Cue the army of Deadites marching on the castle.

Anyway.

It seems to me that crossovers are a particularly prime candidate for getting the “black box” treatment. Unlike regular EQ, they aren’t really a device where you go hands-on, twist the knobs while audio is flowing, and hear the results. They’re also quite important for running a system in a sane way. They can indeed be vital to not trashing system components.

But if you don’t understand the whys and wherefores associated with crossovers, you might be unnecessarily anxious over what to do with one. Or without one.

The Basics

First things first: A crossover is a frequency dividing network. You may even see that terminology used in place of the word “crossover.” What that phrase means is that a crossover is a set of interconnected electronic devices (a network) that acts to separate a single input containing a wide range of audio frequencies into two or more outputs (a signal divider). Each output includes a subset of the original input frequency range (hence the “frequency dividing” designation), and, in standard practice, the frequency range of all the outputs put together should be the same as the input frequency range.

In other words, a crossover takes an input that can potentially contain signals spanning the full-bandwidth of human hearing (or more), and separates that signal into bandwidth-limited outputs. If you took all the outputs and summed them together, you should theoretically be able to recover the original input signal – plus any noise, distortion, phase artifacts, and whatever else that’s a product of the processing.

As an aside, a digital crossover is also – effectively – a frequency dividing network. The difference is that digital processing algorithms are used to simulate the filtering provided by a network of physical, electronic components. The specific methods are different, but the results are functionally the same.

Anyway.

If you want to be strict, a crossover has ONLY one job, and that’s to separate full-range audio into multiple, discrete passbands. (A passband being a filtered range of audio that we expect to be delivered at between unity and -3 dB gain.) Any functionality other than that is not actually part of the crossover domain…which is not to say that additional functionality is “wrong!” Input gain controls, passband output gain controls, special corrective equalization, and other such things are nifty features to have included in the package that contains the crossover. They are not, however, core to what a crossover is.

If you want to get right down to the nitty-gritty, a crossover is a set of well-engineered highpass and lowpass filters. The filters are ideally designed so that they combine with perfect phase and magnitude when adjacent to each other. In a certain sense, you can view a crossover as a highly specialized sort of EQ with a limited use-case.

What Is It Good For? Absolutely Something

Now then. Why would we want to separate full-range audio into multiple, discrete passbands?

There are purely creative reasons to do so, but the most overwhelmingly common reason is utilitarian: Loudspeaker drivers with differing characteristics have frequency ranges that they are best at reproducing. These frequency ranges are smaller than the complete frequency range audible to humans. A properly configured frequency-dividing network allows each loudspeaker driver in a “multi-way” system to receive only the frequency range that it works with optimally.

Beyond just “helping things sound good,” crossovers are very important to the care and feeding of high-frequency drivers. The reason for this is due to one of the classic failure modes of a driver receiving power: Too much power at too low a frequency.

Low frequencies require large driver displacements to reproduce. This is why you see videos of woofers “pumping” with the bass. More often than not, “large diameter” drivers are capable of very large displacements (front-to-back movement) when compared to “small diameter” drivers. If you try to get a high-frequency horn driver to reproduce 100 Hz at an audible level, you’re very likely to completely wreck the unit. The diaphragm will get smashed into something, or the voice coil will launch out of the gap and never return.

With that being the case, a crossover provides a highpass filter to the small driver which removes that potentially fatal material. If 100 Hz is what we’re talking about, a 24 dB/ octave highpass filter with a corner (-3 dB) frequency of 1500 Hz has a gain reduction of beyond 75 dB…if I did my math correctly. That’s an intensity that’s over 10,000,000 times LOWER than the material in the unity-gain area of the passband, and that’s pretty darn safe.

Where Do You Put This Thing?

With all that established, the implementation questions start to arise. One of the most basic queries is, “where in the signal-chain does the crossover go?”

Good question.

Crossover come in two basic varieties: Active and passive. Active crossovers require that their components be continually energized by stable voltage from a power supply. Passive crossovers energize their components by way of the fluctuating signal from a power amplifier.

Now, if you’re looking at a piece of rackmount gear that has to be plugged into mains power, you’re looking at an active crossover. However, I mention passive crossovers for the sake of completeness. Hidden inside most multi-way loudspeaker cabinets is a passive crossover that allows the box to be used “full range.” Frequency-dividing does still occur (remember what I said about those horn drivers and low frequency material), but it occurs in an electronic network that’s concealed from view – and sometimes drops out-of-mind as a consequence. Passive crossovers can include the ability to be bypassed, so you must take heed of them!

Anyway, back at the ranch…

The normative signal-chain position of an active crossover unit is to be just preceding the power amplifiers. Yes, the outputs of an active crossover are line-level, so you could theoretically connect other processing between each crossover output and its corresponding amp. Doing so manually, however, is a pretty advanced application. Most folks with physical pieces of outboard gear do all their “interactive” processing before the crossover unit. Doing much after the crossover gets expensive, confusing, and fills a lot of rackspace in a big hurry.

Again, remember that passive crossovers are run POST the power amplifiers (because they need that kind of voltage to operate), and may very well be “stacking” with any active crossover you have in the system. This is not a bad thing at all – it’s actually quite normal – but you should be aware of it. There are lots of PA systems that use an active crossover to get a passband for the subwoofers and a passband for everything else, with the assumption that there will be a passive crossover in the full-range loudspeaker box.

I’m going to refrain from talking about specific crossover settings, because those are so application specific that it’s not worth it.

Various Other Wrinkles

To wrap this up, I want to talk a bit about some of the wider issues that cause headscratching and crossovers to intersect.

One thing to realize is that crossover functionality is increasingly becoming wrapped up with lots of other things. Some folks benignly refer to devices like the Driverack PA+, or the DCX 2496 as “a crossover.” These units, and others, do indeed include frequency-dividing functions. However, they also include lots of other things, like pre AND post crossover EQ, dynamics, time-alignment, and other goodies. If you want to be picky, these “lots of things in one box” products are more accurately referred to as “loudspeaker management” or “system management” or “system controllers.” Because they encapsulate so many virtual processors, the concept of where the actual crossover function occurs can be obscured.

Another issue is that pro-audio is often presented in absolutes when what’s really meant is “normally.” For instance, I do recommend that a person wanting to add subs to a system use a crossover. However, the idea that you have to use a crossover or it just plain won’t work is false. Yes, you can y-split a set of outputs and send full-range signals to both the sub amps and the main amps. The subs will get (and output) a LOT more midrange than in a standard scenario, and so their acoustical output might interact with the mains’ output in a way that’s not all that great. Also, the mains will still be being asked to produce low-frequency content that chews up their headroom. Even so, if you can get it to sound good in your application, then who cares? You’d be better off with a crossover, it’s true, but the system will definitely produce sound, and not blow itself up as long as you’re not being stupid.

The point is that if you know what the crossover does, or should do, then you don’t have to be confused or intimidated by the thing.


On Powered Speakers (And Other “Black Boxes”)

The commoditization of live-sound is enabled by manufacturers removing unknowns from their equations.

Please Remember:

The opinions expressed are mine only. These opinions do not necessarily reflect anybody else’s opinions. I do not own, operate, manage, or represent any band, venue, or company that I talk about, unless explicitly noted.

Want to use this image for something else? Great! Click it for the link to a high-res or resolution-independent version.

When I talk about a “black box,” I’m not thinking of an aircraft’s flight recorder. I’m not even thinking of a device enclosure that’s black.

And seriously, as much as we say that there are a lot of ugly, black-colored boxes in live-sound, let’s be real. Most of them are really just a very deep gray. If they were actually black, they would absorb all light and completely disappear when they were in shadow. Like ninjas. Ninjas that amplify bands. (That would be a great movie.)

Okay, where was I?

When I say, “black box,” what I’m getting at is a concept. It’s the idea that the user of a device doesn’t know how the device works – or, they might now, but they aren’t required to know. Whether or not people are conscious of it, this is a central factor in the commoditization of technological devices. That is, for people to regard technological thingamabobs as “common, everyday” sorts of tools, those folks have to be in a world where understanding the internal functioning of the tool is not required.

A fine example of this is the personal computer. As the years have gone by, hardware and software manufacturers have progressively “black boxed” their offerings. In the computer’s infancy, operating a computer meant you had to have a lot of detailed knowledge about what the computer was doing. Nowadays – not so much. Almost everything is handled invisibly (which is great, until something breaks). Whether or not you think this is good or bad, this reality of “it just works” has allowed the personal computer to become a thoroughly mundane item. Having and using a computer isn’t a special thing anymore…in fact, it’s rather more surprising if someone DOESN’T have a computer that they use regularly.

In the same way, live-sound is also far more commoditized than it used to be. For instance, I’m betting that most readers of this site have never constructed a power amplifier. I know that I haven’t. Most of you probably haven’t built your own mixer. I know I haven’t.

But, in the early days, building your own gear from the ground up was often required. You couldn’t just head on over to the store and browse a vast selection of poweramps, loudspeakers, mixers, and whatever else. Before pro-audio (as we know it) really took hold as a market segment, the people pushing the boundaries were working by building things that either didn’t exist, or didn’t exist in enough quantity that they could be easily gotten “off the shelf.”

Now, pretty much every audio device you can think of is already in existence. You can go online and positively drown in a million iterations and manufacturer-specific takes on all manner of gear. Even if you’re thinking of something rather narrowly defined, like a 2-way active crossover, you won’t have any trouble finding a bunch of options to pick through.

It’s funny that I just mentioned active-crossovers, because it’s possible that you may never have to buy one. That’s because of one particular class of “black box” product: The powered loudspeaker.

Encapsulation

The powered or “active” loudspeaker is hardly a monolithic sort of entity. They exist in all shapes and sizes, with some being vastly more capable than others. There are plenty of active loudspeakers that put on a facade of advanced engineering, but really aren’t much more complicated than you or I connecting a rackmounted power amp to a “full-range” loudspeaker. Even so, every powered loudspeaker on the planet shares a common trait:

They all encapsulate devices with diverse operations into a single, functional unit.

In other words, powered loudspeakers stick components with very different purposes into one box. In the most basic case, you have a power amplifier bundled up with a loudspeaker. The power amp takes a relatively small input voltage and delivers a corresponding, high-voltage, high-current signal to a load. The loudspeaker takes a high-voltage, high-current signal and transduces it into sound-pressure waves. Obviously, these two actions are complementary, but they’re also very different. Encapsulating the two actions reduces complexity for the user. Where they once had to manage and connect the amplifier and loudspeaker as separate units, they now only have to look after one unit and one signal connection.

What can be missed, though, is that this simplification by encapsulation involves a very profound “exchange.” This exchange puts tremendous capability in the hands of people who would not be able to access it otherwise.

Many Unknowns For The User, Almost No Unknowns For The Manufacturer

A non-encapsulated system is a pretty complex thing to build and deploy. Let’s take the case of a fully-processed, biamplified loudspeaker. (Biamplification is the use of independent amplifiers for low and high-frequency signals.) To construct and operate an un-encapsulated, fully-processed, biamped audio rig, the following has to happen:

  1. You have to pick out, purchase, rackmount, and connect some sort of equalizer.
  2. You have to do the same for an active, two-way crossover.
  3. You might also want some dynamic filters – or even full-fledged dynamic EQ – for each crossover output.
  4. For both crossover outputs, you will need to have a limiter. If you want to get fancy, you’ll need two limiters – one that can determine and limit the RMS level of a signal, and one that “brickwalls” peak levels.
  5. You’ll need an alignment delay for one channel or the other. (Alignment delay is fraction-of-a-millisecond control over when a signal arrives. Effect delay has much coarser control over the time involved, and it’s also mixed with the unmodified signal to create the sound of an echo.)
  6. You will need two channels of amplification. The power available from each channel will need to be more than what the drivers can handle. I’ll explain why in just a bit.
  7. Now you can add a cabinet with an LF and HF driver.

If you’ve got all that done, now you get to do a bit of science. First, you pre-configure the crossover based on recommendations from the loudspeaker manufacturer.

You next have to figure out what input voltages to the amplifiers correspond with output voltages that – just barely – won’t destroy your drivers. You set the peak-stop limiter accordingly, with the RMS-sensing limiter in place as a backup. The reason that you got a “too powerful” amp is that even VERY heavily limited signals usually end up having a continuous power that’s one quarter of the peaks. As such, getting the maximum, “sane,” real-world performance possible means using amps that can deliver more continuous power than the drivers are rated for…and then limiting the continuous power to something safe while letting some of the peaks through. (If you want to be really dangerous, you could set RMS limiter only. It will probably be a while before something gets destroyed. Maybe.)

By the way – if you end up trying any of this, and you blow something up, I am NOT liable. It’s your funeral, okay?

Now you have to find an environment that’s as anechoic as possible (or go outside), and set up a measurement rig. The first thing to do is figure out which driver’s sound arrives “late” when compared to the other. You then apply the alignment delay to the “early” driver, so that signals from both the HF and LF elements hit the listener at the same time. Next, you measure the whole thing and apply EQ to make the response as flat as possible. If you’re ambitious enough, you run up the system to full-throttle and note how the response changes. You can then set dynamic EQs to keep the response flat (or filter out damaging LF energy) at high levels.

Oh, and you can always try some different crossover slopes to see what has the best phase and amplitude response.

So, yeah. You could buy all that for hundreds or thousands of dollars, and spend all that time dialing it in (assuming that you know what you’re doing), or…

…you could live with all of the above being unknown to you, but known to the manufacturer. If you’re willing to do that, then for a few hundred bucks you can purchase a powered box. That powered box will have had that whole mess up there done for it already. You just plug it into the wall, put some signal into it, and off you go.

See, when all of those components are encapsulated by an equipment builder, there’s an exchange that’s basically inevitable. The inner workings of the system become an unknown for you, the user. In trade, the configuration of all those components is now intimately understood and highly optimized by the manufacturer. This creates an integrated, powerful, black-box system that you can just use, with minimal effort. This especially gets around some of the problems I discuss in Dirty Secrets About Power: Manufacturers don’t have to deal with as many unknowns regarding how their equipment will be used, and you don’t have to deal with semi-knowns about what amp to mate with what loudspeaker cabinet.

In closing, let me be clear. I advocate being curious. I’m in favor of knowing what’s happening inside your gear, at least to whatever extent is practicable. I’m all for building things, and doing experiments. I’ve got access to some gear that I want to rebuild, to see just how effectively I can do a “biamped, externally powered and processed” loudspeaker rig. At the same time, the reality is that black-box products have created a world where you can just plug something in and get decent (if not stellar) results.